Page 124 of 546

3-33
Convenient features of your vehicle
3
Information
• Some garage door openers require
to press the programmed button on
the mirror up to three times right
after the programming is just com-
pleted to operate the garage door.
• The indicator (4) is turned ON in
Orange and flashes for about 60sec-
onds, during the programing mode
and if a programing is not succeed-
ed within the 60 seconds, the pro-
graming mode will be abort.
HomeLink
®should now activate your
rolling code equipped device.
Gate operator & Canadian program-
ming
During programming, your handheld
transmitter may automatically stop
transmitting. Continue to press the
Integrated HomeLink
®Wireless
Control System button while you
press and re-press ("cycle") your
handheld transmitter every two sec-
onds until the frequency signal has
been learned. The indicator light will
flash slowly and then rapidly after
several seconds upon successful
training.
Operating HomeLink®
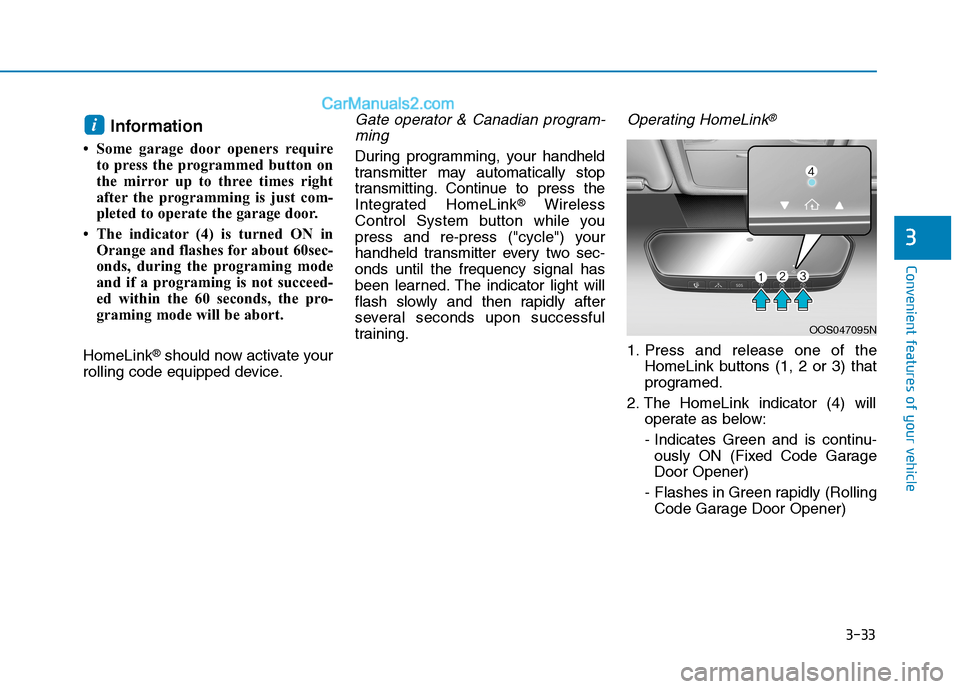
1. Press and release one of the
HomeLink buttons (1, 2 or 3) that
programed.
2. The HomeLink indicator (4) will
operate as below:
- Indicates Green and is continu-
ously ON (Fixed Code Garage
Door Opener)
- Flashes in Green rapidly (Rolling
Code Garage Door Opener)
i
OOS047095N
Page 125 of 546

3-34
Erasing HomeLink®buttons
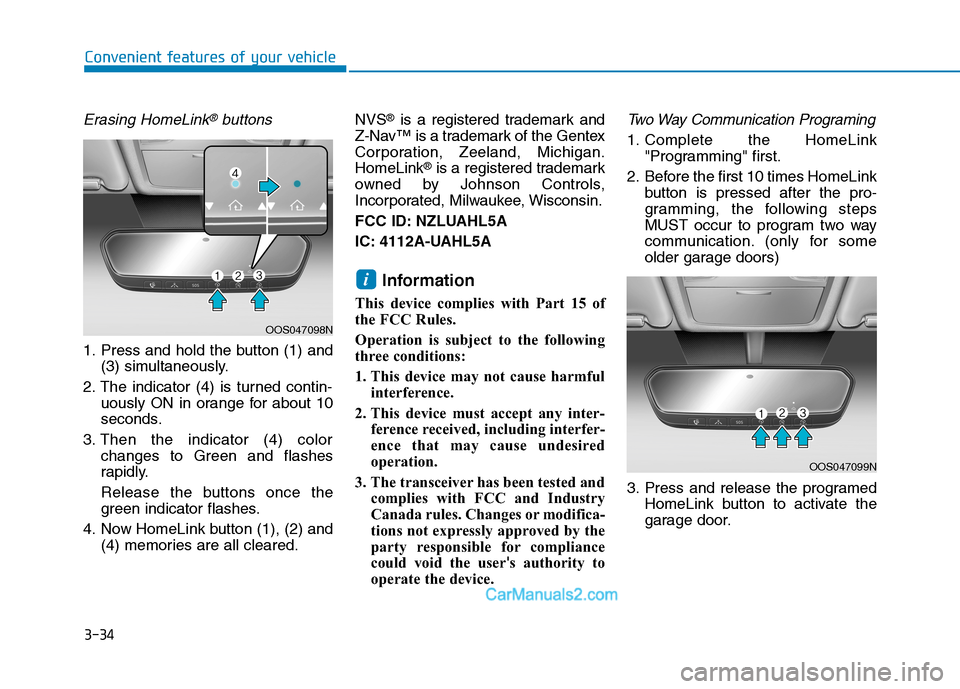
1. Press and hold the button (1) and
(3) simultaneously.
2. The indicator (4) is turned contin-
uously ON in orange for about 10
seconds.
3. Then the indicator (4) color
changes to Green and flashes
rapidly.
Release the buttons once the
green indicator flashes.
4. Now HomeLink button (1), (2) and
(4) memories are all cleared.NVS
®is a registered trademark and
Z-Nav™ is a trademark of the Gentex
Corporation, Zeeland, Michigan.
HomeLink
®is a registered trademark
owned by Johnson Controls,
Incorporated, Milwaukee, Wisconsin.
FCC ID: NZLUAHL5A
IC: 4112A-UAHL5A
Information
This device complies with Part 15 of
the FCC Rules.
Operation is subject to the following
three conditions:
1. This device may not cause harmful
interference.
2. This device must accept any inter-
ference received, including interfer-
ence that may cause undesired
operation.
3. The transceiver has been tested and
complies with FCC and Industry
Canada rules. Changes or modifica-
tions not expressly approved by the
party responsible for compliance
could void the user's authority to
operate the device.
Two Way Communication Programing
1. Complete the HomeLink
"Programming" first.
2. Before the first 10 times HomeLink
button is pressed after the pro-
gramming, the following steps
MUST occur to program two way
communication. (only for some
older garage doors)
3. Press and release the programed
HomeLink button to activate the
garage door.
i
Convenient features of your vehicle
OOS047098N
OOS047099N
Page 127 of 546

3-36
Convenient features of your vehicle
Recalling Garage Door Status
Homelink mirror with two way com-
munication provides a way to view
the last stored message from the
garage door opener. In order to recall
the last known status of the last acti-
vated device, press the buttons "1
and 2" OR "2 and 3" simultaneously.
If the indicator (4) is ON continu-
ously in Green, it indicates that the
last activated device was "closed"
properly.
If the indicator (6) is ON continu-
ously in Green, it indicates that the
last activated device was "open"
properly.
Information
Two way communication range dis-
tance between "vehicle" and "garage
door opener" is 100m.
The range may be reduced or
increased a little due to obstacle con-
ditions around the garage door open-
er, such as houses or trees.
Side View Mirrors
Make sure to adjust the side view
mirrors to your desired position
before you begin driving.
Your vehicle is equipped with both
left-hand and right-hand side view
mirrors. The mirrors can be adjusted
remotely with the remote switch. The
side view mirrors can be folded to
help prevent damage when going
through an automatic car wash or
when passing through a narrow
street.
The right side view mirror is convex.
Objects seen in the mirror are closer
than they appear.Use the inside rear view mirror or
look back directly to determine the
actual distance of other vehicles
prior to changing lanes.
i
OTL045018
Do not adjust or fold the side
view mirrors while driving. This
may cause loss of vehicle con-
trol resulting in an accident.
WARNING
Do not scrape ice off the mir-
ror face; this may damage the
surface of the glass.
If the mirror is jammed with
ice, do not adjust the mirror by
force. Use an approved de-icer
spray. (Do not use radiator
anti-freeze.) Wipe the mirror
using a sponge or soft cloth
with warm water. Or move the
vehicle to a warm area and
allow the ice to melt.
CAUTION
Page 148 of 546

3-57
Convenient features of your vehicle
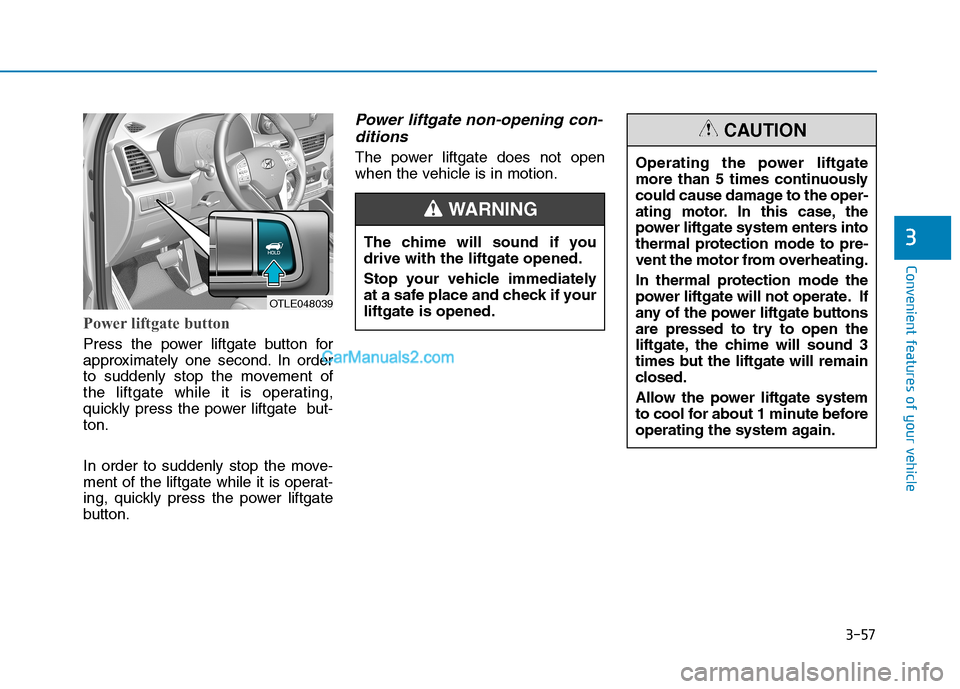
Power liftgate button
Press the power liftgate button for
approximately one second. In order
to suddenly stop the movement of
the liftgate while it is operating,
quickly press the power liftgate but-
ton.
In order to suddenly stop the move-
ment of the liftgate while it is operat-
ing, quickly press the power liftgate
button.
Power liftgate non-opening con-
ditions
The power liftgate does not open
when the vehicle is in motion.
3
OTLE048039
The chime will sound if you
drive with the liftgate opened.
Stop your vehicle immediately
at a safe place and check if your
liftgate is opened.
WARNING
Operating the power liftgate
more than 5 times continuously
could cause damage to the oper-
ating motor. In this case, the
power liftgate system enters into
thermal protection mode to pre-
vent the motor from overheating.
In thermal protection mode the
power liftgate will not operate. If
any of the power liftgate buttons
are pressed to try to open the
liftgate, the chime will sound 3
times but the liftgate will remain
closed.
Allow the power liftgate system
to cool for about 1 minute before
operating the system again.
CAUTION
Page 218 of 546
3-127
Convenient features of your vehicle
3
M MA
AN
NU
UA
AL
L
C
CL
LI
IM
MA
AT
TE
E
C
CO
ON
NT
TR
RO
OL
L
S
SY
YS
ST
TE
EM
M
(
(I
IF
F
E
EQ
QU
UI
IP
PP
PE
ED
D)
)
OTL045207/OTL045207R-1
1. Fan speed control knob
2. Temperature control knob
3. Mode selection buttons
4. Front windshield defroster button
5. Rear window defroster button
6. Air intake control (recirc) button
7. A/C (Air conditioning) button*
8. Air intake control (fresh) button
* : if equipped
■ ■Type A
■
■Type B
Page 230 of 546

3-139
Convenient features of your vehicle
3
A solar compensation sensor is
located inside the vehicle on the
center of the dash near the front
windshield. In order to ensure
optimum control of the heating
and cooling system, never block
the sensor or place anything near
the sensor while the climate con-
trol system is operating.
Manual Heating and Air
Conditioning
The heating and cooling system can
be controlled manually by pushing
buttons other than the AUTO button.
In this case, the system works
sequentially according to the order of
buttons selected.
When pressing any button except the
AUTO button while using automatic
operation, the functions not selected
will be controlled automatically.
1. Start the engine.
2. Set the mode to the desired posi-
tion.
To improve the effectiveness of
heating and cooling, select the
mode according to the following:
- Heating:
- Cooling:3. Set the temperature control to the
desired position.
4. Set the air intake control to the
outside (fresh) air position.
5. Set the fan speed control to the
desired speed.
6. If air conditioning is desired, turn
the air conditioning system on.
7. Press the AUTO button to convert
to full automatic control of the sys-
tem.
NOTICE
OTLE048246
Page 237 of 546
3-146
Convenient features of your vehicle
OFF mode
Push the OFF button to turn the air
climate control system off.You can still operate the mode and
air intake buttons as long as the igni-
tion switch is in the ON position.
System Operation
Ventilation
1. Select the Face Level mode.
2. Set the air intake control to the
outside (fresh) air position.
3. Set the temperature control to the
desired position.
4. Set the fan speed control to the
desired speed.
Heating
1. Select the Floor Level mode.
2. Set the air intake control to the
outside (fresh) air position.
3. Set the temperature control to the
desired position.
4. Set the fan speed control to the
desired speed.
5. If dehumidified heating is desired,
turn the air conditioning system on.
If the windshield fogs up, select the
Floor & Defrost mode or press
the Front Defrost mode.OTLE045285R
■Type A
OTLE045224R
■Type B
Page 265 of 546
4-3
Multimedia System
Steering Wheel Audio Control
Do not operate multiple audio
remote control buttons simultane-
ously.
VOLUME (VOL + / - ) (1)
Move the VOLUME lever up to
increase volume.
Move the VOLUME lever down to
decrease volume.
SEEK/PRESET ( / ) (2)
If the SEEK/PRESET switch is
pressed up or down and held for 0.8
second or more, it will function in the
following modes:
RADIO mode
It will function as the AUTO SEEK
select button. It will SEEK until you
release the button.
MEDIA mode
It will function as the FF/REW button.If the SEEK/PRESET switch is
pressed up or down, it will function
in the following modes:
RADIO mode
It will function as the PRESET STA-
TION UP/DOWN button.
MEDIA mode
It will function as the TRACK UP/
DOWN button.
MODE (3)
Press the MODE button to select
Radio, Disc*, or AUX.
* if equipped
Information
Detailed information for audio control
buttons are described in the separate-
ly supplied manual with the vehicle.
i
NOTICE
4
OTLA045238