2019 Hyundai Tucson Automatic transmission
[x] Cancel search: Automatic transmissionPage 317 of 546
5-51
Driving your vehicle
5
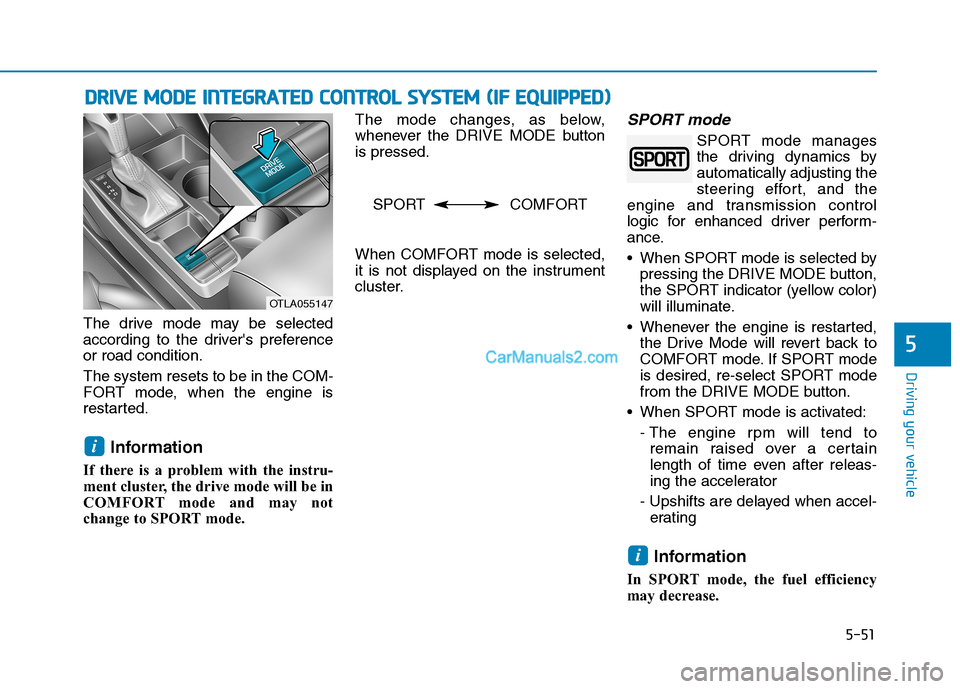
The drive mode may be selected
according to the driver's preference
or road condition.
The system resets to be in the COM-
FORT mode, when the engine is
restarted.
Information
If there is a problem with the instru-
ment cluster, the drive mode will be in
COMFORT mode and may not
change to SPORT mode. The mode changes, as below,
whenever the DRIVE MODE button
is pressed.
When COMFORT mode is selected,
it is not displayed on the instrument
cluster.
SPORT mode
SPORT mode manages
the driving dynamics by
automatically adjusting the
steering effort, and the
engine and transmission control
logic for enhanced driver perform-
ance.
When SPORT mode is selected by
pressing the DRIVE MODE button,
the SPORT indicator (yellow color)
will illuminate.
Whenever the engine is restarted,
the Drive Mode will revert back to
COMFORT mode. If SPORT mode
is desired, re-select SPORT mode
from the DRIVE MODE button.
When SPORT mode is activated:
- The engine rpm will tend to
remain raised over a certain
length of time even after releas-
ing the accelerator
- Upshifts are delayed when accel-
erating
Information
In SPORT mode, the fuel efficiency
may decrease.
i
i
D DR
RI
IV
VE
E
M
MO
OD
DE
E
I
IN
NT
TE
EG
GR
RA
AT
TE
ED
D
C
CO
ON
NT
TR
RO
OL
L
S
SY
YS
ST
TE
EM
M
(
(I
IF
F
E
EQ
QU
UI
IP
PP
PE
ED
D)
)
OTLA055147
SPORT COMFORT
Page 388 of 546
5-122
Driving your vehicle
Hazardous driving conditions
When hazardous driving elements
are encountered such as water,
snow, ice, mud and sand, take the
below suggestions:
Drive cautiously and keep a longer
braking distance.
Avoid abrupt braking or steering.
When your vehicle is stuck in snow,
mud, or sand, use second gear.
Accelerate slowly to avoid unnec-
essary wheel spin.
Put sand, rock salt, tire chains or
other non-slip materials under the
wheels to provide additional trac-
tion while the vehicle becomes
stuck in ice, snow, or mud.
Rocking the vehicle
If it is necessary to rock the vehicle
to free it from snow, sand, or mud,
first turn the steering wheel right and
left to clear the area around your
front wheels. Then, shift back and
forth between R (Reverse) and a for-
ward gear.
Try to avoid spinning the wheels, and
do not race the engine.
To prevent transmission wear, wait
until the wheels stop spinning before
shifting gears. Release the accelera-
tor pedal while shifting, and press
lightly on the accelerator pedal while
the transmission is in gear. Slowly
spinning the wheels in forward and
reverse directions causes a rocking
motion that may free the vehicle.
S SP
PE
EC
CI
IA
AL
L
D
DR
RI
IV
VI
IN
NG
G
C
CO
ON
ND
DI
IT
TI
IO
ON
NS
S
Downshifting with an automatic
transmission while driving on
slippery surfaces can cause an
accident. The sudden change in
tire speed could cause the tires
to skid. Be careful when down-
shifting on slippery surfaces.
WARNING
If the vehicle is stuck and
excessive wheel spin occurs,
the temperature in the tires can
increase very quickly. If the tires
become damaged, a tire blow
out or tire explosion can occur.
This condition is dangerous -
you and others may be injured.
Do not attempt this procedure if
people or objects are anywhere
near the vehicle.
If you attempt to free the vehicle,
the vehicle can overheat quickly,
possibly causing an engine
compartment fire or other dam-
age. Try to avoid spinning the
wheels as much as possible to
prevent overheating of either the
tires or the engine. DO NOT
allow the vehicle to spin the
wheels above 35 mph (56 km/h).
WARNING
Page 429 of 546
6-20
What to do in an emergency
Jack label
To prevent damaging the com-
pact spare tire and your vehicle:
Drive slowly enough for the
road conditions to avoid all
hazards, such as a potholes
or debris.
Avoid driving over obstacles.
The compact spare tire diame-
ter is smaller than the diame-
ter of a conventional tire and
reduces the ground clearance
approximately 1 inch (25 mm).
Do not use tire chains on the
compact spare tire. Because
of the smaller size, a tire chain
will not fit properly.
Do not use the compact spare
tire on any other wheels, nor
should standard tires, snow
tires, wheel covers or trim
rings be used with the com-
pact spare wheel.
CAUTION
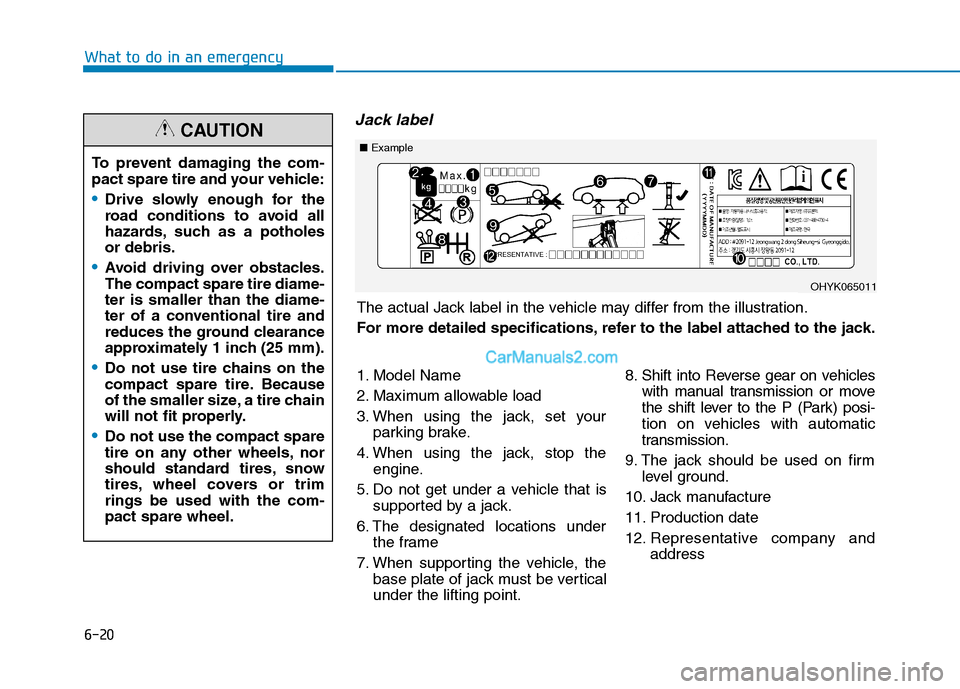
The actual Jack label in the vehicle may differ from the illustration.
For more detailed specifications, refer to the label attached to the jack.
■Example
OHYK065011
1. Model Name
2. Maximum allowable load
3. When using the jack, set your
parking brake.
4. When using the jack, stop the
engine.
5. Do not get under a vehicle that is
supported by a jack.
6. The designated locations under
the frame
7. When supporting the vehicle, the
base plate of jack must be vertical
under the lifting point.8. Shift into Reverse gear on vehicles
with manual transmission or move
the shift lever to the P (Park) posi-
tion on vehicles with automatic
transmission.
9. The jack should be used on firm
level ground.
10. Jack manufacture
11. Production date
12. Representative company and
address
Page 433 of 546
6-24
What to do in an emergency
If towing service is not available in an
emergency, your vehicle may be
temporarily towed using a cable or
chain secured to the emergency tow-
ing hook at the front (or rear) of the
vehicle.
Use extreme caution when towing
the vehicle with a cable or chain. A
driver must be in the vehicle to steer
it and operate the brakes.
Towing in this manner may be done
only on hard-surfaced roads for a
short distance and at low speeds.
Also, the wheels, axles, power train,
steering and brakes must all be in
good condition.Always follow these emergency tow-
ing precautions:
Place the ignition switch in the
ACC position so the steering
wheel is not locked. (if equipped)
Place the shift lever in N (Neutral).
Release the parking brake.
Depress the brake pedal with more
force than normal since you will
have reduced braking perform-
ance.
More steering effort will be
required because the power steer-
ing system will be disabled.
Use a vehicle heavier than your
own to tow your vehicle.
The drivers of both vehicles should
communicate with each other fre-
quently.
Before emergency towing, check
that the hook is not broken or dam-
aged.
Fasten the towing cable or chain
securely to the hook.
Do not jerk the hook. Apply steady
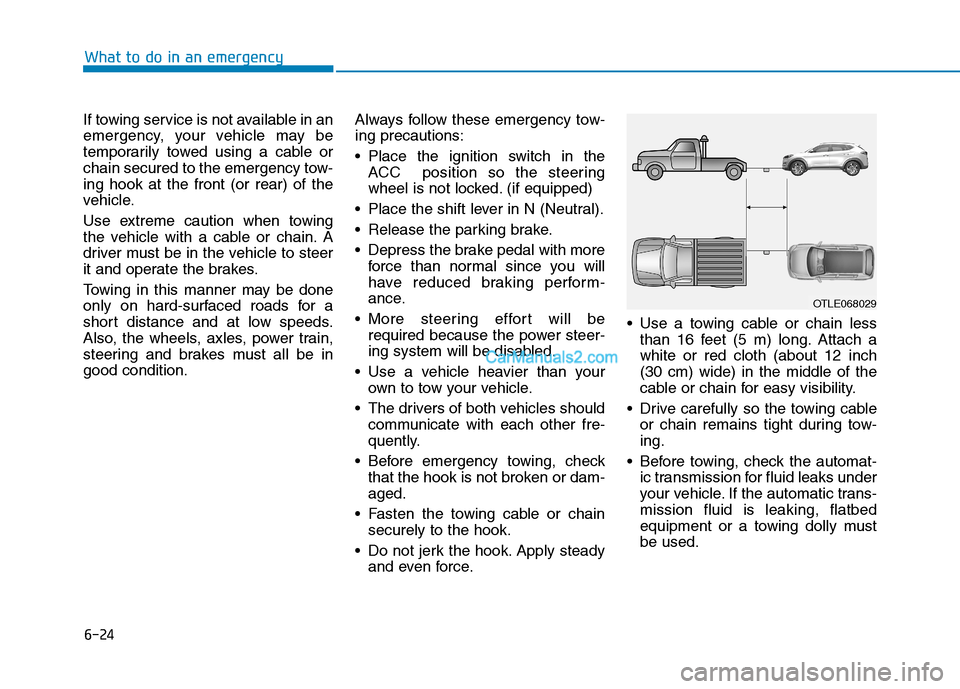
and even force. Use a towing cable or chain less
than 16 feet (5 m) long. Attach a
white or red cloth (about 12 inch
(30 cm) wide) in the middle of the
cable or chain for easy visibility.
Drive carefully so the towing cable
or chain remains tight during tow-
ing.
Before towing, check the automat-
ic transmission for fluid leaks under
your vehicle. If the automatic trans-
mission fluid is leaking, flatbed
equipment or a towing dolly must
be used.
OTLE068029
Page 440 of 546
7-6
Maintenance
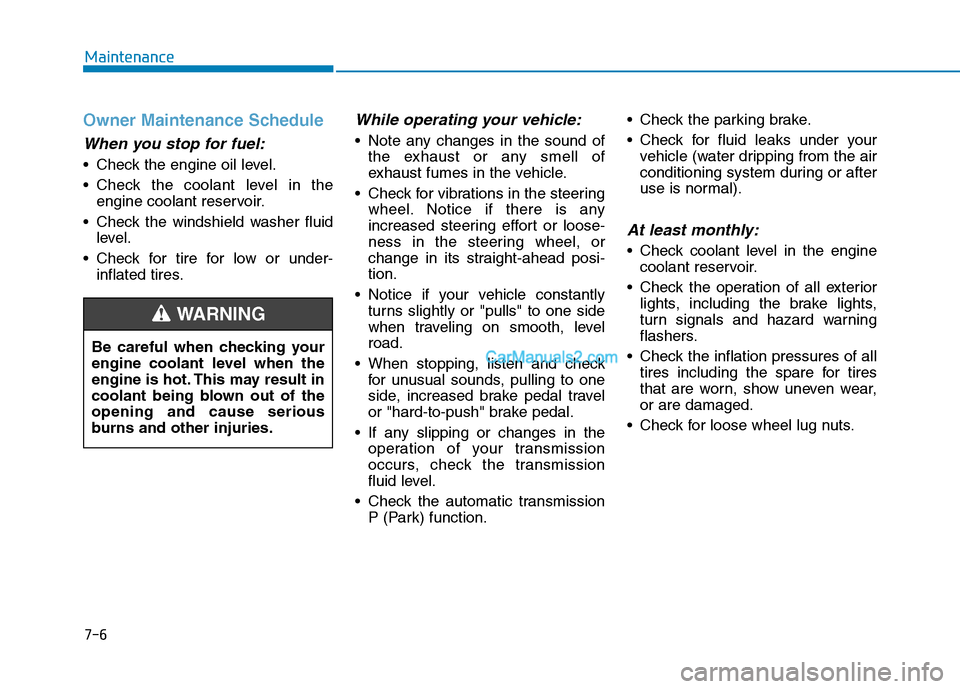
Owner Maintenance Schedule
When you stop for fuel:
• Check the engine oil level.
Check the coolant level in the
engine coolant reservoir.
Check the windshield washer fluid
level.
Check for tire for low or under-
inflated tires.
While operating your vehicle:
Note any changes in the sound of
the exhaust or any smell of
exhaust fumes in the vehicle.
Check for vibrations in the steering
wheel. Notice if there is any
increased steering effort or loose-
ness in the steering wheel, or
change in its straight-ahead posi-
tion.
Notice if your vehicle constantly
turns slightly or "pulls" to one side
when traveling on smooth, level
road.
When stopping, listen and check
for unusual sounds, pulling to one
side, increased brake pedal travel
or "hard-to-push" brake pedal.
If any slipping or changes in the
operation of your transmission
occurs, check the transmission
fluid level.
Check the automatic transmission
P (Park) function. Check the parking brake.
Check for fluid leaks under your
vehicle (water dripping from the air
conditioning system during or after
use is normal).
At least monthly:
Check coolant level in the engine
coolant reservoir.
Check the operation of all exterior
lights, including the brake lights,
turn signals and hazard warning
flashers.
Check the inflation pressures of all
tires including the spare for tires
that are worn, show uneven wear,
or are damaged.
Check for loose wheel lug nuts. Be careful when checking your
engine coolant level when the
engine is hot. This may result in
coolant being blown out of the
opening and cause serious
burns and other injuries.
WARNING
Page 441 of 546
7-7
7
Maintenance
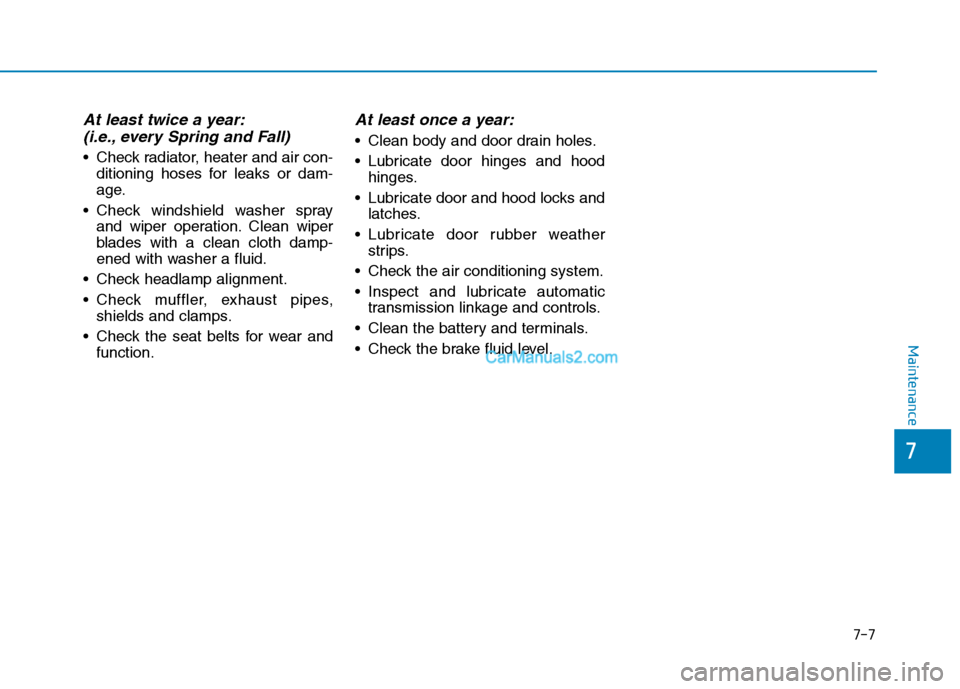
At least twice a year:
(i.e., every Spring and Fall)
Check radiator, heater and air con-
ditioning hoses for leaks or dam-
age.
Check windshield washer spray
and wiper operation. Clean wiper
blades with a clean cloth damp-
ened with washer a fluid.
Check headlamp alignment.
Check muffler, exhaust pipes,
shields and clamps.
Check the seat belts for wear and
function.
At least once a year:
Clean body and door drain holes.
Lubricate door hinges and hood
hinges.
Lubricate door and hood locks and
latches.
Lubricate door rubber weather
strips.
Check the air conditioning system.
Inspect and lubricate automatic
transmission linkage and controls.
Clean the battery and terminals.
Check the brake fluid level.
Page 445 of 546

7-11
7
Maintenance
I : Inspect and if necessary, adjust, correct, clean or replace. R : Replace or change.
*4: Transfer case oil and rear differential oil should be changed anytime they have been submerged in water.
*5: Fuel filter & Fuel tank air filter are considered to be maintenance free but periodic inspection is recommended for this mainte-
nance schedule depends on fuel quality. If there are some important safety matters like fuel flow restriction, surging, loss of
power, hard starting problem, etc. replace the fuel filter immediately regardless of maintenance schedule and consult an
authorized HYUNDAI dealer for details.
Months1224364860728496108120132144156168180
Miles×1,0007.51522.53037.54552.56067.57582.59097.5105112.5
Km×1,0001224364860728496108120132144156168180
Automatic transmission fluidNo check, No service required
Rear differential oil (AWD) *4III
Transfer case oil (AWD) *4III
Vapor hose, fuel filler cap and fuel tankIIIIIII
Fuel tank air filter *5IIIIIII
Fuel filter *5IIIIIII
Fuel lines, hoses and connectionsIII
Parking brakeIIIIIII
Brake fluidIIIIIII
MAINTENANCE
INTERVALS
MAINTENANCE
ITEM
Normal Maintenance Schedule (Nu 2.0 GDI, Theta 2.4 GDI) (CONT)
Page 446 of 546

7-12
Maintenance
Maintenance itemMaintenance
operationMaintenance intervalsDriving condition
Engine oil and filterREvery 3,750 miles or 6 monthsA, B, C, D, E, F,
G, H, I, J, K
Air cleaner filterRMore frequentlyC, E
Spark plugsRMore frequentlyA, B, H, I, K
Automatic transmission fluidREvery 60,000 milesA, C, D, E, F, G, I
Front brake disc/pads, calipersIMore frequentlyC, D, G, H
Rear brake disc/padsIMore frequentlyC, D, G, H
Parking brakeIMore frequentlyC, D, G, H
Maintenance Under Severe Usage Conditions (Nu 2.0 GDI, Theta 2.4 GDI)
The following items must be serviced more frequently on cars normally used under severe driving conditions.
Refer to the chart below for the appropriate maintenance intervals.
I : Inspect and if necessary, adjust, correct, clean or replace. R : Replace or change.