Page 121 of 546

3-30
Convenient features of your vehicle
Electrochromic mirror (ECM)
with HomeLink®system and
Blue Link®(if equipped)
Your vehicle may be equipped with a
Gentex Automatic-Dimming Mirror
and an Integrated HomeLink
®
Wireless Control System. The
HomeLink®Universal Transceiver
allows you to activate your garage
door(s), electric gate, home lighting,
etc.
(1) HomeLink Channel 1
(2) HomeLink Channel 2
(3) HomeLink Channel 3
(4) Garage Door Opener Status
Indicator : Closing or Closed
(5) HomeLink Operation Indicator
(6) Garage Door Opener Status
Indicator : Opening or Opened
(7) HomeLink User Interface
Indicator
Automatic-Dimming Night Vision
Safety™ (NVS®) Mirror
(if equipped)
The NVS®Mirror automatically
reduces glare by monitoring light lev-
els in the front and the rear of the
vehicle. Any object that obstructs
either light sensor will degrade the
automatic dimming control feature.
For more information regarding
NVS
®mirrors and other applica-
tions, please refer to the Gentex
website:
www.gentex.comOOS047093N
HomeLink Indicator
HomeLink ButtonTelematics buttons
Page 122 of 546
3-31
Convenient features of your vehicle
3
Your mirror will automatically dim
upon detecting glare from the vehi-
cles traveling behind you. The auto-
dimming function can be controlled
by pressing the Dimming ON/OFF
button:
1. Pressing and holding the button
for 3 seconds turns the auto-dim-
ming function OFF which is indi-
cated by the green Status
Indicator LED turning off.
2. Pressing and holding the button
for 3 seconds again turns the auto-
dimming function ON which is indi-
cated by the green Status Indicator
LED turning on.
The mirror defaults to the ON posi-
tion each time the vehicle is started.Integrated HomeLink®Wireless
Control System
The HomeLink®Wireless Control
System can replace up to three
hand-held radio-frequency (RF)
transmitters with a single built-in
device. This innovative feature will
learn the radio frequency codes of
most current transmitters to operate
devices such as gate operators,
garage door openers, entry door
locks, security systems, even home
lighting. Both standard and rolling
code-equipped transmitters can be
programmed by following the out-
lined procedures.
Additional HomeLink
®information
can be found at: www.homelink.com
or by calling 1-800-355-3515.
Retain the original transmitter of the
RF device you are programming for
use in other vehicles as well as for
future HomeLink
®programming. It is
also suggested that upon the sale of
the vehicle, the programmed
HomeLink
®buttons be erased for
security purposes.
Before programming
HomeLink®to a garage door
opener or gate operator, make
sure people and objects are out
of the way of the device to pre-
vent potential harm or damage.
Do not use the HomeLink
®with
any garage door opener that
lacks the safety stop and
reverse features required by
U.S. federal safety standards
(this includes any garage door
opener model manufactured
before April 1, 1982). A garage
door that cannot detect an
object - signaling the door to
stop and reverse - does not
meet current U.S. federal safety
standards. Using a garage door
opener without these features
increases the risk of serious
injury or death.
WARNING
Page 124 of 546
3-33
Convenient features of your vehicle
3
Information
• Some garage door openers require
to press the programmed button on
the mirror up to three times right
after the programming is just com-
pleted to operate the garage door.
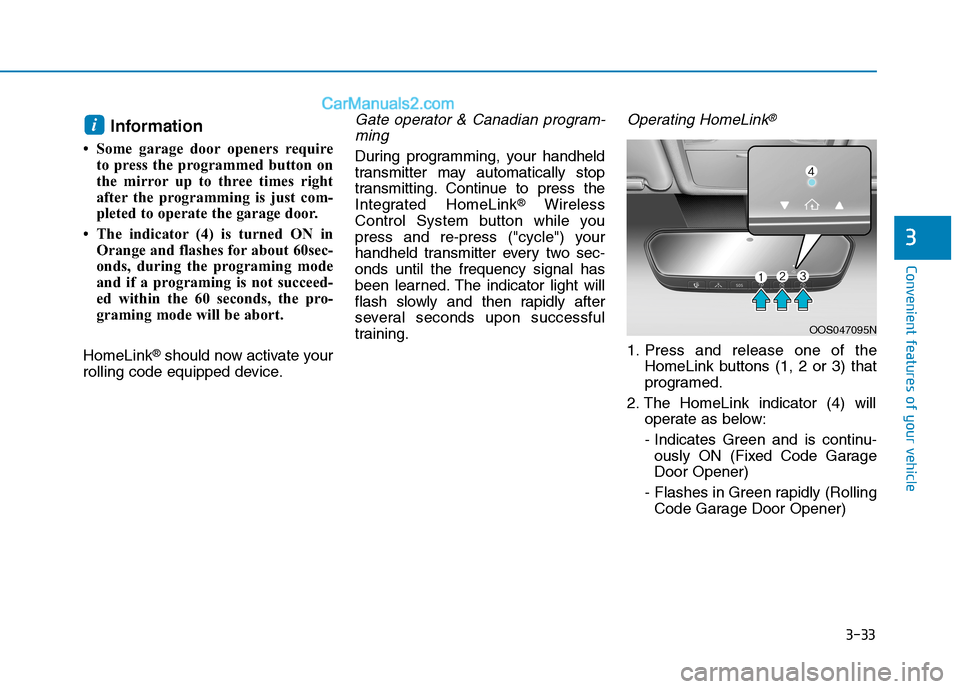
• The indicator (4) is turned ON in
Orange and flashes for about 60sec-
onds, during the programing mode
and if a programing is not succeed-
ed within the 60 seconds, the pro-
graming mode will be abort.
HomeLink
®should now activate your
rolling code equipped device.
Gate operator & Canadian program-
ming
During programming, your handheld
transmitter may automatically stop
transmitting. Continue to press the
Integrated HomeLink
®Wireless
Control System button while you
press and re-press ("cycle") your
handheld transmitter every two sec-
onds until the frequency signal has
been learned. The indicator light will
flash slowly and then rapidly after
several seconds upon successful
training.
Operating HomeLink®
1. Press and release one of the
HomeLink buttons (1, 2 or 3) that
programed.
2. The HomeLink indicator (4) will
operate as below:
- Indicates Green and is continu-
ously ON (Fixed Code Garage
Door Opener)
- Flashes in Green rapidly (Rolling
Code Garage Door Opener)
i
OOS047095N
Page 154 of 546
3-63
Convenient features of your vehicle
3
3. Automatic opening
The hazard warning lights will blink
and chime will sound several times
and then the liftgate will slowly open.
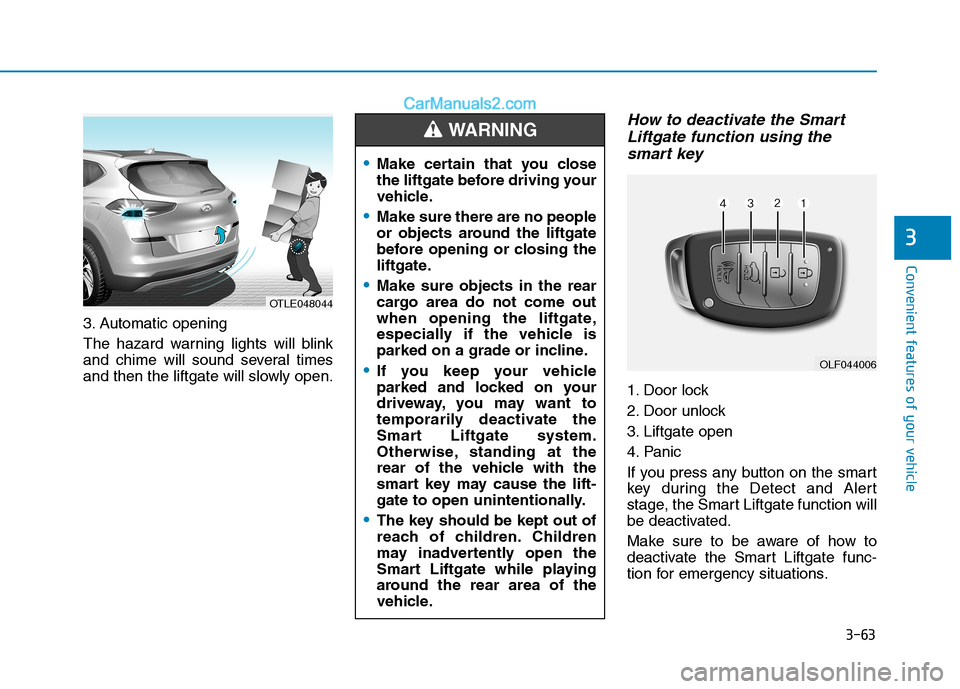
How to deactivate the Smart
Liftgate function using the
smart key
1. Door lock
2. Door unlock
3. Liftgate open
4. Panic
If you press any button on the smart
key during the Detect and Alert
stage, the Smart Liftgate function will
be deactivated.
Make sure to be aware of how to
deactivate the Smart Liftgate func-
tion for emergency situations.
OLF044006
Make certain that you close
the liftgate before driving your
vehicle.
Make sure there are no people
or objects around the liftgate
before opening or closing the
liftgate.
Make sure objects in the rear
cargo area do not come out
when opening the liftgate,
especially if the vehicle is
parked on a grade or incline.
If you keep your vehicle
parked and locked on your
driveway, you may want to
temporarily deactivate the
Smart Liftgate system.
Otherwise, standing at the
rear of the vehicle with the
smart key may cause the lift-
gate to open unintentionally.
The key should be kept out of
reach of children. Children
may inadvertently open the
Smart Liftgate while playing
around the rear area of the
vehicle.
WARNING
OTLE048044
Page 161 of 546
3-70
Convenient features of your vehicle
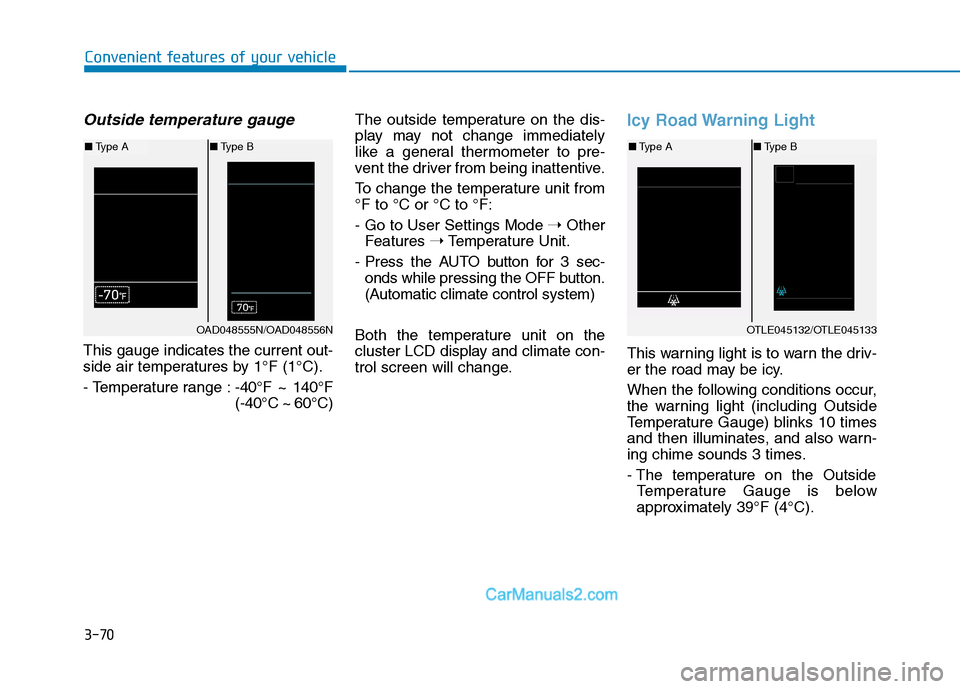
Outside temperature gauge
This gauge indicates the current out-
side air temperatures by 1°F (1°C).
- Temperature range :-40°F ~ 140°F
(-40°C ~ 60°C)The outside temperature on the dis-
play may not change immediately
like a general thermometer to pre-
vent the driver from being inattentive.
To change the temperature unit from
°F to °C or °C to °F:
- Go to User Settings Mode ➝Other
Features ➝Temperature Unit.
- Press the AUTO button for 3 sec-
onds while pressing the OFF button.
(Automatic climate control system)
Both the temperature unit on the
cluster LCD display and climate con-
trol screen will change.
Icy Road Warning Light
This warning light is to warn the driv-
er the road may be icy.
When the following conditions occur,
the warning light (including Outside
Temperature Gauge) blinks 10 times
and then illuminates, and also warn-
ing chime sounds 3 times.
- The temperature on the Outside
Temperature Gauge is below
approximately 39°F (4°C).
OTLE045132/OTLE045133
■Type A■Type B
OAD048555N/OAD048556N
■Type A■Type B
Page 162 of 546
3-71
Convenient features of your vehicle
3
Information
If the icy road warning light appears
while driving, you should drive more
attentively and safely refraining from
over-speeding, rapid acceleration,
sudden braking or sharp turning, etc.
Automatic transmission shift
indicator (If equipped)
This indicator displays which auto-
matic transmission shift lever is
selected.
Reverse : R
Neutral : N
Manual Shift Mode
- 1, 2, 3, 4, 5, 6
Shift indicator pop-up (if equipped)
The pop-up displays the current gear
position selected for 2 seconds
(P/R/N/D).
i
OTL045132/OTL045133
■Type A■Type B
OTL045134/OTL045135
■Type A■Type B
Page 174 of 546
3-83
Convenient features of your vehicle
3
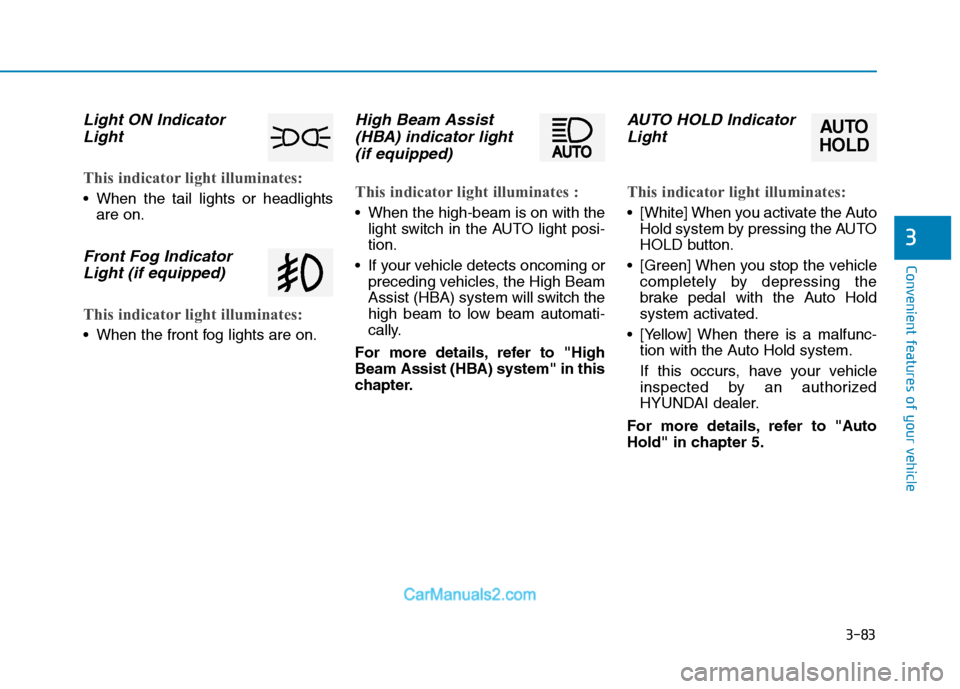
Light ON Indicator
Light
This indicator light illuminates:
When the tail lights or headlights
are on.
Front Fog Indicator
Light (if equipped)
This indicator light illuminates:
When the front fog lights are on.
High Beam Assist
(HBA) indicator light
(if equipped)
This indicator light illuminates :
When the high-beam is on with the
light switch in the AUTO light posi-
tion.
If your vehicle detects oncoming or
preceding vehicles, the High Beam
Assist (HBA) system will switch the
high beam to low beam automati-
cally.
For more details, refer to "High
Beam Assist (HBA) system" in this
chapter.
AUTO HOLD Indicator
Light
This indicator light illuminates:
[White] When you activate the Auto
Hold system by pressing the AUTO
HOLD button.
[Green] When you stop the vehicle
completely by depressing the
brake pedal with the Auto Hold
system activated.
[Yellow] When there is a malfunc-
tion with the Auto Hold system.
If this occurs, have your vehicle
inspected by an authorized
HYUNDAI dealer.
For more details, refer to "Auto
Hold" in chapter 5.
AUTO
HOLD
Page 178 of 546
3-87
Convenient features of your vehicle
3
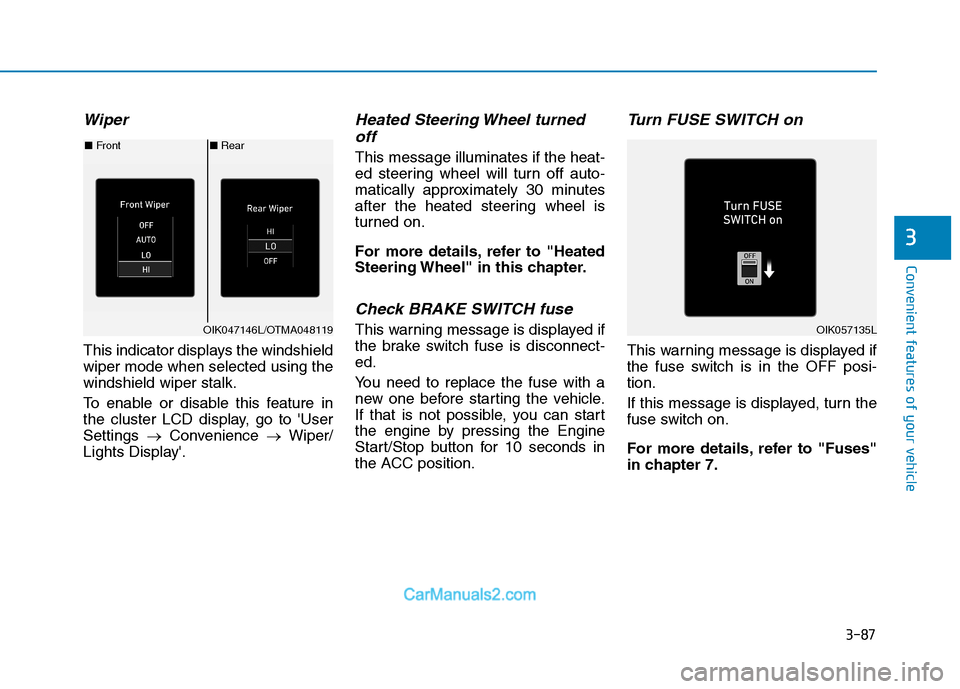
Wiper
This indicator displays the windshield
wiper mode when selected using the
windshield wiper stalk.
To enable or disable this feature in
the cluster LCD display, go to 'User
Settings →Convenience →Wiper/
Lights Display'.
Heated Steering Wheel turned off
This message illuminates if the heat-
ed steering wheel will turn off auto-
matically approximately 30 minutes
after the heated steering wheel is
turned on.
For more details, refer to "Heated
Steering Wheel" in this chapter.
Check BRAKE SWITCH fuse
This warning message is displayed if
the brake switch fuse is disconnect-
ed.
You need to replace the fuse with a
new one before starting the vehicle.
If that is not possible, you can start
the engine by pressing the Engine
Start/Stop button for 10 seconds in
the ACC position.
Turn FUSE SWITCH on
This warning message is displayed if
the fuse switch is in the OFF posi-
tion.
If this message is displayed, turn the
fuse switch on.
For more details, refer to "Fuses"
in chapter 7.
■ Rear
■ Front
OIK047146L/OTMA048119OIK057135L