2019 Hyundai Tucson Chapter 8
[x] Cancel search: Chapter 8Page 363 of 685
5-39
Driving your vehicle
5
D (Drive)
This is the normal driving position.
The transmission will automatically
shift through a 7-gear sequence, pro-
viding the best fuel economy and
power.
For extra power when passing anoth-
er vehicle or driving uphill, depress
the accelerator fully. The transmis-
sion will automatically downshift to
the next lower gear (or gears, as
appropriate).
The DRIVE MODE switch, located on
the shift lever console, allows the driv-
er to switch from NORMAL mode to
SPORT mode. (if equipped)
For more details, refer to "Drive
Mode Integrated Control System"
later in this chapter.Always make sure the vehicle is
stationary, at a complete stop,
before selecting D (Drive).
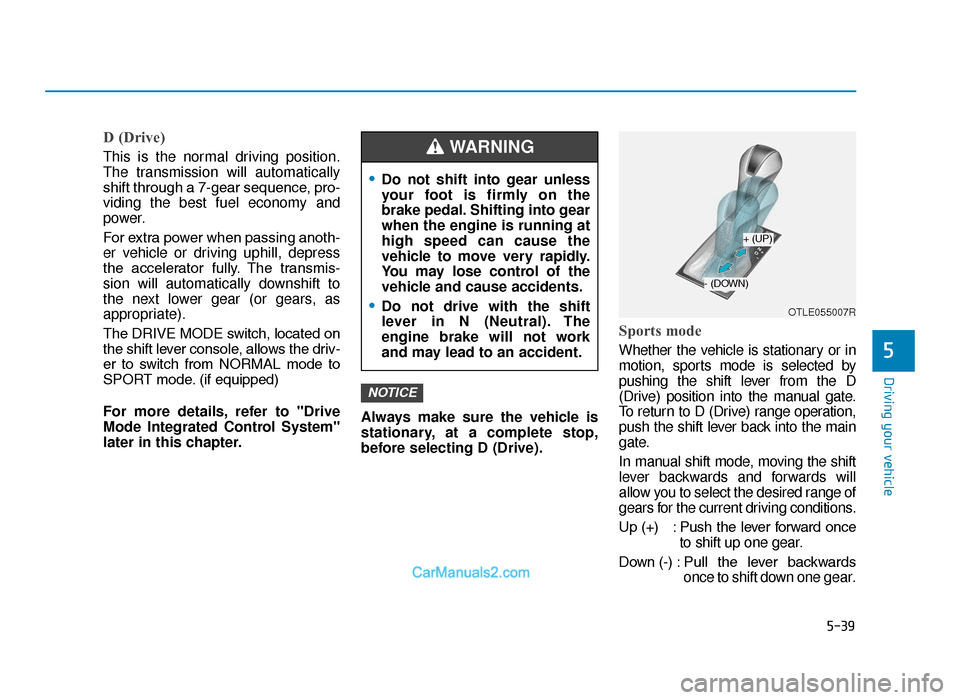
Sports mode
Whether the vehicle is stationary or in
motion, sports mode is selected by
pushing the shift lever from the D
(Drive) position into the manual gate.
To return to D (Drive) range operation,
push the shift lever back into the main
gate.
In manual shift mode, moving the shift
lever backwards and forwards will
allow you to select the desired range of
gears for the current driving conditions.
Up (+) : Push the lever forward once
to shift up one gear.
Down (-) : Pull the lever backwards
once to shift down one gear.
NOTICE
OTLE055007R
+ (UP)
- (DOWN)
•Do not shift into gear unless
your foot is firmly on the
brake pedal. Shifting into gear
when the engine is running at
high speed can cause the
vehicle to move very rapidly.
You may lose control of the
vehicle and cause accidents.
•Do not drive with the shift
lever in N (Neutral). The
engine brake will not work
and may lead to an accident.
WARNING
TLe UK 5.qxp 5/10/2018 12:21 PM Page 39
Page 383 of 685
5-59
Driving your vehicle
5
ESC operation
ESC ON condition
When the ignition switch is in the ON
position, the ESC and the ESC OFF
indicator lights illuminate for approxi-
mately three seconds and goes off,
then the ESC is turned on.
When operating
When the ESC is in opera-
tion, the ESC indicator light
blinks:
• When you apply your brakes under conditions which may lock the
wheels, you may hear sounds from
the brakes, or feel a corresponding
sensation in the brake pedal. This is
normal and it means your ESC is
active.
• When the ESC activates, the engine may not respond to the
accelerator as it does under routine
conditions.
• If the Cruise Control was in use when the ESC activates, the Cruise
Control automatically disengages.
The Cruise Control can be reen-
gaged when the road conditions
allow. See “Cruise Control System”
later in this chapter. (if equipped)
Never drive too fast for the road
conditions or too quickly when
cornering. The ESC system will
not prevent accidents.
Excessive speed in turns, abrupt
manoeuvres, and hydroplaning
on wet surfaces can result in
severe accidents.WARNING
TLe UK 5.qxp 5/10/2018 12:22 PM Page 59
Page 397 of 685
5-73
Driving your vehicle
5
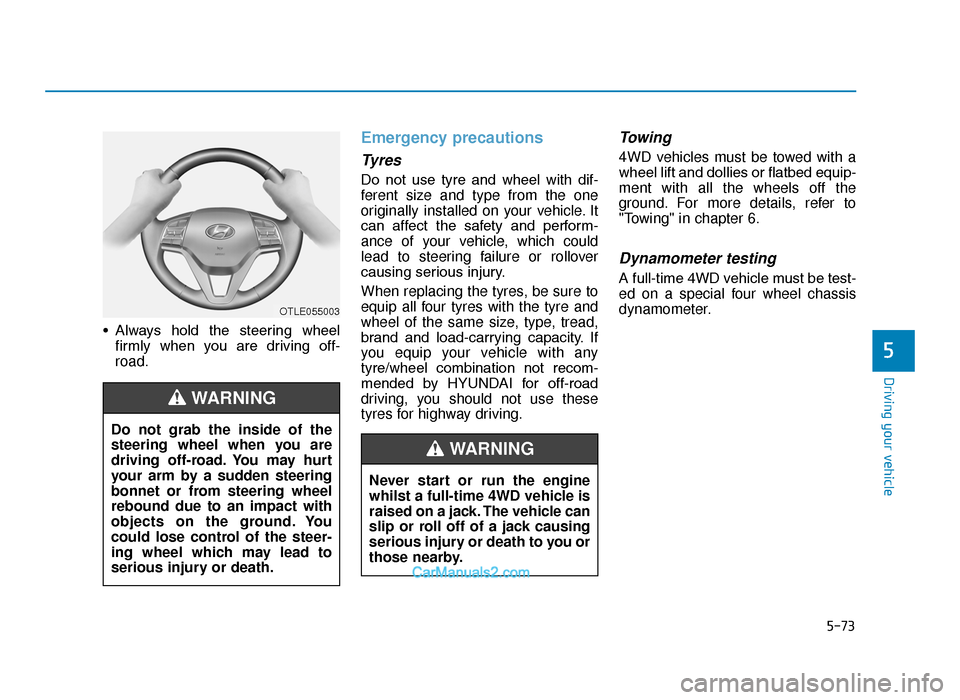
• Always hold the steering wheelfirmly when you are driving off-
road.
Emergency precautions
Tyres
Do not use tyre and wheel with dif-
ferent size and type from the one
originally installed on your vehicle. It
can affect the safety and perform-
ance of your vehicle, which could
lead to steering failure or rollover
causing serious injury.
When replacing the tyres, be sure to
equip all four tyres with the tyre and
wheel of the same size, type, tread,
brand and load-carrying capacity. If
you equip your vehicle with any
tyre/wheel combination not recom-
mended by HYUNDAI for off-road
driving, you should not use these
tyres for highway driving.
Towing
4WD vehicles must be towed with a
wheel lift and dollies or flatbed equip-
ment with all the wheels off the
ground. For more details, refer to
"Towing" in chapter 6.
Dynamometer testing
A full-time 4WD vehicle must be test-
ed on a special four wheel chassis
dynamometer.
OTLE055003
Do not grab the inside of the
steering wheel when you are
driving off-road. You may hurt
your arm by a sudden steering
bonnet or from steering wheel
rebound due to an impact with
objects on the ground. You
could lose control of the steer-
ing wheel which may lead to
serious injury or death.
WARNING
Never start or run the engine
whilst a full-time 4WD vehicle is
raised on a jack. The vehicle can
slip or roll off of a jack causing
serious injury or death to you or
those nearby.
WARNING
TLe UK 5.qxp 5/10/2018 12:23 PM Page 73
Page 427 of 685
5-103
Driving your vehicle
5
• The warning chime may be deacti-vated.
- To deactivate the warning chime:
Go to the "User Settings →Driver
Assistance and deselect BCW
sound (Blind-Spot Collision
Warning)" on the LCD display.
- To activate the warning chime:
Go to the "User Settings →Driver
Assistance and select BCW sound
(Blind-Spot Collision Warning)" on
the LCD display.
Information
The warning chime function helps
alert the driver. Deactivate this func-
tion only when it is necessary.
Refer to "User settings mode" in
chapter 3 for more details.
RCCW (Rear Cross-Traffic
Collision Warning)
(if equipped)
The Rear Cross-Traffic Collision
warning function monitors approach-
ing cross traffic from the left and right
side of the vehicle when your vehicle
is in reverse.
Operating conditions
To operate:
Go to the 'User Settings →Driver
Assistance and select RCCW (Rear
Cross-Traffic Collision Warning)' on
the LCD display.
The system will turn on and standby
to activate. If you deactivate this
function in the cluster, the system will
stop.
Refer to "User settings mode" in
chapter 3 for more details.
Information
If the vehicle is turned off then on
again, the BCW system returns to the
previous state.
The system will activate when vehicle
speed is below 6.2 mph (10 km/h) and
with the shift lever in R (Reverse).
The Rear Cross-Traffic Collision
warning detecting range is approxi-
mately 0.5 m ~ 20 m (1 ft ~ 65 ft) in the
direction of both lateral sides of the
vehicle. An approaching vehicle will
be detected if their vehicle speed is
within 2.5 ~ 22.5 mph (4 km/h ~ 36
km/h).
Note that the detecting range may
vary under certain conditions. As
always, use caution and pay close
attention to your surroundings when
backing up your vehicle.
i
i
TLe UK 5.qxp 5/10/2018 12:25 PM Page 103
Page 434 of 685
5-110
Driving your vehicleNote that the vehicle
speed must be at least
approximately 37 mph
(60 km/h) to ENABLE the
LKA system. The indicator in the
cluster display will illuminate green.
The colour of indicator will change
depending on the condition of LKA
system.
- White : Sensor does not detect
lane markers or vehicle
speed is under 37 mph (60
km/h).
- Green : Sensor detects lane mark- ers and the system is able
to control vehicle steering.
Information
The LKA automatically activates
upon placing the Engine Start/Stop
button to the ON position. The switch
indicator will be on and the indicator
in the cluster display will initially illu-
minate white. The driver can deacti-
vate the LKA by pushing LKA switch
located on the instrument panel on the
lower right hand side of the driver or
LDW selecting from the User Settings
Mode on the LCD display.
LKA activation
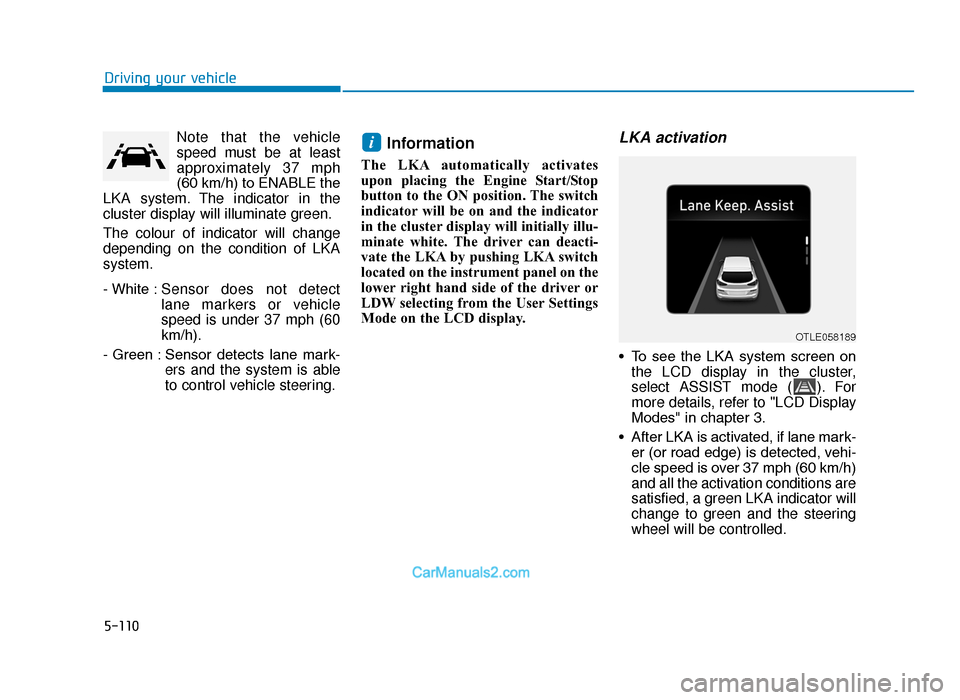
• To see the LKA system screen onthe LCD display in the cluster,
select ASSIST mode ( ). For
more details, refer to "LCD Display
Modes" in chapter 3.
• After LKA is activated, if lane mark- er (or road edge) is detected, vehi-
cle speed is over 37 mph (60 km/h)
and all the activation conditions are
satisfied, a green LKA indicator will
change to green and the steering
wheel will be controlled.
i
OTLE058189
TLe UK 5.qxp 5/10/2018 12:26 PM Page 110
Page 442 of 685
5-118
Driving your vehicle
• The driver can monitor their driving conditions on the LCD display.
The DAW screen will appear when
you select the ASSIST mode tab
( ) on the LCD display if the sys-
tem is activated. (For more
details, refer to "LCD Display
Modes" in chapter 3.)
• The driver's attention level is dis- played on the scale of 1 to 5. The
lower the level is, the more inatten-
tive the driver is.
• The level decreases when the driv- er does not take a break for a cer-
tain period of time.
• The level increases when the driv- er attentively drives for a certain
period of time.
• When the driver turns on the sys- tem whilst driving, it displays 'Last
Break time' and level.
Take a break
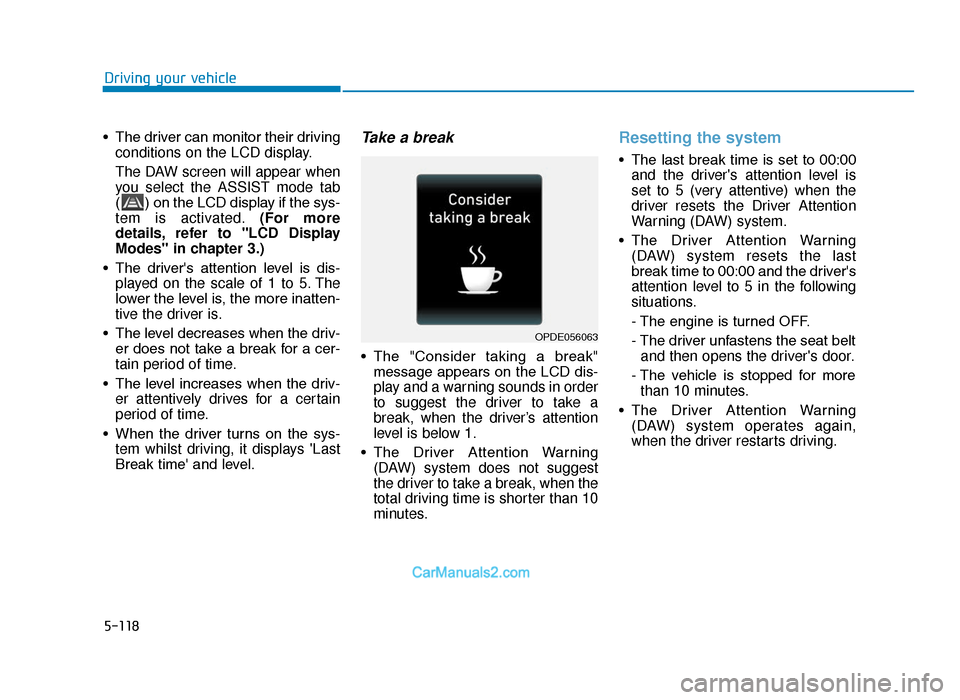
• The "Consider taking a break"message appears on the LCD dis-
play and a warning sounds in order
to suggest the driver to take a
break, when the driver’s attention
level is below 1.
• The Driver Attention Warning (DAW) system does not suggest
the driver to take a break, when the
total driving time is shorter than 10
minutes.
Resetting the system
• The last break time is set to 00:00and the driver's attention level is
set to 5 (very attentive) when the
driver resets the Driver Attention
Warning (DAW) system.
• The Driver Attention Warning (DAW) system resets the last
break time to 00:00 and the driver's
attention level to 5 in the following
situations.
- The engine is turned OFF.
- The driver unfastens the seat beltand then opens the driver's door.
- The vehicle is stopped for more than 10 minutes.
• The Driver Attention Warning (DAW) system operates again,
when the driver restarts driving.
OPDE056063
TLe UK 5.qxp 5/10/2018 12:27 PM Page 118
Page 444 of 685
5-120
Driving your vehicle
The Driver Attention Warning
(DAW) system utilizes the camera
sensor on the front windscreen for
its operation. To keep the camera
sensor in the best condition, you
should observe the followings:
• NEVER install any accessories or stickers on the front wind-
screen, nor tint the front wind-
screen.
• NEVER locate any reflective objects (i.e. white paper, mirror)
over the dashboard. Any light
reflection may cause a malfunc-
tion of the Driver Attention
Warning (DAW) system.
• Pay extreme caution to keep the camera sensor out of water.
• NEVER disassemble the camera assembly, nor apply any impact
on the camera assembly.
(Continued)(Continued)
• Do not disassemble the camera
temporarily for tinted window or
attaching any types of coatings
and accessories. If you disas-
semble a camera and assemble
it again, we recommend that you
take your vehicle to a HYUNDAI
authorised repairer and have the
system checked for calibration.
NOTICE
The Driver Attention Warning
(DAW) system may not properly
operate with limited alerting in
the following situations:
•The lane detection perform-
ance is limited. (For more
details, refer to "Lane Keeping
Assist (LKA) system" in this
chapter.)
• The vehicle is violently driven
or is abruptly turned for
obstacle avoidance (e.g. con-
struction area, other vehicles,
fallen objects, bumpy road).
• Forward drivability of the
vehicle is severely under-
mined (possibly due to wide
variation in tyre pressures,
uneven tyre wear-out, toe-
in/toe-out alignment).
(Continued)
CAUTION
TLe UK 5.qxp 5/10/2018 12:27 PM Page 120
Page 466 of 685
5-142
Driving your vehicle
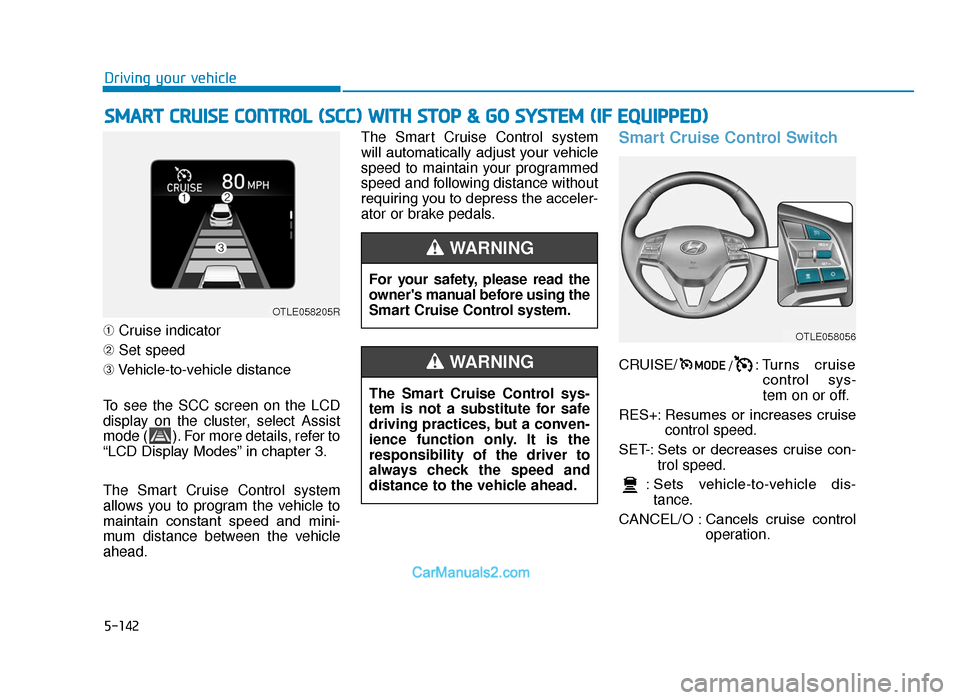
➀ Cruise indicator
➁ Set speed
➂ Vehicle-to-vehicle distance
To see the SCC screen on the LCD
display on the cluster, select Assist
mode ( ). For more details, refer to
“LCD Display Modes” in chapter 3.
The Smart Cruise Control system
allows you to program the vehicle to
maintain constant speed and mini-
mum distance between the vehicle
ahead. The Smart Cruise Control system
will automatically adjust your vehicle
speed to maintain your programmed
speed and following distance without
requiring you to depress the acceler-
ator or brake pedals.
Smart Cruise Control Switch
CRUISE/
/: Turns cruise
control sys-
tem on or off.
RES+: Resumes or increases cruise control speed.
SET-: Sets or decreases cruise con- trol speed.
: Sets vehicle-to-vehicle dis- tance.
CANCEL/O : Cancels cruise control operation.
SMART CRUISE CONTROL (SCC) WITH STOP & GO SYSTEM (IF EQUIPPED)
For your safety, please read the
owner's manual before using the
Smart Cruise Control system.
WARNING
The Smart Cruise Control sys-
tem is not a substitute for safe
driving practices, but a conven-
ience function only. It is the
responsibility of the driver to
always check the speed and
distance to the vehicle ahead.
WARNING
OTLE058205R
OTLE058056
TLe UK 5.qxp 5/10/2018 12:30 PM Page 142