2019 Hyundai Tucson Chapter 8
[x] Cancel search: Chapter 8Page 533 of 685
6-30
What to do in an emergency
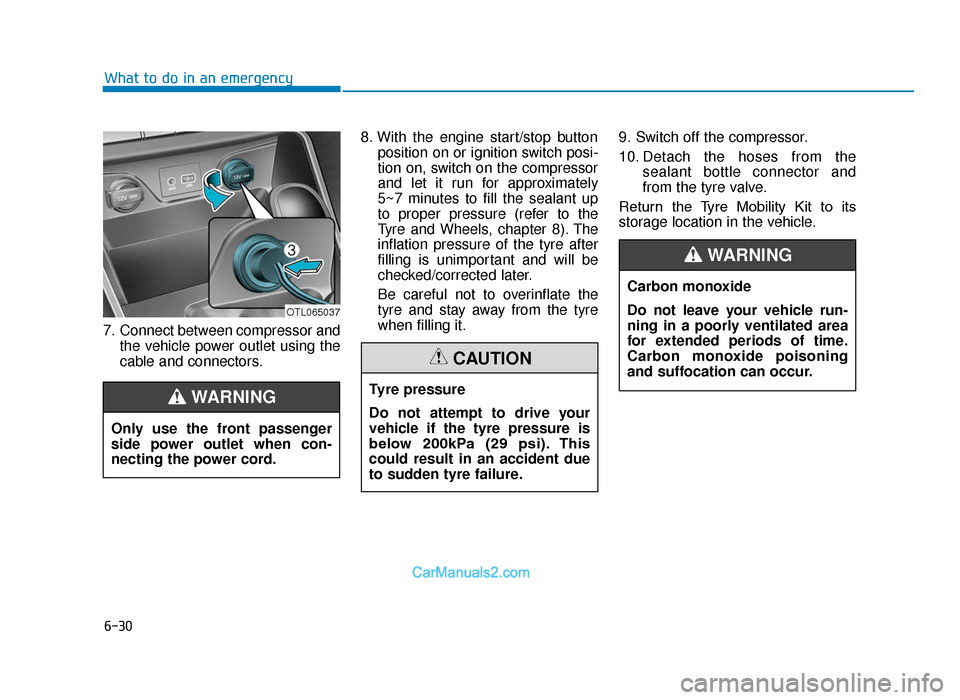
7. Connect between compressor and the vehicle power outlet using the
cable and connectors. 8. With the engine start/stop button
position on or ignition switch posi-
tion on, switch on the compressor
and let it run for approximately
5~7 minutes to fill the sealant up
to proper pressure (refer to the
Tyre and Wheels, chapter 8). The
inflation pressure of the tyre after
filling is unimportant and will be
checked/corrected later.
Be careful not to overinflate the
tyre and stay away from the tyre
when filling it. 9. Switch off the compressor.
10. Detach the hoses from the
sealant bottle connector and
from the tyre valve.
Return the Tyre Mobility Kit to its
storage location in the vehicle.
Tyre pressure
Do not attempt to drive your
vehicle if the tyre pressure is
below 200kPa (29 psi). This
could result in an accident due
to sudden tyre failure.
CAUTION
Carbon monoxide
Do not leave your vehicle run-
ning in a poorly ventilated area
for extended periods of time.
Carbon monoxide poisoning
and suffocation can occur.
WARNING
OTL065037
Only use the front passenger
side power outlet when con-
necting the power cord.
WARNING
TLe UK 6.qxp 5/10/2018 1:21 PM Page 30
Page 541 of 685
6-38
5. Plug the compressor power cord(4) into the vehicle power outlet.
Only use the front passenger side
power outlet when connecting the
power cord.
6. With the ignition switch in the ON position, switch on the compres-
sor and let it run for approximately
5~7 minutes to fill the sealant up
to proper pressure. (refer to the
Tyre and Wheels, chapter 8). The
inflation pressure of the tyre after
filling is unimportant and will be
checked/corrected later.
Be careful not to overinflate the
tyre and stay away from the tyre
when filling it. 7. Switch off the compressor.
8. Detach the hoses from the sealant
bottle connector and from the tyre
valve.
Return the Tyre Mobility Kit to its
storage location in the vehicle.
NOTICE
What to do in an emergency
Tyre pressure
Do not attempt to drive your
vehicle if the tyre pressure is
below 200 kPa (29 psi). This
could result in an accident due
to sudden tyre failure.
CAUTION
Carbon monoxide
Do not leave your vehicle run-
ning in a poorly ventilated area
for extended periods of time.
Carbon monoxide poisoning
and suffocation can occur.
WARNING
TLe UK 6.qxp 5/10/2018 1:22 PM Page 38
Page 549 of 685
6-46
What to do in an emergency
Your vehicle is equipped with emer-
gency commodities to help you
respond to emergency situation.
Fire extinguisher
If there is small fire and you know how
to use the fire extinguisher, follow
these steps carefully.
1. Pull out the safety pin at the top of the extinguisher that keeps the han-
dle from being accidentally pressed.
2. Aim the nozzle towards the base of the fire.
3. Stand approximately 2.5 m (8 ft) away from the fire and squeeze
the handle to discharge the extin-
guisher. If you release the handle,
the discharge will stop.
4. Sweep the nozzle back and forth at the base of the fire. After the fire
appears to be out, watch carefully
since it may re-ignite.
First aid kit
Supplies for use in giving first aid
such as scissors, bandage and
adhesive tape, etc. are provided.
Triangle reflector
Place the triangle reflector on the
road to warn oncoming vehicles dur-
ing emergencies, such as when the
vehicle is parked by the roadside due
to problems.
Tyre pressure gauge
(if equipped)
Tyres normally lose some air in day-
to-day use, and you may have to add
a air periodically and usually it is not
a sign of a leaking tyre, but of normal
wear. Always check tyre pressure
when the tyres are cold because tyre
pressure increases with temperature. To check the tyre pressure, take the
following steps:
1. Unscrew the inflation valve cap
that is located on the rim of the
tyre.
2. Press and hold the gauge against the tyre valve. Some air will leak as
you begin and more will leak if you
don't press the gauge in firmly.
3. A firm non-leaking push will acti- vate the gauge.
4. Read the tyre pressure on the gauge to see whether the tyre pres-
sure is low or high.
5. Adjust the tyre pressure to the specified pressure. Refer to “Tyres
and Wheels” in chapter 8.
6. Reinstall the inflation valve cap.
EMERGENCY COMMODITY (IF EQUIPPED)
TLe UK 6.qxp 5/10/2018 1:22 PM Page 46
Page 555 of 685
7-6
Maintenance
MAINTENANCE SERVICES
You should exercise the utmost care
to prevent damage to your vehicle
and injury to yourself whenever per-
forming any maintenance or inspec-
tion procedures.
We recommend you have your vehi-
cle maintained and repaired by a
HYUNDAI authorised repairer. a
HYUNDAI authorised repairer meets
HYUNDAI’s high service quality stan-
dards and receives technical support
from HYUNDAI in order to provide
you with a high level of service satis-
faction.Owner’s responsibility
Maintenance service and record reten-
tion are the owner’s responsibility.
You should retain documents that show
proper maintenance has been per-
formed on your vehicle in accordance
with the scheduled maintenance serv-
ice charts shown on the following
pages. You need this information to
establish your compliance with the
servicing and maintenance require-
ments of your vehicle warranties.
Detailed warranty information is pro-
vided in your Warranty Booklet.
Repairs and adjustments required as
a result of improper maintenance or
a lack of required maintenance are
not covered.
Owner maintenance precautions
Inadequate, incomplete or insufficient
servicing may result in operational
problems with your vehicle that could
lead to vehicle damage, an accident,
or personal injury. This chapter pro-
vides instructions only for the mainte-
nance items that are easy to perform.
Several procedures can be done only
by a HYUNDAI authorised repairer
with special tools.
Your vehicle should not be modified in
any way. Such modifications may
adversely affect the performance,
safety or durability of your vehicle and
may, in addition, violate conditions of
the limited warranties covering the
vehicle.
TLe UK 7.qxp 5/10/2018 1:32 PM Page 6
Page 563 of 685
7-14
Maintenance
The use of a non-specified fluid
could result in transaxle malfunc-
tion and failure.
Use only specified automatic
transaxle fluid.
(Refer to “Recommended lubri-
cants and capacities” in chapter 8.)
Manual transaxle fluid
(if equipped)
Inspect the manual transaxle fluid
according to the maintenance sched-
ule.
Dual clutch transmission fluid
(if equipped)
Inspect the dual clutch transmission
fluid according to the maintenance
schedule.
Brake hoses and lines
Visually check for proper installation,
chafing, cracks, deterioration and
any leakage. Replace any deteriorat-
ed or damaged parts immediately.
Brake/Clutch fluid (if equipped)
Check brake fluid level in the brake
fluid reservoir. The level should be
between “MIN” and “MAX” marks on
the side of the reservoir. Use only
hydraulic brake fluid conforming to
DOT 3 or DOT 4 specification.
Parking brake
Inspect the parking brake system
including the parking brake lever and
cables.
Brake pads, calipers and
rotors
Check the pads for excessive wear,
discs for run out and wear, and
calipers for fluid leakage.
For more information on checking
the pads or lining wear limit, refer to
the HYUNDAI web site.
( http://ser
vice.hyundai-motor.com)
Suspension mounting bolts
Check the suspension connections
for looseness or damage. Retighten
to the specified torque.
Steering gear box, linkage &
boots/lower arm ball joint
With the vehicle stopped and engine
off, check for excessive free-play in
the steering wheel.
Check the linkage for bends or dam-
age. Check the dust boots and ball
joints for deterioration, cracks, or
damage. Replace any damaged
parts.
Drive shafts and boots
Check the drive shafts, boots and
clamps for cracks, deterioration, or
damage. Replace any damaged
parts and, if necessary, repack the
grease.
Air conditioning refrigerant/
compressor
Check the air conditioning lines and
connections for leakage and dam-
age.
NOTICE
TLe UK 7.qxp 5/10/2018 1:32 PM Page 14
Page 565 of 685
7-16
Maintenance
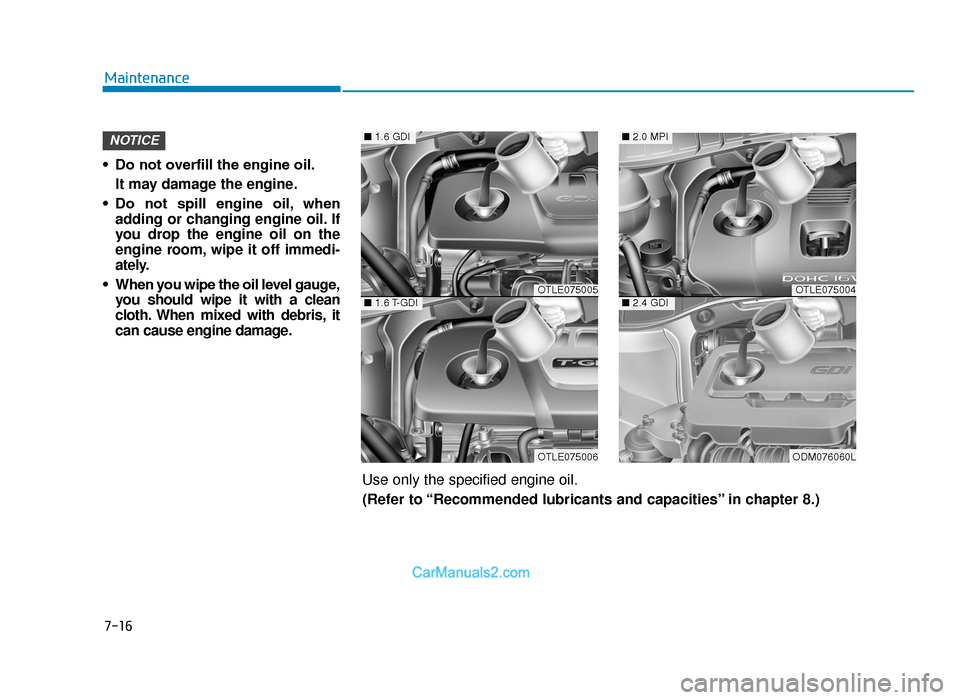
• Do not overfill the engine oil. It may damage the engine.
• Do not spill engine oil, when adding or changing engine oil. If
you drop the engine oil on the
engine room, wipe it off immedi-
ately.
• When you wipe the oil level gauge, you should wipe it with a clean
cloth. When mixed with debris, it
can cause engine damage.
NOTICE
OTLE075005
OTLE075006
■ 1.6 GDI
■1.6 T-GDIOTLE075004
ODM076060L
■2.0 MPI
■2.4 GDI
Use only the specified engine oil.
(Refer to “Recommended lubricants and capacities” in chapter 8.)
TLe UK 7.qxp 5/10/2018 1:32 PM Page 16
Page 567 of 685
7-18
Maintenance
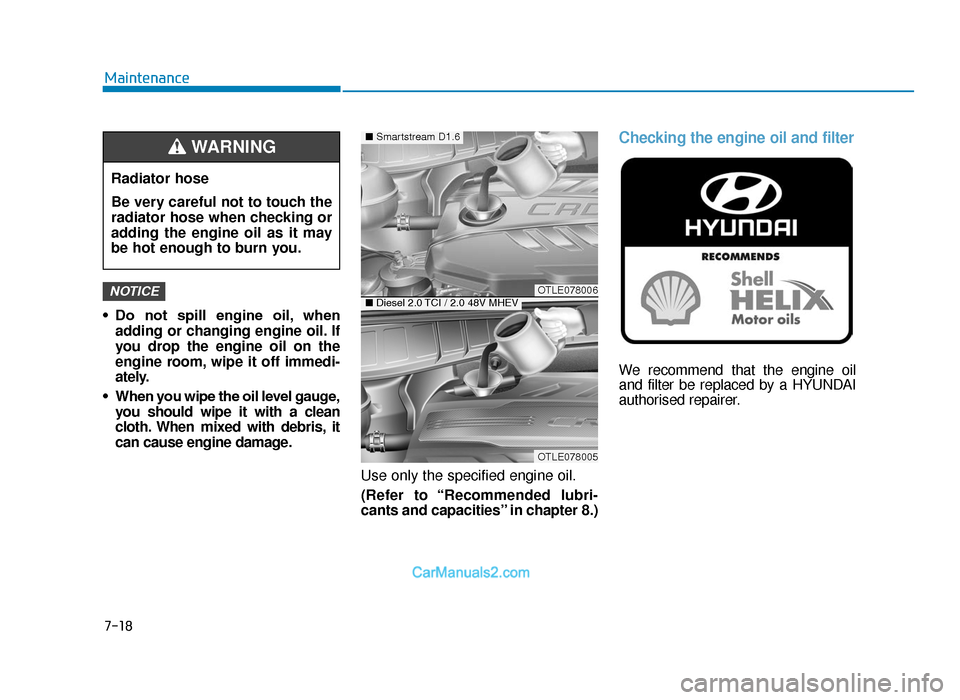
• Do not spill engine oil, when adding or changing engine oil. If
you drop the engine oil on the
engine room, wipe it off immedi-
ately.
• When you wipe the oil level gauge, you should wipe it with a clean
cloth. When mixed with debris, it
can cause engine damage.
Use only the specified engine oil.
(Refer to “Recommended lubri-
cants and capacities” in chapter 8.)
Checking the engine oil and filter
We recommend that the engine oil
and filter be replaced by a HYUNDAI
authorised repairer.
NOTICEOTLE078006
OTLE078005
■Smartstream D1.6
■Diesel 2.0 TCI / 2.0 48V MHEV
Radiator hose
Be very careful not to touch the
radiator hose when checking or
adding the engine oil as it may
be hot enough to burn you.
WARNING
TLe UK 7.qxp 5/10/2018 1:33 PM Page 18
Page 573 of 685
7-24
Maintenance
BRAKE/CLUTCH FLUID (IF EQUIPPED)
Checking the brake/clutch
fluid level
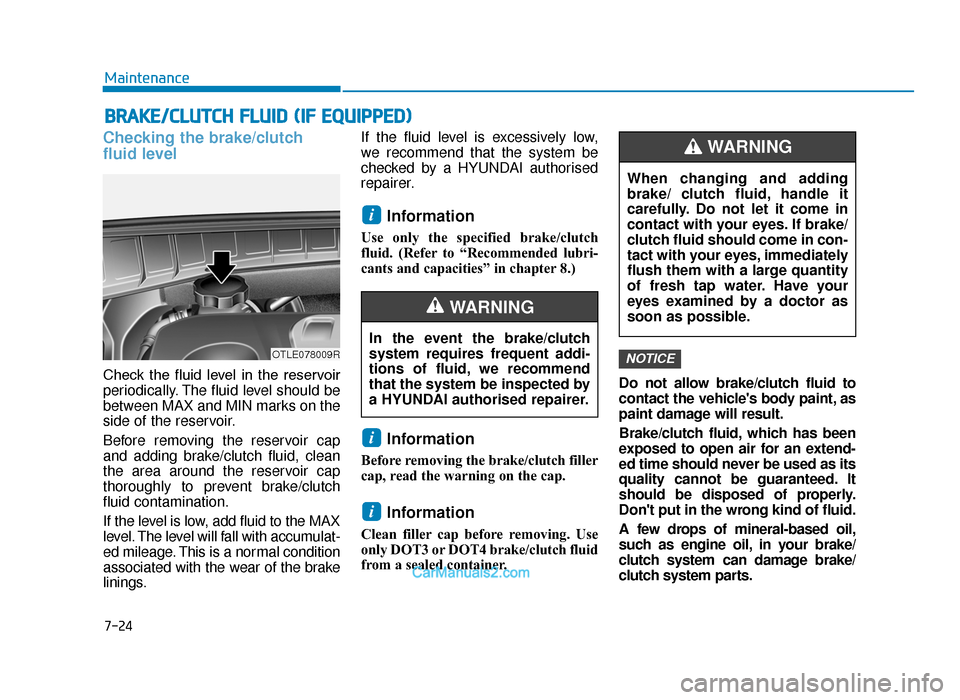
Check the fluid level in the reservoir
periodically. The fluid level should be
between MAX and MIN marks on the
side of the reservoir.
Before removing the reservoir cap
and adding brake/clutch fluid, clean
the area around the reservoir cap
thoroughly to prevent brake/clutch
fluid contamination.
If the level is low, add fluid to the MAX
level. The level will fall with accumulat-
ed mileage. This is a normal condition
associated with the wear of the brake
linings.If the fluid level is excessively low,
we recommend that the system be
checked by a HYUNDAI authorised
repairer.
Information
Use only the specified brake/clutch
fluid. (Refer to “Recommended lubri-
cants and capacities” in chapter 8.)
Information
Before removing the brake/clutch filler
cap, read the warning on the cap.
Information
Clean filler cap before removing. Use
only DOT3 or DOT4 brake/clutch fluid
from a sealed container.
Do not allow brake/clutch fluid to
contact the vehicle's body paint, as
paint damage will result.
Brake/clutch fluid, which has been
exposed to open air for an extend-
ed time should never be used as its
quality cannot be guaranteed. It
should be disposed of properly.
Don't put in the wrong kind of fluid.
A few drops of mineral-based oil,
such as engine oil, in your brake/
clutch system can damage brake/
clutch system parts.
NOTICE
i
i
i
OTLE078009R
In the event the brake/clutch
system requires frequent addi-
tions of fluid, we recommend
that the system be inspected by
a HYUNDAI authorised repairer.
WARNING
When changing and adding
brake/ clutch fluid, handle it
carefully. Do not let it come in
contact with your eyes. If brake/
clutch fluid should come in con-
tact with your eyes, immediately
flush them with a large quantity
of fresh tap water. Have your
eyes examined by a doctor as
soon as possible.
WARNING
TLe UK 7.qxp 5/10/2018 1:33 PM Page 24