2019 Hyundai Sonata AV off
[x] Cancel search: AV offPage 124 of 522
3-39
Convenient features of your vehicle
3
5. Press and hold the just-trainedHomeLink®button and observe
the red Status Indicator LED. If the
indicator light stays on constantly,
programming is complete and
your device should activate when
the HomeLink
®button is pressed
and released.
6. To program the remaining two HomeLink
®buttons, follow steps 2
through 5.
Gate operator & Canadian program- ming
During programming, your handheld
transmitter may automatically stop
transmitting. Continue to press the
Integrated HomeLink
®Wireless
Control System button (note
steps 2 through 4 in the Standard
Programming portion of this docu-
ment) while you press and re-press
("cycle") your handheld transmitter
every two seconds until the frequen-
cy signal has been learned. The indi-
cator light will flash slowly and then
rapidly after several seconds upon
successful training.
Operating HomeLink®
To operate, simply press and release
the programmed HomeLink®button.
Activation will now occur for the
trained device (i.e. garage door
opener, gate operator, security sys-
tem, entry door lock, home/office
lighting, etc.). For convenience, the
hand-held transmitter of the device
may also be used at any time.
Reprogramming a single HomeLink®button
To program a new device to a previ-
ously trained HomeLink®button, fol-
low these steps:
1. Press and hold the desired HomeLink
®button. Do NOT
release until step 4 has been com-
pleted.
2. When the indicator light begins to flash slowly (after 20 seconds),
position the handheld transmitter 1
to 3 inches away from the
HomeLink
®surface.
3. Press and hold the handheld transmitter button. The HomeLink
®
indicator light will flash, first slowly
and then rapidly.
4. When the indicator light begins to flash rapidly, release both buttons.
5. Press and hold the just-trained HomeLink
®button and observe
the red Status Indicator LED. If the
indicator light stays on constantly,
programming is complete and
your new device should activate.
Page 126 of 522

3-41
Convenient features of your vehicle
3
Use your interior rearview mirror or
direct observation to determine the
actual distance of following vehicles
when changing lanes.Blind spot mirror
The Blind Spot Mirror (BSM) is a
supplemental mirror that reduces the
driver’s blind spot by showing the
rear side area of the vehicle. The
blind spot mirror is equipped on the
left-hand side view mirror.Do not clean the mirror with harsh
abrasives, fuel or other petroleum
based cleaning products.
NOTICE
Do not adjust or fold the side
view mirrors while driving. This
may cause loss of vehicle con-
trol resulting in an accident.
WARNING
Do not scrape ice off the mir-
ror face; this may damage the
surface of the glass.
If the mirror is jammed with
ice, do not adjust the mirror by
force. Use an approved spray
de-icer (not radiator antifreeze)
spray, or a sponge or soft cloth
with very warm water, or move
the vehicle to a warm place
and allow the ice to melt.
CAUTION
OLF044477N
OLF044478N
Always check the road condi-
tion while driving for unex-
pected situations even though
the vehicle is equipped with a
blind spot mirror.
The blind spot mirror is a
device made for convenience.
Do not solely rely on the mir-
ror but always pay attention to
traffic around you.
WARNING
Page 128 of 522
3-43
Convenient features of your vehicle
3
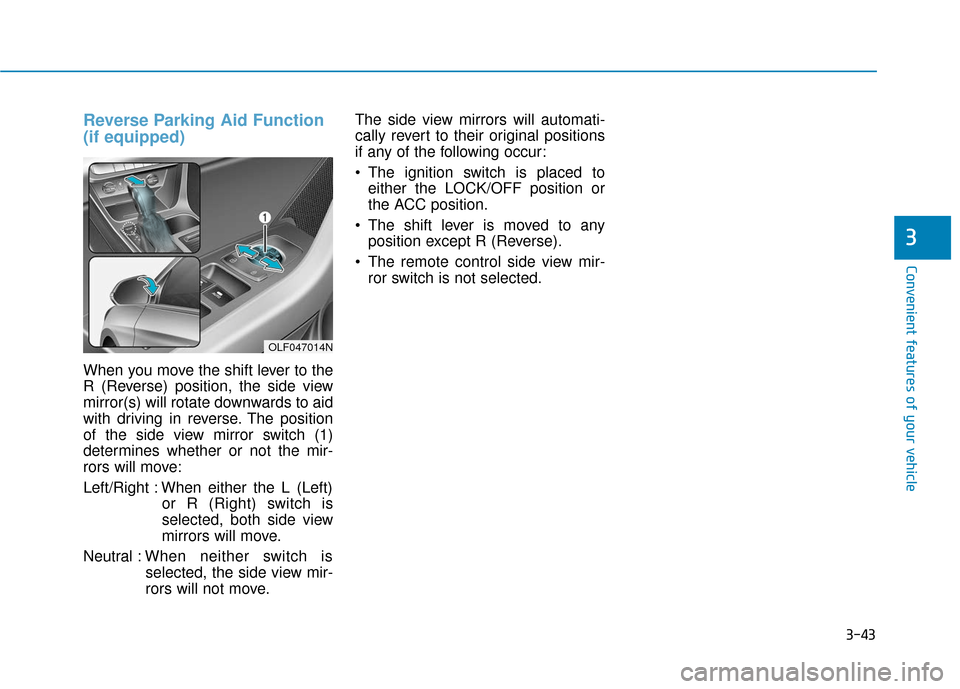
Reverse Parking Aid Function
(if equipped)
When you move the shift lever to the
R (Reverse) position, the side view
mirror(s) will rotate downwards to aid
with driving in reverse. The position
of the side view mirror switch (1)
determines whether or not the mir-
rors will move:
Left/Right : When either the L (Left)or R (Right) switch is
selected, both side view
mirrors will move.
Neutral : When neither switch is
selected, the side view mir-
rors will not move. The side view mirrors will automati-
cally revert to their original positions
if any of the following occur:
The ignition switch is placed to
either the LOCK/OFF position or
the ACC position.
The shift lever is moved to any position except R (Reverse).
The remote control side view mir- ror switch is not selected.
OLF047014N
Page 130 of 522
3-45
Convenient features of your vehicle
3
Power Windows
The ignition switch must be in the ON
position to be able to raise or lower
the windows. Each door has a Power
Window switch to control that door's
window. The driver has a Power
Window Lock switch which can block
the operation of passenger windows.
The power windows will operate for
approximately 30 seconds after the
ignition switch is placed in the ACC
or LOCK/OFF position. However, if
the front doors are opened, the
Power Windows cannot be operated
even within the 30 second period.
Information
• In cold and wet climates, power win-dows may not work properly due to
freezing conditions.
• While driving with the rear win- dows down or with the sunroof (if
equipped) opened (or partially
opened), your vehicle may demon-
strate a wind buffeting or pulsation
noise. This noise is normal and can
be reduced or eliminated by taking
the following actions. If the noise
occurs with one or both of the rear
windows down, partially lower both
front windows approximately one
inch. If you experience the noise
with the sunroof open, slightly close
the sunroof.
Window opening and closing
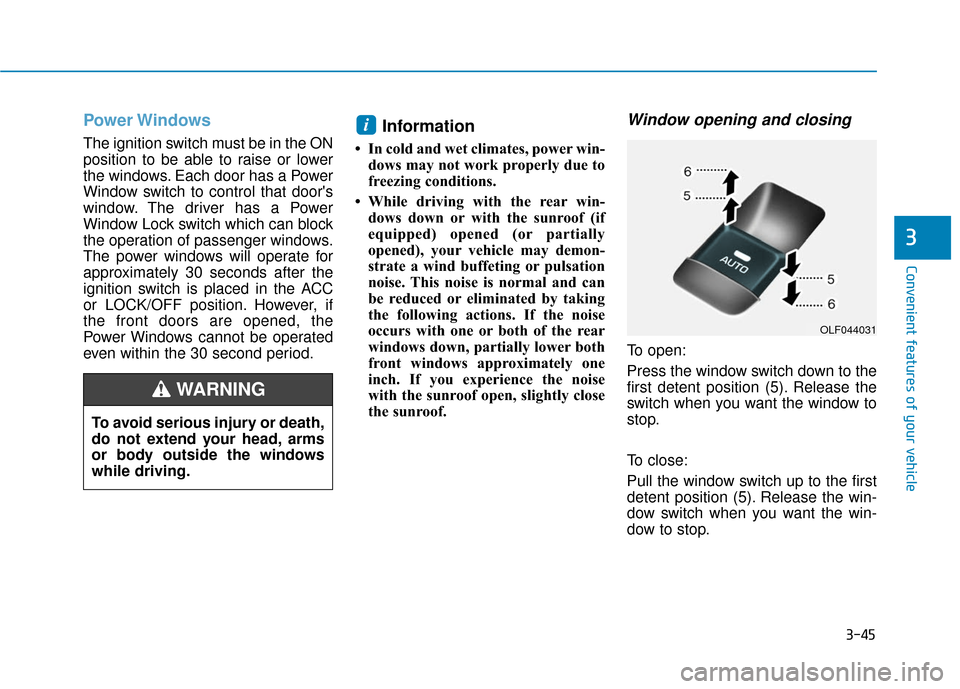
To open:
Press the window switch down to the
first detent position (5). Release the
switch when you want the window to
stop.
To close:
Pull the window switch up to the first
detent position (5). Release the win-
dow switch when you want the win-
dow to stop.
i
To avoid serious injury or death,
do not extend your head, arms
or body outside the windows
while driving.
WARNING
OLF044031
Page 133 of 522
3-48
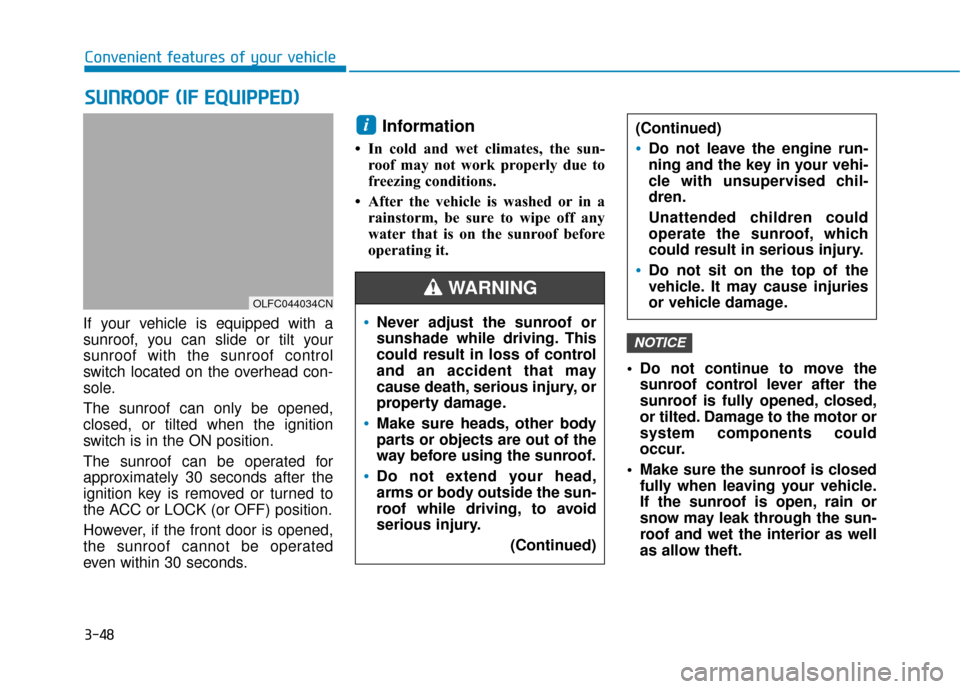
If your vehicle is equipped with a
sunroof, you can slide or tilt your
sunroof with the sunroof control
switch located on the overhead con-
sole.
The sunroof can only be opened,
closed, or tilted when the ignition
switch is in the ON position.
The sunroof can be operated for
approximately 30 seconds after the
ignition key is removed or turned to
the ACC or LOCK (or OFF) position.
However, if the front door is opened,
the sunroof cannot be operated
even within 30 seconds.
Information
• In cold and wet climates, the sun-roof may not work properly due to
freezing conditions.
• After the vehicle is washed or in a rainstorm, be sure to wipe off any
water that is on the sunroof before
operating it.
Do not continue to move thesunroof control lever after the
sunroof is fully opened, closed,
or tilted. Damage to the motor or
system components could
occur.
Make sure the sunroof is closed fully when leaving your vehicle.
If the sunroof is open, rain or
snow may leak through the sun-
roof and wet the interior as well
as allow theft.
NOTICE
i
S SU
U N
NR
RO
O O
OF
F
(
( I
IF
F
E
E Q
Q U
UI
IP
P P
PE
ED
D )
)
Convenient features of your vehicle
OLFC044034CN
Never adjust the sunroof or
sunshade while driving. This
could result in loss of control
and an accident that may
cause death, serious injury, or
property damage.
Make sure heads, other body
parts or objects are out of the
way before using the sunroof.
Do not extend your head,
arms or body outside the sun-
roof while driving, to avoid
serious injury.
(Continued)
(Continued)
Do not leave the engine run-
ning and the key in your vehi-
cle with unsupervised chil-
dren.
Unattended children could
operate the sunroof, which
could result in serious injury.
Do not sit on the top of the
vehicle. It may cause injuries
or vehicle damage.
WARNING
Page 144 of 522
3-59
Convenient features of your vehicle
3
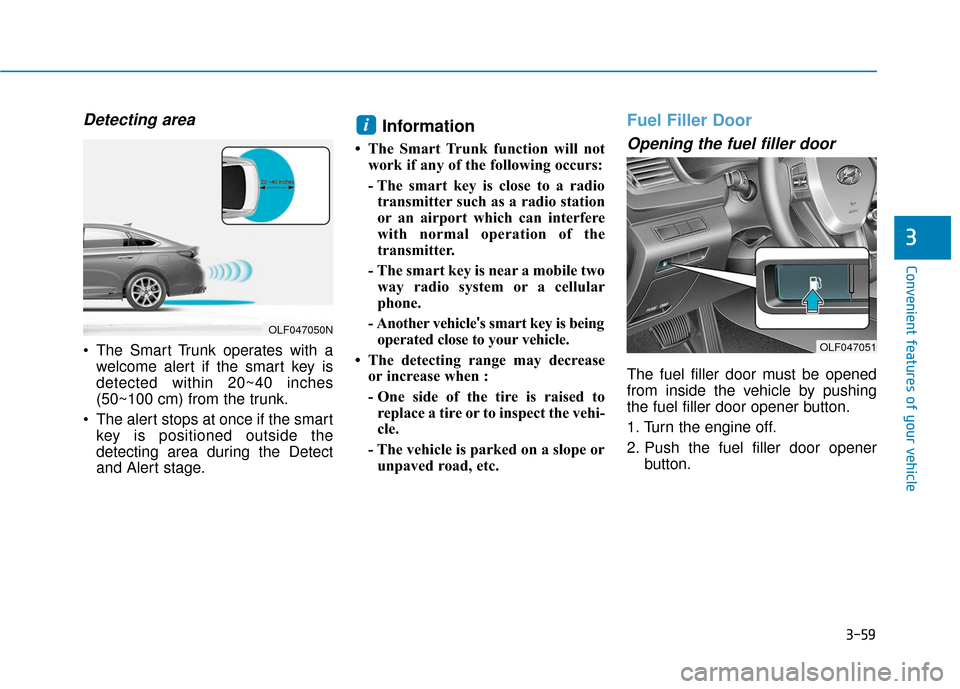
Detecting area
The Smart Trunk operates with awelcome alert if the smart key is
detected within 20~40 inches
(50~100 cm) from the trunk.
The alert stops at once if the smart key is positioned outside the
detecting area during the Detect
and Alert stage.
Information
• The Smart Trunk function will notwork if any of the following occurs:
- The smart key is close to a radiotransmitter such as a radio station
or an airport which can interfere
with normal operation of the
transmitter.
- The smart key is near a mobile two way radio system or a cellular
phone.
- Another vehicle 's smart key is being
operated close to your vehicle.
• The detecting range may decrease or increase when :
- One side of the tire is raised toreplace a tire or to inspect the vehi-
cle.
- The vehicle is parked on a slope or unpaved road, etc.
Fuel Filler Door
Opening the fuel filler door
The fuel filler door must be opened
from inside the vehicle by pushing
the fuel filler door opener button.
1. Turn the engine off.
2. Push the fuel filler door opener button.
i
OLF047050N
OLF047051
Page 146 of 522
3-61
Convenient features of your vehicle
3
(Continued)
Do not get back into a vehicle
once you have begun refuel-
ing. You can generate a build-
up of static electricity by
touching, rubbing or sliding
against any item or fabric
capable of producing static
electricity. Static electricity
discharge can ignite fuel
vapors causing a fire. If you
must re-enter the vehicle, you
should once again eliminate
potentially dangerous static
electricity discharge by touch-
ing a metal part of the vehicle,
away from the fuel filler neck,
nozzle or other gasoline
source, with your bare hand.
When using an approved
portable fuel container, be
sure to place the container on
the ground prior to refueling.
Static electricity discharge
from the container can ignite
fuel vapors causing a fire.(Continued)
(Continued)Once refueling has begun,
contact between your bare
hand and the vehicle should
be maintained until the filling
is complete.
Use only approved portable
plastic fuel containers designed
to carry and store gasoline.
When refueling, always move
the shift lever to the P (Park)
position, set the parking
brake, and place the ignition
switch to the LOCK/OFF posi-
tion. Sparks produced by
electrical components related
to the engine can ignite fuel
vapors causing a fire.
Do not use matches or a
lighter and do not smoke or
leave a lit cigarette in your
vehicle while at a gas station,
especially during refueling.
Do not over-fill or top-off your
vehicle tank, which can cause
gasoline spillage. (Continued)
Gasoline is highly flammable
and explosive. Failure to follow
these guidelines may result in
SERIOUS INJURY or DEATH:
Read and follow all warnings
posted at the gas station.
Before refueling, note the
location of the Emergency
Gasoline Shut-Off, if available,
at the gas station.
Before touching the fuel noz-
zle, you should eliminate the
potential build-up of static
electricity by touching a metal
part of the vehicle, a safe dis-
tance away from the fuel filler
neck, nozzle, or other gas
source, with your bare hand.
Do not use cellular phones
while refueling. Electric cur-
rent and/or electronic interfer-
ence from cellular phones can
potentially ignite fuel vapors
and cause a fire.(Continued)
WARNING
Page 154 of 522
3-69
Convenient features of your vehicle
3
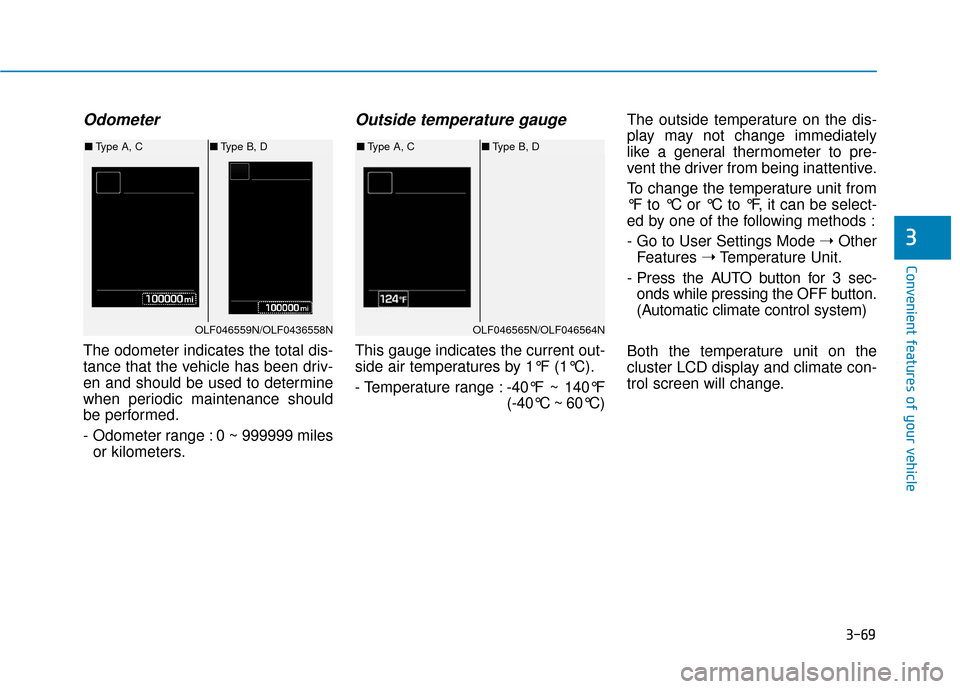
Odometer
The odometer indicates the total dis-
tance that the vehicle has been driv-
en and should be used to determine
when periodic maintenance should
be performed.
- Odometer range : 0 ~ 999999 milesor kilometers.
Outside temperature gauge
This gauge indicates the current out-
side air temperatures by 1°F (1°C).
- Temperature range : -40°F ~ 140°F
(-40°C ~ 60°C)The outside temperature on the dis-
play may not change immediately
like a general thermometer to pre-
vent the driver from being inattentive.
To change the temperature unit from
°F to °C or °C to °F, it can be select-
ed by one of the following methods :
- Go to User Settings Mode
➝Other
Features ➝Temperature Unit.
- Press the AUTO button for 3 sec- onds while pressing the OFF button.
(Automatic climate control system)
Both the temperature unit on the
cluster LCD display and climate con-
trol screen will change.
OLF046559N/OLF0436558N
■ Type A, C ■Type B, D
OLF046565N/OLF046564N
■Type A, C ■Type B, D