Page 509 of 546

7-71
7
Maintenance
Always handle them carefully, andavoid scratches and abrasions. If
the bulbs are lit, avoid contact with
liquids.
Never touch the glass with bare hands. Residual oil may cause the
bulb to overheat and burst when lit.
A bulb should be operated only when installed in a headlamp.
If a bulb becomes damaged or cracked, replace it immediatelyand carefully dispose of it.
1. Open the hood.
2. Disconnect the negative batterycable.
3. Remove the headlamp bulb cover by turning it counterclockwise.
4. Disconnect the headlamp bulb socket-connector. 5. Unsnap the headlamp bulb retain-
ing wire by pressing the end and
pushing it upward.
6. Remove the bulb from the head- lamp assembly.
7. Install a new headlamp bulb and snap the headlamp bulb retaining
wire into position by aligning the
wire with the groove on the bulb.
8. Connect the headlamp bulb sock- et-connector.
9. Install the headlamp bulb cover by turning it clockwise.
Information
The headlamp aiming should be
adjusted after an accident or after the
headlamp assembly is reinstalled at an
authorized HYUNDAI dealer.
i
OLF077070
OLF077069
■ High beam
■Low beam
Page 510 of 546
7-72
Maintenance
Headlamp (LED type)
If the LED lamp does not operate,
have the system checked by an
authorized HYUNDAI dealer.
Turn signal lamp
1. Open the hood.
2. Disconnect the negative batterycable.
3. Remove the socket from the assembly by turning the socket
counterclockwise until the tabs on
the socket align with the slots on
the assembly.
4. Remove the bulb from the socket by pressing it in and rotating it
counterclockwise until the tabs on
the bulb align with the slots in the
socket. Pull the bulb out of the
socket. 5. Install a new bulb by inserting it
into the socket and rotating it until
it locks into place.
6. Install the socket in the assembly by aligning the tabs on the socket
with the slots in the assembly.
7. Push the socket into the assembly and turn the socket clockwise.
OLF077052N
Turn signal lamp
Page 511 of 546
7-73
7
Maintenance
Side marker lamp
1. Open the hood.
2. Disconnect the negative batterycable.
3. Remove the socket from the assembly by turning the socket
counterclockwise until the tabs on
the socket align with the slots on
the assembly.
4. Remove the bulb from the socket by pulling out the bulb.
5. Insert a new bulb.
Daytime running lamp/
Parking lamp (LED type)
If the LED lamp does not operate,
have the vehicle checked by an
authorized HYUNDAI dealer.
Side repeater lamp replace- ment
If the LED lamp does not operate,
have the vehicle checked by an
authorized HYUNDAI dealer.
OLF077053
OLF077074
Side marker lamp
Page 512 of 546
7-74
Maintenance
Rear combination light bulb replacement
(1) Stop/Tail lamp
(2) Turn signal lamp
(3) Tail lamp
(4) Back-up lamp
(5) Rear side marker (LED) (if equipped)
Stop/Tail lamp and Turn signal
lamp (Bulb type)
1. Open the trunk lid.
2. Remove the service cover by turn-ing the lock counterclockwise and then pulling it out. 3. Remove the socket from the
assembly by turning the socket
counterclockwise until the tabs on
the socket align with the slots on
the assembly.
4. Remove the bulb from the socket by pressing it in and rotating it
counterclockwise until the tabs on
the bulb align with the slots in the
socket. Pull the bulb out of the
socket.
5. Install a new bulb by inserting it into the socket and rotating it until
it locks into place.OLF077060
OLF074062OLF077128
Stop/Tail lamp
Turn Signal lamp
Page 513 of 546
7-75
7
Maintenance
6. Install the socket in the assemblyby aligning the tabs on the socket
with the slots in the assembly.
Push the socket into the assembly
and turn the socket clockwise.
Stop/Tail lamp and rear side mark-
er (LED type)
If the LED lamp does not operate,
have the vehicle checked by an
authorized HYUNDAI dealer.
Back-up lamp and tail lamp
1. Open the trunk.
2. Loosen the retaining screw of thetrunk lid cover and then remove
the cover.
3. Disconnect the connector and then remove the screws by turning
the screws counterclockwise. 4. Remove the bulb by pulling it
straight out.
5. Install a new bulb by inserting it into the socket and rotating it until
it locks into place.
6. Install the socket into the assem- bly by aligning the tabs on the
socket with the slots in the assem-
bly. Push the socket into the
assembly and turn the socket
clockwise.
7. Reinstall the trunk lid cover by pushing in the screw.
OLF077065OLF077064
Page 517 of 546

7-79
7
Maintenance
Waxing
A good coat of wax provides a barri-
er between your paint and environ-
mental contamination. Keeping a
good coat of wax on your vehicle willhelp protect it.
Wax the vehicle when water will no longer bead on the paint.
Always wash and dry the vehicle
before waxing. Use a good quality
liquid or paste wax, and follow the
manufacturer’s instructions. Wax all
metal trim to protect it and to main-
tain its luster.
Removing oil, tar, and similar materi-
als with a spot remover will usually
strip the wax from the finish. Be sure
to re-wax these areas even if the rest
of the vehicle does not yet need wax-ing.
OLMB073082
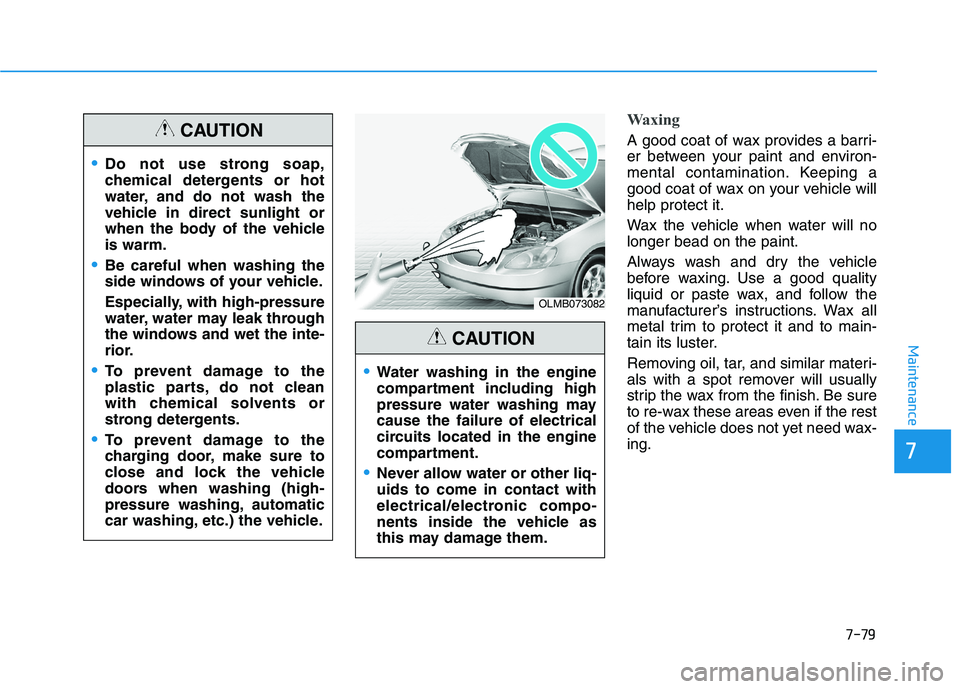
Water washing in the engine
compartment including high
pressure water washing maycause the failure of electrical
circuits located in the engine
compartment.
Never allow water or other liq- uids to come in contact with
electrical/electronic compo-
nents inside the vehicle as
this may damage them.
CAUTION
Do not use strong soap,
chemical detergents or hot
water, and do not wash the
vehicle in direct sunlight or
when the body of the vehicleis warm.
Be careful when washing the
side windows of your vehicle.
Especially, with high-pressure
water, water may leak through
the windows and wet the inte-
rior.
To prevent damage to the
plastic parts, do not clean
with chemical solvents or
strong detergents.
To prevent damage to the
charging door, make sure to
close and lock the vehicle
doors when washing (high-
pressure washing, automatic
car washing, etc.) the vehicle.
CAUTION
Page 537 of 546
8-9
88
Specifications & Consumer information
The tires supplied on your new vehi-
cle are chosen to provide the best
performance for normal driving.
The tire label located on the driver’s
side center pillar gives the tire pres-
sures recommended for your car.The engine number is stamped on
the engine block as shown in the
drawing.
EE
NN GGIINN EE NN UU MM BBEERR
TT IIRR EE SS PP EECCIIFF IICC AA TTIIOO NN AA NN DD
P
P RR EESSSS UU RREE LL AA BBEELL
OLFH085007N
OLFH087003
Page 540 of 546

I-3
Braking system ...............................................................5-19
Anti-lock Brake System (ABS)..................................5-32
AUTO HOLD .............................................................5-28
Disc brakes wear indicator .........................................5-20
Electronic Parking Brake (EPB) ................................5-22
Electronic Stability Control (ESC).............................5-34
Foot parking brake .....................................................5-20
Good braking practices ..............................................5-40
Hill-Start Assist Control (HAC) .................................5-39
Power brakes ..............................................................5-19
Vehicle Stability Management (VSM) .......................5-38
Bulb wattage .....................................................................8-3
Charging The Plug-In Hybrid Vehicle ..............................H4 Charging Information ...................................................H4
Charging Precautions ....................................................H6
Charging Status ....................................................H5, H11
Charging Time ..............................................................H4
Charging Types .............................................................H4
Normal Charge..............................................................H9
Scheduled Charging ......................................................H5
Trickle Charger (Stage-1 type) ...................................H13
Child restraint system (CRS) ..........................................2-36 Children Always in the Rear ......................................2-36
Installing a Child Restraint System (CRS) ................2-39
Selecting a Child Restraint System (CRS).................2-37 Climate control additional features...............................3-136
Automatic Ventilation...............................................3-136
Sunroof Inside Air Recirculation .............................3-136
Climate control air filter .................................................7-28 Filter inspection ..........................................................7-28
Cruise control..................................................................5-79 Cruise Control operation ............................................5-79
Defroster........................................................................3-118 Rear Window Defroster ............................................3-118
Dimensions .......................................................................8-2
Door locks .........................................................................3-9 Auto Door Lock/Unlock Features ..............................3-12
Child-Protector Rear Door locks................................3-12
Operating Door Locks from Inside the Vehicle .........3-10
Operating Door Locks from Outside the Vehicle ........3-9
Drive mode integrated control system ............................5-41 Hybrid vehicle ............................................................5-41
Plug-in hybrid vehicle ................................................5-43
Driver assist system ......................................................3-113
Rear parking assist system .......................................3-114
Rear parking assist system precautions ....................3-117
Rear view camera .....................................................3-113
I
Index
C
D