2019 Hyundai Santa Fe change reverse Light
[x] Cancel search: change reverse LightPage 124 of 557

3-35
Convenient features of your vehicle
3
To adjust the Zone setting:
1. Determine the desired ZoneNumber based upon your current
location on the Zone Map.
2. Press and hold the Control Button for up to 6 seconds, the current
Zone Number will appear on the
display.
3. Release and press the Control Button and then hold the Control
Button again will cause the num-
bers to increment (Note: they will
repeat …13, 14, 15, 1, 2, …).
Releasing the button when the
desired Zone Number appears on
the display will set the new Zone.
4. Within about 5 seconds the com- pass will start displaying a com-
pass heading again.
There are some conditions that can
cause changes to the vehicle mag-
nets, such as installing a ski rack or
a CB antenna. Body repair work on
the vehicle can also cause changes
to the vehicle's magnetic field. In
these situations, the compass will
need to be re-calibrated to correct
these changes. If you need to recalibrate the com-
pass:
1. Press and hold the Control Button
for more than 6 seconds. When
the compass memory is cleared, a
"C" will appear in the display.
2. Drive the vehicle in 2 complete cir- cles at less than 5 mph (8 km/h).
Integrated HomeLink®Wireless
Control System
The HomeLink®Wireless Control
System can replace up to three
hand-held radio-frequency (RF)
transmitters with a single built-in
device. This innovative feature will
learn the radio frequency codes of
most current transmitters to operate
devices such as gate operators,
garage door openers, entry door
locks, security systems, even home
lighting. Both standard and rolling
code-equipped transmitters can be
programmed by following the out-
lined procedures.
Additional HomeLink
®information
can be found at: www.homelink.com,
www.youtube.com/HomeLinkGentex
or by calling 1-800-355-3515. Retain the original transmitter of the RF
device you are programming for use in
other vehicles as well as for future
HomeLink
®programming. It is also sug-
gested that upon the sale of the vehicle,
the programmed HomeLink
®buttons be
erased for security purposes.
Before programming HomeLink
®
to a garage door opener or gate
operator, make sure people and
objects are out of the way of the
device to prevent potential harm
or damage. Do not use the
HomeLink
®with any garage
door opener that lacks the safe-
ty stop and reverse features
required by U.S. federal safety
standards (this includes any
garage door opener model man-
ufactured before April 1, 1982). A
garage door that cannot detect
an object - signaling the door to
stop and reverse - does not meet
current U.S. federal safety stan-
dards. Using a garage door
opener without these features
increases the risk of serious
injury or death.
WARNING
Page 194 of 557

3-105
Convenient features of your vehicle
3
ItemsExplanation
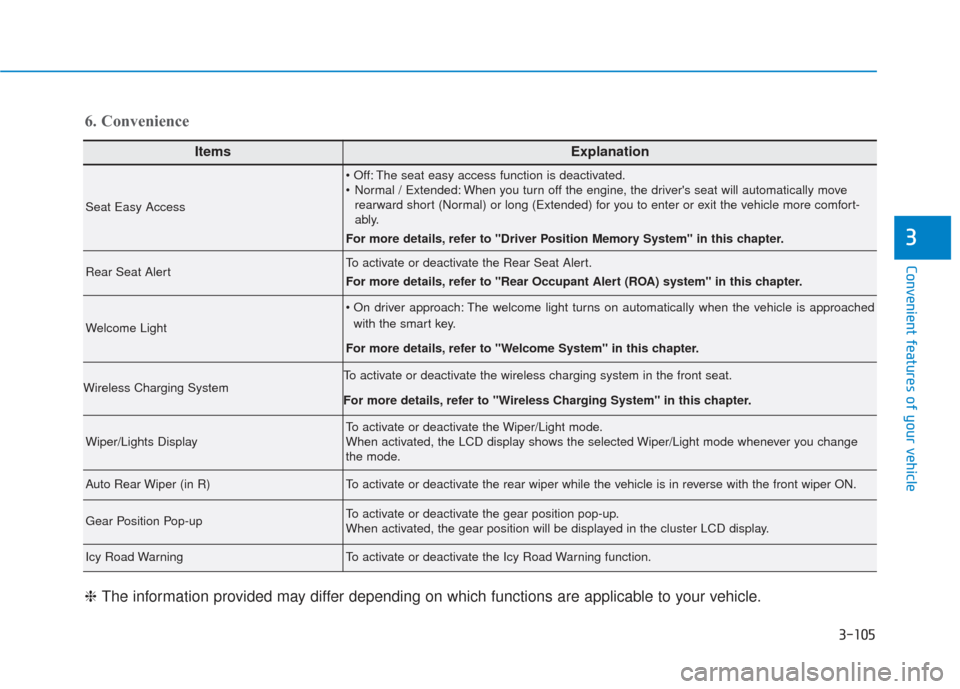
Seat Easy Access
The seat easy access function is deactivated.
Normal / Extended: When you turn off the engine, the driver's seat will automatically moverearward short (Normal) or long (Extended) for you to enter or exit the vehicle more comfort-
ably.
For more details, refer to "Driver Position Memory System" in this chapter.
Rear Seat AlertTo activate or deactivate the Rear Seat Alert.
For more details, refer to "Rear Occupant Alert (ROA) system" in this chapter.
Welcome Light
The welcome light turns on automatically when the vehicle is approached with the smart key.
For more details, refer to ''Welcome System'' in this chapter.
Wireless Charging SystemTo activate or deactivate the wireless charging system in the front seat.
For more details, refer to "Wireless Charging System" in this chapter.
Wiper/Lights DisplayTo activate or deactivate the Wiper/Light mode.
When activated, the LCD display shows the selected Wiper/Light mode whenever you change
the mode.
Auto Rear Wiper (in R)To activate or deactivate the rear wiper while the vehicle is in reverse with the front wiper ON.
Gear Position Pop-upTo activate or deactivate the gear position pop-up.
When activated, the gear position will be displayed in the cluster LCD display.
Icy Road WarningTo activate or deactivate the Icy Road Warning function.
6. Convenience
❈ The information provided may differ depending on which functions are applicable to your vehicle.
Page 302 of 557
![Hyundai Santa Fe 2019 Owners Manual 5-28
To cancel :
1. Depress the brake pedal.
2. Press the [AUTO HOLD] switch.
The AUTO HOLD indicator will turn
off.
Information
• The Auto Hold does not operatewhen:
- The drivers door is opened
Hyundai Santa Fe 2019 Owners Manual 5-28
To cancel :
1. Depress the brake pedal.
2. Press the [AUTO HOLD] switch.
The AUTO HOLD indicator will turn
off.
Information
• The Auto Hold does not operatewhen:
- The drivers door is opened](/manual-img/35/16316/w960_16316-301.png)
5-28
To cancel :
1. Depress the brake pedal.
2. Press the [AUTO HOLD] switch.
The AUTO HOLD indicator will turn
off.
Information
• The Auto Hold does not operatewhen:
- The driver's door is opened
- The engine hood is opened
- The shift lever is in P (Park) or R(Reverse)
- The EPB is applied
• For your safety, the Auto Hold automatically switches to EPB
when:
- The driver's door is opened withthe shift lever in D (Drive) or N
(Neutral)
- The engine hood is opened with the shift lever in D (Drive) or N
(Neutral)
- The vehicle stops for more than 10 minutes
- The vehicle stands on a steep slope
- The vehicle moves several times In these cases, the parking brake
warning light comes on, the AUTO
HOLD indicator changes from
green to white, and a warning
sound and a message will appear to
inform you that EPB has been auto-
matically engaged. Before driving
off again, press foot brake pedal,
check the surrounding area near
your vehicle and release parking
brake manually with the EPB
switch.
• While operating Auto Hold, you may hear mechanical noise.
However, it is normal operating
noise.
If the AUTO HOLD indicator
changes to yellow, the Auto Hold
is not working properly. Contact
an authorized HYUNDAI dealer.
NOTICE
i
Driving your vehicle
OTM058020
To prevent, unexpected and sud-
den vehicle movement, ALWAYS
press your foot on the brake
pedal to cancel the Auto Hold
before you:
- Drive downhill.
- Drive the vehicle in R (Reverse).
- Park the vehicle.
WARNING
Page 358 of 557

5-84
Driving your vehicle
- Normal:
When this condition is selected, the
initial Rear Cross-Traffic Collision
Warning is activated normally. If this
setting feels sensitive, change the
option to 'Later'.
The warning activation time may feel
late if the a vehicle at the side or rear
abruptly accelerates.
- Later:
Select this warning activation time
when the traffic is light and you are
driving in a low speed.
Information
If you change the warning timing, the
warning time of other systems may
change. Always be aware before
changing the warning timing. The driver can select the warning
volume of the Rear Cross-Traffic
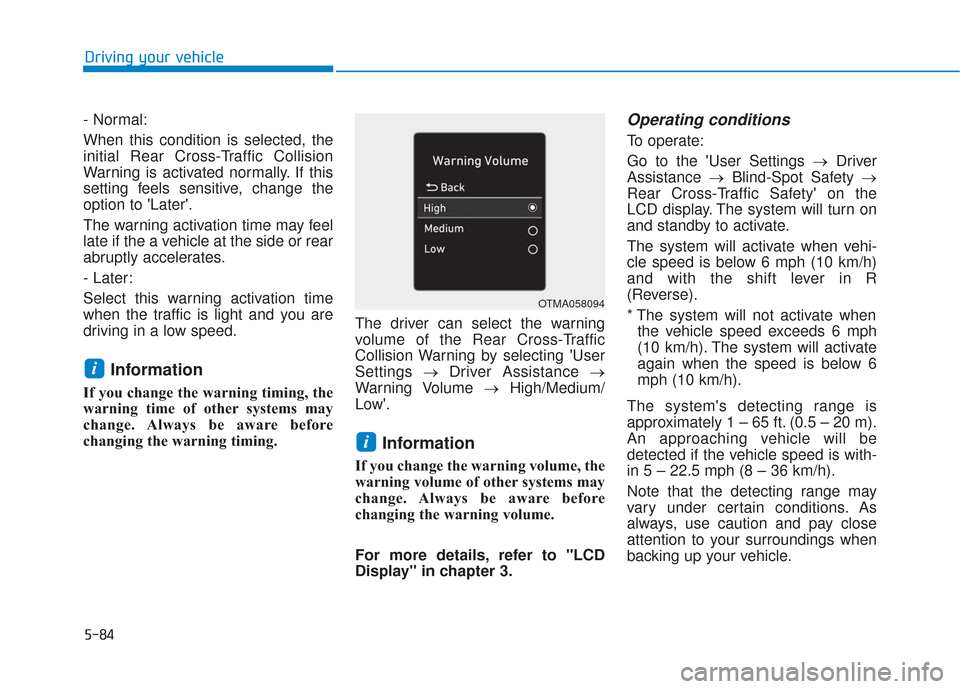
Collision Warning by selecting 'User
Settings
→Driver Assistance →
Warning Volume →High/Medium/
Low'.
Information
If you change the warning volume, the
warning volume of other systems may
change. Always be aware before
changing the warning volume.
For more details, refer to "LCD
Display" in chapter 3.
Operating conditions
To operate:
Go to the 'User Settings → Driver
Assistance →Blind-Spot Safety →
Rear Cross-Traffic Safety' on the
LCD display. The system will turn on
and standby to activate.
The system will activate when vehi-
cle speed is below 6 mph (10 km/h)
and with the shift lever in R
(Reverse).
* The system will not activate when the vehicle speed exceeds 6 mph
(10 km/h). The system will activate
again when the speed is below 6
mph (10 km/h).
The system's detecting range is
approximately 1 – 65 ft. (0.5 – 20 m).
An approaching vehicle will be
detected if the vehicle speed is with-
in 5 – 22.5 mph (8 – 36 km/h).
Note that the detecting range may
vary under certain conditions. As
always, use caution and pay close
attention to your surroundings when
backing up your vehicle.
i
i
OTMA058094
Page 399 of 557

5-125
Driving your vehicle
5
Hazardous Driving Conditions
When hazardous driving elements
are encountered such as water,
snow, ice, mud and sand, take the
below suggestions:
Drive cautiously and keep a longerbraking distance.
Avoid abrupt braking or steering.
When your vehicle is stuck in snow, mud, or sand, use second
gear. Accelerate slowly to avoid
unnecessary wheel spin.
Put sand, rock salt, tire chains or other non-slip materials under the
wheels to provide additional trac-
tion while the vehicle becomes
stuck in ice, snow, or mud.
Rocking the Vehicle
If it is necessary to rock the vehicle
to free it from snow, sand, or mud,
first turn the steering wheel right and
left to clear the area around your
front wheels. Then, shift back and
forth between R (Reverse) and a for-
ward gear.
Try to avoid spinning the wheels, and
do not race the engine.
To prevent transmission wear, wait
until the wheels stop spinning before
shifting gears. Release the accelera-
tor pedal while shifting, and press
lightly on the accelerator pedal while
the transmission is in gear. Slowly
spinning the wheels in forward and
reverse directions causes a rocking
motion that may free the vehicle.
S SP
P E
EC
CI
IA
A L
L
D
D R
RI
IV
V I
IN
N G
G
C
C O
O N
ND
DI
IT
T I
IO
O N
NS
S
Downshifting with an automatic
transmission while driving on
slippery surfaces can cause an
accident. The sudden change in
tire speed could cause the tires
to skid. Be careful when down-
shifting on slippery surfaces.
WARNING
If the vehicle is stuck and
excessive wheel spin occurs,
the temperature in the tires can
increase very quickly. If the tires
become damaged, a tire blow
out or tire explosion can occur.
This condition is dangerous -
you and others may be injured.
Do not attempt this procedure if
people or objects are anywhere
near the vehicle.
If you attempt to free the vehicle,
the vehicle can overheat quickly,
possibly causing an engine
compartment fire or other dam-
age. Try to avoid spinning the
wheels as much as possible to
prevent overheating of either the
tires or the engine. DO NOT
allow the vehicle to spin the
wheels above 35 mph (56 km/h).
WARNING