Page 116 of 557

3-27
Convenient features of your vehicle
3
Reattempt to do the resettingprocedure again, when the reset-
ting procedure incompletely
stops or the notification sound
do not stop.
Make sure that there is no obsta- cle around the driver's seat in
advance of resetting the driver's
seat memory system.
Easy Access Function
The system will move the driver's
seat automatically as follows:
- It will move the driver’s seat rear- ward when the ignition key is
removed.
- It will move the driver’s seat for- ward when the ignition key is
inserted.
- It will move the driver’s seat rear- ward when the Engine Start/Stop
button is pressed to the OFF posi-
tion. - It will move the driver’s seat for-
ward when the Engine Start/Stop
button is pressed to the ACC or
START position.
You can activate or deactivate the
Easy Access Function from the User
Settings mode in the cluster LCD dis-
play.
'Convenience →Seat Easy Access →
Off/Normal/Extended'.
For more details, refer to "LCD
Display" in this chapter.
NOTICE
Driver should be cautious when
using this function to assure no
injury to passenger or child on
the back seat. In case of emer-
gency the driver has to stop
movement of front seat (when
easy access feature is activat-
ed) by pressing SET button or
any of the driver seat control
switches.
CAUTION
Page 119 of 557

3-30
Convenient features of your vehicle
Heated Steering Wheel
(if equipped)
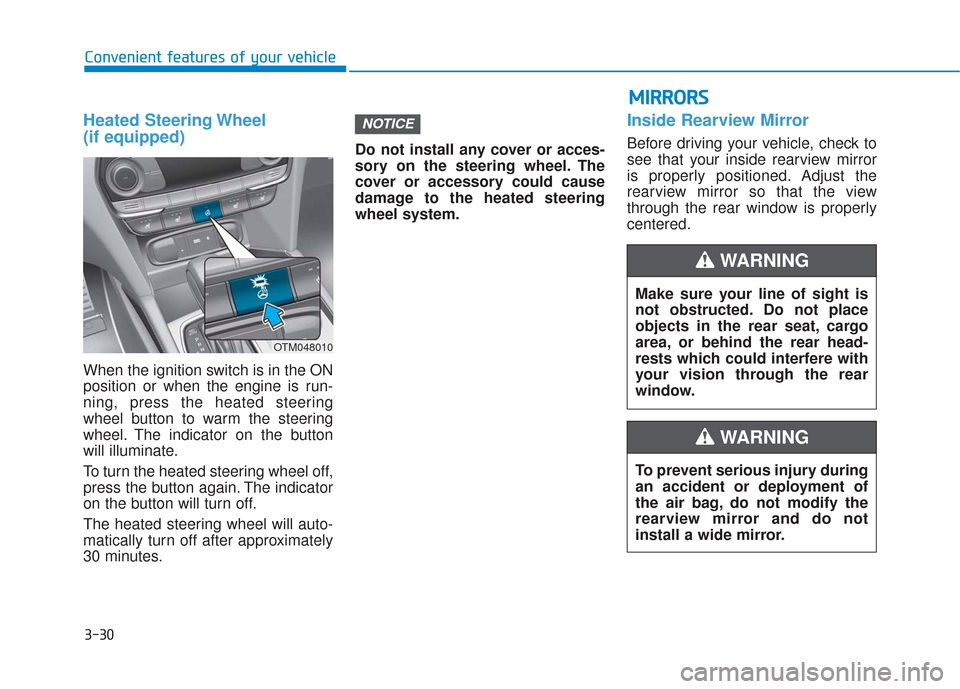
When the ignition switch is in the ON
position or when the engine is run-
ning, press the heated steering
wheel button to warm the steering
wheel. The indicator on the button
will illuminate.
To turn the heated steering wheel off,
press the button again. The indicator
on the button will turn off.
The heated steering wheel will auto-
matically turn off after approximately
30 minutes.Do not install any cover or acces-
sory on the steering wheel. The
cover or accessory could cause
damage to the heated steering
wheel system.
Inside Rearview Mirror
Before driving your vehicle, check to
see that your inside rearview mirror
is properly positioned. Adjust the
rearview mirror so that the view
through the rear window is properly
centered.
NOTICE
Make sure your line of sight is
not obstructed. Do not place
objects in the rear seat, cargo
area, or behind the rear head-
rests which could interfere with
your vision through the rear
window.
WARNING
To prevent serious injury during
an accident or deployment of
the air bag, do not modify the
rearview mirror and do not
install a wide mirror.
WARNING
M M
I
IR
R R
RO
O R
RS
S
OTM048010
Page 122 of 557

3-33
Convenient features of your vehicle
3
Automatic-Dimming Night Vision
Safety™ (NVS®) Mirror
(if equipped)
The NVS®Mirror automatically
reduces glare by monitoring light lev-
els in the front and the rear of the
vehicle. Any object that obstructs
either light sensor will degrade the
automatic dimming control feature.
For more information regarding
NVS
®mirrors and other applica-
tions, please refer to the Gentex
website:
www.gentex.com
Your mirror will automatically dim
upon detecting glare from the vehi-
cles traveling behind you.
The mirror defaults to the ON posi-
tion each time the vehicle is started.
Z-Nav™ Compass Display
The NVS™ Mirror in your vehicle is
also equipped with a Z-Nav™
Compass that shows the vehicle
Compass heading in the Display
Window using the 8 basic cardinal
headings (N, NE, E, SE, etc.).
Compass function
The Compass can be turned ON and
OFF, but it returns to ON after the
ignition is cycled.
1. Press and release the Control Button within 1 second to turn the
display feature OFF.
2. Press and release the Control Button again within 1 second to
turn the display back ON.
Additional options can be set with
press and hold sequences of the
Control Button and are detailed
below.
OTMA048467
Page 143 of 557

3-54
Convenient features of your vehicle
Power Liftgate (if equipped)
Power liftgate button
Power liftgate setting
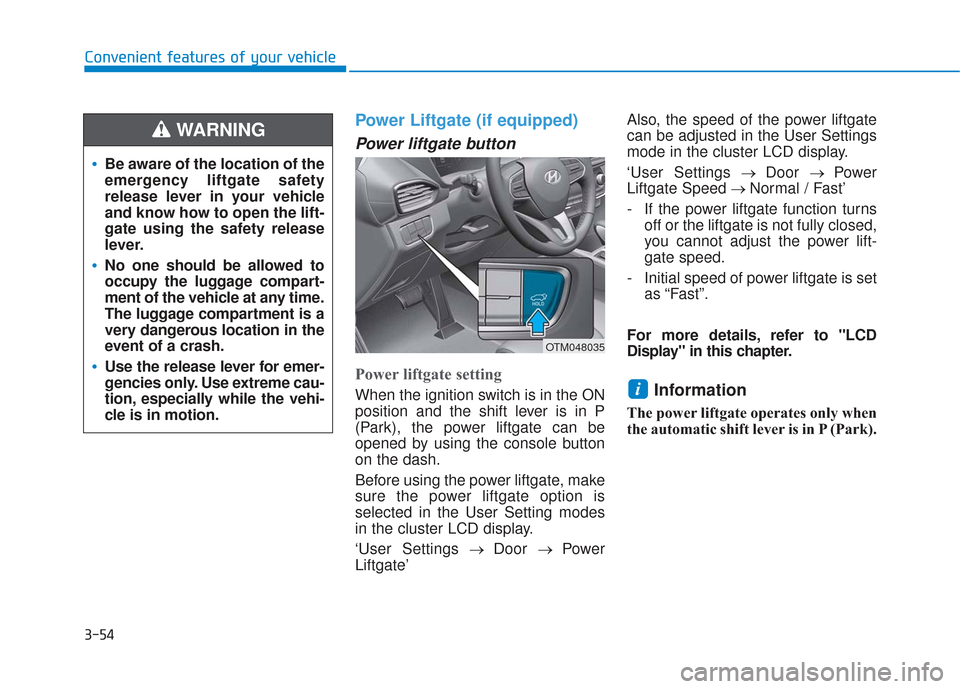
When the ignition switch is in the ON
position and the shift lever is in P
(Park), the power liftgate can be
opened by using the console button
on the dash.
Before using the power liftgate, make
sure the power liftgate option is
selected in the User Setting modes
in the cluster LCD display.
‘User Settings→ Door → Power
Liftgate’ Also, the speed of the power liftgate
can be adjusted in the User Settings
mode in the cluster LCD display.
‘User Settings
→ Door → Power
Liftgate Speed → Normal / Fast’
- If the power liftgate function turns off or the liftgate is not fully closed,
you cannot adjust the power lift-
gate speed.
- Initial speed of power liftgate is set as “Fast”.
For more details, refer to "LCD
Display" in this chapter.Information
The power liftgate operates only when
the automatic shift lever is in P (Park).
i
Be aware of the location of the
emergency liftgate safety
release lever in your vehicle
and know how to open the lift-
gate using the safety release
lever.
No one should be allowed to
occupy the luggage compart-
ment of the vehicle at any time.
The luggage compartment is a
very dangerous location in the
event of a crash.
Use the release lever for emer-
gencies only. Use extreme cau-
tion, especially while the vehi-
cle is in motion.
WARNING
OTM048035
Page 161 of 557

3-72
Convenient features of your vehicle
Outside temperature gauge
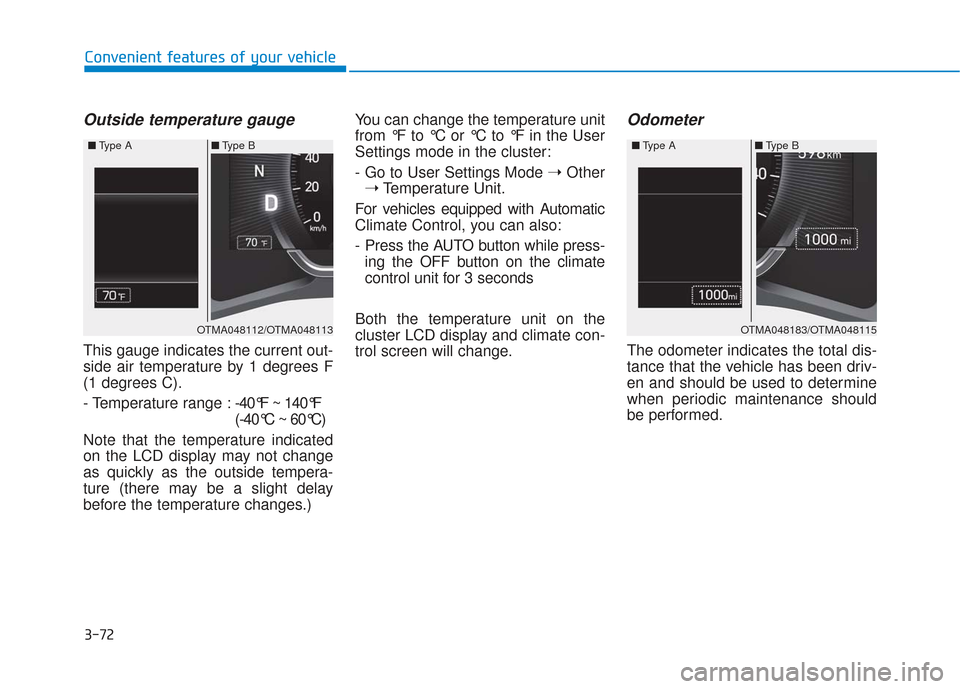
This gauge indicates the current out-
side air temperature by 1 degrees F
(1 degrees C).
- Temperature range :-40°F ~ 140°F
(-40°C ~ 60°C)
Note that the temperature indicated
on the LCD display may not change
as quickly as the outside tempera-
ture (there may be a slight delay
before the temperature changes.) You can change the temperature unit
from °F to °C or °C to °F in the User
Settings mode in the cluster:
- Go to User Settings Mode
➝Other
➝ Temperature Unit.
For vehicles equipped with Automatic
Climate Control, you can also:
- Press the AUTO button while press- ing the OFF button on the climate
control unit for 3 seconds
Both the temperature unit on the
cluster LCD display and climate con-
trol screen will change.
Odometer
The odometer indicates the total dis-
tance that the vehicle has been driv-
en and should be used to determine
when periodic maintenance should
be performed.
OTMA048112/OTMA048113
■
Type A ■Type B OTMA048183/OTMA048115
■
Type A ■Type B
Page 163 of 557

3-74
Convenient features of your vehicle
Shift indicator pop-up (if equipped)
The pop-up indicates the current
gear position displayed in the cluster
for about 2 seconds when shifting
into other positions (P/R/N/D).
The shift indicator pop-up function
can be activated or deactivated from
the User Settings mode in the cluster
LCD display.
Warning and Indicator LightsInformation
Make sure that all warning lights are
OFF after starting the engine. If any
light is still ON, this indicates a situa-
tion that needs attention.
Seat Belt Warning Light
This warning light informs the driver
that the seat belt is not fastened.
For more information, refer to
"Seat Belts" in chapter 2.
Air Bag Warning Light
This warning light illuminates:
When you set the ignition switch orthe Engine Start/Stop button to the
ON position.
- The air bag warning light illumi-nates for about 6 seconds and
then turns off when all checks
have been performed
The air bag warning light will remain illuminated if there is a
malfunction with the Safety
Restraint System (SRS) air bag
operation.
If this occurs, have the vehicle
inspected by an authorized
HYUNDAI dealer.
i
OIK047141
Page 164 of 557

3-75
Convenient features of your vehicle
3
Parking Brake & BrakeFluid Warning Light
This warning light illuminates:
When you set the ignition switch
or the Engine Start/Stop button to
the ON position.
- The parking brake light illumi-nates for about 3 seconds and
will then turn off once the parking
brake is released.
Whenever the parking brake is applied.
Whenever the brake fluid level in the reservoir is low.
- If the warning light illuminateswith the parking brake released,
it indicates the brake fluid level in
the reservoir is low.
If the brake fluid level in the reser-
voir is low:
1. Drive carefully to the nearest safe location and stop your vehicle.
2. With the engine stopped, check the brake fluid level immediately and
add fluid as required (For more
details, refer to "Brake Fluid" in
chapter 7). After adding brake
fluid, check all brake components
for fluid leaks. If a brake fluid leak is
found, or if the warning light
remains on, or if the brakes do not
operate properly, do not drive the
vehicle. Have the vehicle inspected
by an authorized HYUNDAI dealer.
Dual-diagonal braking system
Your vehicle is equipped with dual-
diagonal braking system. This means
you still have braking on two wheels
even if one of the dual systems
should fail.
With only one of the dual systems
working, more than normal pedal
travel and greater pedal pressure is
required to stop the vehicle. Also, the vehicle will not stop in as
short a distance with only a portion
of the brake system working.
If the brakes fail while you are driv-
ing, shift to a lower gear for addition-
al engine braking and stop the vehi-
cle as soon as it is safe to do so.
Parking Brake & Brake Fluid
Warning Light
Driving the vehicle with a warn-
ing light ON is dangerous. If the
Parking Brake & Brake Fluid
Warning Light illuminates with
the parking brake released, it
indicates that the brake fluid
level is low.
If this occurs, have the vehicle
inspected by an authorized
HYUNDAI dealer.
WARNING
Page 165 of 557

3-76
Convenient features of your vehicle
Anti-lock Brake System(ABS) Warning Light
This warning light illuminates:
When you set the ignition switch
or the Engine Start/Stop button to
the ON position.
- The ABS warning light illumi-nates for about 3 seconds and
then turns off.
Whenever there is a malfunction with the ABS.
Note that the hydraulic braking
system will still be operational
even if there is a malfunction with
the ABS.
Electronic Brake ForceDistribution (EBD) System Warning Light
These two warning lights illuminate
at the same time while driving:
When the ABS and regular brake
system may not work normally.
If this occurs, have the vehicle
inspected by an authorized
HYUNDAI dealer.
Information - Electronic
Brake Force Distribution
(EBD) System Warning Light
When the ABS Warning Light is on or
both ABS and Parking Brake & Brake
Fluid Warning Lights are on, the
speedometer, odometer, or tripmeter
may not work. Also, the EPS Warning
Light may illuminate and the steering
effort may increase or decrease.
If this occurs, have the vehicle inspect-
ed by an authorized HYUNDAI deal-
er as soon as possible.i
Have the vehicle inspected by
an authorized HYUNDAI dealer
as soon as possible.
Electronic Brake Force
Distribution (EBD) System
Warning Light
When both ABS and Parking
Brake & Brake Fluid Warning
Lights are on, the brake system
will not work normally and you
may experience an unexpected
and dangerous situation during
sudden braking.
If this occurs, avoid high speed
driving and abrupt braking.
WARNING