2019 Hyundai Santa Fe radiator
[x] Cancel search: radiatorPage 124 of 682
3-33
Convenient features of your vehicle
3
• Do not scrape ice off the mirror
face; this may damage the sur-
face of the glass.
• If the mirror is jammed with ice,
do not adjust the mirror by
force. Use an approved spray
de-icer (not radiator antifreeze)
spray, or a sponge or soft cloth
with very warm water, or move
the vehicle to a warm place and
allow the ice to melt.
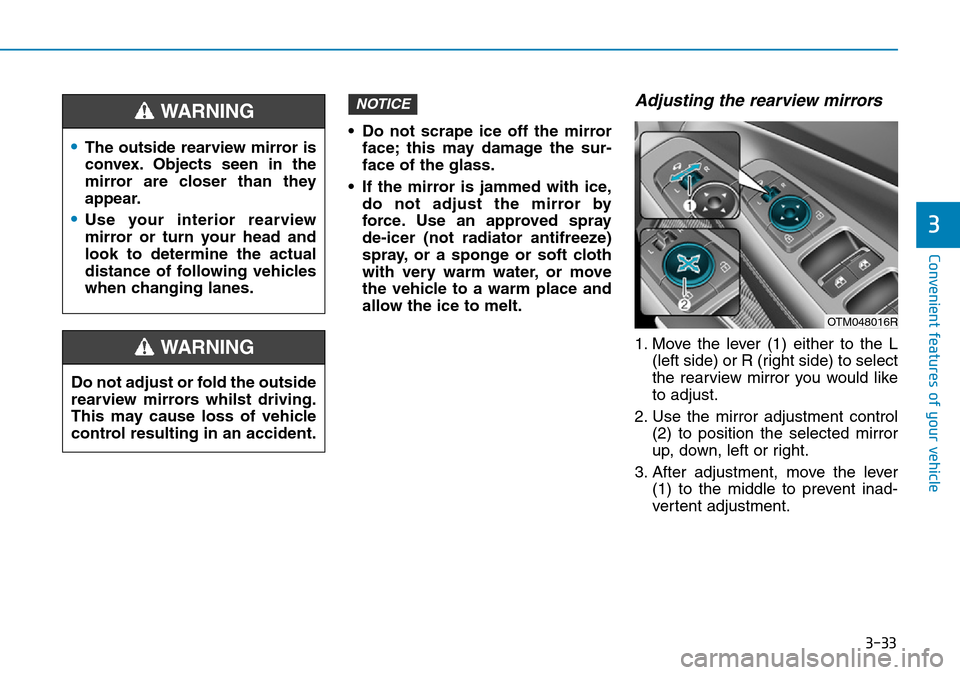
Adjusting the rearview mirrors
1. Move the lever (1) either to the L
(left side) or R (right side) to select
the rearview mirror you would like
to adjust.
2. Use the mirror adjustment control
(2) to position the selected mirror
up, down, left or right.
3. After adjustment, move the lever
(1) to the middle to prevent inad-
vertent adjustment.
NOTICE
•The outside rearview mirror is
convex. Objects seen in the
mirror are closer than they
appear.
•Use your interior rearview
mirror or turn your head and
look to determine the actual
distance of following vehicles
when changing lanes.
WARNING
Do not adjust or fold the outside
rearview mirrors whilst driving.
This may cause loss of vehicle
control resulting in an accident.
WARNING
OTM048016R
Page 150 of 682
3-59
Convenient features of your vehicle
Information
If the fuel filler door does not open
because ice has formed around it, tap
lightly or push on the door to break
the ice and release the door. Do not
pry on the door. If necessary, spray
around the door with an approved de-
icer fluid (do not use radiator anti-
freeze) or move the vehicle to a warm
place and allow the ice to melt.
Closing the fuel filler door
1. To install the fuel tank cap, turn it
clockwise until it “clicks” one time.
2. Close the fuel filler door until it is
latched securely.
Information
The fuel filler door will not close if the
driver's door is locked. If you lock the
driver's door whilst fuelling, unlock it
before closing the fuel filler door.
i
i
3
Petrol is highly flammable and
explosive. Failure to follow
these guidelines may result in
SERIOUS INJURY or DEATH:
•Read and follow all warnings
posted at the gas station.
•Before refuelling, note the
location of the Emergency
Petrol Shut-Off, if available, at
the gas station.
•Before touching the fuel noz-
zle, you should eliminate the
potential build-up of static
electricity by touching a metal
part of the vehicle, a safe dis-
tance away from the fuel filler
neck, nozzle, or other gas
source, with your bare hand.
•Do not use mobile phones
whilst refuelling. Electric cur-
rent and/or electronic interfer-
ence from mobile phones can
potentially ignite fuel vapours
and cause a fire.
WARNING •Do not get back into a vehicle
once you have begun refu-
elling. You can generate a
build-up of static electricity by
touching, rubbing or sliding
against any item or fabric
capable of producing static
electricity.
Static electricity discharge can
ignite fuel vapours causing a
fire. If you must re-enter the
vehicle, you should once again
eliminate potentially danger-
ous static electricity discharge
by touching a metal part of the
vehicle, away from the fuel filler
neck, nozzle or other petrol
source, with your bare hand.
•When refuelling, always move
the shift lever to the P (Park)
position (for automatic trans-
mission) or first gear or R
(Reverse, for manual transmis-
sion), set the parking brake,
and place the ignition switch
to the LOCK/OFF position.
Sparks produced by electrical
components related to the
engine can ignite fuel vapours
causing a fire.
Page 155 of 682
3-64
Convenient features of your vehicle
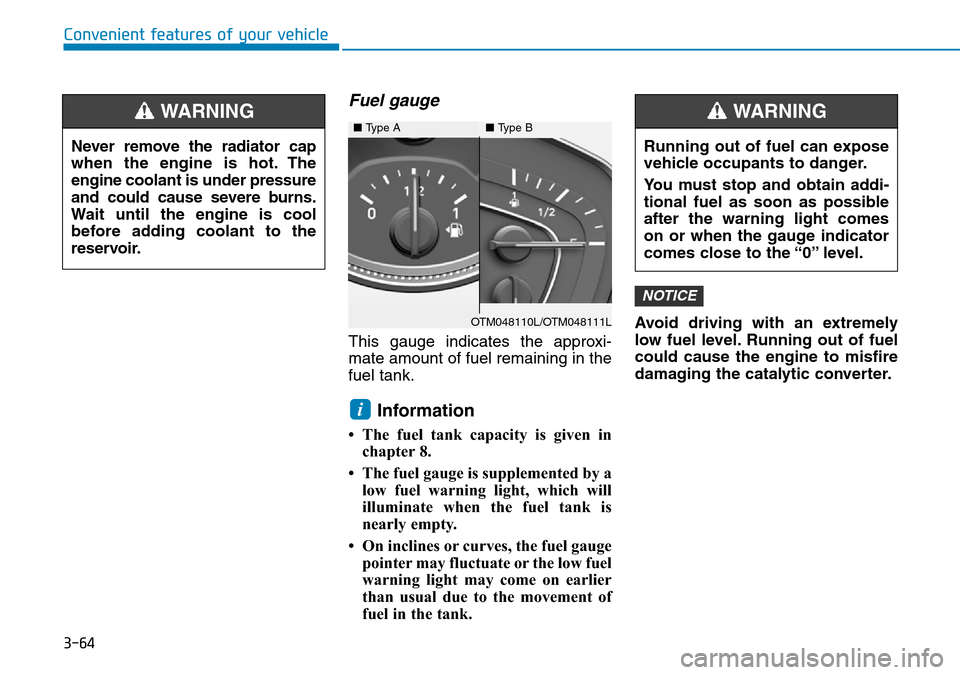
Fuel gauge
This gauge indicates the approxi-
mate amount of fuel remaining in the
fuel tank.
Information
• The fuel tank capacity is given in
chapter 8.
• The fuel gauge is supplemented by a
low fuel warning light, which will
illuminate when the fuel tank is
nearly empty.
• On inclines or curves, the fuel gauge
pointer may fluctuate or the low fuel
warning light may come on earlier
than usual due to the movement of
fuel in the tank.Avoid driving with an extremely
low fuel level. Running out of fuel
could cause the engine to misfire
damaging the catalytic converter.
NOTICE
i
Running out of fuel can expose
vehicle occupants to danger.
You must stop and obtain addi-
tional fuel as soon as possible
after the warning light comes
on or when the gauge indicator
comes close to the “0” level.
WARNING
Never remove the radiator cap
when the engine is hot. The
engine coolant is under pressure
and could cause severe burns.
Wait until the engine is cool
before adding coolant to the
reservoir.
WARNING
OTM048110L/OTM048111L ■ Type A■ Type B
Page 545 of 682
6-7
What to do in an emergency
6
If your temperature gauge indicates
overheating, you experience a loss
of power, or hear loud pinging or
knocking, the engine may be over-
heating. If this happens, you should:
1. Pull off the road and stop as soon
as it is safe to do so.
2. Place the shift lever in P (Park, for
automatic transmission vehicle) or
neutral (for manual transmis-
sion/automatic transmission vehi-
cle) and set the parking brake. If
the air conditioning is ON, turn it
OFF.
3. If engine coolant is running out
under the vehicle or steam is com-
ing out from the bonnet, stop the
engine. Do not open the bonnet
until the coolant has stopped run-
ning or the steaming has stopped.
If there is no visible loss of engine
coolant and no steam, leave the
engine running and check to be
sure the engine cooling fan is
operating. If the fan is not running,
turn the engine off.4. Check for coolant leaking from the
radiator, hoses or under the vehi-
cle. (If the air conditioning had been
in use, it is normal for cold water to
be draining from it when you stop.)
5. If engine coolant is leaking out, stop
the engine immediately and we rec-
ommend that you call a HYUNDAI
authorised repairer for assistance.
‘
IF THE ENGINE OVERHEATS
Whilst the engine is
running, keep hands,
clothing and tools
away from the mov-
ing parts such as the
cooling fan and drive
belt to prevent seri-
ous injury.
WARNING
NEVER remove the
radiator cap or the
drain plug whilst the
engine and radiator
are hot. Hot coolant
and steam may blow out under
pressure, causing serious
injury.
Turn the engine off and wait
until the engine cools down.
Use extreme care when remov-
ing the radiator cap. Wrap a
thick towel around it, and turn it
counterclockwise slowly to the
first stop. Step back whilst the
pressure is released from the
cooling system. When you are
sure all the pressure has been
released, press down on the
cap, using a thick towel, and
continue turning counterclock-
wise to remove it.
WARNING
Page 583 of 682
7-8
Maintenance
Owner maintenance schedule
When you stop for fuel:
• Check the engine oil level.
• Check the coolant level in the
engine coolant reservoir.
• Check the windscreen washer fluid
level.
• Check for low or under-inflated
tyres.
Whilst operating your vehicle:
• Note any changes in the sound of
the exhaust or any smell of exhaust
fumes in the vehicle.
• Check for vibrations in the steering
wheel. Notice if there is any
increased steering effort or loose-
ness in the steering wheel, or
change in its straight-ahead position.
• Notice if your vehicle constantly turns
slightly or “pulls” to one side when
travelling on smooth, level road.
• When stopping, listen and check for
unusual sounds, pulling to one side,
increased brake pedal travel or
“hard-to-push” brake pedal.
• If any slipping or changes in the
operation of your transmission
occurs, check the transmission fluid
level.
• Check the automatic transmission
P (Park) function.
• Check the parking brake.
• Check for fluid leaks under your
vehicle (water dripping from the air
conditioning system during or after
use is normal).
At least monthly:
• Check coolant level in the engine
coolant reservoir.
• Check the operation of all exterior
lights, including the stoplights, turn
signals and hazard warning flashers.
• Check the inflation pressures of all
tyres including the spare for tyres
that are worn, show uneven wear,
or are damaged.
• Check for loose wheel lug nuts.
At least twice a year:
(i.e., every Spring and Autumn)
• Check radiator, heater and air condi-
tioning hoses for leaks or damage.
• Check windscreen washer spray
and wiper operation. Clean wiper
blades with a clean cloth damp-
ened with washer fluid.
• Check headlamp alignment.
• Check muffler, exhaust pipes,
shields and clamps.
• Check the seat belts for wear and
function. Be careful when checking your
engine coolant level when the
engine is hot. This may result in
coolant being blown out of the
opening and cause serious
burns and other injuries.
WARNING
Page 586 of 682
7-11
7
Maintenance
Air cleaner filter
We recommend that the air cleaner
filter be replaced by a HYUNDAI
authorised repairer.
Spark plugs
(for Petrol engine)
Make sure to install new spark plugs
of the correct heat range.
Valve clearance
(for Petrol engine)
Inspect excessive valve noise and/or
engine vibration and adjust if neces-
sary. We recommend that the system
be serviced by a HYUNDAI autho-
rised repairer.
Cooling system
Check the cooling system parts,
such as radiator, coolant reservoir,
hoses and connections for leakage
and damage. Replace any damaged
parts.
Engine coolant
The coolant should be changed at
the intervals specified in the mainte-
nance schedule.
Manual transmission fluid
(if equipped)
Inspect the manual transmission
fluid according to the maintenance
schedule.
Automatic transmission fluid
(if equipped)
Automatic transmission fluid should
not be checked under normal usage
conditions.
We recommend that the automatic
transmission fluid is changed by a
HYUNDAI authorised repairer accord-
ing to the maintenance schedule.
Information
Automatic transmission fluid colour is
red when new.
As the vehicle is driven, the automatic
transmission fluid will begin to look
darker.
This is a normal condition. It does not
need to be replaced based on the
colour change.
The use of a non-specified fluid
could result in transmission mal-
function and failure.
Use only specified automatic
transmission fluid.
(Refer to “Recommended lubri-
cants and capacities” in chapter 8.)
NOTICE
i
Do not disconnect and inspect
spark plugs when the engine is
hot. You may burn yourself.
WARNING
Page 588 of 682
7-13
7
Maintenance
ENGINE OIL
Checking the engine oil level
(Petrol engine)
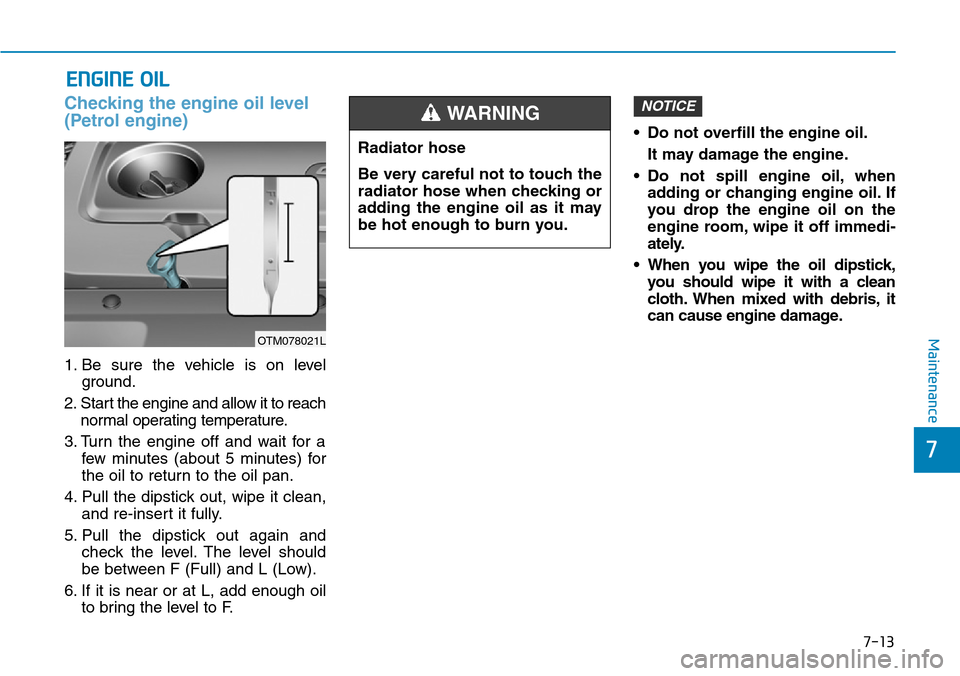
1. Be sure the vehicle is on level
ground.
2. Start the engine and allow it to reach
normal operating temperature.
3. Turn the engine off and wait for a
few minutes (about 5 minutes) for
the oil to return to the oil pan.
4. Pull the dipstick out, wipe it clean,
and re-insert it fully.
5. Pull the dipstick out again and
check the level. The level should
be between F (Full) and L (Low).
6. If it is near or at L, add enough oil
to bring the level to F.• Do not overfill the engine oil.
It may damage the engine.
• Do not spill engine oil, when
adding or changing engine oil. If
you drop the engine oil on the
engine room, wipe it off immedi-
ately.
• When you wipe the oil dipstick,
you should wipe it with a clean
cloth. When mixed with debris, it
can cause engine damage.
NOTICE
Radiator hose
Be very careful not to touch the
radiator hose when checking or
adding the engine oil as it may
be hot enough to burn you.
WARNING
OTM078021L
Page 590 of 682
7-15
7
Maintenance
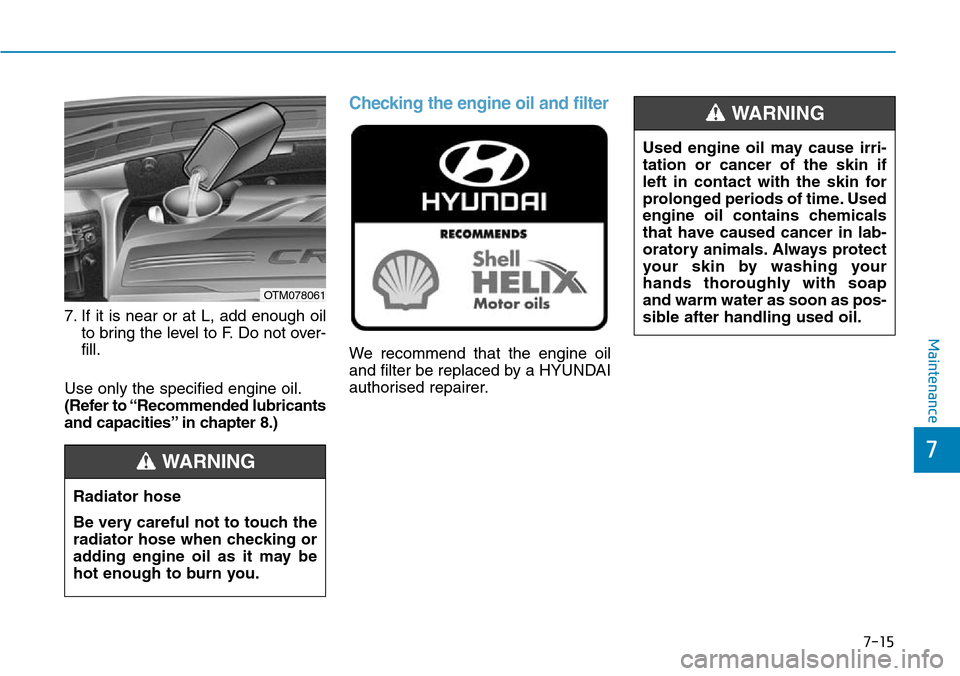
7. If it is near or at L, add enough oil
to bring the level to F. Do not over-
fill.
Use only the specified engine oil.
(Refer to “Recommended lubricants
and capacities” in chapter 8.)
Checking the engine oil and filter
We recommend that the engine oil
and filter be replaced by a HYUNDAI
authorised repairer.
OTM078061
Radiator hose
Be very careful not to touch the
radiator hose when checking or
adding engine oil as it may be
hot enough to burn you.
WARNING
Used engine oil may cause irri-
tation or cancer of the skin if
left in contact with the skin for
prolonged periods of time. Used
engine oil contains chemicals
that have caused cancer in lab-
oratory animals. Always protect
your skin by washing your
hands thoroughly with soap
and warm water as soon as pos-
sible after handling used oil.
WARNING