2019 Hyundai Kona display speed display
[x] Cancel search: display speed displayPage 171 of 485
3-87
Convenient features of your vehicle
3
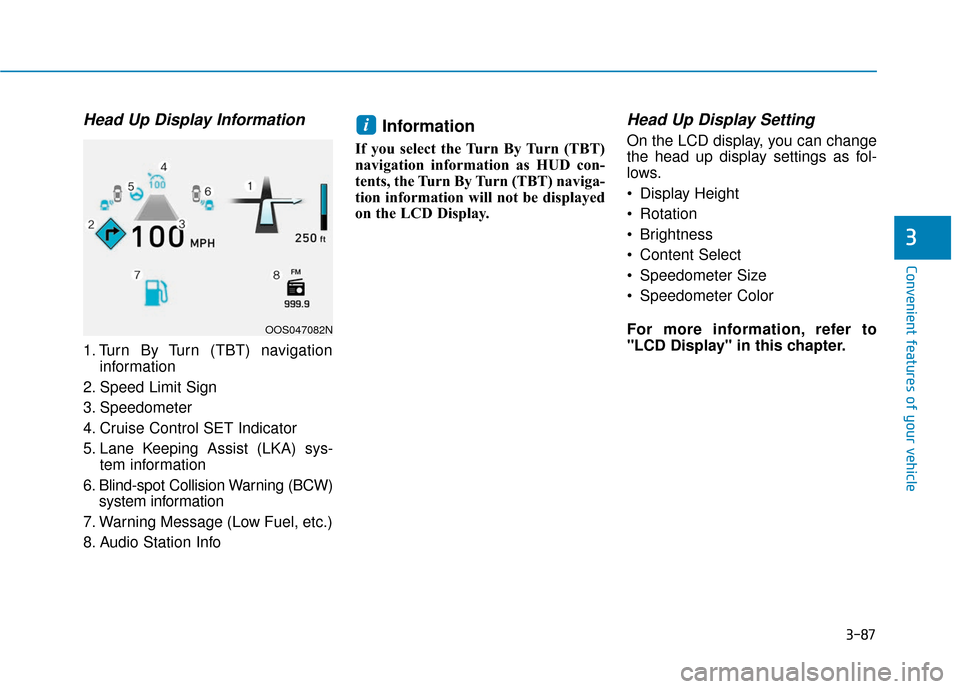
Head Up Display Information
1. Turn By Turn (TBT) navigationinformation
2. Speed Limit Sign
3. Speedometer
4. Cruise Control SET Indicator
5. Lane Keeping Assist (LKA) sys- tem information
6. Blind-spot Collision Warning (BCW) system information
7. Warning Message (Low Fuel, etc.)
8. Audio Station Info
Information
If you select the Turn By Turn (TBT)
navigation information as HUD con-
tents, the Turn By Turn (TBT) naviga-
tion information will not be displayed
on the LCD Display.
Head Up Display Setting
On the LCD display, you can change
the head up display settings as fol-
lows.
Display Height
Rotation
Brightness
Content Select
Speedometer Size
Speedometer Color
For more information, refer to
"LCD Display" in this chapter.i
OOS047082N
Page 179 of 485
3-95
Convenient features of your vehicle
3
Headlamp delay function
If the key is removed from the ignition
switch or placed in the ACC position
or the LOCK/OFF position with the
headlamps ON, the headlamps
(and/or parking lamps) remain on for
about 5 minutes. However, if the dri-
ver’s door is opened and closed, the
headlights are turned off after 15
seconds. Also, with the engine off if
the driver's door is opened and
closed, the headlamps (and/or park-
ing lamps) are turned off after 15
seconds.
The headlamps (and/or parking
lamps) can be turned off by pressing
the lock button on the remote key or
smart key twice or turning the head-
lamp switch to the OFF or AUTO
position.
You can activate or deactivate the
Headlamp Delay function from the
User Settings Mode in the LCD dis-
play.
For more information, refer to the
"LCD Display" section in this
chapter.If the driver exits the vehicle
through another door besides the
driver door, the battery saver func-
tion does not operate and the
headlamp delay function does not
turn OFF automatically.
This may cause the battery to dis-
charge. To avoid battery dis-
charge, turn OFF the headlamps
manually from the headlamp
switch before exiting the vehicle.
Smart cornering lamp
(if equipped)
As an optional safety feature, your
vehicle may be equipped with a
smart cornering lamp. The cornering
lamp turns ON automatically while
driving when the vehicle enters into a
cornering maneuver.
The system will operate under the
following conditions:
When the headlamps are turned
ON
When the steering angle is above 25 to 35 degrees (depending on
vehicle speed)
When the vehicle speed is under 25 mph (40 kph)
When the smart cornering lamp
turns on, the front fog lamp turns off.
(if equipped)
NOTICE
Page 186 of 485
3-102
To prevent possible damage tothe washer pump, do not oper-
ate the washer when the fluid
reservoir is empty.
To prevent possible damage to the wipers or windshield, do not
operate the wipers when the
windshield is dry.
To prevent damage to the wiper arms and other components, do
not attempt to move the wipers
manually.
To prevent possible damage to the wipers and washer system,
use anti-freezing washer fluids
in the winter season or cold
weather.
Rear Window Wiper and Washer
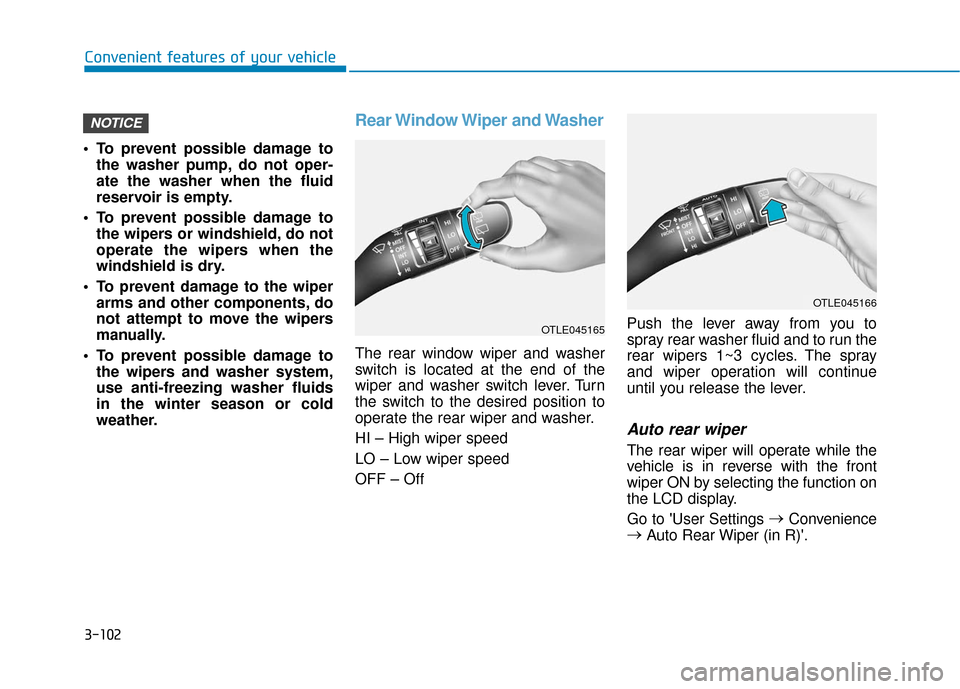
The rear window wiper and washer
switch is located at the end of the
wiper and washer switch lever. Turn
the switch to the desired position to
operate the rear wiper and washer.
HI – High wiper speed
LO – Low wiper speed
OFF – Off Push the lever away from you to
spray rear washer fluid and to run the
rear wipers 1~3 cycles. The spray
and wiper operation will continue
until you release the lever.
Auto rear wiper
The rear wiper will operate while the
vehicle is in reverse with the front
wiper ON by selecting the function on
the LCD display.
Go to 'User Settings
→
Convenience
→ Auto Rear Wiper (in R)'.
NOTICE
Convenient features of your vehicle
OTLE045166
OTLE045165
Page 201 of 485
3-117
Convenient features of your vehicle
3
Automatic Temperature
Control Mode
The Automatic Climate Control
System is controlled by setting the
desired temperature.
1. Press the AUTO button (3).
The modes, fan speeds, air intake
and air-conditioning will be controlled
automatically by the temperature set-
ting you select.
2. Turn the temperature control knob(1) to the desired temperature. If
the temperature is set to the low-
est setting (Lo), the air condition-
ing system will operate continu-
ously. After the interior has cooled
sufficiently, adjust the knob to a
higher temperature set point
whenever possible.
To turn the automatic operation off,
select any button of the following: - Mode selection button
- Front windshield defroster button(Press the button one more time
to deselect the front windshield
defroster function. The 'AUTO'
sign will illuminate on the infor-
mation display once again.)
- Fan speed control button The selected function will be con-
trolled manually while other functions
operate automatically.
For your convenience and to improve
the efficiency of the climate control,
use the AUTO button and set the
temperature to 73°F (23°C).
To change the temperature unit from
°F to °C or °C to °F:
Press and hold the AUTO and OFF
buttons on the climate control unit for
3 seconds.
Never place anything near the
ambient light/solar sensor to
ensure better control of the heat-
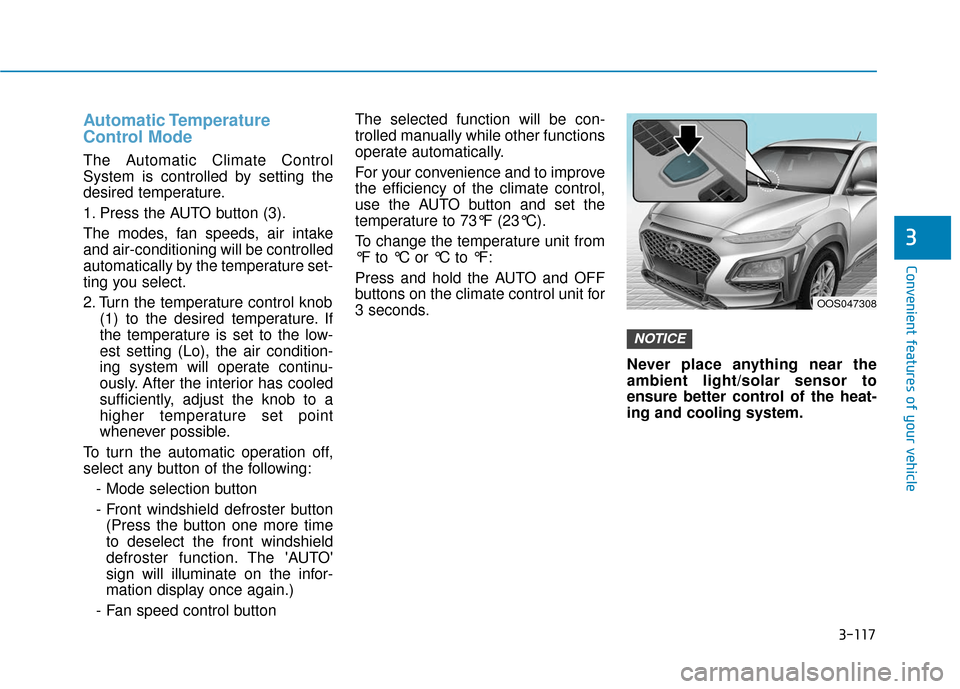
ing and cooling system.
NOTICE
OOS047308
Page 212 of 485
3-128
Convenient features of your vehicleWhen the Auto Defogging
System operates, the indi-
cator will illuminate.
If a high amount of humidity is
detected in the vehicle, the Auto
Defogging System will be enabled.
The following steps will be performed
automatically:
Step 1) The air intake control will change to Fresh mode.
Step 2) The A/C button will turn ON.
Step 3) The mode will be changed to defrost to direct airflow to the
windshield.
Step 4) The fan speed will be set to MAX.
If the air conditioning is off or recircu-
lated air position is manually select-
ed while Auto Defogging System is
ON, the Auto Defogging System
Indicator will blink 3 times to signal
that the manual operation has been
canceled.
To cancel or reset the
Auto Defogging System
Press the front windshield defroster
button for 3 seconds when the ignition
switch is in the ON position. When the
Auto Defogging System is canceled,
the ADS OFF symbol will blink 3 times
and ADS OFF will be displayed on the
climate control information screen.
When the Auto Defogging System is
reset, the ADS OFF symbol will blink
6 times without a signal.
Information
• When the air conditioning is turned on by Auto defogging system, if you
try to turn off the air conditioning, the
indicator will blink 3 times and the air
conditioning will not be turned off.
• To maintain the effectiveness and efficiency of the Auto Defogging
System, do not select Recirculation
mode while the system is operating.
• When the Auto Defogging System is operating, the fan speed adjustment
knob, the temperature adjustment
knob, and the air intake control but-
ton are all disabled. Do not remove the sensor cover
located on the upper end of the
windshield glass.
Damage to system parts could
occur and may not be covered by
your vehicle warranty.
NOTICE
i
Page 222 of 485
3-138
Convenient features of your vehicle
The wireless charging process may temporarily stop, when tem-
perature abnormally increases
inside the wireless cellular
phone charging system. The
wireless charging process
restarts, when temperature falls
to a certain level.
The wireless charging process may temporarily stop when
there is any metallic item, such
as a coin, between the wireless
cellular phone charging system
and cellular phone.
When charging some cell phones with the case still
applied, the wireless charging
speed may decrease and the
wireless charging may stop.
If the cellular phone has a thick cover, the wireless charging may
not be possible.
If the cell phone is not complete- ly contacting the charging pad,
wireless charging may not oper-
ate properly.
Some magnetic items like credit cards, phone cards or rail tickets
may be damaged if left with the
cellular phone during the charg-
ing process. If the cellular phone without the
wireless charging function or
the metallic items are placed on
the charging pad, it may cause
slight noise. This noise does not
affect the cellular phone and the
vehicle, because this noise is an
operating sound during deter-
mining the item on the charging
pad.
Information
If the ignition switch is OFF, the
charging also stops.
Information
This device complies with part 15 of
the FCC Rules.
Operation is subject to the following
two conditions:
1. This device may not cause harmful interference, and
2. This device must accept any inter- ference received, including inter-
ference that may cause undesired
operation.
Clock
Vehicles with Audio system
Select the [SETUP] button on the
audio system ➟ Select [Date/Time].
Set time: Set the time displayed on the audio screen.
Time format: Choose between 12- hour and 24-hour time formats.
Vehicles with Navigation system
Select the Settings menu on the
Navigation system ➟Select
[Date/Time].
GPS time: Displays time according to the received GNSS time.
24-hour: Switches to 12 hour or 24 hour.
i
i
Do not attempt to adjust the
clock while driving. Doing so
may result in distracted driving
which may lead to an accident
involving personal injury or
death.
WARNING
Page 268 of 485
5-36
Driving your vehicle
ESC OFF usage
When Driving
The ESC OFF mode should only be
used briefly to help free the vehicle if
stuck in snow or mud by temporarily
stopping operation of the ESC to
maintain wheel torque.
To turn ESC off while driving, press
the ESC OFF button while driving on
a flat road surface.
To prevent damage to the trans-
mission:
Do not allow wheel(s) of oneaxle to spin excessively while
the ESC, ABS, and parking brake
warning lights are displayed.
The repairs would not be cov-
ered by the vehicle warranty.
Reduce engine power and do
not spin the wheel(s) excessive-
ly while these lights are dis-
played.
When operating the vehicle on a dynamometer, make sure the
ESC is turned off (ESC OFF light
illuminated).
Information
Turning the ESC off does not affect ABS
or standard brake system operation.
Vehicle Stability Management
(VSM)
The Vehicle Stability Management
(VSM) is a function of the Electronic
Stability Control (ESC) system. It
helps ensure the vehicle stays stable
when accelerating or braking sud-
denly on wet, slippery and rough
roads where traction over the four
tires can suddenly become uneven.
VSM operation
VSM ON condition
The VSM operates when:
The Electronic Stability Control(ESC) is on.
Vehicle speed is approximately above 9 mph (15 km/h) on curve
roads.
Vehicle speed is approximately above 12 mph (20 km/h) when the
vehicle is braking on rough roads.
When operating
When you apply your brakes under
conditions which may activate the
ESC, you may hear sounds from the
brakes, or feel a corresponding sen-
sation in the brake pedal. This is nor-
mal and it means your VSM is active.
i
NOTICE
Take the following precautions
when using the Vehicle Stability
Management (VSM):
ALWAYS check the speed and
the distance to the vehicle
ahead. The VSM is not a sub-
stitute for safe driving prac-
tices.
Never drive too fast for the
road conditions. The VSM sys-
tem will not prevent acci-
dents. Excessive speed in bad
weather, slippery and uneven
roads can result in severe
accidents.
WARNING
Page 282 of 485
5-50
Driving your vehicle
RCCW (Rear Cross-Traffic
Collision Warning)
The Rear Cross-Traffic Collision
Warning function monitors approach-
ing cross traffic from the left and right
side of the vehicle when your vehicle
is in reverse.
Operating conditions
To operate:
Go to the 'User Settings →Driver
Assistance and select Rear Cross-
Traffic Collision Warning' on the LCD
display. (For more information,
refer to "LCD Display" in chapter
3.)
The system will turn on and standby
to activate. The system will activate
when vehicle speed is below 6 mph
(10 km/h) and with the shift lever in R
(Reverse).
Information
The Rear Cross-Traffic Collision
Warning (RCCW) detecting range is
approximately 1 - 65 ft (0.5 – 20 m).
An approaching vehicle will be detect-
ed if their vehicle speed is within 2.5 -
22.5 mph (4 - 36 km/h).
Note that the detecting range may
vary under certain conditions. As
always, use caution and pay close
attention to your surroundings when
backing up your vehicle.
Warning type
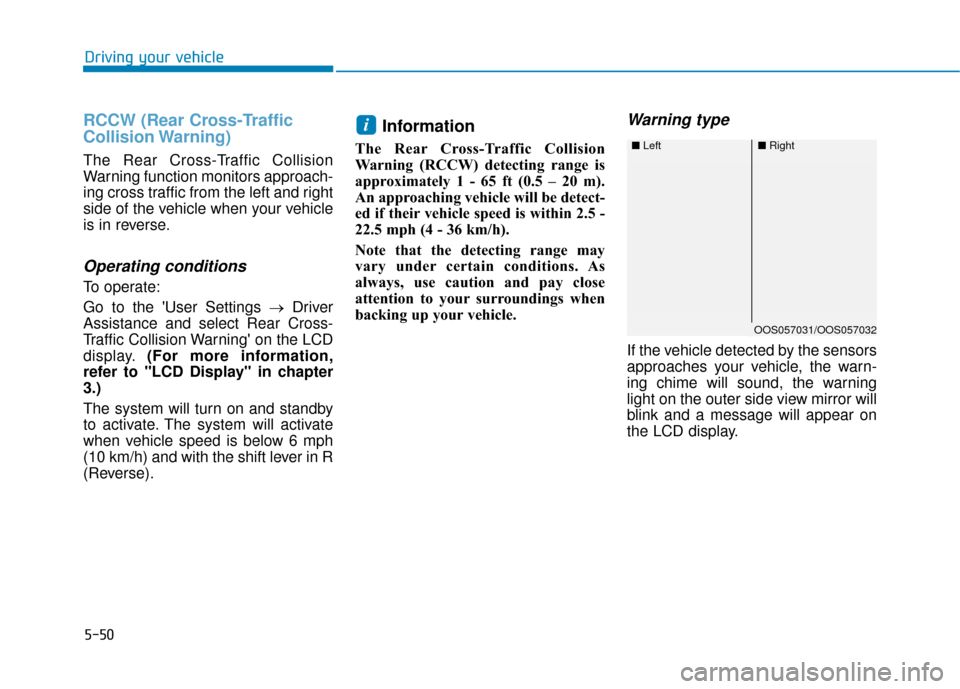
If the vehicle detected by the sensors
approaches your vehicle, the warn-
ing chime will sound, the warning
light on the outer side view mirror will
blink and a message will appear on
the LCD display.
i
■ Left■Right
OOS057031/OOS057032