2019 Hyundai Kona Display
[x] Cancel search: DisplayPage 15 of 526
1-4
Your vehicle at a glance
I
IN
N T
TE
ER
R I
IO
O R
R
O
O V
VE
ER
R V
V I
IE
E W
W
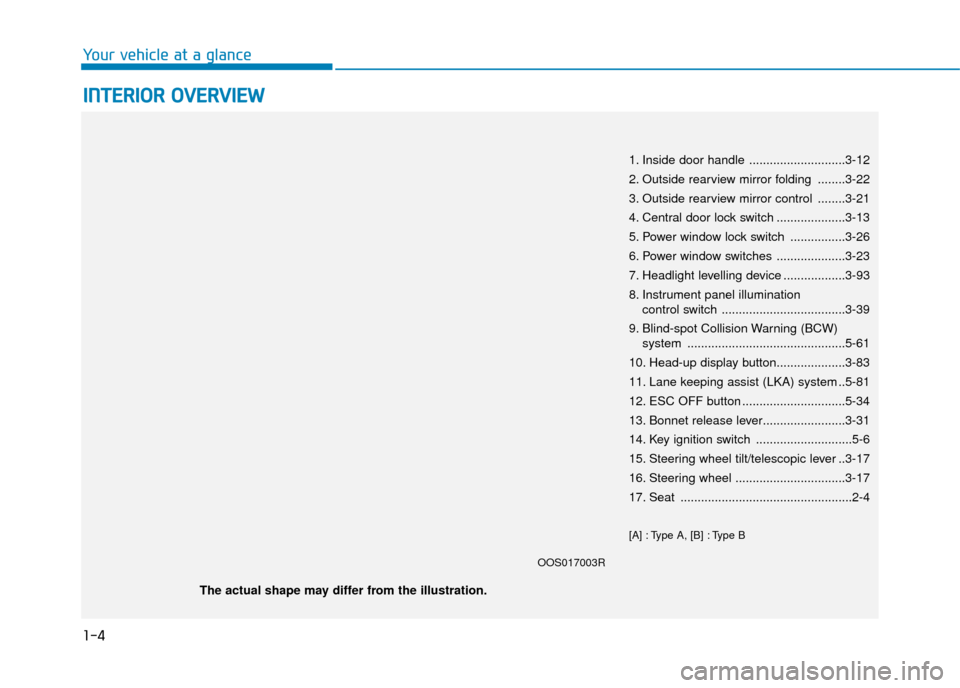
1. Inside door handle ............................3-12
2. Outside rearview mirror folding ........3-22
3. Outside rearview mirror control ........3-21
4. Central door lock switch ....................3-13
5. Power window lock switch ................3-26
6. Power window switches ....................3-23
7. Headlight levelling device ..................3-93
8. Instrument panel illumination
control switch ....................................3-39
9. Blind-spot Collision Warning (BCW) system ..............................................5-61
10. Head-up display button....................3-83
11. Lane keeping assist (LKA) system ..5-81
12. ESC OFF button ..............................5-34
13. Bonnet release lever........................3-31
14. Key ignition switch ............................5-6
15. Steering wheel tilt/telescopic lever ..3-17
16. Steering wheel ................................3-17
17. Seat ..................................................2-4
[A] : Type A, [B] : Type B
OOS017003R
The actual shape may differ from the illustration.
Page 72 of 526
2-54
Safety system of your vehicle
SRS warning light
The SRS (Supplemental Restraint
System) air bag warning light on the
instrument panel displays the air bag
symbol depicted in the illustration. The
system checks the air bag electrical
system for malfunctions. The light indi-
cates that there is a potential problem
with your air bag system, which could
include your side and/or curtain air
bags used for rollover protection (if
equipped with rollover sensor).During a moderate to severe frontal
collision, sensors will detect the vehi-
cle’s rapid deceleration. If the rate of
deceleration is high enough, the con-
trol unit will inflate the front air bags,
at the time and with the force needed.
The front air bags help protect the driv-
er and front passenger by responding
to frontal impacts in which seat belts
alone cannot provide adequate
restraint. When needed, the side air
bags help provide protection in the
event of a side impact or rollover by
supporting the side upper body area.
Air bags are activated (able to inflate
if necessary) only when the ignition
switch is in the ON position.
Air bags inflate in the event of certain frontal or side collisions to help pro-
tect the occupants from serious
physical injury.
There is no single speed at which the air bags will inflate. Generally, air bags
are designed to inflate based upon
the severity of a collision and its direc-
tion. These two factors determine
whether the sensors produce an elec-
tronic deployment/inflation signal.
If your SRS malfunctions, the
air bag may not inflate properly
during an accident increasing
the risk of serious injury or
death.
If any of the following condi-
tions occur, your SRS is mal-
functioning:
The light does not turn on for
approximately six seconds
when the ignition switch is in
the ON position.
The light stays on after illumi-
nating for approximately six
seconds.
The light comes on whilst the
vehicle is in motion.
The light blinks when the
engine is running.
We recommend that a HYUNDAI
authorised repairer inspect the
SRS as soon as possible if any
of these conditions occur.
WARNING
Page 83 of 526
Convenient features of your vehicle
Accessing your vehicle .........................................3-3
Remote key ........................................................................\
.3-3
Smart key ........................................................................\
....3-6
Immobiliser system .........................................................3-10
Door locks .............................................................3-11
Operating door locks from outside the vehicle ......3-11
Operating door locks from inside the vehicle .........3-12
Deadlocks ........................................................................\
..3-14
Auto door lock/unlock features..................................3-15
Child-protector rear door locks ..................................3-15
Theft-alarm system.............................................3-16
Steering wheel......................................................3-17
Electric power steering (EPS) ......................................3-17
Tilt steering/Telescopic steering.................................3-17
Heated steering wheel ...................................................3-18
Horn ........................................................................\
............3-19
Mirrors ...................................................................3-19
Inside rearview mirror....................................................3-19
Outside rearview mirror ................................................3-20
Windows ................................................................3-23
Power windows................................................................3-23
Sunroof..................................................................3-27
Sunroof opening and closing .......................................3-28
Sliding the sunroof .........................................................3-28
Tilting the sunroof ..........................................................3-29
Sunshade ........................................................................\
...3-29Resetting the sunroof ....................................................3-30
Sunroof open warning ...................................................3-30
Exterior features .................................................3-31
Bonnet........................................................................\
........3-31
Tailgate.....................................................................\
..........3-32
Fuel filler door .................................................................3-34
Instrument cluster................................................3-38
Instrument cluster control ............................................3-39
Gauges and meters .........................................................3-39
Icy Road Warning Light .................................................3-42
Transmission shift indicator .........................................3-43
Manual transmission shift indicator ...........................3-43
Warning and indicator lights ........................................3-45
LCD display messages ..................................................3-60
LCD display (Cluster Type B, C) .........................3-66
LCD display control.........................................................3-66
LCD display modes ..........................................................3-67
Trip computer and service reminder
(For cluster Type A) ............................................3-74
Trip computer ...................................................................3-74
Service reminder .............................................................3-77
Trip computer (Type B, Type C).........................3-79
Trip modes ........................................................................\
3-79
Head up display (HUD)........................................3-82
Lighting..................................................................3-85
Exterior lights ..................................................................3-85
3
Page 97 of 526
3-15
Convenient features of your vehicle
3
Auto door lock/unlock features
Impact sensing door unlocksystem (if equipped)
All doors will be automatically
unlocked when an impact causes the
air bags to deploy.
Speed sensing door lock system(if equipped)
All doors will be automatically locked
when vehicle speed exceeds 9 mph
(15 km/h).
You can activate or deactivate the
Auto Door Lock/Unlock features from
the User Settings mode on the LCD
display. For more details, refer to
"LCD Display" in this chapter.
Child-protector rear door locks
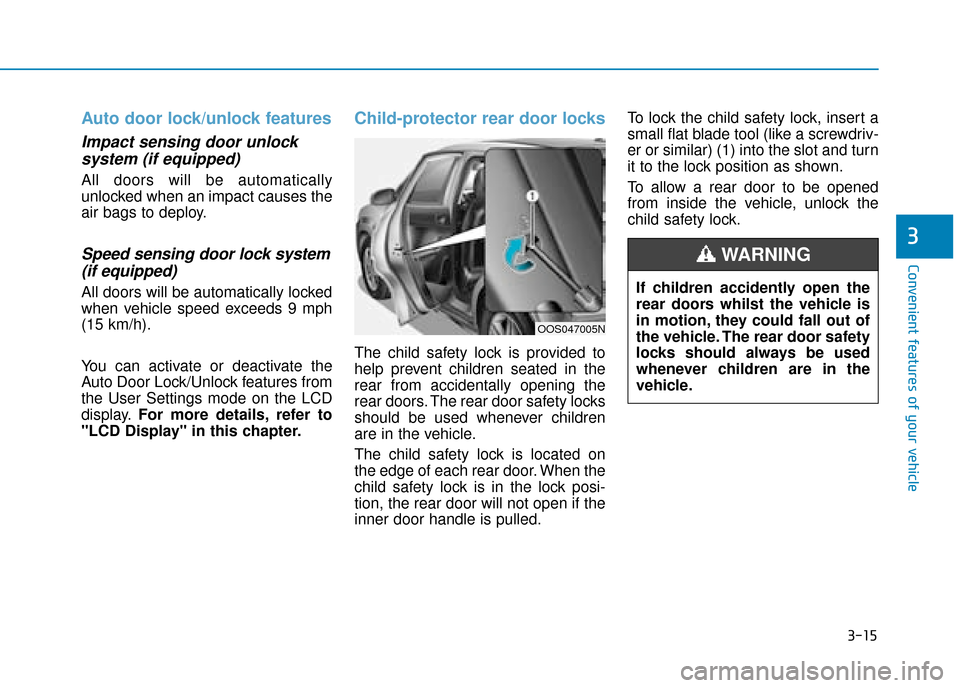
The child safety lock is provided to
help prevent children seated in the
rear from accidentally opening the
rear doors. The rear door safety locks
should be used whenever children
are in the vehicle.
The child safety lock is located on
the edge of each rear door. When the
child safety lock is in the lock posi-
tion, the rear door will not open if the
inner door handle is pulled. To lock the child safety lock, insert a
small flat blade tool (like a screwdriv-
er or similar) (1) into the slot and turn
it to the lock position as shown.
To allow a rear door to be opened
from inside the vehicle, unlock the
child safety lock.
OOS047005N
If children accidently open the
rear doors whilst the vehicle is
in motion, they could fall out of
the vehicle. The rear door safety
locks should always be used
whenever children are in the
vehicle.
WARNING
Page 104 of 526
3-22
Convenient features of your vehicle
The mirrors stop moving when they reach the maximum adjust-
ing angles, but the motor contin-
ues to operate whilst the switch
is pressed. Do not press the
switch longer than necessary,
the motor may be damaged.
Do not attempt to adjust the out- side rearview mirror by hand
otherwise the motor may be
damaged.
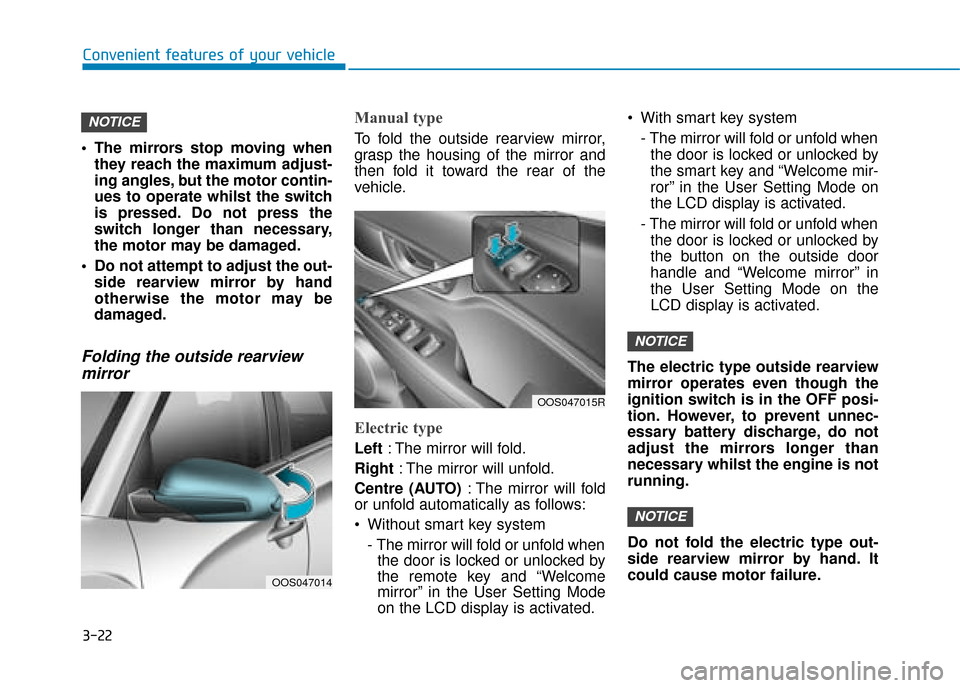
Folding the outside rearviewmirror
Manual type
To fold the outside rearview mirror,
grasp the housing of the mirror and
then fold it toward the rear of the
vehicle.
Electric type
Left : The mirror will fold.
Right : The mirror will unfold.
Centre (AUTO) : The mirror will fold
or unfold automatically as follows:
Without smart key system
- The mirror will fold or unfold whenthe door is locked or unlocked by
the remote key and “Welcome
mirror” in the User Setting Mode
on the LCD display is activated. With smart key system
- The mirror will fold or unfold whenthe door is locked or unlocked by
the smart key and “Welcome mir-
ror” in the User Setting Mode on
the LCD display is activated.
- The mirror will fold or unfold when the door is locked or unlocked by
the button on the outside door
handle and “Welcome mirror” in
the User Setting Mode on the
LCD display is activated.
The electric type outside rearview
mirror operates even though the
ignition switch is in the OFF posi-
tion. However, to prevent unnec-
essary battery discharge, do not
adjust the mirrors longer than
necessary whilst the engine is not
running.
Do not fold the electric type out-
side rearview mirror by hand. It
could cause motor failure.
NOTICE
NOTICE
NOTICE
OOS047014
OOS047015R
Page 112 of 526
3-30
Convenient features of your vehicle
Resetting the sunroof
The sunroof may need to be reset if
the following conditions occur:
- The battery is discharged or dis- connected or the sunroof fuse has
been replaced or disconnected
- The sunroof control lever is not operating correctly
To reset the sunroof, perform the fol-
lowing steps:
1. Place the ignition switch to the ON position or start the engine. It is
recommended to reset the sunroof
whilst the engine is running.
2. Push the control lever forward. The sunroof will close completely or tilt
depending on the condition of the
sunroof.
3. Release the control lever when the sunroof stops moving.
4. Push the control lever forward for about 10 seconds.
- When the sunroof is in the closed position :
The glass will tilt and slightly move up and down. - When the sunroof is in the tilt
position:
The glass will slightly move up and down.
Do not release the lever until the
operation is completed.
If you release the lever during opera-
tion, try again from step 2.
5. Within 3 seconds, push the control lever forward until the sunroof
operates as follows:
Tilt down → Slide Open → Slide
Close.
Do not release the lever until the
operation is completed.
If you release the lever during opera-
tion, try again from step 2.
6. Release the sunroof control lever after all operation has completed.
(The sunroof system has been
reset.)
Information
• If the sunroof does not reset whenthe vehicle battery is disconnected
or discharged, or related fuse is
blown, the sunroof may not operate
normally.
• For more detailed information, we recommend that you contact a
HYUNDAI authorised repairer.
Sunroof open warning
(if equipped)
If the driver turns off the enginewhen the sunroof is not fully
closed, the warning chime will
sound for approximately 3 seconds
and sunroof open warning will
appear on the LCD display.
If the driver turns off the engine and opens the door when the sun-
roof is not fully closed, the open
sunroof warning will appear on the
LCD display until the door is closed
or the sunroof is fully closed.
Close the sunroof securely when
leaving your vehicle.
i
Page 120 of 526
3-38
Convenient features of your vehicle
1. Tachometer
2. Speedometer
3. Engine coolant temperature gauge
4. Fuel gauge
5. Warning and indicator lights
6. LCD display (including Trip computer)
OOS047100E/OOS047101E/OOS047102E
■
■Type A ■
■
Type C
■
■ Type B
I
IN
N S
ST
T R
R U
U M
M E
EN
N T
T
C
C L
LU
U S
ST
T E
ER
R
The actual cluster in the vehicle may differ from the
illustration.
For more details, refer to the "Gauges and Meters" in
this chapter.
Page 121 of 526
3-39
Convenient features of your vehicle
3
Instrument cluster control
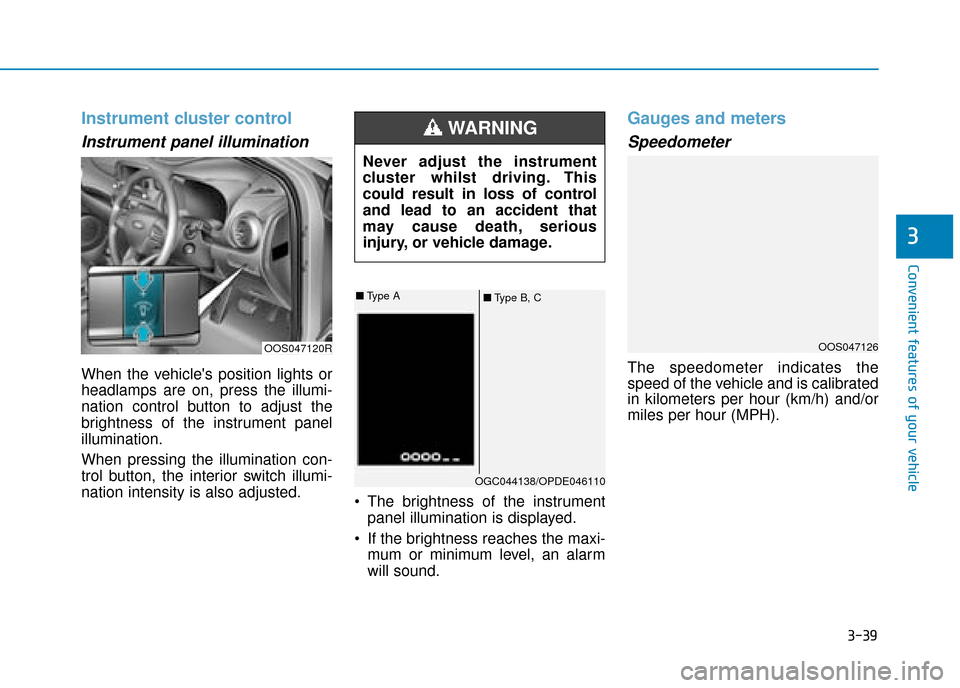
Instrument panel illumination
When the vehicle's position lights or
headlamps are on, press the illumi-
nation control button to adjust the
brightness of the instrument panel
illumination.
When pressing the illumination con-
trol button, the interior switch illumi-
nation intensity is also adjusted. The brightness of the instrument
panel illumination is displayed.
If the brightness reaches the maxi- mum or minimum level, an alarm
will sound.
Gauges and meters
Speedometer
The speedometer indicates the
speed of the vehicle and is calibrated
in kilometers per hour (km/h) and/or
miles per hour (MPH).
OOS047120R
Never adjust the instrument
cluster whilst driving. This
could result in loss of control
and lead to an accident that
may cause death, serious
injury, or vehicle damage.
WARNING
■ Type B, C
■
Type A
OGC044138/OPDE046110
OOS047126