2019 Hyundai Kona Display
[x] Cancel search: DisplayPage 183 of 526
3-101
Convenient features of your vehicle
3
D
DR
RI
IV
V E
ER
R
A
A S
SS
SI
IS
S T
T
S
S Y
Y S
ST
T E
EM
M
Rear view monitor
(if equipped)
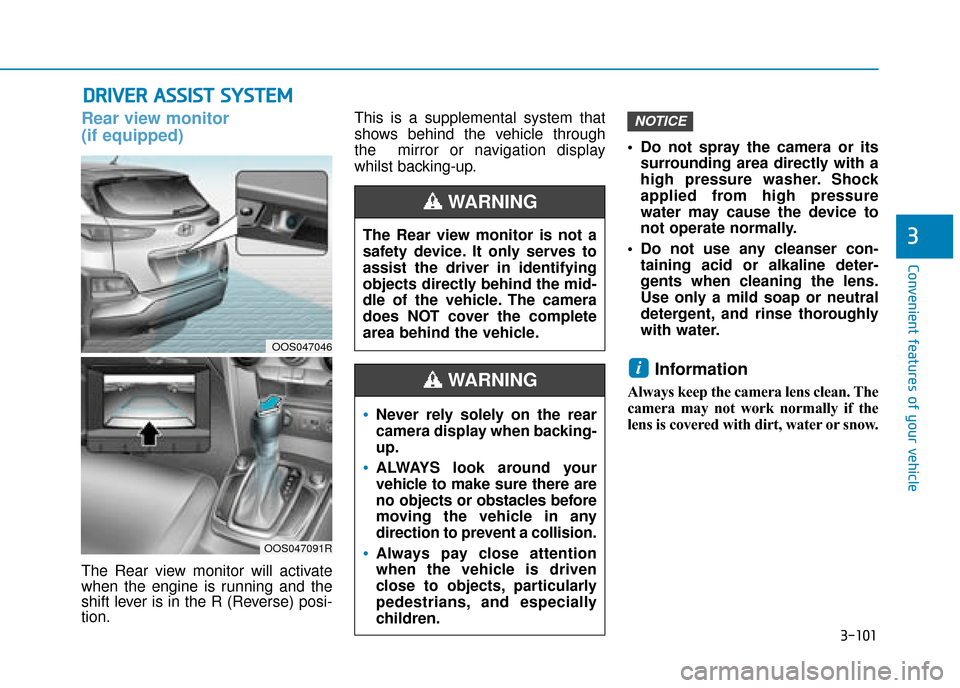
The Rear view monitor will activate
when the engine is running and the
shift lever is in the R (Reverse) posi-
tion. This is a supplemental system that
shows behind the vehicle through
the mirror or navigation display
whilst backing-up.
Do not spray the camera or its
surrounding area directly with a
high pressure washer. Shock
applied from high pressure
water may cause the device to
not operate normally.
Do not use any cleanser con- taining acid or alkaline deter-
gents when cleaning the lens.
Use only a mild soap or neutral
detergent, and rinse thoroughly
with water.
Information
Always keep the camera lens clean. The
camera may not work normally if the
lens is covered with dirt, water or snow.
i
NOTICE
The Rear view monitor is not a
safety device. It only serves to
assist the driver in identifying
objects directly behind the mid-
dle of the vehicle. The camera
does NOT cover the complete
area behind the vehicle.
WARNING
Never rely solely on the rear
camera display when backing-
up.
ALWAYS look around your
vehicle to make sure there are
no objects or obstacles before
moving the vehicle in any
direction to prevent a collision.
Always pay close attention
when the vehicle is driven
close to objects, particularly
pedestrians, and especially
children.
WARNING
OOS047046
OOS047091R
Page 201 of 526
3-119
Convenient features of your vehicle
3
Automatic heating and air con-
ditioning
The Automatic Climate Control
System is controlled by setting the
desired temperature.
1. Press the AUTO button. (3)
The modes, fan speeds, air intake
and air-conditioning will be controlled
automatically by the temperature set-
ting you select.
2. Turn the temperature control knob(1) to the desired temperature. If
the temperature is set to the low-
est setting (Lo), the air condition-
ing system will operate continu-
ously. After the interior has cooled
sufficiently, adjust the knob to a
higher temperature set point
whenever possible.
To turn the automatic operation off,
select any button of the following:
- Mode selection button
- Front windscreen defroster button (Press the button one more time to
deselect the front windscreen
defroster function. The 'AUTO' sign
will illuminate on the information
display once again.) - Fan speed control button
The selected function will be con-
trolled manually whilst other func-
tions operate automatically.
For your convenience and to improve
the effectiveness of the climate con-
trol, use the AUTO button and set the
temperature to 23°C (73°F).
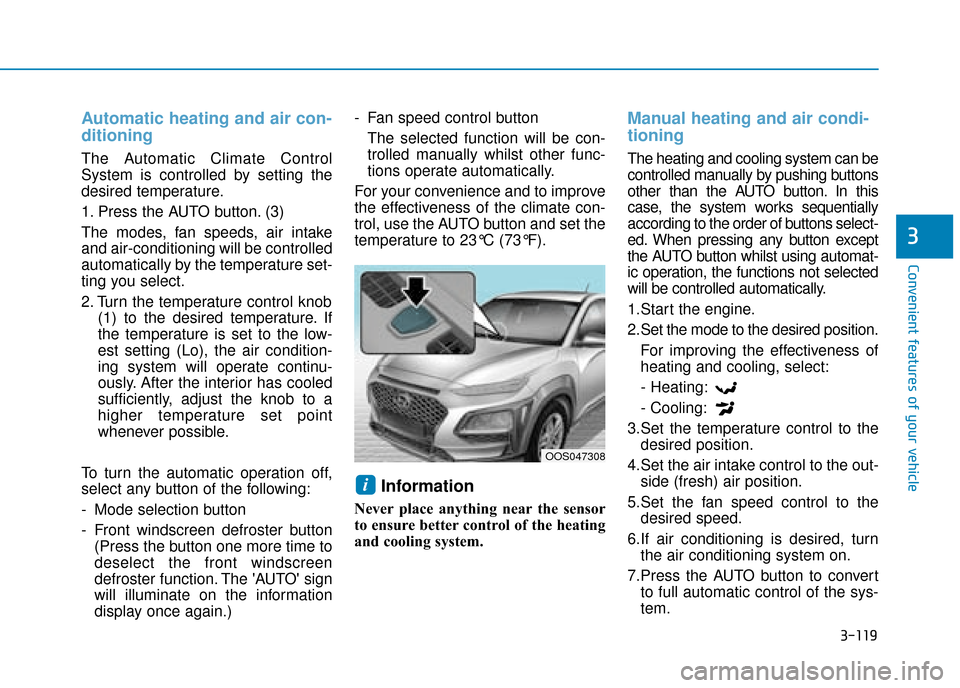
Information
Never place anything near the sensor
to ensure better control of the heating
and cooling system.
Manual heating and air condi-
tioning
The heating and cooling system can be
controlled manually by pushing buttons
other than the AUTO button. In this
case, the system works sequentially
according to the order of buttons select-
ed. When pressing any button except
the AUTO button whilst using automat-
ic operation, the functions not selected
will be controlled automatically.
1.Start the engine.
2.Set the mode to the desired position. For improving the effectiveness of
heating and cooling, select:
- Heating:
- Cooling:
3.Set the temperature control to the desired position.
4.Set the air intake control to the out- side (fresh) air position.
5.Set the fan speed control to the desired speed.
6.If air conditioning is desired, turn the air conditioning system on.
7.Press the AUTO button to convert to full automatic control of the sys-
tem.
i
OOS047308
Page 208 of 526
3-126
W
WI
IN
N D
DS
SC
C R
R E
EE
EN
N
D
D E
EF
FR
R O
O S
ST
T I
IN
N G
G
A
A N
N D
D
D
D E
EF
FO
O G
GG
GI
IN
N G
G
Convenient features of your vehicle
For maximum windscreen defrost-ing, set the temperature control
knob to the highest temperature
setting and the fan control knob to
the highest fan speed. Select the
front defrost button on the climate
control display. After the engine
warm-up period, warm air will be
directed to the front windscreen.
If warm air to the floor is desired whilst defrosting or defogging, set
the mode to the floor-defrost posi-
tion.
Before driving, clear all snow and ice from the windscreen, rear win-
dow, outside rear view mirrors, and
all side windows.
Clear all snow and ice from the bon- net and air inlet in the cowl grill to
improve heater and defroster effi-
ciency and to reduce the probability
of fogging up inside of the wind-
screen.
Information
If the engine temperature is still cold
after starting, then a brief engine warm
up period may be required for the
vented air flow to become warm or hot.
Manual climate control system
To defog inside windscreen
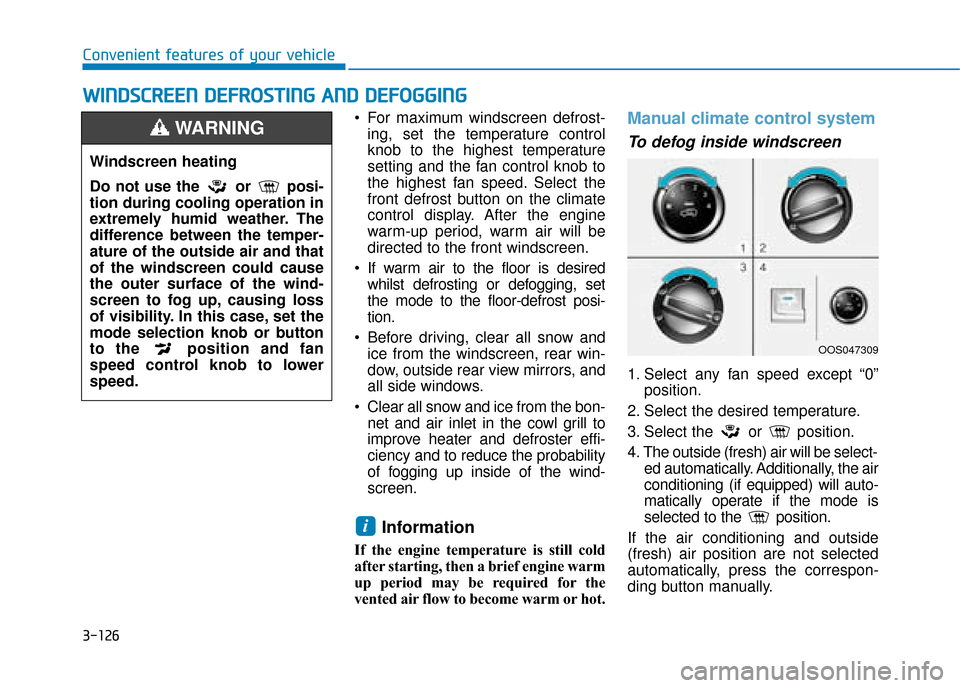
1. Select any fan speed except “0” position.
2. Select the desired temperature.
3. Select the or position.
4. The outside (fresh) air will be select- ed automatically. Additionally, the air
conditioning (if equipped) will auto-
matically operate if the mode is
selected to the position.
If the air conditioning and outside
(fresh) air position are not selected
automatically, press the correspon-
ding button manually.
i
Windscreen heating
Do not use the or posi-
tion during cooling operation in
extremely humid weather. The
difference between the temper-
ature of the outside air and that
of the windscreen could cause
the outer surface of the wind-
screen to fog up, causing loss
of visibility. In this case, set the
mode selection knob or button
to the position and fan
speed control knob to lower
speed.
WARNING
OOS047309
Page 210 of 526
3-128
Auto defogging system
(only for automatic climate
control system, if equipped)
Auto defogging reduces the possibili-
ty of fogging up the inside of the wind-
screen by automatically sensing the
moisture on inside the windscreen.
The auto defogging system operates
when the heater or air conditioning is
on.
Information
The auto defogging system may not
operate normally, when the outside
temperature is below -10 °C.
To cancel or set the Auto Defogging
System, keep the front defroster but-
ton pressed for 3 seconds. The “ADS
OFF” symbol will be shown in the cli-
mate display to inform you that the
system is deactivated. To re-activate
the auto defogging system, follow the
procedure mentioned above and the
“ADS OFF” symbol will disappear.
If the battery has been disconnected
or discharged, it resets to the auto
defogging status.
Information
For efficiency, do not select recirculat-
ed air position whilst the Auto defog-
ging system is operating.
Do not remove the sensor cover
located on the top of the wind-
screen glass.
Damage to system parts could
occur and may not be covered by
your vehicle warranty.
NOTICE
i
i
Convenient features of your vehicle
Page 217 of 526
3-135
Convenient features of your vehicle
3
Some electronic devices cancause electronic interference
when plugged into a vehicle’s
power outlet. These devices may
cause excessive audio static
and malfunctions in other elec-
tronic systems or devices used
in your vehicle.
Push the plug in as far as it will go. If good contact is not made,
the plug may overheat and the
fuse may open.
Plug in battery equipped electrical/ electronic devices with reverse
current protection. The current
from the battery may flow into the
vehicle's electrical/electronic sys-
tem and cause system malfunc-
tion.Wireless mobile phone charg-
ing system (if equipped)
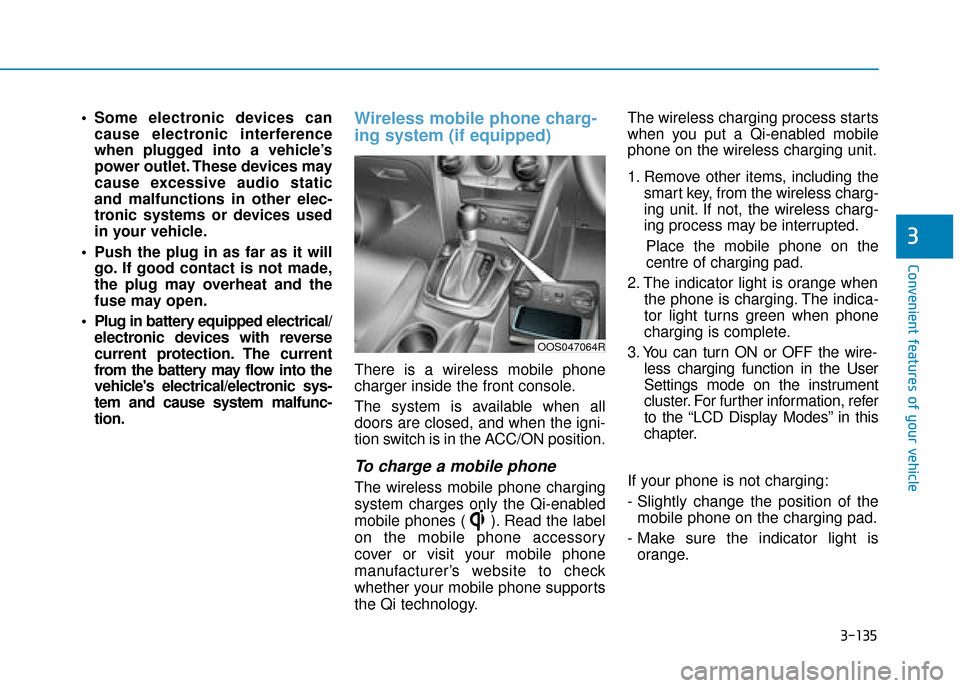
There is a wireless mobile phone
charger inside the front console.
The system is available when all
doors are closed, and when the igni-
tion switch is in the ACC/ON position.
To charge a mobile phone
The wireless mobile phone charging
system charges only the Qi-enabled
mobile phones ( ). Read the label
on the mobile phone accessory
cover or visit your mobile phone
manufacturer’s website to check
whether your mobile phone supports
the Qi technology. The wireless charging process starts
when you put a Qi-enabled mobile
phone on the wireless charging unit.
1. Remove other items, including the
smart key, from the wireless charg-
ing unit. If not, the wireless charg-
ing process may be interrupted.
Place the mobile phone on the
centre of charging pad.
2. The indicator light is orange when the phone is charging. The indica-
tor light turns green when phone
charging is complete.
3. You can turn ON or OFF the wire- less charging function in the User
Settings mode on the instrument
cluster. For further information, refer
to the “LCD Display Modes” in this
chapter.
If your phone is not charging:
- Slightly change the position of the mobile phone on the charging pad.
- Make sure the indicator light is orange.
OOS047064R
Page 218 of 526
3-136
Convenient features of your vehicle
The indicator light will blink orange
for 10 seconds if there is a malfunc-
tion in the wireless charging system.
In this case, temporarily stop the
charging process, and re-attempt to
wirelessly charge your mobile phone
again.
The system warns you with a mes-
sage on the LCD display if the mobile
phone is still on the wireless charging
unit after the engine is turned OFF
and the front door is opened.
Information
For some manufacturers' mobile
phones, the system may not warn you
even though the mobile phone is left
on the wireless charging unit. This is
due to the particular characteristic of
the mobile phone and not a malfunc-
tion of the wireless charging.
The wireless mobile phone charging system may not sup-
port certain mobile phones,
which are not verified for the Qi
specification ( ). When placing your mobile
phone on the charging mat,
position the phone in the middle
of the mat for optimal charging
performance. If your mobile
phone is off to the side, the
charging rate may be less and in
some cases the mobile phone
may experience higher heat con-
duction.
The wireless charging process may temporarily stop, when tem-
perature abnormally increases
inside the wireless mobile
phone charging system. Stop
the charging mobile phone and
wait until temperature falls to a
certain level.
The wireless charging process may temporarily stop when
there is any metallic item, such
as a coin, between the wireless
mobile phone charging system
and the mobile phone.
The charging some mobile phones with the case still
applied, the wireless charging
speed may decrease and the
wireless charging may stop. If the mobile phone is not com-
pletely contacting the charging
pad, wireless charging may not
operate properly.
Some magnetic items like credit cards, phone cards or rail tickets
may be damaged if left with the
mobile phone during the charg-
ing process.
When any mobile phone without a wireless charging function or a
metallic object is placed on the
charging pad, a small noise may
sound. This small sound is due
to the vehicle discerning com-
patibility of the object placed on
the charging pad. It does not
affect your vehicle or the mobile
phone in any way.
Information
If the Engine Start/Stop button is
OFF, the charging also stops.
i
NOTICE
i
Page 219 of 526
![Hyundai Kona 2019 Owners Manual - RHD (UK, Australia) 3-137
Convenient features of your vehicle
3
Clock
Vehicles with Audio system
Select the [SETUP/CLOCK ]button on
the audio system ➟Select [Date/Time].
Set time: Set the time displayed on
the audio s Hyundai Kona 2019 Owners Manual - RHD (UK, Australia) 3-137
Convenient features of your vehicle
3
Clock
Vehicles with Audio system
Select the [SETUP/CLOCK ]button on
the audio system ➟Select [Date/Time].
Set time: Set the time displayed on
the audio s](/manual-img/35/16225/w960_16225-218.png)
3-137
Convenient features of your vehicle
3
Clock
Vehicles with Audio system
Select the [SETUP/CLOCK ]button on
the audio system ➟Select [Date/Time].
Set time: Set the time displayed on
the audio screen.
Time format: Choose between 12- hour and 24-hour time formats.
Vehicles with Navigation system
Select the Settings menu on the
Navigation system ➟Select
[Date/Time].
GPS time: Displays time according to the received GNSS time.
24-hour: Switches to 12 hour or 24 hour.
For more details, please refer to
the separate manual that was sup-
plied with your vehicle.
Clothes hanger (if equipped)
These hangers are not designed to
hold large or heavy items. Do not hang other objects such
as hangers or hard objects
except clothes. Also, do not put
heavy, sharp or breakable
objects in the clothes pockets.
In an accident or when the cur-
tain air bag is inflated, it may
cause vehicle damage or per-
sonal injury.
WARNING
OOS047066
Do not adjust the clock whilst
driving. You may lose your steer-
ing control and cause severe
personal injury or accidents.
WARNING
OOS047065
Page 230 of 526
4-8
Multimedia System
Feature of Your Audio
Head unit
❈The actual features in the vehicle
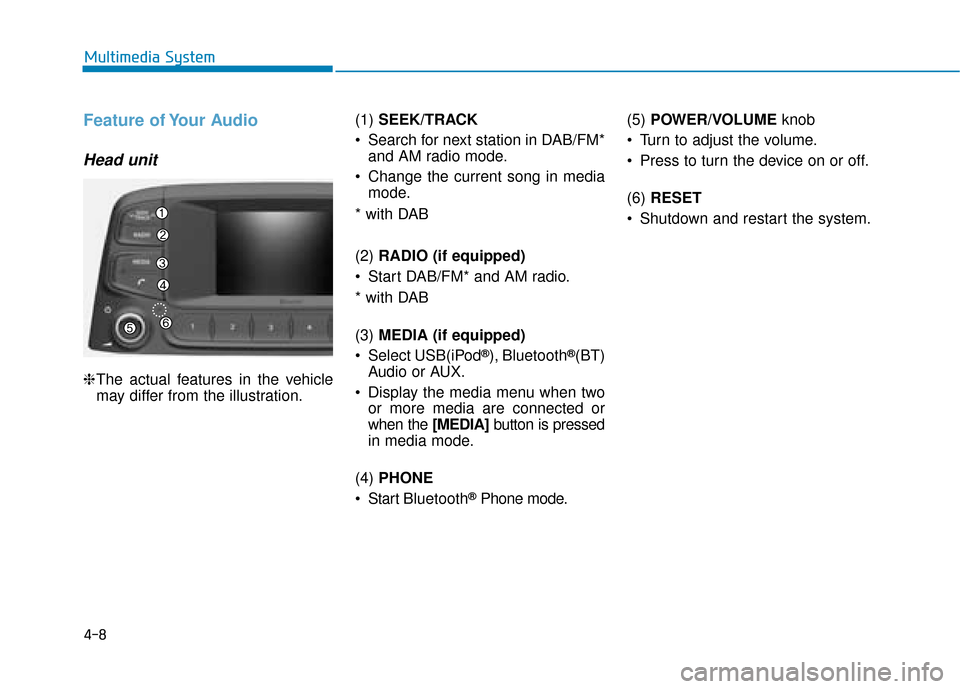
may differ from the illustration. (1)
SEEK/TRACK
Search for next station in DAB/FM* and AM radio mode.
Change the current song in media mode.
* with DAB
(2) RADIO (if equipped)
Start DAB/FM* and AM radio.
* with DAB
(3) MEDIA (if equipped)
Select USB(iPod
®), Bluetooth®(BT)
Audio or AUX.
Display the media menu when two or more media are connected or
when the [MEDIA] button is pressed
in media mode.
(4) PHONE
Start Bluetooth
®Phone mode. (5)
POWER/VOLUME knob
Turn to adjust the volume.
Press to turn the device on or off.
(6) RESET
Shutdown and restart the system.