2019 Hyundai Kona Turn signal
[x] Cancel search: Turn signalPage 382 of 526
6-10
What to do in an emergency
Your vehicle has also been equipped
with a TPMS malfunction indicator to
indicate when the system is not
operating properly. The TPMS mal-
function indicator is combined with
the low tyre pressure telltale. When
the system detects a malfunction,
the telltale will flash for approximate-
ly one minute and then remain con-
tinuously illuminated.
This sequence will continue upon
subsequent vehicle start-ups as long
as the malfunction exists. When the
malfunction indicator is illuminated,
the system may not be able to detect
or signal low tyre pressure as intend-
ed. TPMS malfunctions may occur
for a variety of reasons, including the
installation of replacement or alter-
nate tyres or wheels on the vehicle
that prevent the TPMS from function-
ing properly. Always check the
TPMS malfunction telltale after
replacing one or more tyres or
wheels on your vehicle to ensure that
the replacement or alternate tyres
and wheels allow the TPMS to con-
tinue to function properly. If the TPMS indicator does not illu-
minate for 3 seconds when the
ignition switch is turned to the ON
position or engine is running, or if
it comes on after blinking for
approximately one minute, we rec-
ommend that you contact a
HYUNDAI authorised repairer.
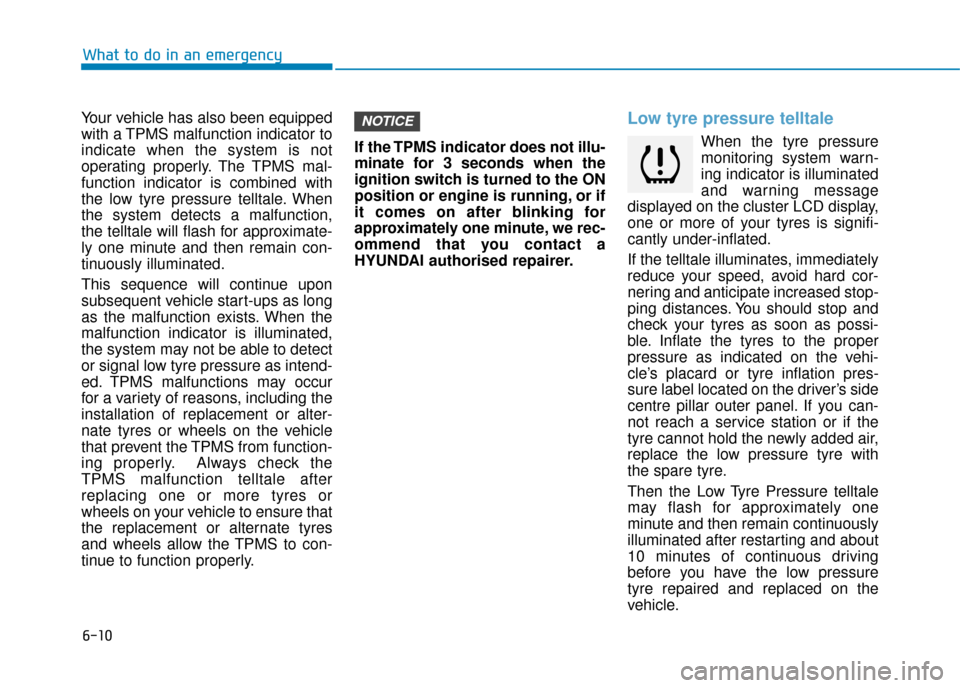
Low tyre pressure telltale
When the tyre pressure
monitoring system warn-
ing indicator is illuminated
and warning message
displayed on the cluster LCD display,
one or more of your tyres is signifi-
cantly under-inflated.
If the telltale illuminates, immediately
reduce your speed, avoid hard cor-
nering and anticipate increased stop-
ping distances. You should stop and
check your tyres as soon as possi-
ble. Inflate the tyres to the proper
pressure as indicated on the vehi-
cle’s placard or tyre inflation pres-
sure label located on the driver’s side
centre pillar outer panel. If you can-
not reach a service station or if the
tyre cannot hold the newly added air,
replace the low pressure tyre with
the spare tyre.
Then the Low Tyre Pressure telltale
may flash for approximately one
minute and then remain continuously
illuminated after restarting and about
10 minutes of continuous driving
before you have the low pressure
tyre repaired and replaced on the
vehicle.
NOTICE
Page 419 of 526
7
Tyres and wheels .................................................7-32
Tyre care ........................................................................\
...7-32
Recommended cold tyre inflation pressures ...........7-33
Check tyre inflation pressure ......................................7-34
Tyre rotation ....................................................................7-34\
Wheel alignment and tyre balance.............................7-35
Tyre replacement ............................................................7-36
Wheel replacement .........................................................7-37
Tyre traction .....................................................................7-3\
7
Tyre maintenance ...........................................................7-37
Tyre sidewall labelling ....................................................7-37
Low aspect ratio tyres...................................................7-41
Fuses ......................................................................7-\
42
Instrument panel fuse replacement ...........................7-43
Engine compartment panel fuse replacement.........7-44
Fuse/Relay panel description ......................................7-46
Light bulbs.............................................................7-59
Headlamp, Low beam assist - Static,
position lamp, turn signal lamp and
daytime running light bulb replacement ...................7-60
Front fog lamp .................................................................7-64
Headlamp and front fog lamp aiming ........................7-64
Side repeater lamp replacement .................................7-69
Rear combination lamp bulb replacement ................7-69
High mounted stop lamp replacement .......................7-71
License plate light bulb replacement .........................7-71
Interior light bulb replacement ....................................7-72
Appearance care ..................................................7-73
Exterior care ....................................................................7-73\
Interior care......................................................................7-\
78
Emission control system .....................................7-80
Crankcase emission control system ...........................7-81
Evaporative emission control system.........................7-81
Exhaust emission control system ...............................7-81
Selective Catalytic Reduction .......................................7-86
Page 424 of 526
7-7
7
Maintenance
Owner maintenance schedule
When you stop for fuel:
Check the engine oil level.
Check the coolant level in theengine coolant reservoir.
Check the windscreen washer fluid level.
Check for low or under-inflated tyres.
Whilst operating your vehicle:
Note any changes in the sound ofthe exhaust or any smell of
exhaust fumes in the vehicle.
Check for vibrations in the steering wheel. Notice if there is any
increased steering effort or loose-
ness in the steering wheel, or
change in its straight-ahead posi-
tion.
Notice if your vehicle constantly turns slightly or “pulls” to one side
when travelling on smooth, level
road.
When stopping, listen and check for unusual sounds, pulling to one
side, increased brake pedal travel
or “hard-to-push” brake pedal.
If any slipping or changes in the operation of your transmission
occurs, check the transmission
fluid level.
Check the dual clutch transmission P (Park) function.
Check the parking brake.
Check for fluid leaks under your vehicle (water dripping from the air
conditioning system during or after
use is normal).
At least monthly:
Check coolant level in the enginecoolant reservoir.
Check the operation of all exterior lights, including the stoplights, turn
signals and hazard warning flash-
ers.
Check the inflation pressures of all tyres including the spare for tyres
that are worn, show uneven wear,
or are damaged.
Check for loose wheel lug nuts.
At least twice a year: (i.e., every Spring and Autumn)
Check radiator, heater and air con-
ditioning hoses for leaks or dam-
age.
Check windscreen washer spray and wiper operation. Clean wiper
blades with a clean cloth damp-
ened with washer fluid.
Check headlamp alignment.
Check muffler, exhaust pipes, shields and clamps.
Check the seat belts for wear and function.
Be careful when checking your
engine coolant level when the
engine is hot. This may result in
coolant being blown out of the
opening and cause serious
burns and other injuries.
WARNING
Page 477 of 526
7-60
Maintenance
Headlamp, Low beam assist –
Static, position lamp, turn sig-
nal lamp and daytime running
light bulb replacement
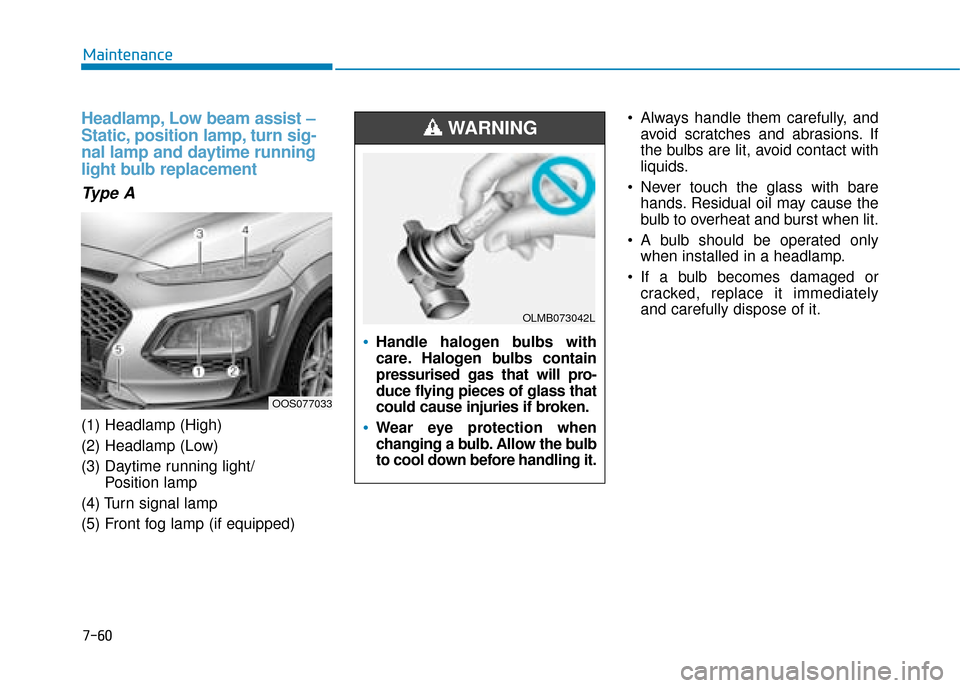
Type A
(1) Headlamp (High)
(2) Headlamp (Low)
(3) Daytime running light/ Position lamp
(4) Turn signal lamp
(5) Front fog lamp (if equipped) Always handle them carefully, and
avoid scratches and abrasions. If
the bulbs are lit, avoid contact with
liquids.
Never touch the glass with bare hands. Residual oil may cause the
bulb to overheat and burst when lit.
A bulb should be operated only when installed in a headlamp.
If a bulb becomes damaged or cracked, replace it immediately
and carefully dispose of it.
OOS077033
Handle halogen bulbs with
care. Halogen bulbs contain
pressurised gas that will pro-
duce flying pieces of glass that
could cause injuries if broken.
Wear eye protection when
changing a bulb. Allow the bulb
to cool down before handling it.
WARNING
OLMB073042L
Page 478 of 526
![Hyundai Kona 2019 Owners Manual - RHD (UK, Australia) 7-61
7
Maintenance
[1] : High beam, [2] : Low beam
Headlamp and position lamp
1. Open the bonnet.
2. Disconnect the negative batterycable.
3. Remove the bulb cover by turning it counterclockwise.
4. D Hyundai Kona 2019 Owners Manual - RHD (UK, Australia) 7-61
7
Maintenance
[1] : High beam, [2] : Low beam
Headlamp and position lamp
1. Open the bonnet.
2. Disconnect the negative batterycable.
3. Remove the bulb cover by turning it counterclockwise.
4. D](/manual-img/35/16225/w960_16225-477.png)
7-61
7
Maintenance
[1] : High beam, [2] : Low beam
Headlamp and position lamp
1. Open the bonnet.
2. Disconnect the negative batterycable.
3. Remove the bulb cover by turning it counterclockwise.
4. Disconnect the bulb socket-con- nector. (for low beam and high
beam)
5. Remove the bulb from the head- lamp assembly.
6. Install a new bulb.
7. Connect the bulb socket-connec- tor. (for low beam and high beam)
8. Install the bulb cover by turning it clockwise.
Turn signal lamp
1. Open the bonnet.
2. Disconnect the negative batterycable.
3. Remove the socket (1) from the assembly by turning the socket
counterclockwise until the tabs on
the socket align with the slots on
the assembly.
4. Remove the bulb from the socket by pressing it in and rotating it
counterclockwise until the tabs on
the bulb align with the slots in the
socket. Pull the bulb out of the
socket. 5. Insert a new bulb by inserting it
into the socket and rotating it until
it locks into place.
6. Install the socket in the assembly by aligning the tabs on the socket
with the slots in the assembly.
7. Push the socket into the assembly and turn the socket clockwise.
Daytime running light
If the LED lamp does not operate, we
recommend that you have the vehi-
cle checked by a HYUNDAI autho-
rised repairer.OOS077038OOS077034
Page 479 of 526
7-62
Maintenance
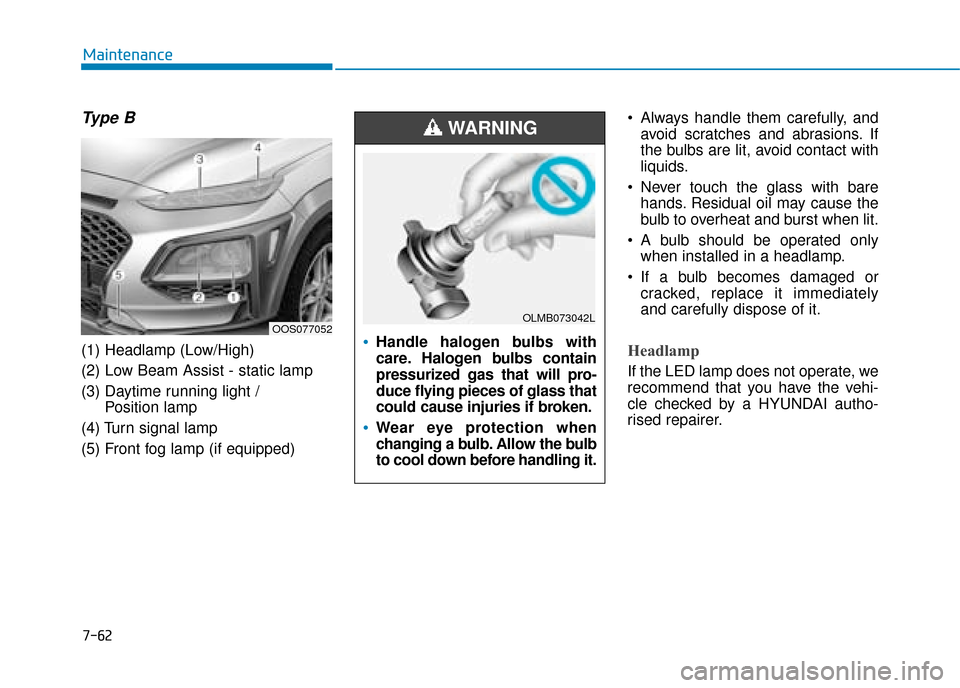
Type B
(1) Headlamp (Low/High)
(2) Low Beam Assist - static lamp
(3) Daytime running light / Position lamp
(4) Turn signal lamp
(5) Front fog lamp (if equipped) Always handle them carefully, and
avoid scratches and abrasions. If
the bulbs are lit, avoid contact with
liquids.
Never touch the glass with bare hands. Residual oil may cause the
bulb to overheat and burst when lit.
A bulb should be operated only when installed in a headlamp.
If a bulb becomes damaged or cracked, replace it immediately
and carefully dispose of it.Headlamp
If the LED lamp does not operate, we
recommend that you have the vehi-
cle checked by a HYUNDAI autho-
rised repairer.
OOS077052Handle halogen bulbs with
care. Halogen bulbs contain
pressurized gas that will pro-
duce flying pieces of glass that
could cause injuries if broken.
Wear eye protection when
changing a bulb. Allow the bulb
to cool down before handling it.
WARNING
OLMB073042L
Page 480 of 526
7-63
7
Maintenance
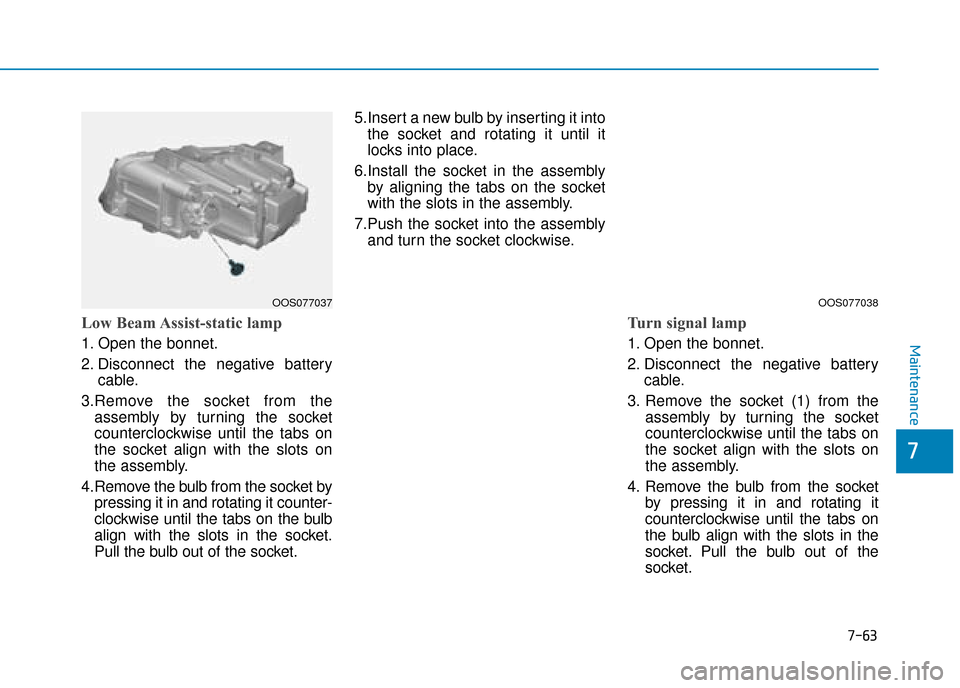
Low Beam Assist-static lamp
1. Open the bonnet.
2. Disconnect the negative batterycable.
3.Remove the socket from the assembly by turning the socket
counterclockwise until the tabs on
the socket align with the slots on
the assembly.
4.Remove the bulb from the socket by pressing it in and rotating it counter-
clockwise until the tabs on the bulb
align with the slots in the socket.
Pull the bulb out of the socket. 5.Insert a new bulb by inserting it into
the socket and rotating it until it
locks into place.
6.Install the socket in the assembly by aligning the tabs on the socket
with the slots in the assembly.
7.Push the socket into the assembly and turn the socket clockwise.
Turn signal lamp
1. Open the bonnet.
2. Disconnect the negative battery cable.
3. Remove the socket (1) from the assembly by turning the socket
counterclockwise until the tabs on
the socket align with the slots on
the assembly.
4. Remove the bulb from the socket by pressing it in and rotating it
counterclockwise until the tabs on
the bulb align with the slots in the
socket. Pull the bulb out of the
socket.
OOS077037 OOS077038
Page 486 of 526
7-69
7
Maintenance
Side repeater lamp replace-
ment
If the light bulb does not operate, we
recommend that you have the vehicle
checked by a HYUNDAI authorised
repairer.
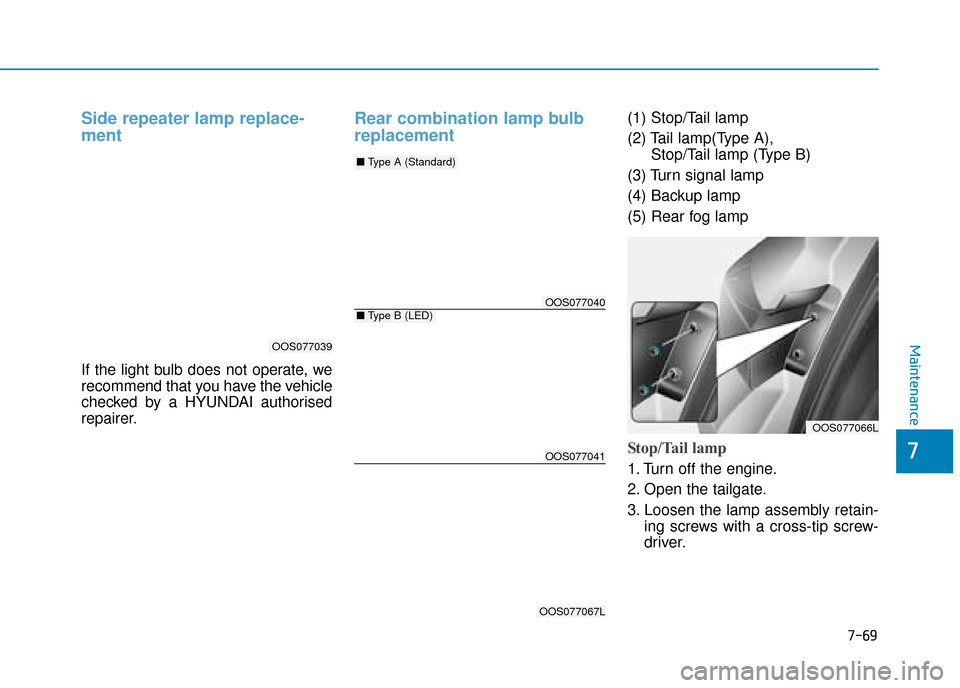
Rear combination lamp bulb
replacement(1) Stop/Tail lamp
(2) Tail lamp(Type A), Stop/Tail lamp (Type B)
(3) Turn signal lamp
(4) Backup lamp
(5) Rear fog lamp
Stop/Tail lamp
1. Turn off the engine.
2. Open the tailgate.
3. Loosen the lamp assembly retain- ing screws with a cross-tip screw-
driver.
OOS077039
OOS077066L
OOS077040
OOS077041
OOS077067L
■Type B (LED)
■Type A (Standard)