2019 Hyundai Kona EV display
[x] Cancel search: displayPage 180 of 540

3-96
Head Up Display Information
1. Turn By Turn (TBT) navigationinformation (if equipped)
2. Speed limit sign (if equipped)
3. Speedometer
4. Cruise control set speed
5. Lane Keeping Assist (LKA) sys- tem information
6. Blind-spot Collision Warning (BCW) system information (if equipped)
Information
If you select the Turn By Turn (TBT)
navigation information as head-up
display contents, the Turn By Turn
(TBT) navigation information will not
be displayed on the LCD Display.
Head Up Display Setting
On the LCD display, you can change
the head-up display settings as fol-
lows.
Display Height
Rotation
Brightness
Content Select
Speed Size
Speed Color
For more details, refer to "LCD
Display" in this chapter.
i
Convenient features of your vehicle
OOSEV048217NOOSEV048142N
Page 187 of 540

3-103
Convenient features of your vehicle
3
The lane change signals will blink 3,
5 or 7 times.
You can activate or deactivate the
One Touch Turn Signal function or
choose the number of blinks (3, 5, or
7) from the User Settings mode in
the LCD display.
For more details, refer to the "LCD
Display" section in this chapter.
Battery saver function
The purpose of this feature is to pre-
vent the battery from being dis-
charged. The system automatically
turns off the parking lamp when the
driver turns the vehicle off and opens
the driver-side door.
With this feature, the parking lamps
will turn off automatically if the driver
parks on the side of road at night.
If necessary, to keep the lamps on
when the vehicle is turned off, perform
the following:
1) Open the driver-side door.
2) Turn the parking lamps OFF andON again using the headlamp
switch on the steering column.
Headlamp delay function
If the POWER button is placed in the
ACC position or the OFF position
with the headlamps ON, the head-
lamps (and/or parking lamps) remain
on for about 5 minutes. However, if
the driver’s door is opened and
closed, the headlights are turned off
after 15 seconds. Also, with the vehi-
cle off if the driver's door is opened
and closed, the headlamps (and/or
parking lamps) are turned off after 15
seconds.
The headlamps (and/or parking
lamps) can be turned off by pressing
the lock button on the smart key
twice or turning the light switch to the
OFF or AUTO position.
You can activate or deactivate the
Headlamp Delay function from the
User Settings mode (Light) on the
LCD display.
For more details, refer to the "LCD
Display" section in this chapter. If the driver exits the vehicle
through another door besides the
driver door, the battery saver func-
tion does not operate and the
headlamp delay function does not
turn OFF automatically.
This may cause the battery to dis-
charge. To avoid battery dis-
charge, turn OFF the headlamps
manually from the headlamp
switch before exiting the vehicle.
NOTICE
Page 188 of 540

3-104
Convenient features of your vehicle
Smart Cornering Lamp
(if equipped)
As an optional safety feature, your
vehicle may be equipped with a
smart cornering lamp. The cornering
lamp turns ON automatically while
driving when the vehicle enters into a
cornering maneuver.
The system will operate under the
following conditions:
When the headlamps are turnedON
When the steering angle is above 25 to 35 degrees (depending on
vehicle speed)
When the vehicle speed is under 25 mph (40 km/h)
Welcome System
Headlamp and parking lamp
When the headlamp (lamp switch in
the headlamp or AUTO position) is
on and all doors (and liftgate) are
locked and closed, the parking lamp
and headlamp will come on for 15
seconds when the door unlock but-
ton is pressed on the smart key.
At this time, if you press the door lock
or unlock button, the parking lamp
and headlamp will turn off immedi-
ately.
You can activate or deactivate the
Welcome Light from the User
Settings mode on the LCD display.
For more details, refer to "LCD
Display" in this chapter.
Interior lamp
When the interior lamp switch is in
the DOOR position and all doors (and
liftgate) are closed and locked, the
room lamp will come on for 30 sec-
onds if any of the below is performed.
When the door unlock button ispressed on the smart key.
When the button of the outside door handle is pressed.
At this time, if you press the door lock
or unlock button, the room lamp will
turn off immediately.
Page 195 of 540

3-111
Convenient features of your vehicle
3
To prevent possible damage tothe washer pump, do not oper-
ate the washer when the fluid
reservoir is empty.
To prevent possible damage to the wipers or windshield, do not
operate the wipers when the
windshield is dry.
To prevent damage to the wiper arms and other components, do
not attempt to move the wipers
manually.
To prevent possible damage to the wipers and washer system,
use anti-freezing washer fluids
in the winter season or cold
weather.
Rear Window Wiper and Washer
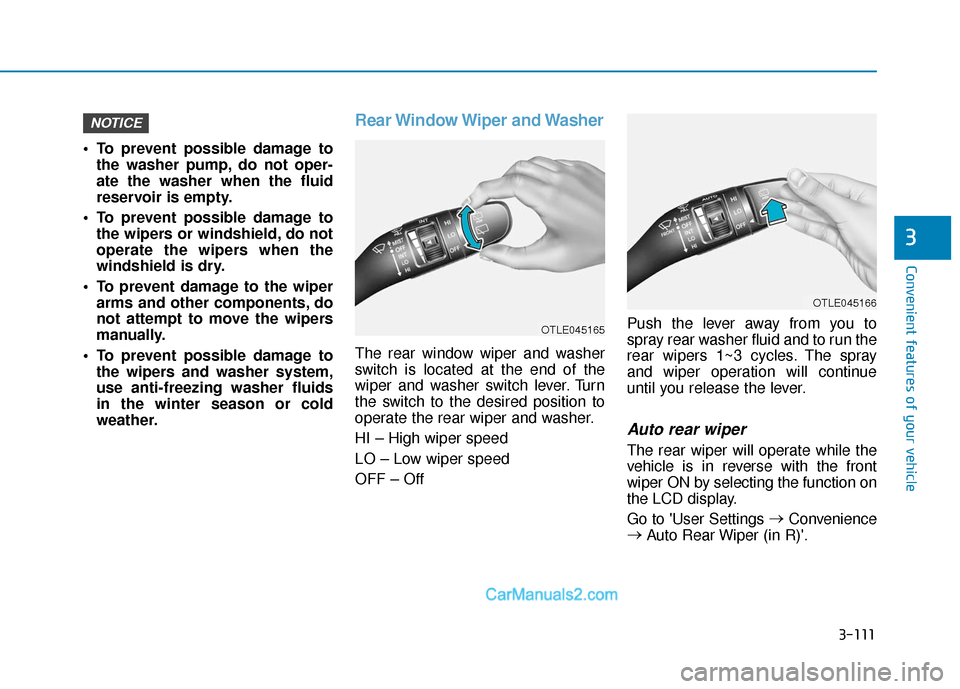
The rear window wiper and washer
switch is located at the end of the
wiper and washer switch lever. Turn
the switch to the desired position to
operate the rear wiper and washer.
HI – High wiper speed
LO – Low wiper speed
OFF – Off Push the lever away from you to
spray rear washer fluid and to run the
rear wipers 1~3 cycles. The spray
and wiper operation will continue
until you release the lever.
Auto rear wiper
The rear wiper will operate while the
vehicle is in reverse with the front
wiper ON by selecting the function on
the LCD display.
Go to 'User Settings
→
Convenience
→ Auto Rear Wiper (in R)'.
NOTICE
OTLE045166
OTLE045165
Page 202 of 540

3-118
Convenient features of your vehicle
Automatic Temperature
Control Mode
The Automatic Climate Control
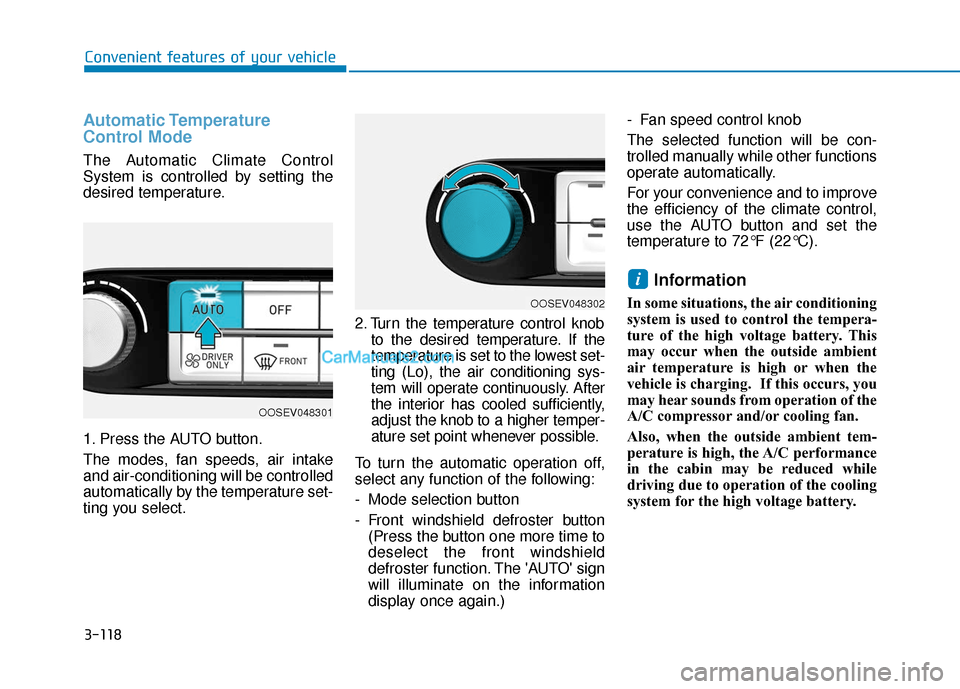
System is controlled by setting the
desired temperature.
1. Press the AUTO button.
The modes, fan speeds, air intake
and air-conditioning will be controlled
automatically by the temperature set-
ting you select.2. Turn the temperature control knob
to the desired temperature. If the
temperature is set to the lowest set-
ting (Lo), the air conditioning sys-
tem will operate continuously. After
the interior has cooled sufficiently,
adjust the knob to a higher temper-
ature set point whenever possible.
To turn the automatic operation off,
select any function of the following:
- Mode selection button
- Front windshield defroster button (Press the button one more time to
deselect the front windshield
defroster function. The 'AUTO' sign
will illuminate on the information
display once again.) - Fan speed control knob
The selected function will be con-
trolled manually while other functions
operate automatically.
For your convenience and to improve
the efficiency of the climate control,
use the AUTO button and set the
temperature to 72°F (22°C).
Information
In some situations, the air conditioning
system is used to control the tempera-
ture of the high voltage battery. This
may occur when the outside ambient
air temperature is high or when the
vehicle is charging. If this occurs, you
may hear sounds from operation of the
A/C compressor and/or cooling fan.
Also, when the outside ambient tem-
perature is high, the A/C performance
in the cabin may be reduced while
driving due to operation of the cooling
system for the high voltage battery.
i
OOSEV048302
OOSEV048301
Page 206 of 540

3-122
Convenient features of your vehicle
Instrument panel vents
The instrument panel vent air flow
can be directed up/down or left/right
using the vent adjustment lever.
The air flow can also be CLOSED
using the vent adjustment lever. The
instrument panel air vents are the
"click-to-close" type.
To CLOSE the instrument panel
vents perform the following:
- For the driver side vents, slide thevent adjustment lever to the left
until it clicks.
- For the passenger side vents, slide the vent adjustment lever to the
right until it clicks.
Temperature control
Turn the knob to the right to increase
the temperature. Turn the knob to the
left to decrease temperature.
The temperature will increase or
decrease by 1°F/0.5°C for each incre-
mental location. When set to the low-
est temperature setting, the air condi-
tioning will operate continuously.
Temperature conversion
If the battery has been discharged or
disconnected, the temperature mode
display will reset to Fahrenheit.
To change the temperature unit from
°F to °C or °C to °F:
- On the instrument cluster, go toUser Settings ➝ Other ➝
Temperature Unit.
- Press the AUTO button while press- ing the OFF button on the climate
control unit for 3 seconds.
The temperature unit on both the
cluster LCD display and climate con-
trol screen will change.
OOSEV048306KOOSEV048302
Page 209 of 540

3-125
Convenient features of your vehicle
3
Air conditioning
Push the A/C button to manually turn
the system on (indicator light will illu-
minate) and off.
HEAT button
Push the HEAT button to turn the
heater on (indicator light will illumi-
nate).
Push the button again to turn the
heater off.
The air conditioner and heater uses
energy from the battery. If you use the
heater or air conditioner for too long,
the EV range can be reduced due to
increased power consumption.
Turn off the heater and air conditioner
if not required.
Climate control informationscreen selection button
Push the climate control information
screen selection button to display cli-
mate control information on the audio
or AVN screen.
OOSEV048308OOSEV048310
OOSEV048309
Page 225 of 540

3-141
Convenient features of your vehicle
3
To charge a cellular phone
The wireless cellular phone charging
system charges only the Qi-enabled
cellular phones ( ). Read the label
on the cellular phone accessory
cover or visit your cellular phone
manufacturer's website to check
whether your cellular phone supports
the Qi technology.
The wireless charging process starts
when you put a Qi-enabled cellular
phone on the wireless charging unit.
1. Remove other items, including thesmart key, from the wireless charg-
ing unit. If not, the wireless charg-
ing process may be interrupted.
Place the cellular phone on the
center of the charging pad ( ).
2. The indicator light is orange when the cellular phone is charging. The
indicator light turns green when
phone charging is complete.
3. You can turn ON or OFF the wire- less charging function in the user
settings mode on the instrument
cluster. For further information,
refer to the "LCD Display Modes"
in this chapter. If your cellular phone is not charging:
- Slightly change the position of the
cellular phone on the charging
pad.
- Make sure the indicator light is orange.
The indicator light will blink orange for
10 seconds if there is a malfunction in
the wireless charging system.
In this case, temporarily stop the
charging process, and re-attempt to
charge your cellular phone again.
The system warns you with a mes-
sage on the LCD display if the cellular
phone is still on the wireless charging
unit after the vehicle is turned OFF
and the front door is opened.
Information
For some manufacturers' cellular
phones, the system may not warn you
even though the cellular phone is left
on the wireless charging unit. This is
due to the particular characteristic of
the cellular phone and not a malfunc-
tion of the wireless charging. The wireless cellular phone
charging system may not sup-
port certain cellular phones,
which are not verified for the Qi
specification ( ).
When placing your cellular phone on the charging mat,
position the phone in the middle
of the mat for optimal charging
performance. If your cell phone
is off to the side, the charging
rate may be less and in some
cases the cell phone may experi-
ence higher heat conduction.
In some cases, the wireless charging may stop temporarily
when the Smart Key is used,
either when starting the vehicle or
locking/unlocking the doors, etc.
When charging certain cellular phones, the charging indicator
may not change to green when
the cell phone is fully charged.
NOTICE
i