2019 Hyundai Kona EV instrument cluster
[x] Cancel search: instrument clusterPage 156 of 540

3-72
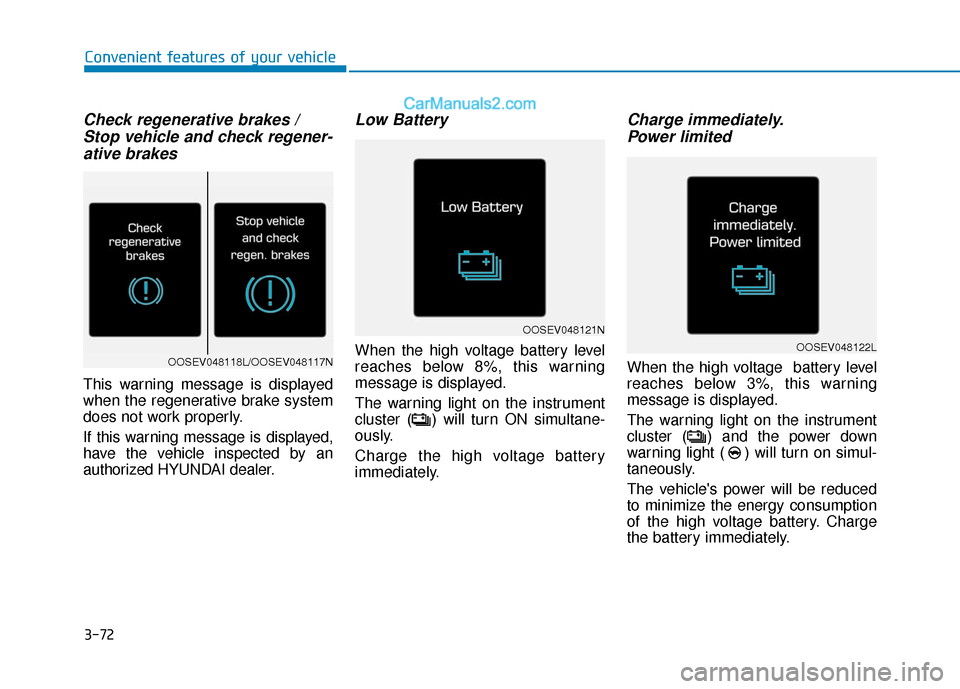
Check regenerative brakes / Stop vehicle and check regener-ative brakes
This warning message is displayed
when the regenerative brake system
does not work properly.
If this warning message is displayed,
have the vehicle inspected by an
authorized HYUNDAI dealer.
Low Battery
When the high voltage battery level
reaches below 8%, this warning
message is displayed.
The warning light on the instrument
cluster ( ) will turn ON simultane-
ously.
Charge the high voltage battery
immediately.
Charge immediately.Power limited
When the high voltage battery level
reaches below 3%, this warning
message is displayed.
The warning light on the instrument
cluster ( ) and the power down
warning light ( ) will turn on simul-
taneously.
The vehicle's power will be reduced
to minimize the energy consumption
of the high voltage battery. Charge
the battery immediately.
Convenient features of your vehicle
OOSEV048121N
OOSEV048122LOOSEV048118L/OOSEV048117N
Page 164 of 540

3-80
Convenient features of your vehicle
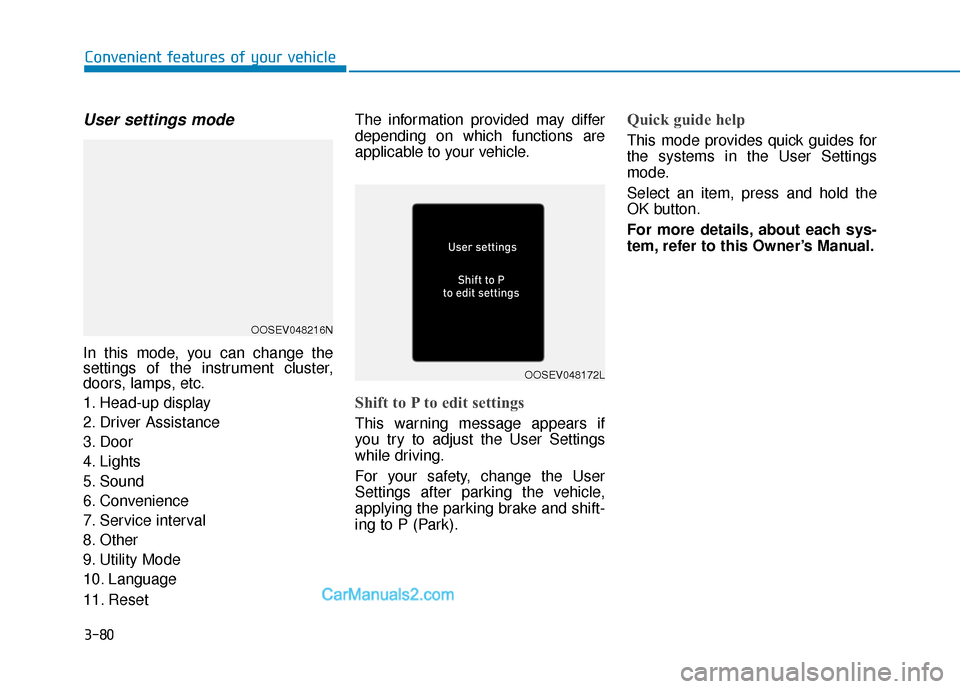
User settings mode
In this mode, you can change the
settings of the instrument cluster,
doors, lamps, etc.
1. Head-up display
2. Driver Assistance
3. Door
4. Lights
5. Sound
6. Convenience
7. Service interval
8. Other
9. Utility Mode
10. Language
11. ResetThe information provided may differ
depending on which functions are
applicable to your vehicle.
Shift to P to edit settings
This warning message appears if
you try to adjust the User Settings
while driving.
For your safety, change the User
Settings after parking the vehicle,
applying the parking brake and shift-
ing to P (Park).
Quick guide help
This mode provides quick guides for
the systems in the User Settings
mode.
Select an item, press and hold the
OK button.
For more details, about each sys-
tem, refer to this Owner’s Manual.
OOSEV048216N
OOSEV048172L
Page 206 of 540

3-122
Convenient features of your vehicle
Instrument panel vents
The instrument panel vent air flow
can be directed up/down or left/right
using the vent adjustment lever.
The air flow can also be CLOSED
using the vent adjustment lever. The
instrument panel air vents are the
"click-to-close" type.
To CLOSE the instrument panel
vents perform the following:
- For the driver side vents, slide thevent adjustment lever to the left
until it clicks.
- For the passenger side vents, slide the vent adjustment lever to the
right until it clicks.
Temperature control
Turn the knob to the right to increase
the temperature. Turn the knob to the
left to decrease temperature.
The temperature will increase or
decrease by 1°F/0.5°C for each incre-
mental location. When set to the low-
est temperature setting, the air condi-
tioning will operate continuously.
Temperature conversion
If the battery has been discharged or
disconnected, the temperature mode
display will reset to Fahrenheit.
To change the temperature unit from
°F to °C or °C to °F:
- On the instrument cluster, go toUser Settings ➝ Other ➝
Temperature Unit.
- Press the AUTO button while press- ing the OFF button on the climate
control unit for 3 seconds.
The temperature unit on both the
cluster LCD display and climate con-
trol screen will change.
OOSEV048306KOOSEV048302
Page 225 of 540

3-141
Convenient features of your vehicle
3
To charge a cellular phone
The wireless cellular phone charging
system charges only the Qi-enabled
cellular phones ( ). Read the label
on the cellular phone accessory
cover or visit your cellular phone
manufacturer's website to check
whether your cellular phone supports
the Qi technology.
The wireless charging process starts
when you put a Qi-enabled cellular
phone on the wireless charging unit.
1. Remove other items, including thesmart key, from the wireless charg-
ing unit. If not, the wireless charg-
ing process may be interrupted.
Place the cellular phone on the
center of the charging pad ( ).
2. The indicator light is orange when the cellular phone is charging. The
indicator light turns green when
phone charging is complete.
3. You can turn ON or OFF the wire- less charging function in the user
settings mode on the instrument
cluster. For further information,
refer to the "LCD Display Modes"
in this chapter. If your cellular phone is not charging:
- Slightly change the position of the
cellular phone on the charging
pad.
- Make sure the indicator light is orange.
The indicator light will blink orange for
10 seconds if there is a malfunction in
the wireless charging system.
In this case, temporarily stop the
charging process, and re-attempt to
charge your cellular phone again.
The system warns you with a mes-
sage on the LCD display if the cellular
phone is still on the wireless charging
unit after the vehicle is turned OFF
and the front door is opened.
Information
For some manufacturers' cellular
phones, the system may not warn you
even though the cellular phone is left
on the wireless charging unit. This is
due to the particular characteristic of
the cellular phone and not a malfunc-
tion of the wireless charging. The wireless cellular phone
charging system may not sup-
port certain cellular phones,
which are not verified for the Qi
specification ( ).
When placing your cellular phone on the charging mat,
position the phone in the middle
of the mat for optimal charging
performance. If your cell phone
is off to the side, the charging
rate may be less and in some
cases the cell phone may experi-
ence higher heat conduction.
In some cases, the wireless charging may stop temporarily
when the Smart Key is used,
either when starting the vehicle or
locking/unlocking the doors, etc.
When charging certain cellular phones, the charging indicator
may not change to green when
the cell phone is fully charged.
NOTICE
i
Page 243 of 540

5-10
Driving your vehicle
To prevent damage to the vehicle:
If the " " indicator turns off
while you are in motion, do not
attempt to shift to the P (Park)
position.
To prevent damage to the vehicle:
When the stop lamp fuse is blown,
you cannot normally start the
vehicle. Replace the fuse with a
new one. If you are not able to
replace the fuse, you can start the
vehicle by pressing and holding
the POWER button for 10 seconds
with the POWER button in the ACC
position.
Do not press the POWER button
for more than 10 seconds except
when the stop lamp fuse is blown.
For your safety always depress
the brake pedal before starting the
vehicle.
Information
If the smart key battery is weak or the
smart key is not operating correctly,
the vehicle still may be started by
pressing the POWER button with the
smart key directly. Hold the smart key
in the position shown and press the
POWER button inward with the
smart key.
Turning Off the Vehicle
1. Depress the brake pedal fully.
2. Shift to P (Park).
3. Apply the parking brake.
4. Press the POWER button to turn the vehicle off.
5. Make sure the " " indicator light on the instrument cluster is
turned off.
i
NOTICE
NOTICE
OOSEV058003K
If the " " indicator light on
the instrument cluster is still
on, the vehicle is not turned off
and can move when the gear is
in any position except P (Park).
CAUTION
Page 252 of 540

5-19
Driving your vehicle
5
Paddle Shifter Operation
The paddle shifter is used to adjust
the regenerative braking level from 0
to 3 during decelerating or braking.
Left side ( ): Increases regener-ative braking and deceleration.
Right side ( ): Decreases regenerative braking and decelera-
tion. One Pedal Driving - If the left side
paddle shifter is held for more than
0.5 second when coasting, the
One Pedal Driving feature is
enabled. This function increases
the regenerative braking effort to a
maximum. Holding the paddle
shifter will enable the vehicle to
come to a complete stop without
applying the foot pedal braking.
Refer to the following pages on
"One Pedal Driving".Information
The paddle shifter does not operate
when:
• The [ ] and [ ] paddleshifters are pulled at the same time.
• The vehicle is decelerating by depressing the brake pedal.
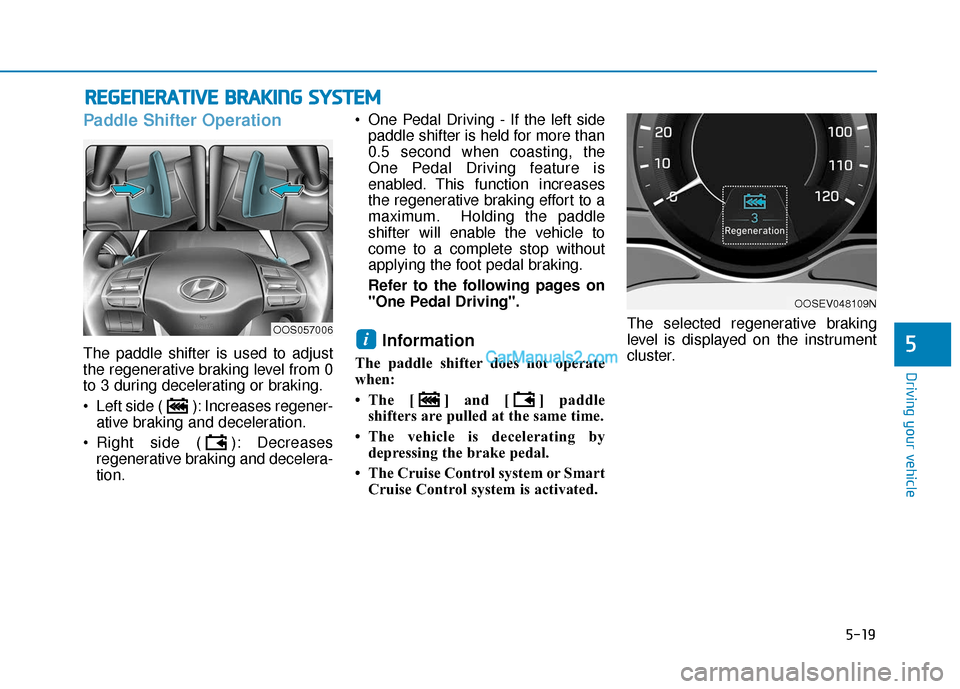
• The Cruise Control system or Smart Cruise Control system is activated. The selected regenerative braking
level is displayed on the instrument
cluster.
i
R
R
E
EG
G E
EN
N E
ER
R A
A T
TI
IV
V E
E
B
B R
RA
A K
KI
IN
N G
G
S
S Y
Y S
ST
T E
EM
M
OOSEV048109N
OOS057006
Page 299 of 540

5-66
Driving your vehicle
Rear Cross-Traffic Collision
Warning (RCCW) (if equipped)
The Rear Cross-Traffic Collision
Warning (RCCW) function monitors
approaching cross traffic from the left
and right side of the vehicle when
your vehicle is in reverse.
Operating conditions
To operate:
Go to the 'User Settings →Driver
Assistance and select Rear Cross-
Traffic Collision Warning' on the LCD
display. For more details, refer to
"LCD Display Modes" in chapter 3.
The system will turn on and standby
to activate. The system will activate
when vehicle speed is below 6 mph
(10 km/h) and with the gear in R
(Reverse).
If the function is deselected from the
instrument cluster, the function will
deactivate.
Information
• The last selected setting (ON or OFF) of the RCCW is remained in
the system.
• The system will activate when vehi- cle speed is below 6.2 mph (10 km/h)
and with the gear shifted to R
(Reverse).
• The RCCW (Rear Cross-Traffic Collision Warning) detecting range
is approximately 1 ft ~ 65 ft (0.5 m ~
20 m) in the direction of both later-
al sides of the vehicle.
An approaching vehicle will be
detected if their vehicle speed is
within 2.5 ~ 22.5 mph (4 km/h ~36
km/h).
Note that the detecting range may
vary under certain conditions. As
always, use caution and pay close
attention to your surroundings
when backing up your vehicle.
Warning type
If the vehicle detected by the sensors
approaches your vehicle, the warn-
ing chime will sound, the warning
light on the outer side view mirror will
blink and a message will appear on
the LCD display.
i
■ Left■ Right
OOSEV058032/OOSEV058033
Page 309 of 540

5-76
Driving your vehicle
LKA Operation
To activate/deactivate the LKA:
With the POWER button in the ON
position, press the LKA switch locat-
ed on the instrument panel on the left
hand side of the steering wheel. The
indicator in the cluster display will ini-
tially illuminate white. This indicates
the LKA is in the READY but NOT
ENABLED state.
If you press the LKA button again,
the indicator on the switch and clus-
ter display will go off.
Always have your hands on
the steering wheel while the
LKA system is activated. If
you continue to drive with
your hands off the steering
wheel after the "Keep hands
on steering wheel" warning
message appears, the system
will turn off automatically.
After then, if you drive with
your hands on the steering
wheel, the control will be acti-
vated again.
The steering wheel is not con-
tinuously controlled so if the
vehicle speed is at a higher
speed when leaving a lane the
vehicle may not be able to be
controlled by the system. The
driver must always follow the
speed limit when using the
system.
If you attach objects to the
steering wheel, the system
may not assist steering or the
hands off alarm may not work
properly.
The system detects lane
markers and controls the
steering wheel by a camera,
therefore, if the lane markers
are hard to detect, the system
may not work properly.
Please refer to "Limitations of
the system".
Do not remove or damage the
related parts of LKA.
You may not hear a warning
sound of LKA because of
excessive audio sound.
If any other warning sound
such as seat belt warning
chime is already generated,
the Lane Keeping Assist
(LKA) system warning may
not sound.
Do not place objects on the
dashboard that reflects light
such as mirrors, white paper,
etc. The system may malfunc-
tion if the sunlight is reflected.
OOSEV058069K