Page 353 of 603
5-57
Driving your vehicle
5
LKA System Operation
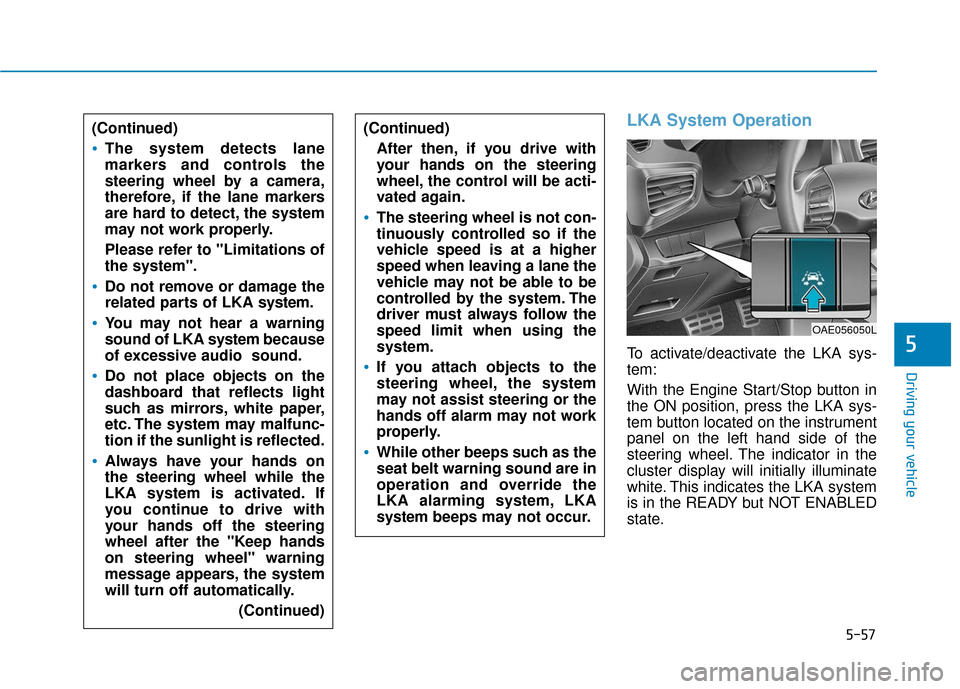
To activate/deactivate the LKA sys-
tem:
With the Engine Start/Stop button in
the ON position, press the LKA sys-
tem button located on the instrument
panel on the left hand side of the
steering wheel. The indicator in the
cluster display will initially illuminate
white. This indicates the LKA system
is in the READY but NOT ENABLED
state.
(Continued)
After then, if you drive with
your hands on the steering
wheel, the control will be acti-
vated again.
The steering wheel is not con-
tinuously controlled so if the
vehicle speed is at a higher
speed when leaving a lane the
vehicle may not be able to be
controlled by the system. The
driver must always follow the
speed limit when using the
system.
If you attach objects to the
steering wheel, the system
may not assist steering or the
hands off alarm may not work
properly.
While other beeps such as the
seat belt warning sound are in
operation and override the
LKA alarming system, LKA
system beeps may not occur.
OAE056050L
(Continued)
The system detects lane
markers and controls the
steering wheel by a camera,
therefore, if the lane markers
are hard to detect, the system
may not work properly.
Please refer to "Limitations of
the system".
Do not remove or damage the
related parts of LKA system.
You may not hear a warning
sound of LKA systembecause
of excessive audio sound.
Do not place objects on the
dashboard that reflects light
such as mirrors, white paper,
etc. The system may malfunc-
tion if the sunlight is reflected.
Always have your hands on
the steering wheel while the
LKA system is activated. If
you continue to drive with
your hands off the steering
wheel after the "Keep hands
on steering wheel" warning
message appears, the system
will turn off automatically.
(Continued)
Page 367 of 603
5-71
Driving your vehicle
5
Cruise Control Operation
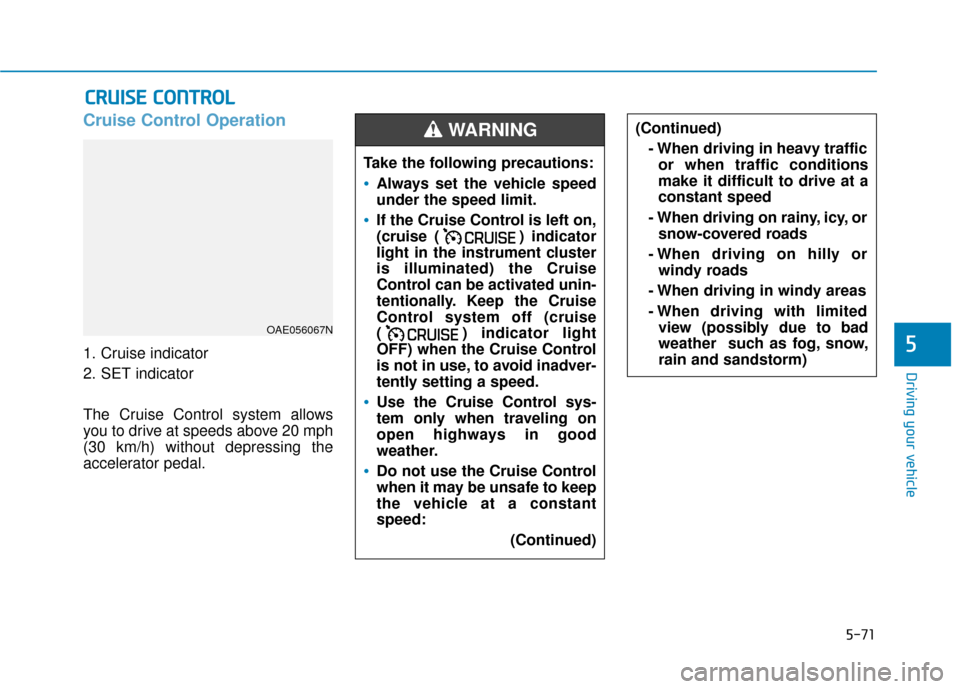
1. Cruise indicator
2. SET indicator
The Cruise Control system allows
you to drive at speeds above 20 mph
(30 km/h) without depressing the
accelerator pedal.
C CR
R U
U I
IS
S E
E
C
C O
O N
NT
TR
R O
O L
L
(Continued)
- When driving in heavy trafficor when traffic conditions
make it difficult to drive at a
constant speed
- When driving on rainy, icy, or snow-covered roads
- When driving on hilly or windy roads
- When driving in windy areas
- When driving with limited view (possibly due to bad
weather such as fog, snow,
rain and sandstorm)
OAE056067N
Take the following precautions:
Always set the vehicle speed
under the speed limit.
If the Cruise Control is left on,
(cruise ( ) indicator
light in the instrument cluster
is illuminated) the Cruise
Control can be activated unin-
tentionally. Keep the Cruise
Control system off (cruise
( ) indicator light
OFF) when the Cruise Control
is not in use, to avoid inadver-
tently setting a speed.
Use the Cruise Control sys-
tem only when traveling on
open highways in good
weather.
Do not use the Cruise Control
when it may be unsafe to keep
the vehicle at a constant
speed:
(Continued)
WARNING
Page 370 of 603
5-74
Driving your vehicle
To temporarily accelerate withthe Cruise Control ON
Depress the accelerator pedal. When
you take your foot off the accelerator,
the vehicle will return to the previ-
ously set speed.
If you push the toggle switch down
(SET-) at the increased speed, the
Cruise Control will maintain the
increased speed.
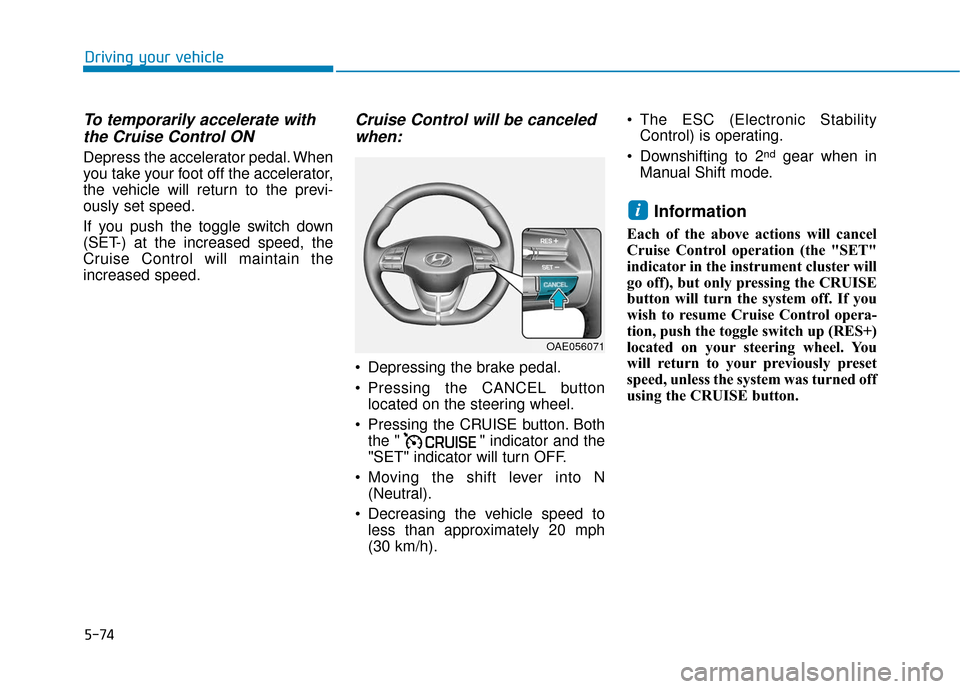
Cruise Control will be canceledwhen:
Depressing the brake pedal.
Pressing the CANCEL button
located on the steering wheel.
Pressing the CRUISE button. Both the " " indicator and the
"SET" indicator will turn OFF.
Moving the shift lever into N (Neutral).
Decreasing the vehicle speed to less than approximately 20 mph
(30 km/h). The ESC (Electronic Stability
Control) is operating.
Downshifting to 2
ndgear when in
Manual Shift mode.
Information
Each of the above actions will cancel
Cruise Control operation (the "SET"
indicator in the instrument cluster will
go off), but only pressing the CRUISE
button will turn the system off. If you
wish to resume Cruise Control opera-
tion, push the toggle switch up (RES+)
located on your steering wheel. You
will return to your previously preset
speed, unless the system was turned off
using the CRUISE button.
i
OAE056071
Page 413 of 603
6-12
What to do in an emergency
If your engine coolant temperature
gauge indicates overheating, you
experience a loss of power, or hear
loud pinging or knocking, the engine
may be overheating. If this happens,
you should:
1. Turn ON the hazard warning flash- er, pull off the road and stop as
soon as it is safe to do so.
2. Place the shift lever in P (Park) and set the parking brake.
3. Make sure that there is no hot steam gushing out of the engine
compartment. When it is safe to
do so, open the engine compart-
ment, and check the water-pump
connector. When the water-pump
connector is disconnected, stop
the engine, re-connect the water-
pump connector, and then re-start
the engine.
4. Set the temperature and the air flow to the maximum, and turn ON
the air conditioner. 5. When the Service warning light
( ) illuminates on the instru-
ment cluster, immediately stop the
engine, and contact an authorized
HYUNDAI dealer. When the
engine warning light ( ) illumi-
nates, or when the coolant or hot
steams gush out of the engine
compartment, leave the engine
compartment opened, while run-
ning the engine. This is to ventilate
the engine compartment and to
cool down the engine.
6. Check the coolant temperature gauge on the instrument cluster to
make sure the coolant temperature
is sufficiently cooled down. Check
the coolant level. When it is insuffi-
cient, check its connection with the
radiator, the heater hose, and the
water pump for any leakage. When
there is no leakage, add the
coolant. However, if the problems
persists, such as the illumination of
the warning lights, leakages, or the
cooling-fan malfunction, which may
overheat the engine, immediately
stop the engine, and have your
vehicle checked by an authorized
HYUNDAI dealer.
I
IF
F
T
T H
H E
E
E
E N
N G
GI
IN
N E
E
O
O V
VE
ER
R H
H E
EA
A T
TS
S
The electric motor for
the cooling fan may
continue to operate
or start up when the
engine is not running
and can cause serious injury.
Keep hands, clothing and tools
away from the rotating fan
blades of the cooling fan.
WARNING
Page 546 of 603
H11
Information
Charging connector AUTO/LOCK
mode
The charging connector is locked in
the inlet at a different period accord-
ing to which mode is selected.
• LOCK mode : The connector lockswhen the charging connector is
plugged into the charging inlet.
• AUTO mode : The connector locks when charging starts.
For more details, refer to "Charging
Connector AUTO/LOCK Mode" in
this chapter. 6. Connect the charging plug to the
electric outlet at a normal charg-
ing station to start charging. 7. Check if the charging indicator
light of the high voltage battery on
the instrument cluster is turned
ON. Charging is not done when
the charging indicator lamp is
OFF.
When the charging connector and charging plug are not connected
properly, reconnect the charging
cable to charge.
i
OLFP0Q4057N
■ Normal Charger
OAEEQ016032
Page 547 of 603
H12
Information
• Even though charging is possiblewith the Engine Start/Stop button in
the ON/START position, for your
safety, start charging when the
Engine Start/Stop button is in the
OFF position and the vehicle shifted
to P (Park). After charging has
started, you can use electrical com-
ponents such as the radio by press-
ing the Engine Start/Stop button to
the ACC or ON position.
• During normal charging, the radio reception may be bad.
• Moving the shift lever from P (Park) to R (Reverse)/N (Neutral)/D
(Drive) stops the charging process.
To restart the charging process,
move the shift lever to P (Park),
place the Engine Start/Stop button
to the OFF position, and disconnect
the charging cable. Then, connect
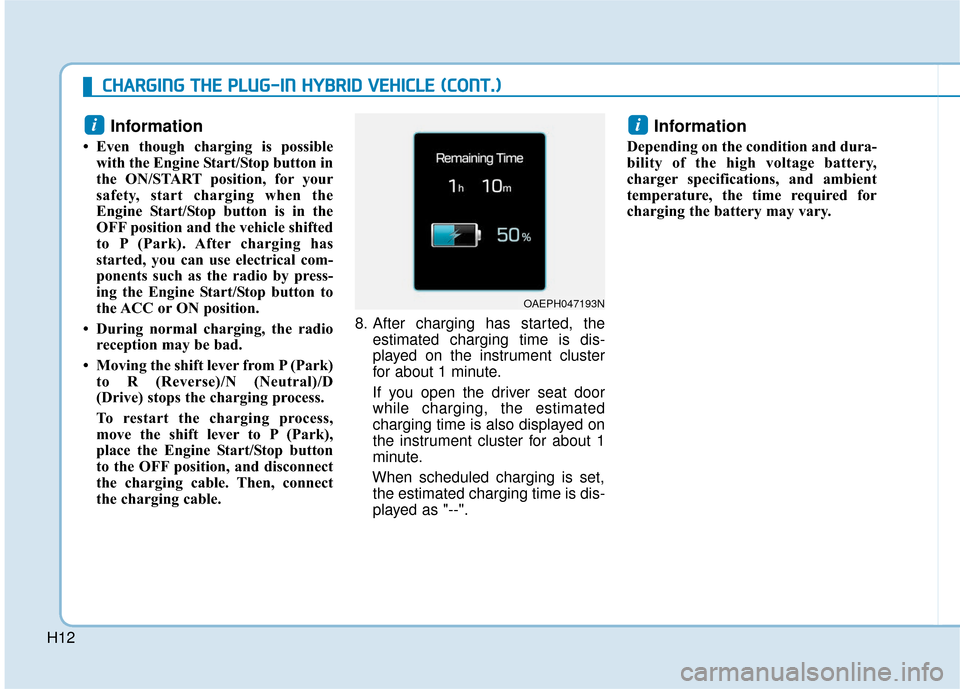
the charging cable. 8. After charging has started, the
estimated charging time is dis-
played on the instrument cluster
for about 1 minute.
If you open the driver seat door
while charging, the estimated
charging time is also displayed on
the instrument cluster for about 1
minute.
When scheduled charging is set, the estimated charging time is dis-
played as "--".
Information
Depending on the condition and dura-
bility of the high voltage battery,
charger specifications, and ambient
temperature, the time required for
charging the battery may vary.
ii
OAEPH047193N
C
C H
H A
AR
RG
G I
IN
N G
G
T
T H
H E
E
P
P L
LU
U G
G-
-I
IN
N
H
H Y
Y B
BR
RI
ID
D
V
V E
EH
H I
IC
C L
LE
E
(
( C
C O
O N
NT
T.
.)
)
Page 554 of 603
H19
Information
Charging connector AUTO/LOCK
mode
The charging connector is locked in
the inlet at a different period accord-
ing to which mode is selected.
• LOCK mode : The connector lockswhen the charging connector is
plugged into the charging inlet.
• AUTO mode : The connector locks when charging starts.
For more details, refer to "Charging
Connector AUTO/LOCK Mode" in
this chapter. 8. Charging starts automatically
(charging lamp blinks). 9. Check if the charging indicator
light of the high voltage battery on
the instrument cluster is turned
ON. Charging is not done when
the charging indicator lamp is
OFF.
When the charging connector is not connected properly, reconnect
the charging cable to charge it
again.
i
OAEEQ016045OAEEQ016032
Page 555 of 603
H20
C
CH
H A
AR
RG
G I
IN
N G
G
T
T H
H E
E
P
P L
LU
U G
G-
-I
IN
N
H
H Y
Y B
BR
RI
ID
D
V
V E
EH
H I
IC
C L
LE
E
(
( C
C O
O N
NT
T.
.)
)
Information
• Even though charging is possible with the Engine Start/Stop button in
the ON/START position, for your
safety, start charging when the
Engine Start/Stop button is in the
OFF position and the vehicle shifted
to P (Park).
After charging has started, you can
use electrical components such as
the radio by pressing the Engine
Start/Stop button to ACC or ON
position.
• Moving the shift lever from P (Park) to R (Reverse)/N (Neutral)/D
(Drive) stops the charging process.
To restart the charging process,
move the shift lever to P (Park),
place the Engine Start/Stop button
to the OFF position, and disconnect
the charging cable. Then, connect
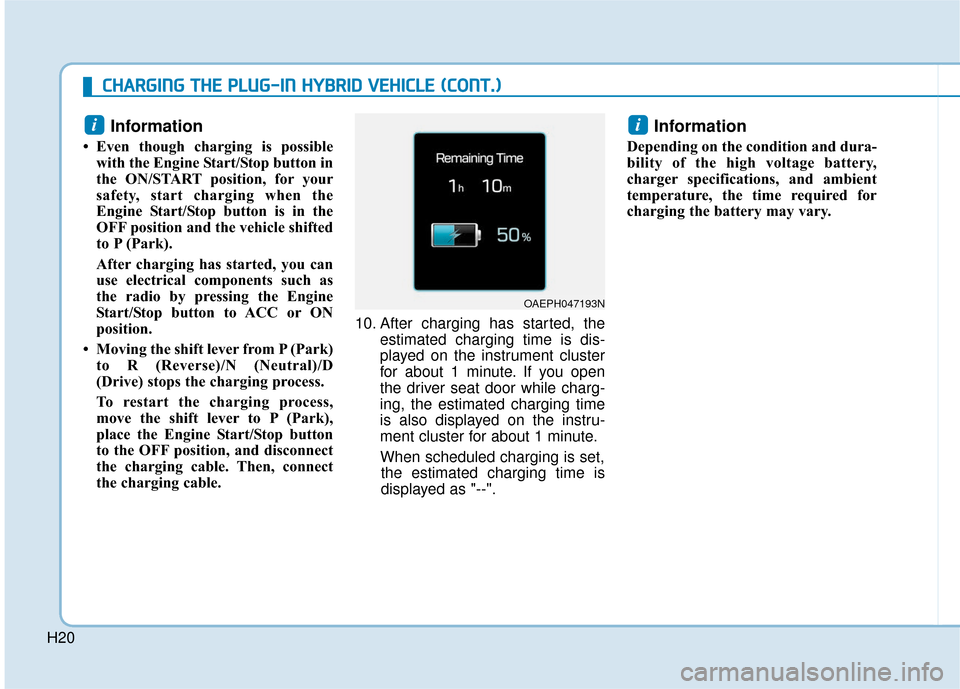
the charging cable. 10. After charging has started, the
estimated charging time is dis-
played on the instrument cluster
for about 1 minute. If you open
the driver seat door while charg-
ing, the estimated charging time
is also displayed on the instru-
ment cluster for about 1 minute.
When scheduled charging is set, the estimated charging time is
displayed as "--".
Information
Depending on the condition and dura-
bility of the high voltage battery,
charger specifications, and ambient
temperature, the time required for
charging the battery may vary.
ii
OAEPH047193N