2019 Hyundai Ioniq Hybrid Ignition
[x] Cancel search: IgnitionPage 248 of 603
3-156
Convenient features of your vehicle
If your phone is not charging:
- Slightly change the position of the cellular phone on the charging pad.
- Make sure the indicator light is orange.
The indicator light will blink orange
for 10 seconds if there is a malfunc-
tion in the wireless charging system.
In this case, temporarily stop the
charging process, and re-attempt to
wirelessly charge your cellular phone
again.
The system warns you with a mes-
sage on the LCD display if the cellu-
lar phone is still on the wireless
charging unit after the ignition switch
is in the OFF position and the front
door is opened.
Information
For some manufacturers' cellular
phones, the system may not warn you
even though the cellular phone is left
on the wireless charging unit. This is
due to the particular characteristic of
the cellular phone and not a malfunc-
tion of the wireless charging. The wireless cellular phone
charging system may not sup-
port certain cellular phones,
which are not verified for the Qi
specification ( ).
When placing your cellular phone on the charging mat,
position the phone in the middle
of the mat for optimal charging
performance. If your cell phone
is off to the side, the charging
rate may be less and in some
cases the cell phone may experi-
ence higher heat conduction.
In some cases, the wireless charging may stop temporarily
when the Smart Key is used,
either when starting the vehicle
or locking/unlocking the doors,
etc.
When charging certain cellular phones, the charging indicator
may not change to green when
the cell phone is fully charged.
(Continued)(Continued)
The wireless charging process
may temporarily stop, when tem-
perature abnormally increases
inside the wireless cellular
phone charging system. The
wireless charging process
restarts, when temperature falls
to a certain level.
The wireless charging process may temporarily stop when
there is any metallic item, such
as a coin, between the wireless
cellular phone charging system
and a cellular phone.
For certain cellular phone with their own protection, the wire-
less charging speed may
decrease and the wireless
charging may stop.
If the cellular phone has a thick cover, the wireless charging may
not be possible.
If the cell phone is not complete- ly contacting the charging pad,
wireless charging may not oper-
ate properly.
(Continued)
NOTICE
i
Page 249 of 603
3-157
Convenient features of your vehicle
3
(Continued)
Some magnetic items like creditcards, phone cards or rail tickets
may be damaged if left with the
cellular phone during the charg-
ing process.
If the cellular phone without the wireless charging function or
the metallic items are placed on
the charging pad, it may cause
slight noise. This noise does not
affect the cellular phone and the
vehicle, because this noise is an
operating sound during deter-
mining the item on the charging
pad.
If the ignition switch is in the OFF position, the charging also
stops.Clock
Vehicles with Audio system
Select the [SETUP] button on the
audio system ➟ Select [Date/Time].
Set time: Set the time displayed on the audio screen.
Time format: Choose between 12- hour and 24-hour time formats.
Vehicles with Navigation system
Select the Settings menu on the
Navigation system ➟Select
[Date/Time].
GPS time: Displays time according to the received GNSS time.
24-hour: Switches to 12 hour or 24 hour.
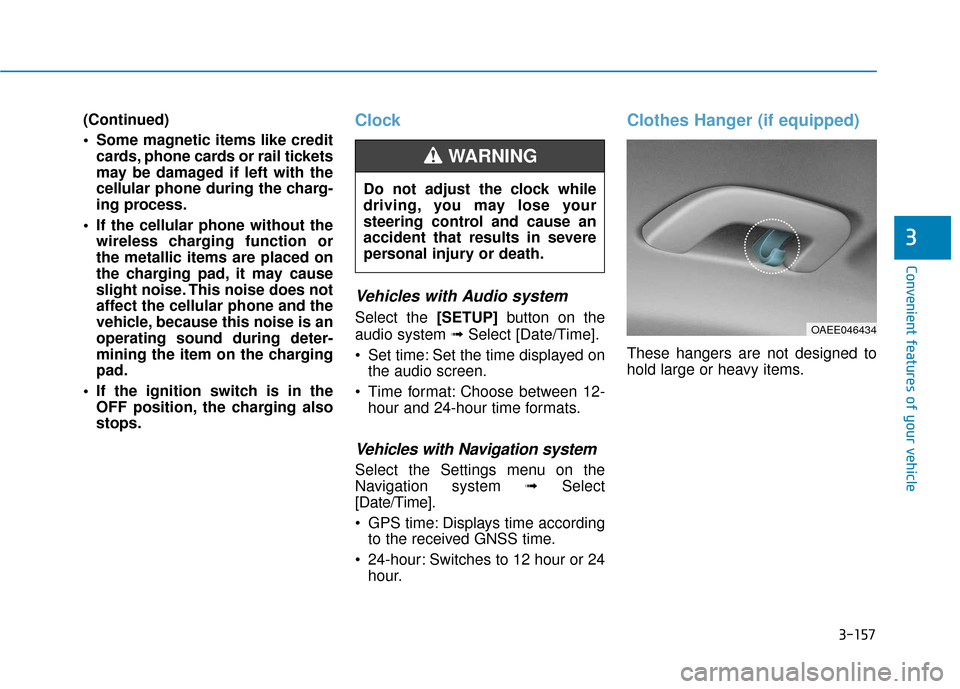
Clothes Hanger (if equipped)
These hangers are not designed to
hold large or heavy items.
Do not adjust the clock while
driving, you may lose your
steering control and cause an
accident that results in severe
personal injury or death.
WARNING
OAEE046434
Page 267 of 603
4-15
Multimedia System
4
Information
Turn on the car ignition before using
this device. Do not operate the audio
system for long periods of time with
the ignition turned off as such opera-
tions may lead to battery discharge. Do not subject the device to
severe shock or impact. Direct
pressure onto the front side of
the monitor may cause damage
to the LCD or touch screen.
When cleaning the device, make sure to turn off the device and
use a dry and smooth cloth.
Never use rough materials,
chemical cloths, or solvents
(alcohol, benzene, thinners,
etc.). As such materials may
damage the device panel or
cause color/quality deteriora-
tion.
Do not place beverages close to the audio system. Spilling bever-
ages may lead to system mal-
function.
Placing the audio system within an electromagnetic environment
may result in noise interference.
Information
In this case of product malfunction,
please contact your dealer or vehicle
service center.
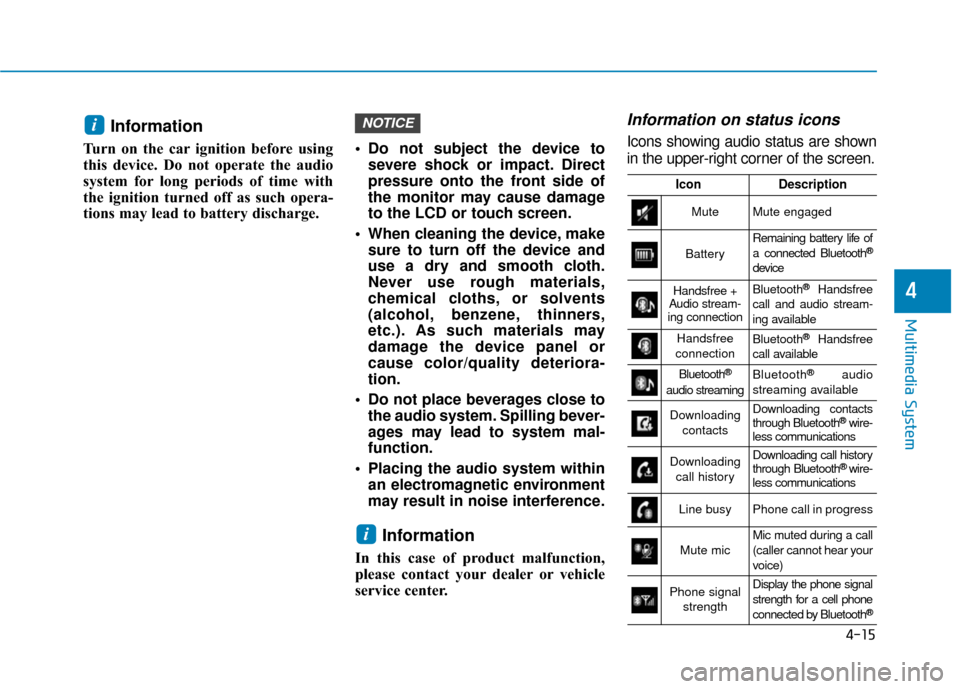
Information on status icons
Icons showing audio status are shown
in the upper-right corner of the screen.
i
NOTICEi
IconDescription
MuteMute engaged
Battery
Remaining battery life of
a connected Bluetooth®
device
Handsfree +
Audio stream-
ing connectionBluetooth®Handsfree
call and audio stream-
ing available
Handsfree
connectionBluetooth®Handsfree
call available
Bluetooth®
audio streaming
Bluetooth®audio
streaming available
Downloading contactsDownloading contacts
through Bluetooth®wire-
less communications
Downloading
call historyDownloading call history
through Bluetooth® wire-
less communications
Line busyPhone call in progress
Mute micMic muted during a call
(caller cannot hear your
voice)
Phone signal
strengthDisplay the phone signal
strength for a cell phone
connected by Bluetooth
®
Page 318 of 603
5-22
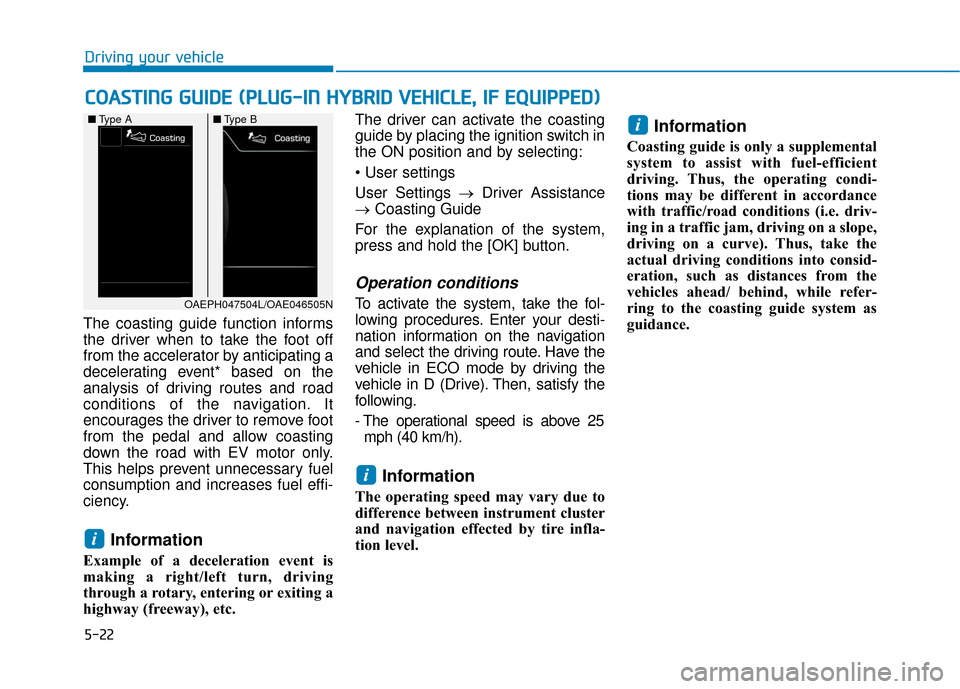
The coasting guide function informs
the driver when to take the foot off
from the accelerator by anticipating a
decelerating event* based on the
analysis of driving routes and road
conditions of the navigation. It
encourages the driver to remove foot
from the pedal and allow coasting
down the road with EV motor only.
This helps prevent unnecessary fuel
consumption and increases fuel effi-
ciency.
Information
Example of a deceleration event is
making a right/left turn, driving
through a rotary, entering or exiting a
highway (freeway), etc. The driver can activate the coasting
guide by placing the ignition switch in
the ON position and by selecting:
User Settings →
Driver Assistance
→ Coasting Guide
For the explanation of the system,
press and hold the [OK] button.
Operation conditions
To activate the system, take the fol-
lowing procedures. Enter your desti-
nation information on the navigation
and select the driving route. Have the
vehicle in ECO mode by driving the
vehicle in D (Drive). Then, satisfy the
following.
- The operational speed is above 25 mph (40 km/h).
Information
The operating speed may vary due to
difference between instrument cluster
and navigation effected by tire infla-
tion level.
Information
Coasting guide is only a supplemental
system to assist with fuel-efficient
driving. Thus, the operating condi-
tions may be different in accordance
with traffic/road conditions (i.e. driv-
ing in a traffic jam, driving on a slope,
driving on a curve). Thus, take the
actual driving conditions into consid-
eration, such as distances from the
vehicles ahead/ behind, while refer-
ring to the coasting guide system as
guidance.
i
i
i
C C O
O A
AS
ST
T I
IN
N G
G
G
G U
U I
ID
D E
E
(
( P
P L
LU
U G
G-
-I
IN
N
H
H Y
Y B
BR
RI
ID
D
V
V E
EH
H I
IC
C L
LE
E ,
,
I
IF
F
E
E Q
Q U
UI
IP
P P
PE
ED
D )
)
Driving your vehicle
OAEPH047504L/OAE046505N
■
Type A ■Type B
Page 354 of 603

5-58
Driving your vehicle
Information
If the indicator (white) is activated
from the previous ignition cycle, the
system will turn ON without any addi-
tional control. If you press the LKA
system button again, the indicator on
the cluster goes off. The color of indicator will
change depending on the
condition of LKA system.
- White : Sensor does not detect
lane markers or vehicle
speed is under 40 mph (64
km/h).
- Green : Sensor detects lane mark- ers and the system is able
to control vehicle steering.
LKA system activation
To see the LKA system screen onthe LCD display in the cluster,
select SCC/LKA mode ( ) for
cluster type A or ASSIST mode
( ) for cluster type B. For more
information, refer to "LCD Display
Modes" in chapter 3.
When both lane markers are detected and all the conditions to
activate the LKA system are satis-
fied, a green steering wheel indica-
tor will illuminate and the LKA sys-
tem indicator light will change from
white to green. This indicates that
the LKA system is in the
ENABLED state and the steering
wheel will be able to be controlled.
i
OAE058122L
The Lane Keeping Assist (LKA)
System is a system to prevent
the driver from leaving the lane.
However, the driver should not
solely rely on the system but
always check the road condi-
tions when driving.
WARNING
Page 357 of 603
5-61
Driving your vehicle
Warning Light and Message
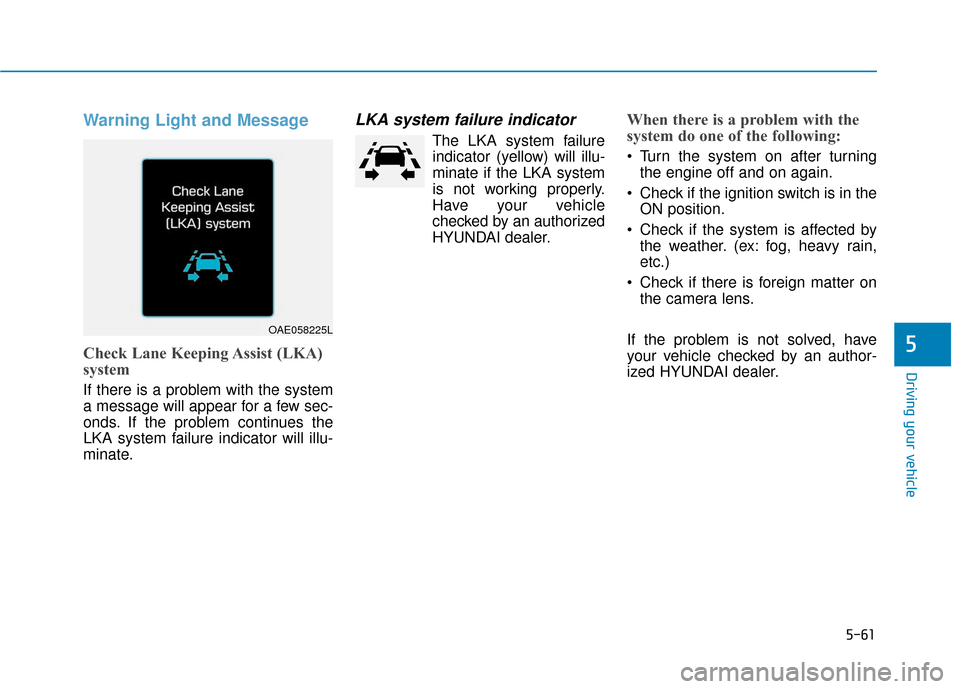
Check Lane Keeping Assist (LKA)
system
If there is a problem with the system
a message will appear for a few sec-
onds. If the problem continues the
LKA system failure indicator will illu-
minate.
LKA system failure indicator
The LKA system failureindicator (y ellow) will illu-
minate if the LKA system
is not working properly.
Have your vehicle
checked by an authorized
HYUNDAI dealer.
When there is a problem with the
system do one of the following:
Turn the system on after turning the engine off and on again.
Check if the ignition switch is in the ON position.
Check if the system is affected by the weather. (ex: fog, heavy rain,
etc.)
Check if there is foreign matter on the camera lens.
If the problem is not solved, have
your vehicle checked by an author-
ized HYUNDAI dealer.
5
OAE058225L
Page 368 of 603
5-72
Driving your vehicle
Information
• During normal cruise control opera-tion, when the SET switch is activat-
ed or reactivated after applying the
brakes, the cruise control will ener-
gize after approximately 3 seconds.
This delay is normal.
• Before activating the cruise control function, the system will check to
verify that the brake switch is oper-
ating normally. Depress the brake
pedal at least once after turning ON
the ignition or starting the engine.
To set Cruise Control speed
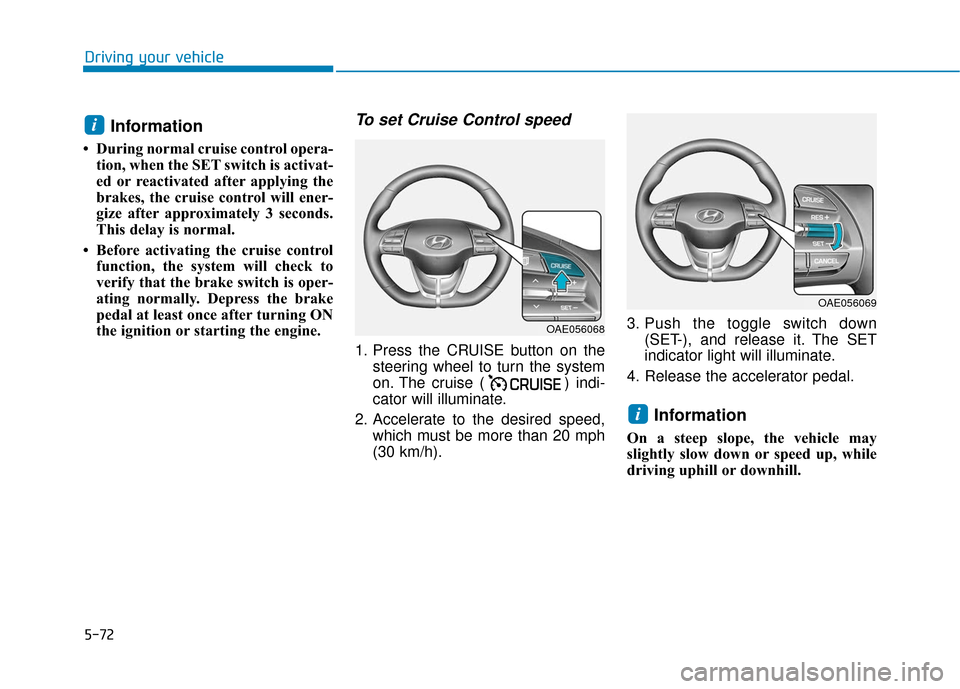
1. Press the CRUISE button on the steering wheel to turn the system
on. The cruise ( ) indi-
cator will illuminate.
2. Accelerate to the desired speed, which must be more than 20 mph
(30 km/h). 3. Push the toggle switch down
(SET-), and release it. The SET
indicator light will illuminate.
4. Release the accelerator pedal.
Information
On a steep slope, the vehicle may
slightly slow down or speed up, while
driving uphill or downhill.
i
i
OAE056068
OAE056069
Page 395 of 603

5-99
Driving your vehicle
5
Check spark plugs and ignitionsystem
Inspect your spark plugs as
described in chapter 7 and replace
them if necessary. Also check all
ignition wiring and components to be
sure they are not cracked, worn or
damaged in any way.
Use approved window washeranti-freeze in system
To keep the water in the window
washer system from freezing, add an
approved window washer anti-freeze
solution in accordance with instruc-
tions on the container. Window wash-
er anti-freeze is available from an
authorized HYUNDAI dealer and
most auto parts outlets. Do not use
engine coolant or other types of anti-
freeze as these may damage the
paint finish.
Do not let your parking brakefreeze
Under some conditions your parking
brake can freeze in the engaged
position. This is most likely to happen
when there is an accumulation of
snow or ice around or near the rear
brakes or if the brakes are wet. If
there is a risk the parking brake may
freeze, apply it only temporarily while
you put the gear selector lever in P
and block the rear wheels so the car
cannot roll. Then release the parking
brake.
Do not let ice and snow accu-mulate underneath
Under some conditions, snow and
ice can build up under the fenders
and interfere with the steering. When
driving in severe winter conditions
where this may happen, you should
periodically check underneath the
car to be sure the movement of the
front wheels and the steering com-
ponents is not obstructed.
Don't place foreign objects ormaterials in the engine com-partment
Placement of foreign object or mate-
rials which prevent cooling of the
engine, in the engine compartment,
may cause a failure or combustion.
The manufacturer is not responsible
for the damage caused by such
placement.
To keep locks from freezing
To keep the locks from freezing,
squirt an approved de-icer fluid or
glycerine into the key opening. If a
lock is covered with ice, squirt it with
an approved de-icing fluid to remove
the ice. If the lock is frozen internally,
you may be able to thaw it out by
using a heated key. Handle the heat-
ed key with care to avoid injury.