Page 368 of 555
5-101
Driving your vehicle
5
Use approved window washeranti-freeze in system
To keep the water in the window
washer system from freezing, add an
approved window washer anti-freeze
solution in accordance with instruc-
tions on the container. Window wash-
er anti-freeze is available from an
authorized HYUNDAI dealer and
most auto parts outlets. Do not use
coolant or other types of anti-freeze
as these may damage the paint fin-
ish.
Do not let your parking brakefreeze
Under some conditions your parking
brake can freeze in the engaged
position. This is most likely to happen
when there is an accumulation of
snow or ice around or near the rear
brakes or if the brakes are wet. If
there is a risk the parking brake may
freeze, apply it only temporarily while
you shift to P (Park) and block the
rear wheels so the car cannot roll.
Then release the parking brake.
Do not let ice and snow accu-mulate underneath
Under some conditions, snow and
ice can build up under the fenders
and interfere with the steering. When
driving in severe winter conditions
where this may happen, you should
periodically check underneath the
car to be sure the movement of the
front wheels and the steering com-
ponents is not obstructed.
Don't place foreign objects ormaterials in the motor compart-ment
Placement of foreign object or mate-
rials which prevent cooling of the
vehicle, in the motor compartment,
may cause a failure. The manufactur-
er is not responsible for the damage
caused by such placement.
To keep locks from freezing
To keep the locks from freezing,
squirt an approved de-icer fluid or
glycerine into the key opening. If a
lock is covered with ice, squirt it with
an approved de-icing fluid to remove
the ice. If the lock is frozen internally,
you may be able to thaw it out by
using a heated key. Handle the heat-
ed key with care to avoid injury.
Page 417 of 555
7-20
Maintenance
W
WI
IP
P E
ER
R
B
B L
LA
A D
DE
ES
S
Blade Inspection
Contamination of either the wind-
shield or the wiper blades with for-
eign matter can reduce the effective-
ness of the windshield wiper func-
tionality. Common sources of con-
tamination are insects, tree sap, and
hot wax treatments used by some
commercial car washes. If the blades
are not wiping properly, clean both
the window and the blades with a
clean cloth dampened with washer
fluid. To prevent damage to the wiper
blades, arms or other compo-
nents, do not:
Use gasoline, kerosene, paint
thinner, or other solvents on or
near them.
Attempt to move the wipers manually.
Use non-specified wiper blades.
Information
Commercial hot waxes applied by
automatic car washes have been
known to make the windshield diffi-
cult to clean.
Blade Replacement
When the wipers no longer clean
adequately, the blades may be worn
or cracked, and require replacement.
To prevent damage to the wiper
arms or other components, do not
attempt to move the wipers manu-
ally.
The use of a non-specified wiper
blade could result in wiper mal-
function and failure.
NOTICE
NOTICE
i
NOTICE
Page 422 of 555
7-25
7
Maintenance
By jump starting
After a jump start from a good bat-
tery, drive the vehicle for 20-30 min-
utes before it is shutoff. The vehicle
may not restart if you shut it off
before the battery had a chance to
adequately recharge. See "Jump
Starting" in chapter 6 for more infor-
mation on jump starting procedures.
Information
An inappropriately disposedbattery can be harmful to
the environment and human
health.
Dispose the battery according to your
local law(s) or regulation.
Reset Features
Some items need to be reset after
the battery has been discharged or
the battery has been disconnected.
See chapter 3 for:
Power Windows
Trip Computer
Climate Control System
Clock
Audio System
Sunroof
Driver Position Memory System
i
(Continued)
Watch the battery during
charging, and stop or reduce
the charging rate if the battery
cells begin boiling violently.
The negative battery cable
must be removed first and
installed last when the battery
is disconnected. Disconnect
the battery charger in the fol-
lowing order:
(1) Turn off the battery charg- er main switch.
(2) Unhook the negative
clamp from the negative
battery terminal.
(3) Unhook the positive clamp from the positive battery
terminal.
Always use a genuine
HYUNDAI approved battery
when you replace the battery.
Page 446 of 555
7-49
7
Maintenance
Fuse NameFuse RatingProtected Component
SUNROOF20ASunroof Motor
P/WDW RH25APower Window (RH) Relay, Passenger Safety Power Window Switch
P/WDW LH25ADriver Safety Power Window Module
PDM27.5ASmart Key Control Module, Start/Stop Button Switch
BRAKE
SWITCH7.5AStop Lamp Switch, Smart Key Control Module
OBC10AOBC
A/CON7.5AA/C Control Module
WASHER15AMultifunctioEt Warmer Control Module, Front Air Ventilation Seat Control Module
S/HEATER FRT25ACharging Connector Lamp, Quick Charging Connector Lamp
CHARGER10ACCM Unit, Charging Connector Lamp, ICM Relay Box (Charging Connector Lock/Unlock Relay)
P/SEAT DRV30ADriver Seat Manual Switch, Driver IMS Module
AMP30AAMP
Instrument panel fuse panel
Page 449 of 555
7-52
Maintenance
Motor compartment fuse panel
Fuse NameFuse RatingProtected Component
MAIN180AEPCU (Low Voltage DC-DC Converter), E/R Junction Block (Fuse - H/LAMP HI,
POWER OUTLET1, AHB2, AHB1)
MDPS80AMDPS Unit
REAR
HEATED150AE/R Junction Block (Rear Defogger Relay)
BLOWER40AE/R Junction Block (Blower Relay)
B+360AIGPM (Fuse - ARISU (4CH), IPS (1CH/2CH))
B+450AIGPM (Fuse - P/WINDOW LH/RH, TAILGATE OPEN, SUNROOF, AMP, CHARGER, OBC,
S/HEATER FRT, P/SEAT DRV)
C/FAN60AE/R Junction Block (Cooling Fan Relay)
B+260AIGPM (Fuse - S/HEATER RR, ARISU (4CH), IPS (2CH))
IG140AE/R Junction Block (Button Start #1 (ACC) Relay, Button Start #2 (IG1) Relay)
IG240AE/R Junction Block (Button Start #2 (IG2) Relay)
E-SHIFTER40AE/R Junction Block (Fuse - E-SHIFTER2, E-SHIFTER Relay)
B+560APCB Block (Fuse - EPCU1, HORN, B/A HORN, BMS, Main Relay)
Page 463 of 555
7-66
Maintenance
After washing, rinse the vehicle thor-
oughly with lukewarm or cold water.
Do not allow soap to dry on the fin-
ish. Do not use strong soap, chemi-
cal detergents or hot water, and
do not wash the vehicle in direct
sunlight or when the body of the
vehicle is warm.
Be careful when washing the side windows of your vehicle.
Especially, with high-pressure
water, water may leak through
the windows and wet the interi-
or.
To prevent damage to the plastic parts, do not clean with chemi-
cal solvents or strong deter-
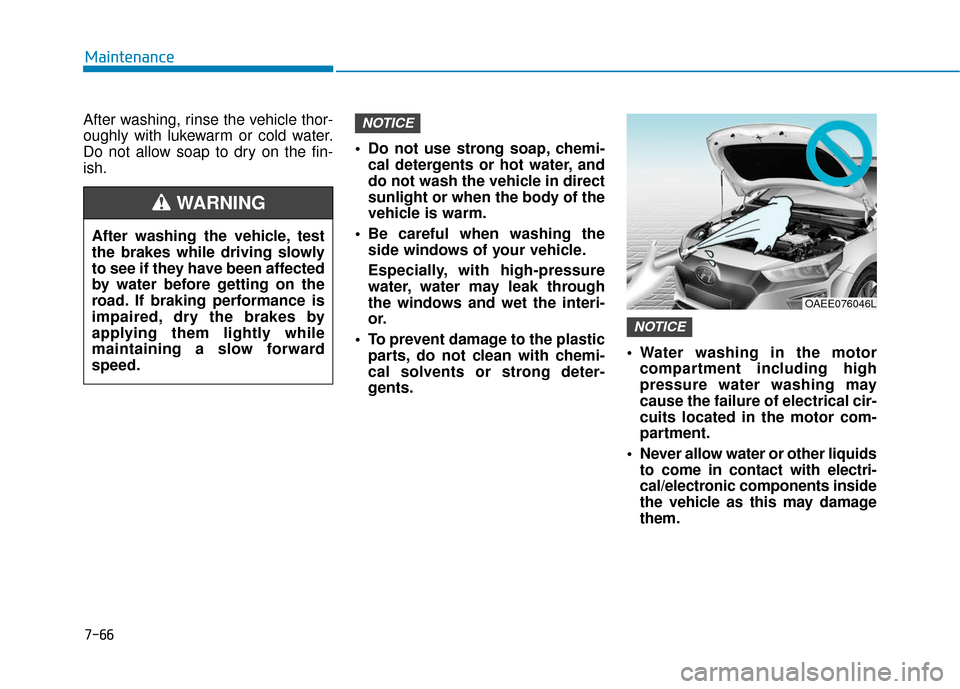
gents. Water washing in the motor
compartment including high
pressure water washing may
cause the failure of electrical cir-
cuits located in the motor com-
partment.
Never allow water or other liquids to come in contact with electri-
cal/electronic components inside
the vehicle as this may damage
them.
NOTICE
NOTICE
OAEE076046L
After washing the vehicle, test
the brakes while driving slowly
to see if they have been affected
by water before getting on the
road. If braking performance is
impaired, dry the brakes by
applying them lightly while
maintaining a slow forward
speed.
WARNING
Page 469 of 555
7-72
Maintenance
Caring for the leather seats - Vacuum the seat periodically toremove dust and sand on the
seat. It will prevent abrasion or
damage of the leather and main-
tain its quality.
- Wipe the natural leather seat cover often with dry or soft cloth.
- Use of proper leather protective may prevent abrasion of the
cover and helps maintain the
color. Be sure to read the instruc-
tions and consult a specialist
when using leather coating or
protective agent.
- Light colored (beige, cream beige) leather is easily contami-
nated and the stain is noticeable.
Clean the seats frequently.
- Avoid wiping with wet cloth. It may cause the surface to crack. Cleaning the leather seats
- Remove all contaminationsinstantly. Refer to instructions
below for removal of each con-
taminant.
- Cosmetic products (sunscreen, foundation, etc.)
Apply cleansing cream on a cloth
and wipe the contaminate spot.
Wipe off the cream with a wet
cloth and remove water with a dry
cloth.
- Beverages (coffee, soft drink, etc.)
Apply a small amount of neutral
detergent and wipe until contami-
nations do not smear.
- Oil Remove oil instantly with
absorbable cloth and wipe with
stain remover used only for natu-
ral leather.
- Chewing gum Harden the gum with ice and
remove gradually.
Cleaning the seat belt webbing
Clean the belt webbing with any mild
soap solution recommended for
cleaning upholstery or carpet. Follow
the instructions provided with the
soap. Do not bleach or re-dye the
webbing because this may weaken
the seat belt.
Cleaning the interior windowglass
If the interior glass surfaces of the
vehicle become fogged (that is, cov-
ered with an oily, greasy or waxy
film), they should be cleaned with
glass cleaner. Follow the directions
on the glass cleaner container.
Do not scrape or scratch the
inside of the rear window. This
may result in damage to the rear
window defroster grid.
NOTICE
Page 510 of 555
H30
Trickle Charge
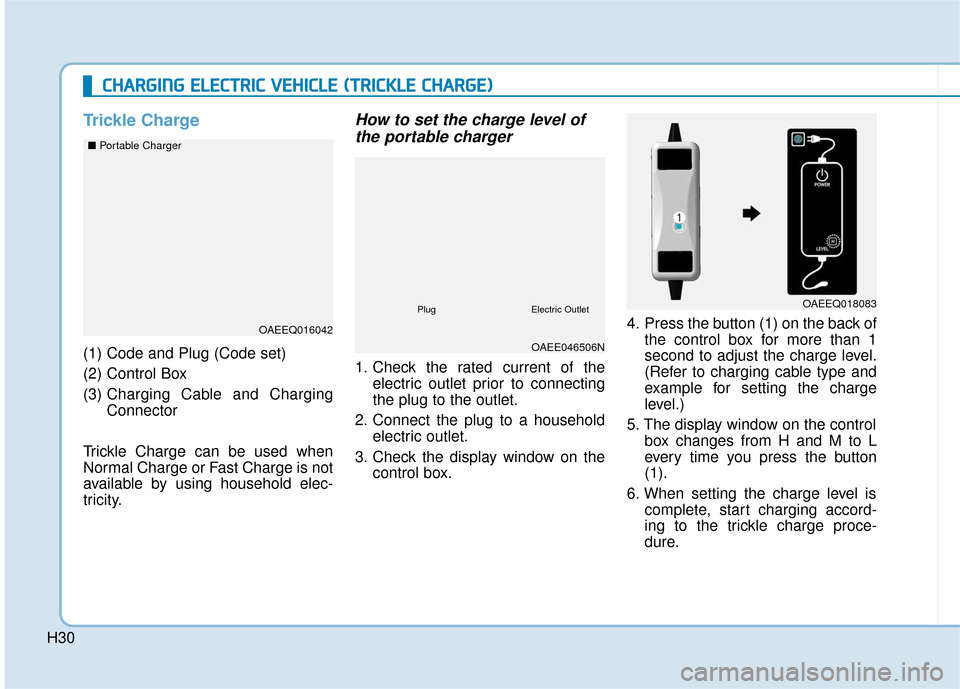
(1) Code and Plug (Code set)
(2) Control Box
(3) Charging Cable and Charging
Connector
Trickle Charge can be used when
Normal Charge or Fast Charge is not
available by using household elec-
tricity.
How to set the charge level of the portable charger
1. Check the rated current of the
electric outlet prior to connecting
the plug to the outlet.
2. Connect the plug to a household electric outlet.
3. Check the display window on the control box. 4. Press the button (1) on the back of
the control box for more than 1
second to adjust the charge level.
(Refer to charging cable type and
example for setting the charge
level.)
5. The display window on the control box changes from H and M to L
every time you press the button
(1).
6. When setting the charge level is complete, start charging accord-
ing to the trickle charge proce-
dure.
C CH
H A
AR
RG
G I
IN
N G
G
E
E L
LE
E C
CT
T R
R I
IC
C
V
V E
EH
H I
IC
C L
LE
E
(
( T
T R
R I
IC
C K
K L
LE
E
C
C H
H A
AR
RG
G E
E)
)
OAEEQ016042
OAEE046506N
OAEEQ018083
■
Portable ChargerElectric OutletPlug