2019 Hyundai Ioniq Electric charge
[x] Cancel search: chargePage 201 of 555
3-116
Convenient features of your vehicle
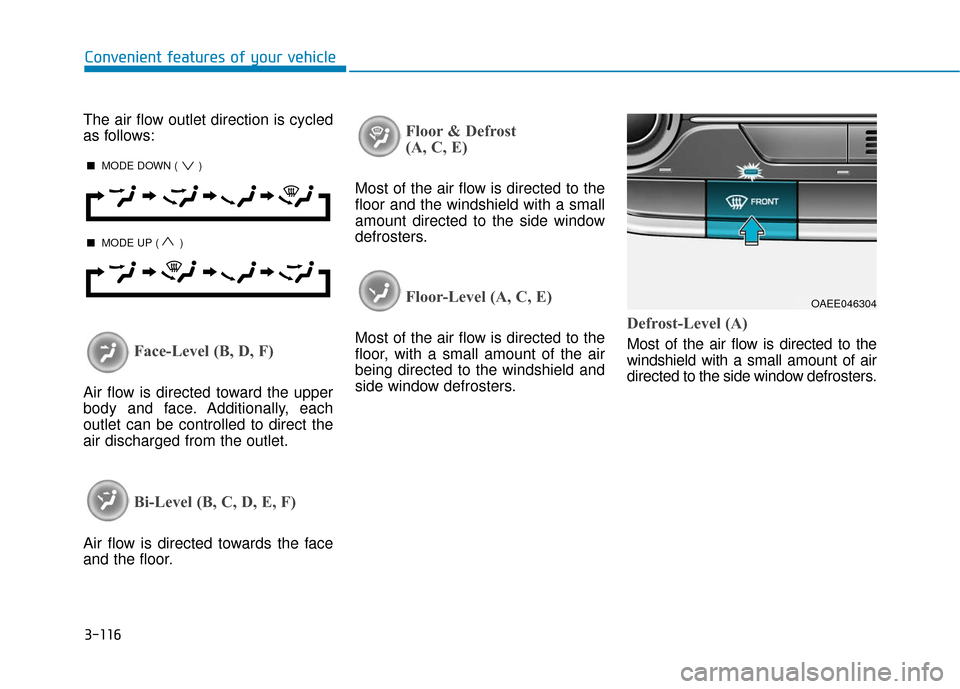
The air flow outlet direction is cycled
as follows:
Face-Level (B, D, F)
Air flow is directed toward the upper
body and face. Additionally, each
outlet can be controlled to direct the
air discharged from the outlet.
Bi-Level (B, C, D, E, F)
Air flow is directed towards the face
and the floor.
Floor & Defrost
(A, C, E)
Most of the air flow is directed to the
floor and the windshield with a small
amount directed to the side window
defrosters.
Floor-Level (A, C, E)
Most of the air flow is directed to the
floor, with a small amount of the air
being directed to the windshield and
side window defrosters.Defrost-Level (A)
Most of the air flow is directed to the
windshield with a small amount of air
directed to the side window defrosters.
OAEE046304
■ MODE DOWN ( )
■MODE UP ( )
Page 202 of 555
3-117
Convenient features of your vehicle
3
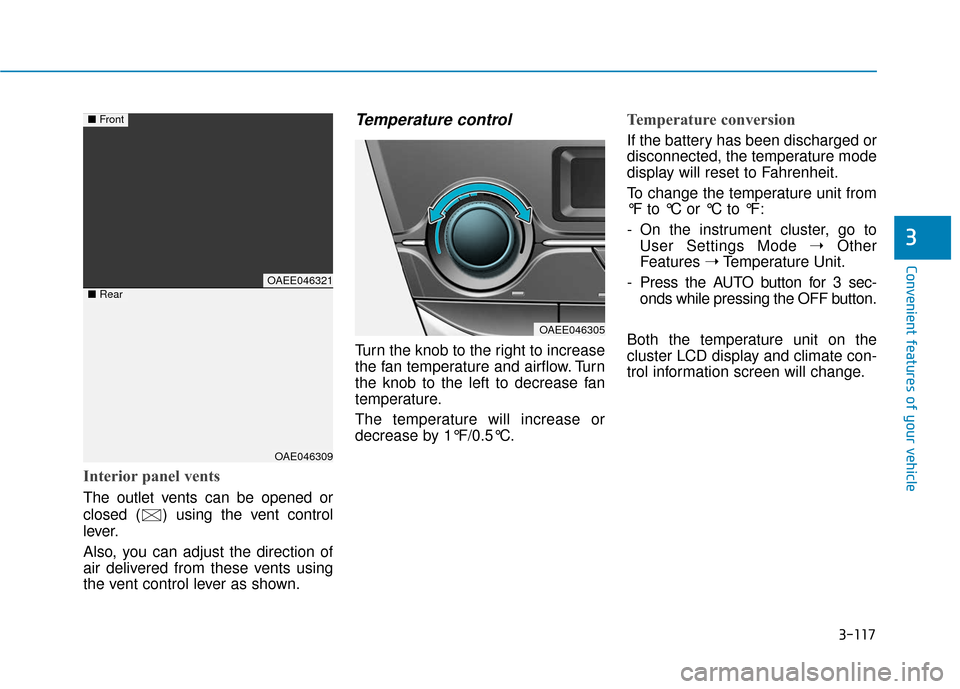
Interior panel vents
The outlet vents can be opened or
closed ( ) using the vent control
lever.
Also, you can adjust the direction of
air delivered from these vents using
the vent control lever as shown.
Temperature control
Turn the knob to the right to increase
the fan temperature and airflow. Turn
the knob to the left to decrease fan
temperature.
The temperature will increase or
decrease by 1°F/0.5°C.
Temperature conversion
If the battery has been discharged or
disconnected, the temperature mode
display will reset to Fahrenheit.
To change the temperature unit from
°F to °C or °C to °F:
- On the instrument cluster, go toUser Settings Mode ➝ Other
Features ➝Temperature Unit.
- Press the AUTO button for 3 sec- onds while pressing the OFF button.
Both the temperature unit on the
cluster LCD display and climate con-
trol information screen will change.
OAEE046321
OAE046309
■ Front
■Rear
OAEE046305
Page 204 of 555
3-119
Convenient features of your vehicle
3
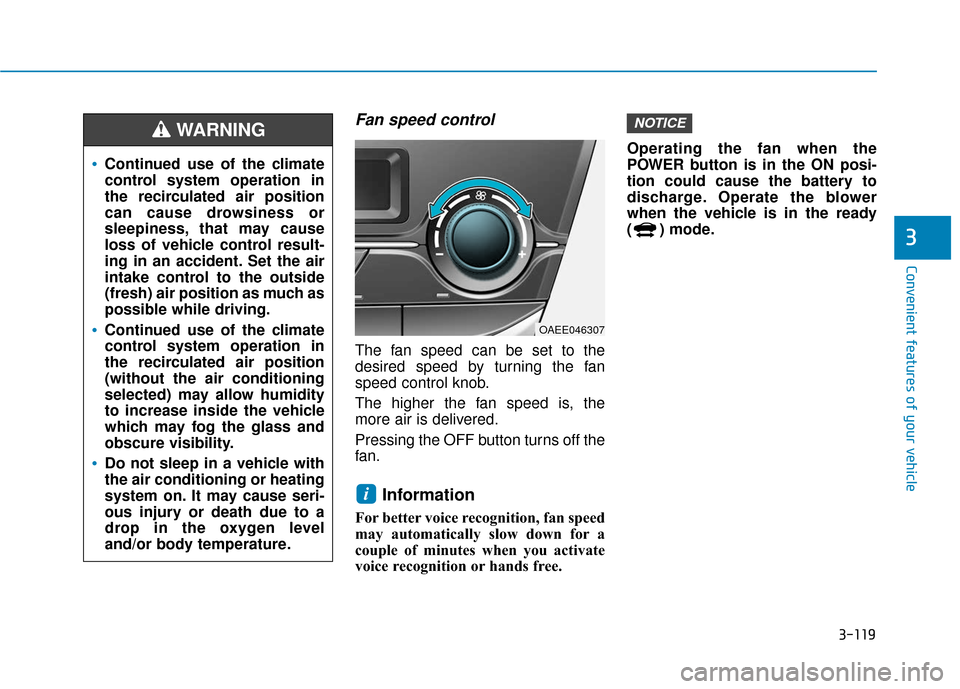
Fan speed control
The fan speed can be set to the
desired speed by turning the fan
speed control knob.
The higher the fan speed is, the
more air is delivered.
Pressing the OFF button turns off the
fan.
Information
For better voice recognition, fan speed
may automatically slow down for a
couple of minutes when you activate
voice recognition or hands free.Operating the fan when the
POWER button is in the ON posi-
tion could cause the battery to
discharge. Operate the blower
when the vehicle is in the ready
( ) mode.
NOTICE
i
Continued use of the climate
control system operation in
the recirculated air position
can cause drowsiness or
sleepiness, that may cause
loss of vehicle control result-
ing in an accident. Set the air
intake control to the outside
(fresh) air position as much as
possible while driving.
Continued use of the climate
control system operation in
the recirculated air position
(without the air conditioning
selected) may allow humidity
to increase inside the vehicle
which may fog the glass and
obscure visibility.
Do not sleep in a vehicle with
the air conditioning or heating
system on. It may cause seri-
ous injury or death due to a
drop in the oxygen level
and/or body temperature.
WARNING
OAEE046307
Page 211 of 555
3-126
Convenient features of your vehicle
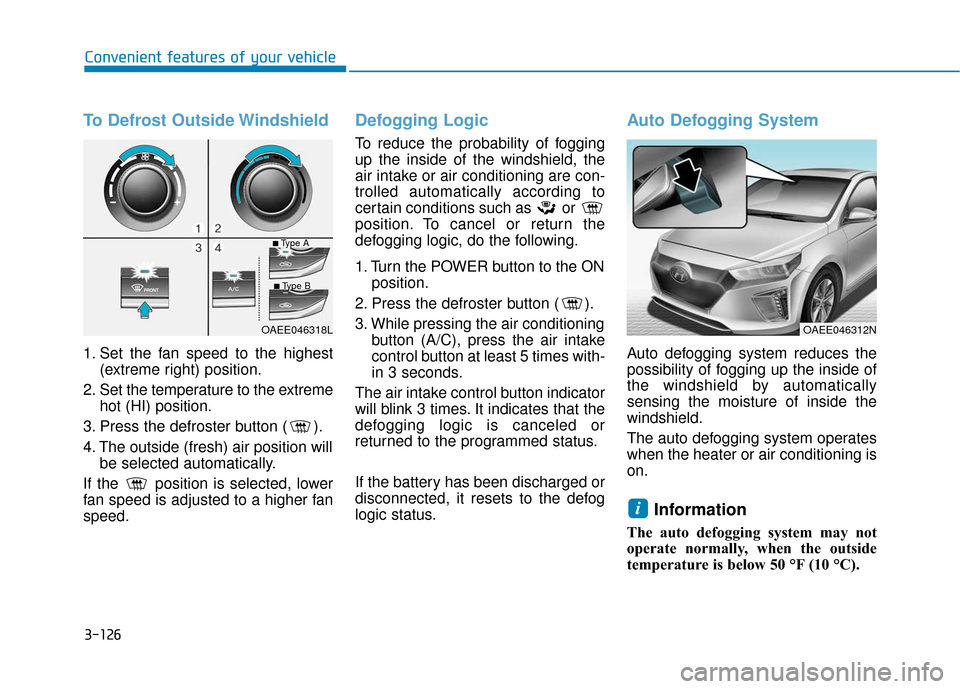
To Defrost Outside Windshield
1. Set the fan speed to the highest(extreme right) position.
2. Set the temperature to the extreme hot (HI) position.
3. Press the defroster button ( ).
4. The outside (fresh) air position will be selected automatically.
If the position is selected, lower
fan speed is adjusted to a higher fan
speed.
Defogging Logic
To reduce the probability of fogging
up the inside of the windshield, the
air intake or air conditioning are con-
trolled automatically according to
certain conditions such as or
position. To cancel or return the
defogging logic, do the following.
1. Turn the POWER button to the ON position.
2. Press the defroster button ( ).
3. While pressing the air conditioning button (A/C), press the air intake
control button at least 5 times with-
in 3 seconds.
The air intake control button indicator
will blink 3 times. It indicates that the
defogging logic is canceled or
returned to the programmed status.
If the battery has been discharged or
disconnected, it resets to the defog
logic status.
Auto Defogging System
Auto defogging system reduces the
possibility of fogging up the inside of
the windshield by automatically
sensing the moisture of inside the
windshield.
The auto defogging system operates
when the heater or air conditioning is
on.
Information
The auto defogging system may not
operate normally, when the outside
temperature is below 50 °F (10 °C).
i
OAEE046318LOAEE046312N
■Type A
■Type B
Page 217 of 555
3-132
Convenient features of your vehicle
Power Outlet (if equipped)
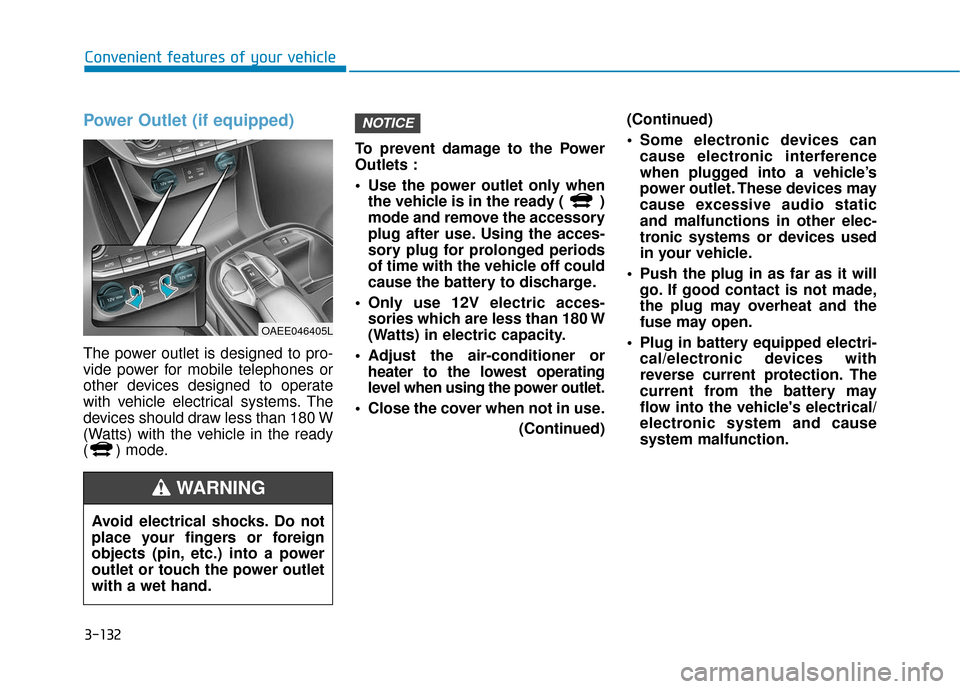
The power outlet is designed to pro-
vide power for mobile telephones or
other devices designed to operate
with vehicle electrical systems. The
devices should draw less than 180 W
(Watts) with the vehicle in the ready
( ) mode.To prevent damage to the Power
Outlets :
Use the power outlet only when
the vehicle is in the ready ( )
mode and remove the accessory
plug after use. Using the acces-
sory plug for prolonged periods
of time with the vehicle off could
cause the battery to discharge.
Only use 12V electric acces- sories which are less than 180 W
(Watts) in electric capacity.
Adjust the air-conditioner or heater to the lowest operating
level when using the power outlet.
Close the cover when not in use. (Continued)(Continued)
Some electronic devices can
cause electronic interference
when plugged into a vehicle’s
power outlet. These devices may
cause excessive audio static
and malfunctions in other elec-
tronic systems or devices used
in your vehicle.
Push the plug in as far as it will go. If good contact is not made,
the plug may overheat and the
fuse may open.
Plug in battery equipped electri- cal/electronic devices with
reverse current protection. The
current from the battery may
flow into the vehicle's electrical/
electronic system and cause
system malfunction.
NOTICE
OAEE046405L
Avoid electrical shocks. Do not
place your fingers or foreign
objects (pin, etc.) into a power
outlet or touch the power outlet
with a wet hand.
WARNING
Page 218 of 555
3-133
Convenient features of your vehicle
3
Wireless Cellular Phone
Charging System (if equipped)
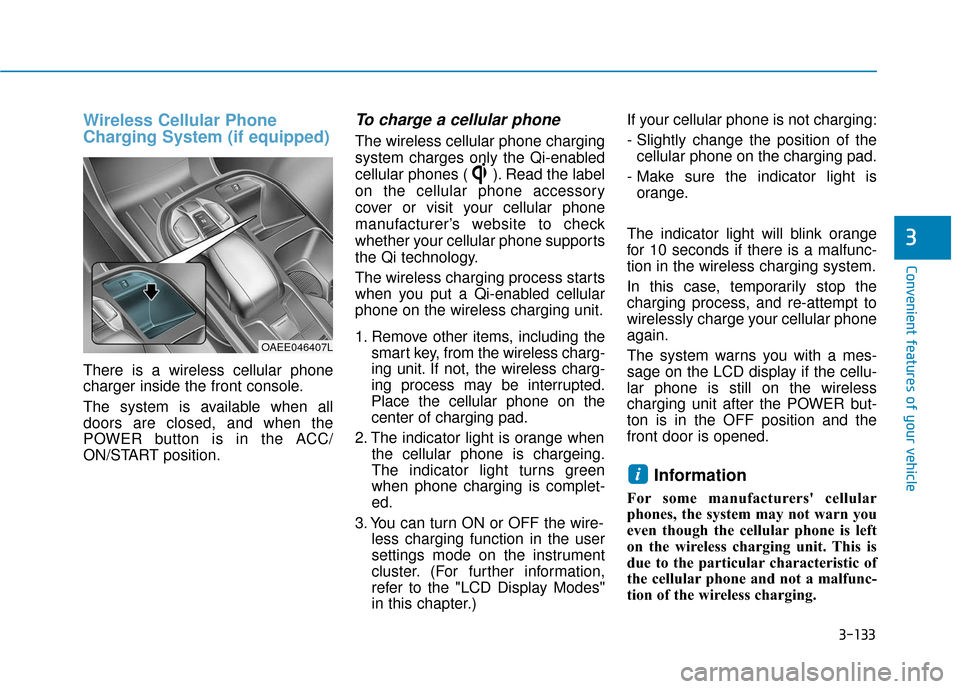
There is a wireless cellular phone
charger inside the front console.
The system is available when all
doors are closed, and when the
POWER button is in the ACC/
ON/START position.
To charge a cellular phone
The wireless cellular phone charging
system charges only the Qi-enabled
cellular phones ( ). Read the label
on the cellular phone accessory
cover or visit your cellular phone
manufacturer’s website to check
whether your cellular phone supports
the Qi technology.
The wireless charging process starts
when you put a Qi-enabled cellular
phone on the wireless charging unit.
1. Remove other items, including thesmart key, from the wireless charg-
ing unit. If not, the wireless charg-
ing process may be interrupted.
Place the cellular phone on the
center of charging pad.
2. The indicator light is orange when the cellular phone is chargeing.
The indicator light turns green
when phone charging is complet-
ed.
3. You can turn ON or OFF the wire- less charging function in the user
settings mode on the instrument
cluster. (For further information,
refer to the "LCD Display Modes"
in this chapter.) If your cellular phone is not charging:
- Slightly change the position of the
cellular phone on the charging pad.
- Make sure the indicator light is orange.
The indicator light will blink orange
for 10 seconds if there is a malfunc-
tion in the wireless charging system.
In this case, temporarily stop the
charging process, and re-attempt to
wirelessly charge your cellular phone
again.
The system warns you with a mes-
sage on the LCD display if the cellu-
lar phone is still on the wireless
charging unit after the POWER but-
ton is in the OFF position and the
front door is opened.
Information
For some manufacturers' cellular
phones, the system may not warn you
even though the cellular phone is left
on the wireless charging unit. This is
due to the particular characteristic of
the cellular phone and not a malfunc-
tion of the wireless charging.
i
OAEE046407L
Page 219 of 555
3-134
Convenient features of your vehicle
The wireless cellular phone charging system may not sup-
port certain cellular phones,
which are not verified for the Qi
specification ( ).
When placing your cellular phone on the charging mat,
position the phone in the middle
of the mat for optimal charging
performance. If your cell phone
is off to the side, the charging
rate may be less and in some
cases the cell phone may experi-
ence higher heat conduction.
In some cases, the wireless charging may stop temporarily
when the Smart Key is used,
either when starting the vehicle
or locking/unlocking the doors,
etc.
When charging certain cellular phones, the charging indicator
may not change to green when
the cell phone is fully charged.
(Continued)(Continued)
The wireless charging process
may temporarily stop, when tem-
perature abnormally increases
inside the wireless cellular
phone charging system. The
wireless charging process
restarts, when temperature falls
to a proper level.
The wireless charging process may temporarily stop when
there is any metallic item, such
as a coin, between the wireless
cellular phone charging system
and a cellular phone.
For certain cellular phone with their own protection, the wire-
less charging speed may
decrease and the wireless
charging may stop.
If the cellular phone has a thick cover, the wireless charging may
not be possible.
If the cell phone is not complete- ly contacting the charging pad,
wireless charging may not oper-
ate properly.
(Continued) (Continued)
Some magnetic items like credit
cards, phone cards or rail tickets
may be damaged if left with the
cellular phone during the charg-
ing process.
If the cellular phone without the wireless charging function or
the metallic items are placed on
the charging pad, it may cause
slight noise. This noise does not
affect the cellular phone and the
vehicle, because this noise is an
operating sound during deter-
mining the item on the charging
pad.
If the POWER button is in the OFF position, the charging also
stops.
NOTICE
Page 238 of 555
4-15
Multimedia System
4
Information
• If you want to change the position ofdevice installation, please inquire
with your place of purchase or serv-
ice maintenance center. Technical
expertise is required to install or dis-
assemble the device.
• Turn on the car ignition before using this device. Do not operate the
audio system for long periods of
time with the ignition turned off as
such operations may lead to battery
discharge. Do not subject the device to
severe shock or impact. Direct
pressure onto the front side of
the monitor may cause damage
to the LCD or touch screen.
When cleaning the device, make sure to turn off the device and
use a dry and smooth cloth.
Never use tough materials,
chemical cloths, or solvents
(alcohol, benzene, thinners, etc.)
As such materials may damage
the device panel or cause
color/quality deterioration.
Do not place beverages close to the audio system. Spilling bever-
ages may lead to system mal-
function.
Placing the audio system within an electromagnetic environment
may result in noise interference.
Information
In this case of product malfunction,
please contact your dealer or vehicle
service center.
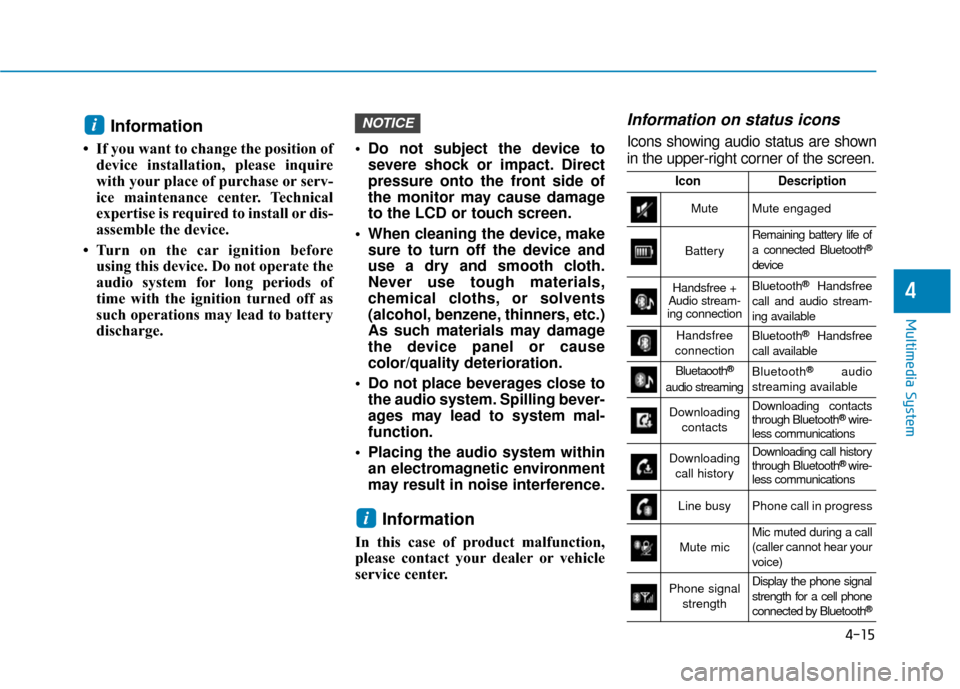
Information on status icons
Icons showing audio status are shown
in the upper-right corner of the screen.
i
NOTICEi
IconDescription
MuteMute engaged
Battery
Remaining battery life of
a connected Bluetooth®
device
Handsfree +
Audio stream-
ing connectionBluetooth®Handsfree
call and audio stream-
ing available
Handsfree
connectionBluetooth®Handsfree
call available
Bluetaooth®
audio streaming
Bluetooth®audio
streaming available
Downloading contactsDownloading contacts
through Bluetooth®wire-
less communications
Downloading
call historyDownloading call history
through Bluetooth® wire-
less communications
Line busyPhone call in progress
Mute micMic muted during a call
(caller cannot hear your
voice)
Phone signal
strengthDisplay the phone signal
strength for a cell phone
connected by Bluetooth
®