2019 Hyundai Ioniq Electric hood open
[x] Cancel search: hood openPage 287 of 555
5-20
Driving your vehicle
Information
• For your safety, you can engage theEPB even though the POWER but-
ton is in the OFF position, but you
cannot release it.
• For your safety, depress the brake pedal and release the parking brake
manually with the EPB switch when
you drive downhill or when backing
up the vehicle.
If the parking brake warning light is still on even though the EPB
has been released, have the sys-
tem checked an authorized
HYUNDAI dealer.
Do not drive your vehicle with the EPB applied. It may cause
excessive brake pad and brake
rotor wear.
EPB (Electronic Parking Brake)
may be automatically applied
when:
Requested by other systems
The vehicle is turned off with theAuto Hold operating
Information
If the driver turns the vehicle off while
Auto Hold is operating, EPB will be
automatically applied. However, if
you press the EPB switch within one
second after the vehicle is turned off,
the EPB will not be applied.
Warning messages
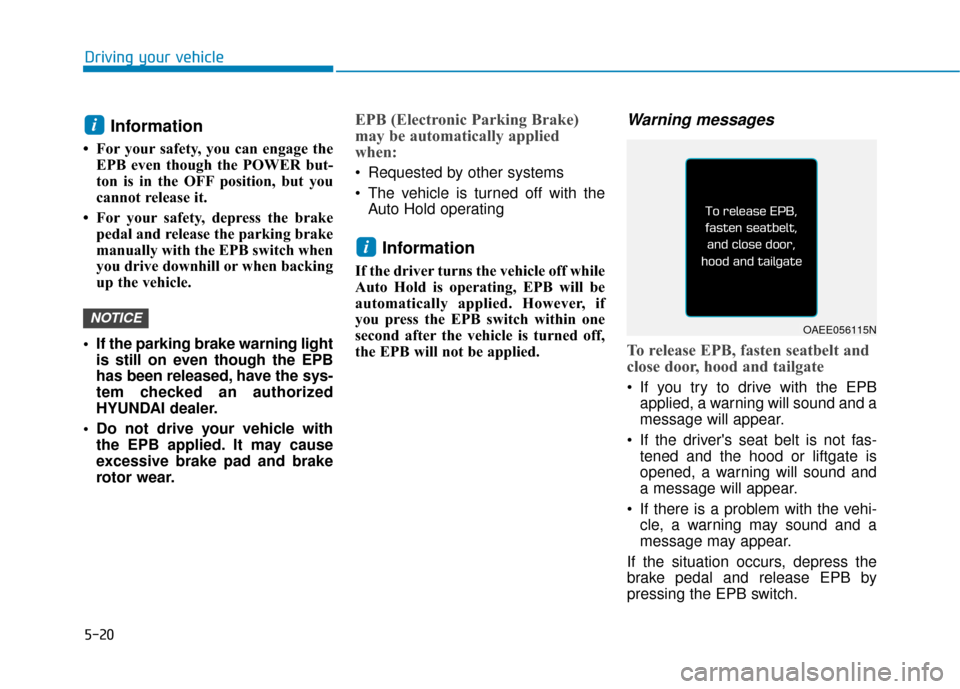
To release EPB, fasten seatbelt and
close door, hood and tailgate
If you try to drive with the EPBapplied, a warning will sound and a
message will appear.
If the driver's seat belt is not fas- tened and the hood or liftgate is
opened, a warning will sound and
a message will appear.
If there is a problem with the vehi- cle, a warning may sound and a
message may appear.
If the situation occurs, depress the
brake pedal and release EPB by
pressing the EPB switch.
i
NOTICE
i
OAEE056115N
Page 292 of 555
![Hyundai Ioniq Electric 2019 Owners Manual 5-25
Driving your vehicle
5
Cancel
To cancel the Auto Hold operation,
press the [AUTO HOLD] switch. The
AUTO HOLD indicator will turn off.
To cancel the Auto Hold operation
when the vehicle is at a st Hyundai Ioniq Electric 2019 Owners Manual 5-25
Driving your vehicle
5
Cancel
To cancel the Auto Hold operation,
press the [AUTO HOLD] switch. The
AUTO HOLD indicator will turn off.
To cancel the Auto Hold operation
when the vehicle is at a st](/manual-img/35/14897/w960_14897-291.png)
5-25
Driving your vehicle
5
Cancel
To cancel the Auto Hold operation,
press the [AUTO HOLD] switch. The
AUTO HOLD indicator will turn off.
To cancel the Auto Hold operation
when the vehicle is at a standstill,
press the [AUTO HOLD] switch while
depressing the brake pedal.
Information
• The Auto Hold does not operatewhen:
- The driver's seat belt is unfastenedand driver's door is opened
- The hood is opened
- The gear is in P (Park) or R (Reverse)
- The EPB is applied
• For your safety, the Auto Hold auto- matically switches to EPB in such
cases:
- The driver's seat belt is unfastenedand driver's door is opened
- The hood is opened while the gear is in D (Drive)
- The vehicle is in a standstill for more than 10 minutes
- The vehicle is standing on a steep slope
- The vehicle moved several times (Continued)(Continued)
In these cases, the parking brake
warning light comes on, the AUTO
HOLD indicator changes from green
to white, and a warning sounds and
a message will appear to inform you
that EPB has been automatically
engaged. Before driving again,
depress the brake pedal, check the
surrounding area near your vehicle
and release the parking brake man-
ually with the EPB switch.
• If the AUTO HOLD indicator lights up yellow, the Auto Hold is not
working properly. Contact an
authorized HYUNDAI dealer.
• While operating Auto Hold, you may hear mechanical noise. However, it is
normal operating noise.
i
OAEE056007
L
L
L
L
i
i
i
i
g
g
g
g
h
h
h
h
t
t
t
t
o
o
o
o
f
f
f
f
f
f
f
f
Page 293 of 555
5-26
Driving your vehicle
If there is a malfunction with the
driver's door or hood open detec-
tion system, the Auto Hold may
not work properly. Contact an
authorized HYUNDAI dealer.
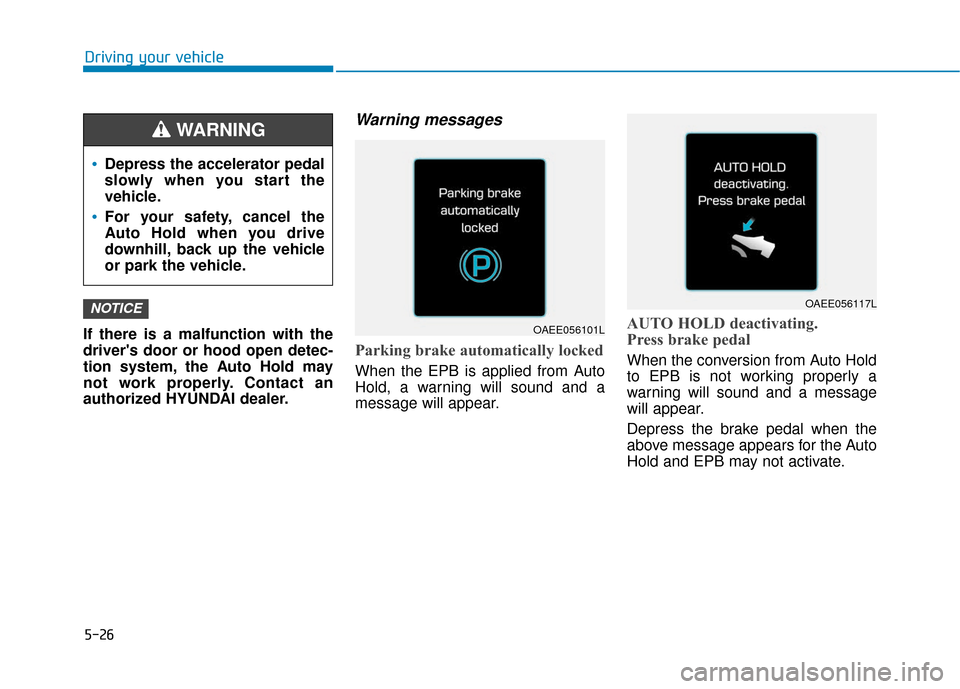
Warning messages
Parking brake automatically locked
When the EPB is applied from Auto
Hold, a warning will sound and a
message will appear.
AUTO HOLD deactivating.
Press brake pedal
When the conversion from Auto Hold
to EPB is not working properly a
warning will sound and a message
will appear.
Depress the brake pedal when the
above message appears for the Auto
Hold and EPB may not activate.
NOTICE
Depress the accelerator pedal
slowly when you start the
vehicle.
For your safety, cancel the
Auto Hold when you drive
downhill, back up the vehicle
or park the vehicle.
WARNING
OAEE056101L
OAEE056117L
Page 379 of 555
6-6
What to do in an emergency
7. Connect the other end of the sec- ond jumper cable to the black,
negative (-) chassis ground of
your vehicle (4).
Do not allow the jumper cables to
contact anything except the cor-
rect battery or jumper terminals or
the correct ground. Do not lean
over the battery when making
connections.
8. Start the engine of the assisting vehicle and let it run at approxi-
mately 2,000 rpm for a few min-
utes. Then start your vehicle.
9. After your vehicle starts allow it to operate at least 30 minutes with-
out shutting it down, this will help
charge back the 12V battery.
If your vehicle will not start after a
few attempts, it probably requires
servicing. In this event please seek
qualified assistance. If the cause of
your battery discharging is not
apparent, have your vehicle checked
by an authorized HYUNDAI dealer. Disconnect the jumper cables in the
exact reverse order you connected
them:
1. Disconnect the jumper cable from
the black, negative (-) chassis
ground of your vehicle (4).
2. Disconnect the other end of the jumper cable from the black, neg-
ative (-) battery/chassis ground of
the assisting vehicle (3).
3. Disconnect the second jumper cable from the red, positive (+)
battery/jumper terminal of the
assisting vehicle (2).
4. Disconnect the other end of the jumper cable from the red, positive
(+) jumper terminal of your vehicle
(1). 1. Pull off the road and stop as soon
as it is safe to do so.
2. Shift to P (Park) and set the park- ing brake. If the air conditioning is
on, turn it off.
3. If coolant is running out under the vehicle or steam is coming out
from the hood, stop the vehicle.
Do not open the hood until the
coolant has stopped running or
the steaming has stopped. If there
is no visible loss of coolant and no
steam, leave the vehicle running
and check to be sure the vehicle
cooling fan is operating. If the fan
is not running, turn the vehicle off.
I IF
F
T
T H
H E
E
V
V E
EH
H I
IC
C L
LE
E
O
O V
VE
ER
R H
H E
EA
A T
TS
S
Page 454 of 555
7-57
7
Maintenance
Headlamp and parking lamp
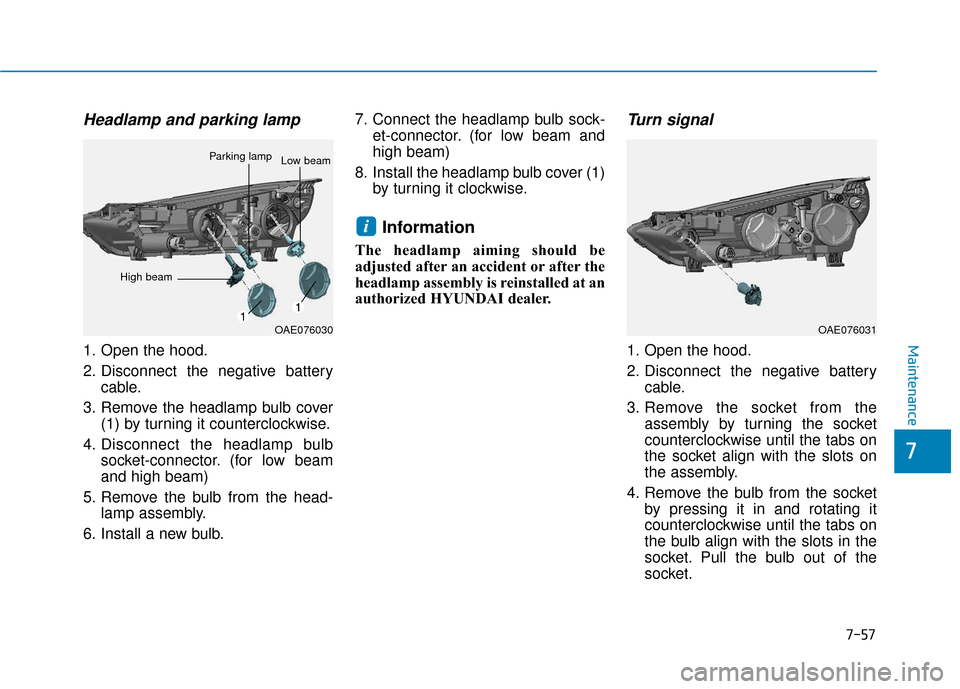
1. Open the hood.
2. Disconnect the negative batterycable.
3. Remove the headlamp bulb cover (1) by turning it counterclockwise.
4. Disconnect the headlamp bulb socket-connector. (for low beam
and high beam)
5. Remove the bulb from the head- lamp assembly.
6. Install a new bulb. 7. Connect the headlamp bulb sock-
et-connector. (for low beam and
high beam)
8. Install the headlamp bulb cover (1) by turning it clockwise.
Information
The headlamp aiming should be
adjusted after an accident or after the
headlamp assembly is reinstalled at an
authorized HYUNDAI dealer.
Turn signal
1. Open the hood.
2. Disconnect the negative batterycable.
3. Remove the socket from the assembly by turning the socket
counterclockwise until the tabs on
the socket align with the slots on
the assembly.
4. Remove the bulb from the socket by pressing it in and rotating it
counterclockwise until the tabs on
the bulb align with the slots in the
socket. Pull the bulb out of the
socket.
i
OAE076030
Parking lampLow beam
OAE076031
High beam
Page 455 of 555
7-58
Maintenance
5. Install a new bulb by inserting it into the socket and rotating it until
it locks into place.
6. Install the socket in the assembly by aligning the tabs on the socket
with the slots in the assembly.
7. Push the socket into the assembly and turn the socket clockwise.
Side marker
1. Open the hood.
2. Disconnect the negative batterycable.
3. Remove the socket from the assembly by turning the socket
counterclockwise until the tabs on
the socket align with the slots on
the assembly.
4. Remove the bulb from the socket by pulling out the bulb.
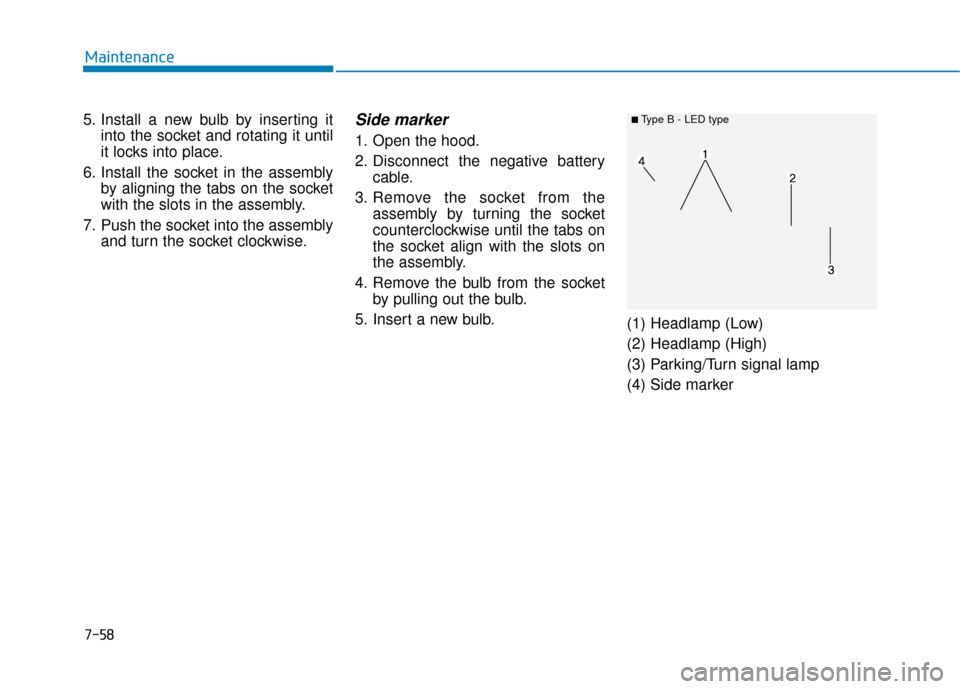
5. Insert a new bulb. (1) Headlamp (Low)
(2) Headlamp (High)
(3) Parking/Turn signal lamp
(4) Side marker
■ Type B - LED type
Page 457 of 555
7-60
Maintenance
Headlamp (High)
1. Open the hood.
2. Disconnect the negative batterycable.
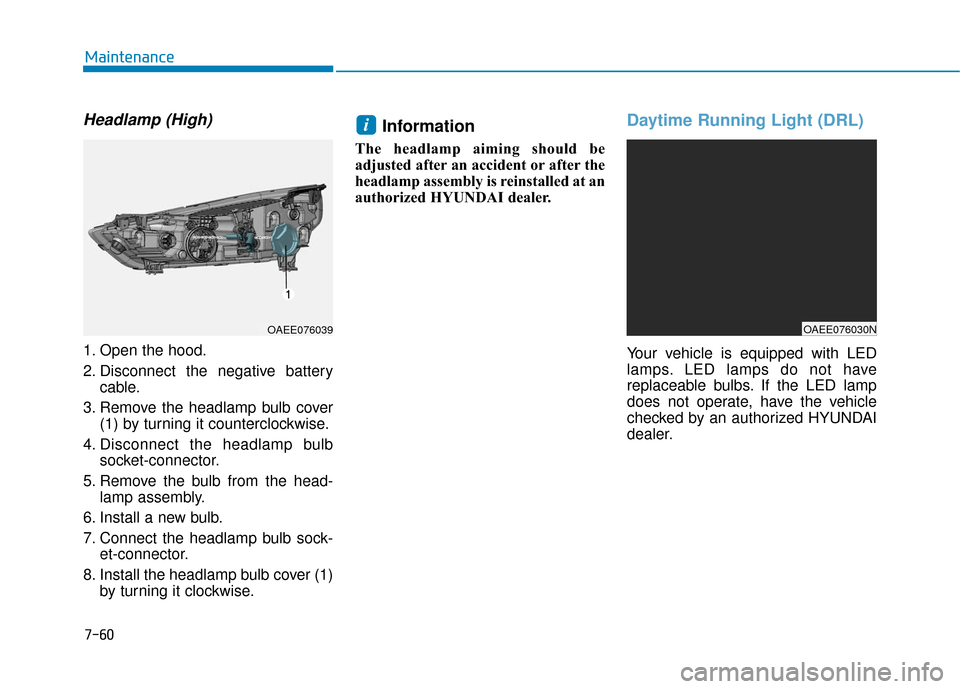
3. Remove the headlamp bulb cover (1) by turning it counterclockwise.
4. Disconnect the headlamp bulb socket-connector.
5. Remove the bulb from the head- lamp assembly.
6. Install a new bulb.
7. Connect the headlamp bulb sock- et-connector.
8. Install the headlamp bulb cover (1) by turning it clockwise.
Information
The headlamp aiming should be
adjusted after an accident or after the
headlamp assembly is reinstalled at an
authorized HYUNDAI dealer.
Daytime Running Light (DRL)
Your vehicle is equipped with LED
lamps. LED lamps do not have
replaceable bulbs. If the LED lamp
does not operate, have the vehicle
checked by an authorized HYUNDAI
dealer.
i
OAEE076030NOAEE076039
Page 549 of 555
I-8
LCD displayAssist mode ................................................................3-83
LCD display modes ....................................................3-81
Quick guide help ........................................................3-82
Trip computer mode ...................................................3-82
Turn By Turn (TBT) mode.........................................3-82
User settings mode .....................................................3-84
Warning mode ............................................................3-83
LCD display messages Aux. Battery Saver+ used while parked ....................3-75
Battery Overheated! Stop vehicle ..............................3-77
Charge immediately. Power limited ...........................3-76
Charger Error!/Quick Charger Error!.........................3-75
Charging door open ....................................................3-74
Check BRAKE SWITCH fuse ...................................3-70
Check brakes ..............................................................3-76
Check electric vehicle system ....................................3-79
Check headlamp FAN ................................................3-73
Check headlamp LED ................................................3-72
Check headlight ..........................................................3-72
Check steering wheel lock system .............................3-69
Check virtual engine sound ........................................3-79
Door, Hood, Tailgate Open ........................................3-70
Key not detected .........................................................3-69
Key not in vehicle ......................................................3-69
Lights mode ................................................................3-73
Low battery ................................................................3-76
Low Battery Temp. Power limited .............................3-77 Low Battery. Charge immediately .............................3-77
Low Key Battery ........................................................3-68
Low pressure ..............................................................3-72
Low washer fluid........................................................3-70
Power limited .............................................................3-78
Press brake pedal to start vehicle ...............................3-69
Press POWER button again .......................................3-69
Press POWER button while turning wheel ................3-69
Press POWER button with key ..................................3-70
Remaining time ..........................................................3-74
Shift to P.....................................................................3-6\
8
Shift to P to charge .....................................................3-74
Shift to P to start vehicle ............................................3-70
Stop vehicle and check brakes ...................................3-75
Stop vehicle and check power supply ........................3-78
Sunroof open ..............................................................3-71
Turn on "FUSE SWITCH".........................................3-71
Unplug vehicle to start ...............................................3-70
Wiper ........................................................................\
..3-73
LCD display modes ........................................................3-81
Liftgate ........................................................................\
....3-48
Light ........................................................................\
........3-95 Turn signals ..............................................................3-100
Parking lamp position ................................................3-96
Lane change signals .................................................3-100
High Beam Assist (HBA) ...........................................3-97
High beam operation ..................................................3-97
Index