2019 Hyundai Elantra transmission
[x] Cancel search: transmissionPage 272 of 535
![Hyundai Elantra 2019 Owners Manual 5-36
Driving your vehicle
With the shift lever in the D posi-
tion
The paddle shifter will operate when
the vehicle speed is more than
6 mph (10 km/h).
Pull the [+] or [-] paddle shifter once
to shi Hyundai Elantra 2019 Owners Manual 5-36
Driving your vehicle
With the shift lever in the D posi-
tion
The paddle shifter will operate when
the vehicle speed is more than
6 mph (10 km/h).
Pull the [+] or [-] paddle shifter once
to shi](/manual-img/35/14536/w960_14536-271.png)
5-36
Driving your vehicle
With the shift lever in the D posi-
tion
The paddle shifter will operate when
the vehicle speed is more than
6 mph (10 km/h).
Pull the [+] or [-] paddle shifter once
to shift up or down one gear and the
system changes from automatic
mode to manual mode.
When the vehicle speed is lower
than 6 mph (10 km/h), if you depress
the accelerator pedal for more than 5
seconds or if you move the shift lever
from Manual Shift Mode to D (Drive),
the system changes from manual
mode to automatic mode.
With the shift lever in the manual
shift mode
Pull the [+] or [-] paddle shifter once
to shift up or down one gear.
If the [+] and [-] paddle shifters are
pulled at the same time, gear
change may not occur.
Shift-Lock System
For your safety, the dual clutch trans-
mission has a shift-lock system
which prevents shifting the transmis-
sion from P (Park) into R (Reverse)
unless the brake pedal is depressed.
To shift the transmission from P
(Park) into R (Reverse):
1. Depress and hold the brake pedal.
2. Start the engine or place the igni-tion switch in the ON position.
3. Move the shift lever.
Shift-Lock Release
If the shift lever cannot be moved from
the P (Park) position into R (Reverse)
position with the brake pedal
depressed, continue depressing the
brake, and then do the following:
1. Place the ignition switch in the LOCK/OFF position.
2. Apply the parking brake.
3. Carefully remove the cap (1) cov- ering the shift-lock release access
hole.
4. Insert a tool (e.g. flathead screw- driver) into the access hole and
press down on the tool.
NOTICE
OAD058084N
Page 273 of 535

5-37
Driving your vehicle
5
5. Move the shift lever.
6. Remove the tool from the shift-lock override access hole then
install the cap.
If you need to use the shift-lock
release, have your vehicle inspected
by an authorized HYUNDAI dealer
immediately.
Parking
Always come to a complete stop and
continue to depress the brake pedal.
Move the shift lever into the P (Park)
position, apply the parking brake,
and place the ignition switch in the
LOCK/OFF position. Take the key
with you when exiting the vehicle.
Good Driving Practices
Never move the shift lever from P (Park) or N (Neutral) to any other
position with the accelerator pedal
depressed.
Never move the shift lever into P (Park) when the vehicle is in
motion.
Be sure the vehicle is completely
stopped before you attempt to shift
into R (Reverse) or D (Drive).
Do not move the shift lever to N (Neutral) when driving. Doing so
may result in an accident because
of a loss of engine braking and the
transmission could be damaged.
Do not drive with your foot resting on the brake pedal. Even light, but
consistent pedal pressure can
result in the brakes overheating,
brake wear and possibly even
brake failure.
Do not hold the vehicle on the incline with the accelerator pedal.
This can cause the transmission to
overheat. Always use the brake
pedal or parking brake.
When you stay in the vehicle
with the engine running, be
careful not to depress the accel-
erator pedal for a long period of
time. The engine or exhaust
system may overheat and start
a fire.
The exhaust gas and the
exhaust system are very hot.
Keep away from the exhaust
system components.
Do not stop or park over flam-
mable materials, such as dry
grass, paper or leaves. They
may ignite and cause a fire.WARNING
Page 285 of 535

5-49
Driving your vehicle
5
VSM OFF condition
To cancel VSM operation, press the
ESC OFF button. ESC OFF indicator
light ( ) will illuminate.
To turn on VSM, press the ESC OFF
button again. The ESC OFF indicator
light will go out.
Driving with wheels and tires with dif-
ferent sizes may cause the ESC sys-
tem to malfunction. Before replacing
tires, make sure all four tires and
wheels are the same size. Never
drive the vehicle with different sized
tires and wheels installed.
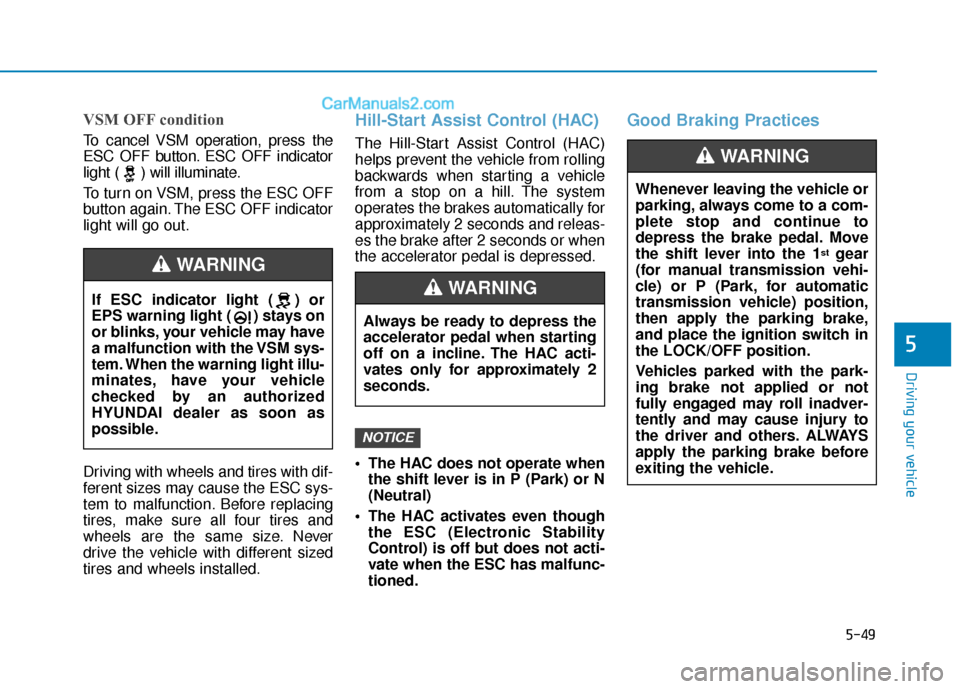
Hill-Start Assist Control (HAC)
The Hill-Start Assist Control (HAC)
helps prevent the vehicle from rolling
backwards when starting a vehicle
from a stop on a hill. The system
operates the brakes automatically for
approximately 2 seconds and releas-
es the brake after 2 seconds or when
the accelerator pedal is depressed.
The HAC does not operate whenthe shift lever is in P (Park) or N
(Neutral)
The HAC activates even though the ESC (Electronic Stability
Control) is off but does not acti-
vate when the ESC has malfunc-
tioned.
Good Braking Practices
NOTICE
If ESC indicator light ( ) or
EPS warning light ( ) stays on
or blinks, your vehicle may have
a malfunction with the VSM sys-
tem. When the warning light illu-
minates, have your vehicle
checked by an authorized
HYUNDAI dealer as soon as
possible.
WARNING
Always be ready to depress the
accelerator pedal when starting
off on a incline. The HAC acti-
vates only for approximately 2
seconds.
WARNING
Whenever leaving the vehicle or
parking, always come to a com-
plete stop and continue to
depress the brake pedal. Move
the shift lever into the 1
stgear
(for manual transmission vehi-
cle) or P (Park, for automatic
transmission vehicle) position,
then apply the parking brake,
and place the ignition switch in
the LOCK/OFF position.
Vehicles parked with the park-
ing brake not applied or not
fully engaged may roll inadver-
tently and may cause injury to
the driver and others. ALWAYS
apply the parking brake before
exiting the vehicle.
WARNING
Page 287 of 535

5-51
Driving your vehicle
5
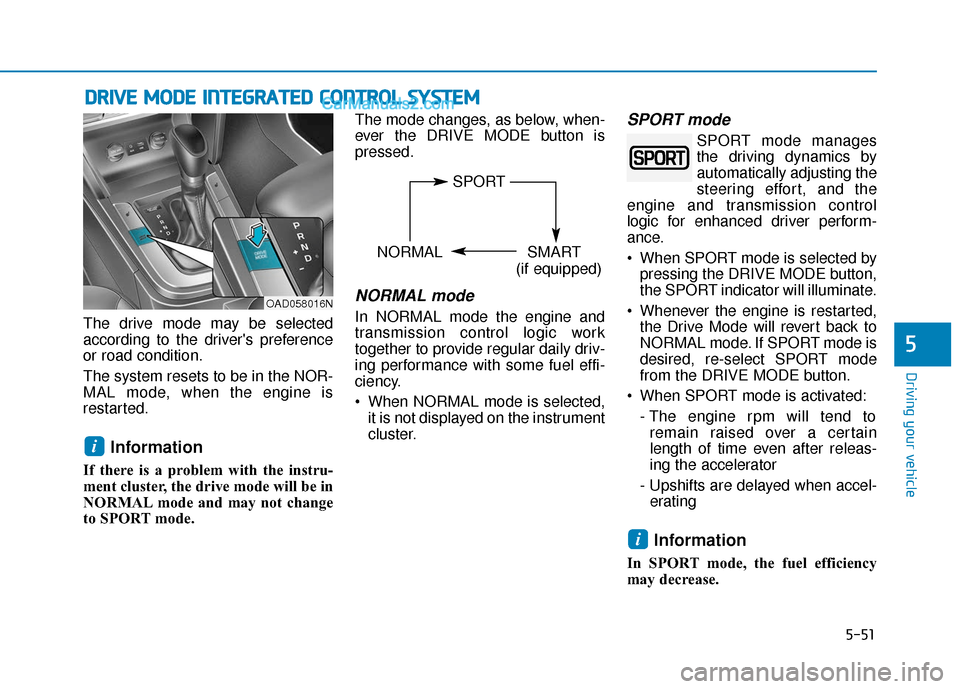
The drive mode may be selected
according to the driver's preference
or road condition.
The system resets to be in the NOR-
MAL mode, when the engine is
restarted.
Information
If there is a problem with the instru-
ment cluster, the drive mode will be in
NORMAL mode and may not change
to SPORT mode. The mode changes, as below, when-
ever the DRIVE MODE button is
pressed.
NORMAL mode
In NORMAL mode the engine and
transmission control logic work
together to provide regular daily driv-
ing performance with some fuel effi-
ciency.
When NORMAL mode is selected,
it is not displayed on the instrument
cluster.
SPORT mode
SPORT mode manages
the driving dynamics by
automatically adjusting the
steering effort, and the
engine and transmission control
logic for enhanced driver perform-
ance.
When SPORT mode is selected by pressing the DRIVE MODE button,
the SPORT indicator will illuminate.
Whenever the engine is restarted, the Drive Mode will revert back to
NORMAL mode. If SPORT mode is
desired, re-select SPORT mode
from the DRIVE MODE button.
When SPORT mode is activated: - The engine rpm will tend toremain raised over a certain
length of time even after releas-
ing the accelerator
- Upshifts are delayed when accel- erating
Information
In SPORT mode, the fuel efficiency
may decrease.
i
i
D D R
RI
IV
V E
E
M
M O
OD
DE
E
I
IN
N T
TE
EG
G R
RA
A T
TE
ED
D
C
C O
O N
NT
TR
R O
O L
L
S
S Y
Y S
ST
T E
EM
M
OAD058016N
SPORT
NORMAL SMART
(if equipped)
Page 289 of 535

5-53
Driving your vehicle
5
Limitation of SMART mode
The SMART mode may be limited in
following situations. (The OFF indica-
tor illuminates in those situations.)
The driver manually moves theshift lever :
It deactivates SMART mode. The
vehicle drives, as the driver manu-
ally moves the shift lever.
The cruise control is activated : The cruise control system may
deactivate the SMART mode when
the vehicle is controlled by the set
speed of the smart cruise control
system. (SMART mode is not
deactivated just by activating the
cruise control system.) The transmission oil temperature is
either extremely low or extremely
high :
The SMART mode can be active in
most of the normal driving situa-
tions. However, an extremely high/
low transmission oil temperature
may temporarily deactivate the
SMART mode, because the trans-
mission condition is out of normal
operation condition.
Page 349 of 535

5-113
Driving your vehicle
5
Cruise Control Operation
1. Cruise indicator
2. SET indicator (Type A) / Set speed (Type B)
The Cruise Control system allows
you to drive at speeds above 20 mph
(30 km/h) without depressing the
accelerator pedal. During cruise-speed driving of a
manual transmission vehicle, do
not shift into neutral without
depressing the clutch pedal, since
the engine will be overrevved. If
this happens, depress the clutch
pedal or press the cruise control
ON/OFF button.
NOTICE
C C
R
R U
U I
IS
S E
E
C
C O
O N
NT
TR
R O
O L
L
(
( I
IF
F
E
E Q
Q U
UI
IP
P P
PE
ED
D )
)
Do not use when:
- Driving in heavy traffic or
when traffic conditions make
it difficult to drive at a con-
stant speed
- Driving on rainy, icy, or snow-covered roads
- Driving on hilly or windy roads
- Driving in windy areas
- Driving with limited view (possibly due to bad weather
such as fog, snow, rain and
sandstorm)
Take the following precautions:
Always set the vehicle speed
under the speed limit.
If the Cruise Control is left on,
(cruise indicator light in the
instrument cluster is illumi-
nated) the Cruise Control can
be activated unintentionally.
Keep the Cruise Control sys-
tem off (cruise indicator light
OFF) when the Cruise Control
is not in use, to avoid inadver-
tently setting a speed.
Use the Cruise Control sys-
tem only when traveling on
open highways in good
weather.
Do not use the Cruise Control
when it may be unsafe to keep
the vehicle at a constant
speed.
WARNING
OAD048594N/OIK057157N
■ Type A■ Type B
Page 350 of 535

5-114
Driving your vehicle
Information
• During normal cruise control opera-tion, when the SET switch is activat-
ed or reactivated after applying the
brakes, the cruise control will ener-
gize after approximately 3 seconds.
This delay is normal.
• Before activating the cruise control function, the system will check to
verify that the brake switch is oper-
ating normally. Depress the brake
pedal at least once after turning ON
the ignition or starting the engine.
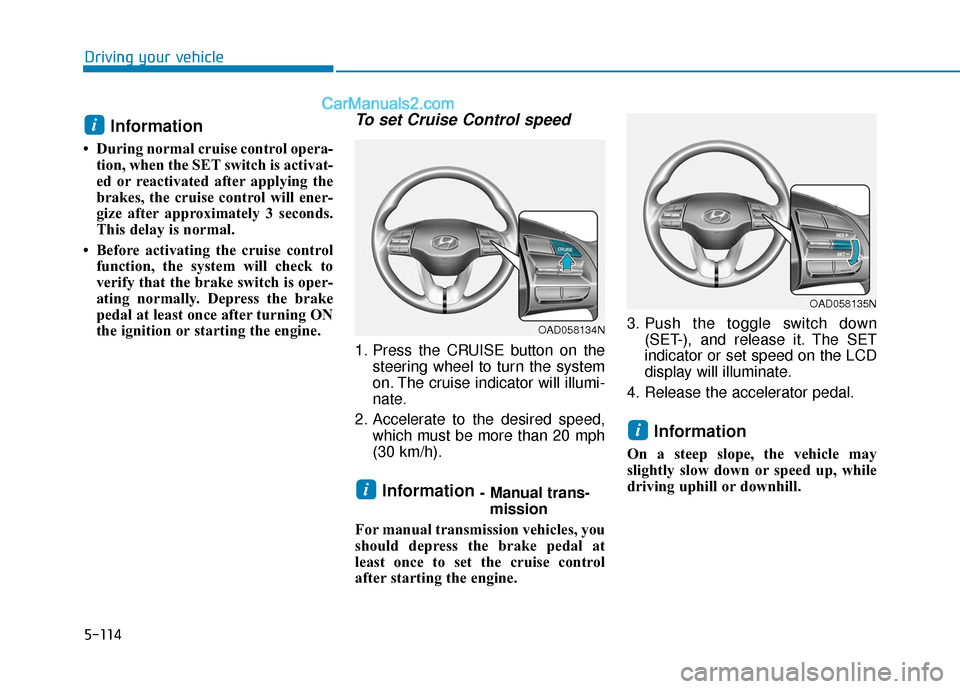
To set Cruise Control speed
1. Press the CRUISE button on the steering wheel to turn the system
on. The cruise indicator will illumi-
nate.
2. Accelerate to the desired speed, which must be more than 20 mph
(30 km/h).
Information - Manual trans-mission
For manual transmission vehicles, you
should depress the brake pedal at
least once to set the cruise control
after starting the engine. 3. Push the toggle switch down
(SET-), and release it. The SET
indicator or set speed on the LCD
display will illuminate.
4. Release the accelerator pedal.
Information
On a steep slope, the vehicle may
slightly slow down or speed up, while
driving uphill or downhill.
i
i
i
OAD058135N
OAD058134N
Page 352 of 535

5-116
Driving your vehicle
Cruise Control will be canceledwhen:
Depressing the brake pedal.
Depressing the clutch pedal.
(for manual transmission vehicle)
Pressing the CANCEL button located on the steering wheel.
Pressing the CRUISE button. Both the cruise indicator and the SET
indicator or set speed on the LCD
display will turn OFF.
Moving the shift lever into N (Neutral).(for automatic transmis-
sion/dual clutch transmission vehi-
cle) Decreasing the vehicle speed to
less than approximately 20 mph
(30 km/h).
The ESC (Electronic Stability Control) is operating.
Information
Each of the above actions will cancel
Cruise Control operation (the set
speed on the LCD display in the
instrument cluster will go off), but only
pressing the CRUISE button will turn
the system off. If you wish to resume
Cruise Control operation, push the
toggle switch up (RES+) located on
your steering wheel. You will return to
your previously preset speed, unless
the system was turned off using the
CRUISE button.
To resume preset Cruisingspeed
Push the toggle switch up (RES+). If
the vehicle speed is over 20 mph (30
km/h), the vehicle will resume the
preset speed.
i
OAD058137NOAD058136N