2019 HONDA ODYSSEY warning
[x] Cancel search: warningPage 184 of 767
182
Controls
Opening and Closing the Windows
Opening/Closing the Power Windows
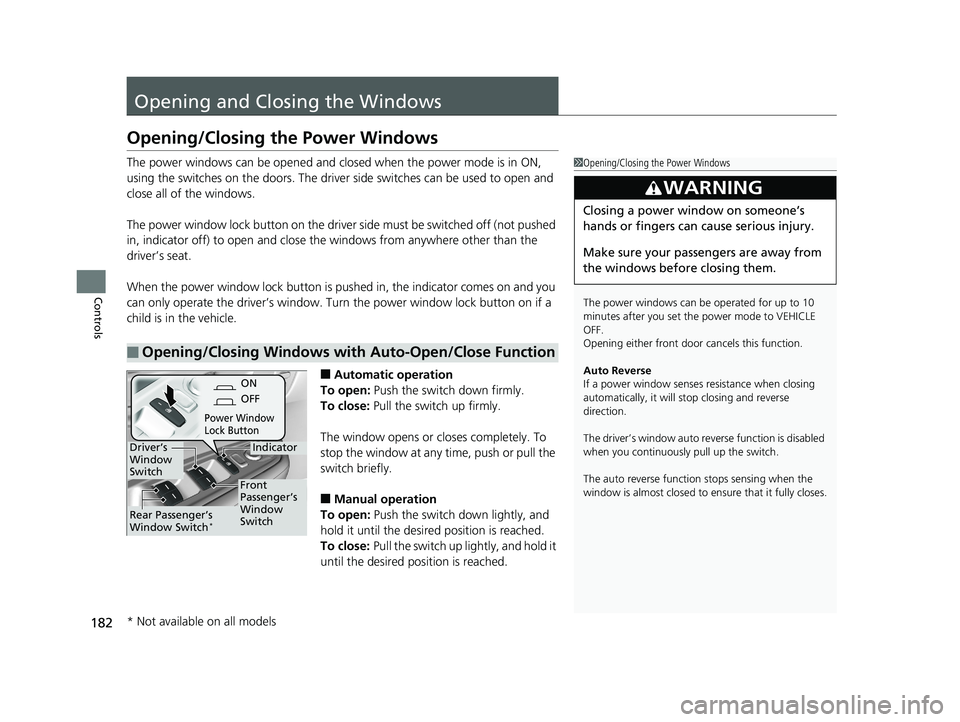
The power windows can be opened and closed when the power mode is in ON,
using the switches on the do ors. The driver side switches can be used to open and
close all of the windows.
The power window lock button on the driver side must be switched off (not pushed
in, indicator off) to open and close th e windows from anywhere other than the
driver’s seat.
When the power window lock button is pu shed in, the indicator comes on and you
can only operate the driver’s window. Turn the power window lock button on if a
child is in the vehicle.
■Automatic operation
To open: Push the switch down firmly.
To close: Pull the switch up firmly.
The window opens or cl oses completely. To
stop the window at any time, push or pull the
switch briefly.
■Manual operation
To open: Push the switch down lightly, and
hold it until the desired position is reached.
To close: Pull the switch up lightly, and hold it
until the desired position is reached.
■Opening/Closing Windows with Auto-Open/Close Function
1 Opening/Closing the Power Windows
The power windows can be operated for up to 10
minutes after you set the power mode to VEHICLE
OFF.
Opening either front door cancels this function.
Auto Reverse
If a power window senses resistance when closing
automatically, it will stop closing and reverse
direction.
The driver’s window auto re verse function is disabled
when you continuously pull up the switch.
The auto reverse function stops sensing when the
window is almost closed to en sure that it fully closes.
3WARNING
Closing a power window on someone’s
hands or fingers can cause serious injury.
Make sure your passengers are away from
the windows before closing them.
ON
OFF
Power Window
Lock Button
IndicatorDriver’s
Window
Switch
Front
Passenger’s
Window
Switch
Rear Passenger’s
Window Switch*
* Not available on all models
19 ODYSSEY-31THR6120.book 182 ページ 2018年12月6日 木曜日 午後4時35分
Page 187 of 767
185
Controls
Opening and Closing the Moonroof*
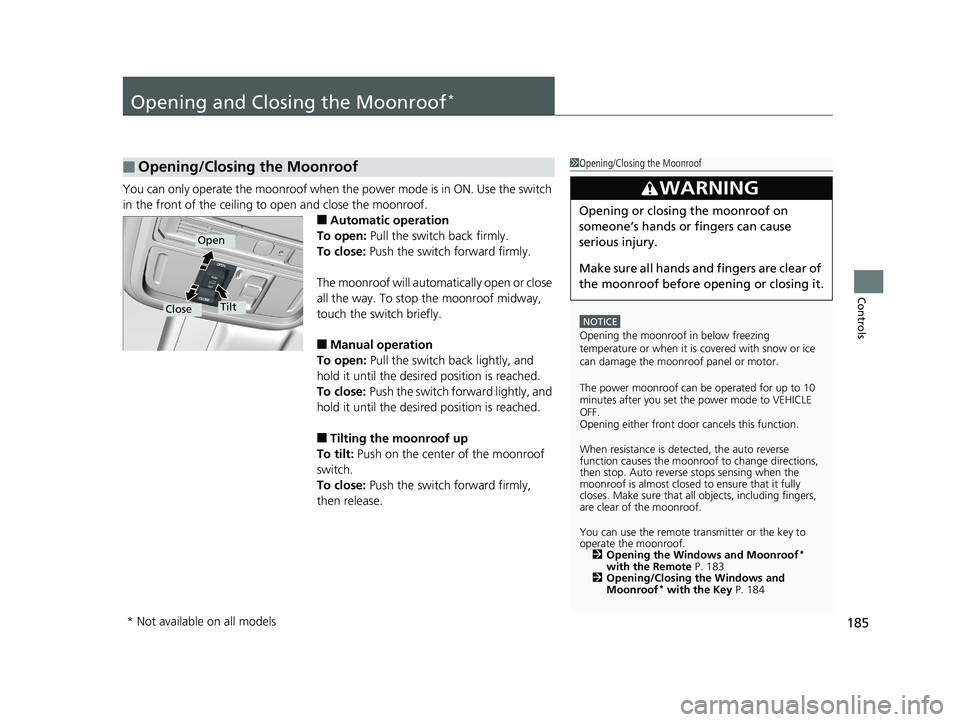
You can only operate the moonroof when the power mode is in ON. Use the switch
in the front of the ceiling to open and close the moonroof.
■Automatic operation
To open: Pull the switch back firmly.
To close: Push the switch forward firmly.
The moonroof will automatically open or close
all the way. To stop the moonroof midway,
touch the switch briefly.
■Manual operation
To open: Pull the switch back lightly, and
hold it until the desired position is reached.
To close: Push the switch fo rward lightly, and
hold it until the desired position is reached.
■Tilting the moonroof up
To tilt: Push on the center of the moonroof
switch.
To close: Push the switch forward firmly,
then release.
■Opening/Closing the Moonroof1 Opening/Closing the Moonroof
NOTICE
Opening the moonroof in below freezing
temperature or when it is covered with snow or ice
can damage the moonr oof panel or motor.
The power moonroof can be operated for up to 10
minutes after you set the power mode to VEHICLE
OFF.
Opening either front door cancels this function.
When resistance is detected, the auto reverse
function causes the moonroof to change directions,
then stop. Auto reverse stops sensing when the
moonroof is almost closed to ensure that it fully
closes. Make sure that al l objects, including fingers,
are clear of the moonroof.
You can use the remote transmitter or the key to
operate the moonroof. 2 Opening the Windows and Moonroof
*
with the Remote P. 183
2 Opening/Closing the Windows and
Moonroof
* with the Key P. 184
3WARNING
Opening or closing the moonroof on
someone’s hands or fingers can cause
serious injury.
Make sure all hands and fingers are clear of
the moonroof before opening or closing it.
Open
CloseTilt
* Not available on all models
19 ODYSSEY-31THR6120.book 185 ページ 2018年12月6日 木曜日 午後4時35分
Page 190 of 767
uuOperating the Switches Around the Steering Wheel uENGINE START/STOP Button
188
Controls
If you open the driver’s doo r when the power mode is set to ACCESSORY, a warning
beep sounds.
Warning buzzers may sound from inside and/
or outside the vehicle to remind you that the
remote is out of the vehicle. If the buzzer
continues even after the remote is put back
inside, place it to be within its operational
range.
■When the power mode is in ON
If the remote is taken out of the vehicle, and
the driver’s door is closed, warning buzzers
sound from both inside and outside the
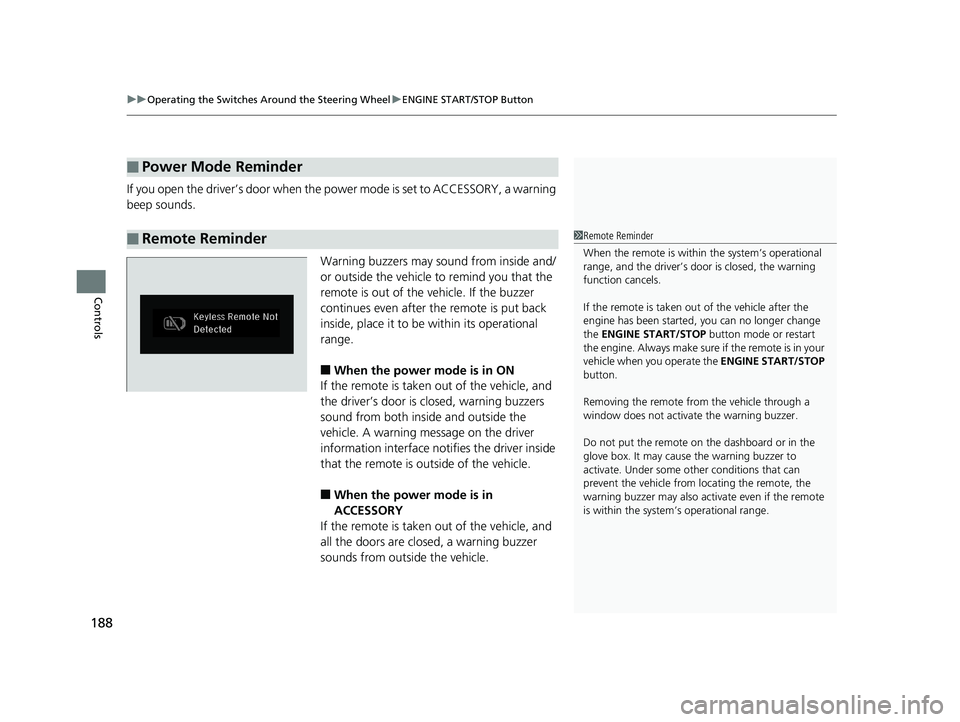
vehicle. A warning me ssage on the driver
information interface notifies the driver inside
that the remote is outside of the vehicle.
■When the power mode is in
ACCESSORY
If the remote is taken out of the vehicle, and
all the doors are clos ed, a warning buzzer
sounds from outside the vehicle.
■Power Mode Reminder
■Remote Reminder1 Remote Reminder
When the remote is within the system’s operational
range, and the driver’s door is closed, the warning
function cancels.
If the remote is taken out of the vehicle after the
engine has been started, you can no longer change
the ENGINE START/STOP button mode or restart
the engin e. Always make sure if the remote is in your
vehicle when you operate the ENGINE START/STOP
button.
Removing the remote fr om the vehicle through a
window does not activate the warning buzzer.
Do not put the remote on the dashboard or in the
glove box. It may cause the warning buzzer to
activate. Under some ot her conditions that can
prevent the vehicle from locating the remote, the
warning buzzer may also activate even if the remote
is within the system’s operational range.
19 ODYSSEY-31THR6120.book 188 ページ 2018年12月6日 木曜日 午後4時35分
Page 207 of 767

205
uuOperating the Switches Around the Steering Wheel uAdjusting the Steering Wheel
Controls
Adjusting the Steering Wheel
The steering wheel height and distance from your body can be adjusted so that you
can comfortably grip the steering wheel in an appropriate driving posture.
1. Push the steering wheel adjustment lever
down.
u The steering wheel adjustment lever is
under the steering column.
2. Move the steering wheel up or down, and
in or out.
u Make sure you can see the instrument
panel gauges and indicators.
3. Pull the steering wheel adjustment lever up
to lock the steering wheel in position.
u After adjusting the position, make sure
you have securely locked the steering
wheel in place by trying to move it up,
down, in, and out.1Adjusting the Steering Wheel
3WARNING
Adjusting the steering wheel position while
driving may cause you to lose control of the
vehicle and be seriously injured in a crash.
Adjust the steering wh eel only when the
vehicle is stopped.To adjust
To lock
Lever
19 ODYSSEY-31THR6120.book 205 ページ 2018年12月6日 木曜日 午後4時35分
Page 211 of 767

209Continued
Controls
Adjusting the Seats
Front Seats
Adjust the driver’s seat as far back as possible
while allowing you to ma intain full control of
the vehicle. You should be able to sit upright,
well back in the seat and be able to
adequately press the pedals without leaning
forward, and grip the steering wheel
comfortably. The passenger’s seat should be
adjusted in a similar manner, so that it is as far
back from the front airbag in the dashboard
as possible.1 Adjusting the Seats
The National Highway Traffic Safety Administration
and Transport Cana da recommend that drivers allow
at least 10 inches (25 cm) between the center of the
steering wheel and the chest.
Always make seat adjustments before driving.
3WARNING
Sitting too close to a front airbag can result
in serious injury or death if the front
airbags inflate.
Always sit as far back from the front
airbags as possible while maintaining
control of the vehicle.
Move back.
Allow sufficient
space.
■Adjusting the Seat Positions
Horizontal
Position
Adjustment
Height
Adjustment
(Driver’s seat
only)
Seat-back
Angle
Adjustment
19 ODYSSEY-31THR6120.book 209 ページ 2018年12月6日 木曜日 午後4時35分
Page 213 of 767
211
uuAdjusting the Seats uFront Seats
Controls
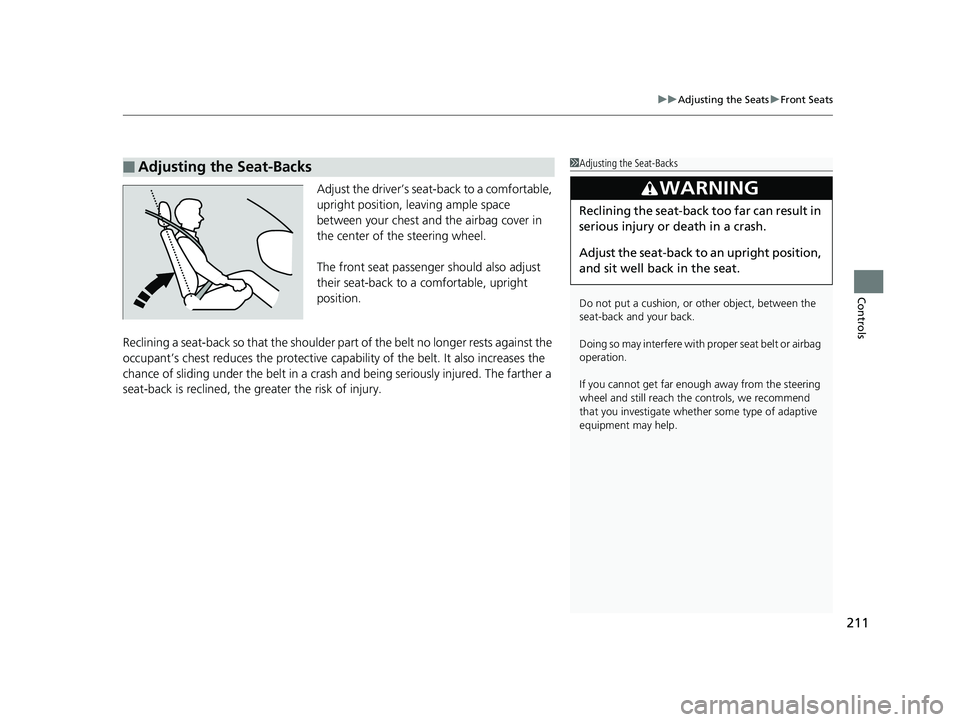
Adjust the driver’s seat -back to a comfortable,
upright position, leaving ample space
between your chest and the airbag cover in
the center of the steering wheel.
The front seat passenger should also adjust
their seat-back to a comfortable, upright
position.
Reclining a seat-back so that the shoulder part of the belt no longer rests against the
occupant’s chest reduces the protective capa bility of the belt. It also increases the
chance of sliding under the belt in a crash and being seriously injured. The farther a
seat-back is reclined, the gr eater the risk of injury.
■Adjusting the Seat-Backs1Adjusting the Seat-Backs
Do not put a cushion, or other object, between the
seat-back and your back.
Doing so may interfere with proper seat belt or airbag
operation.
If you cannot get far e nough away from the steering
wheel and still reach th e controls, we recommend
that you investigate whether some type of adaptive
equipment may help.
3WARNING
Reclining the seat-back too far can result in
serious injury or death in a crash.
Adjust the seat-back to an upright position,
and sit well back in the seat.
19 ODYSSEY-31THR6120.book 211 ページ 2018年12月6日 木曜日 午後4時35分
Page 214 of 767
212
uuAdjusting the Seats uHead Restraints
Controls
Head Restraints
Your vehicle is equipped with head restraints in all seating positions.
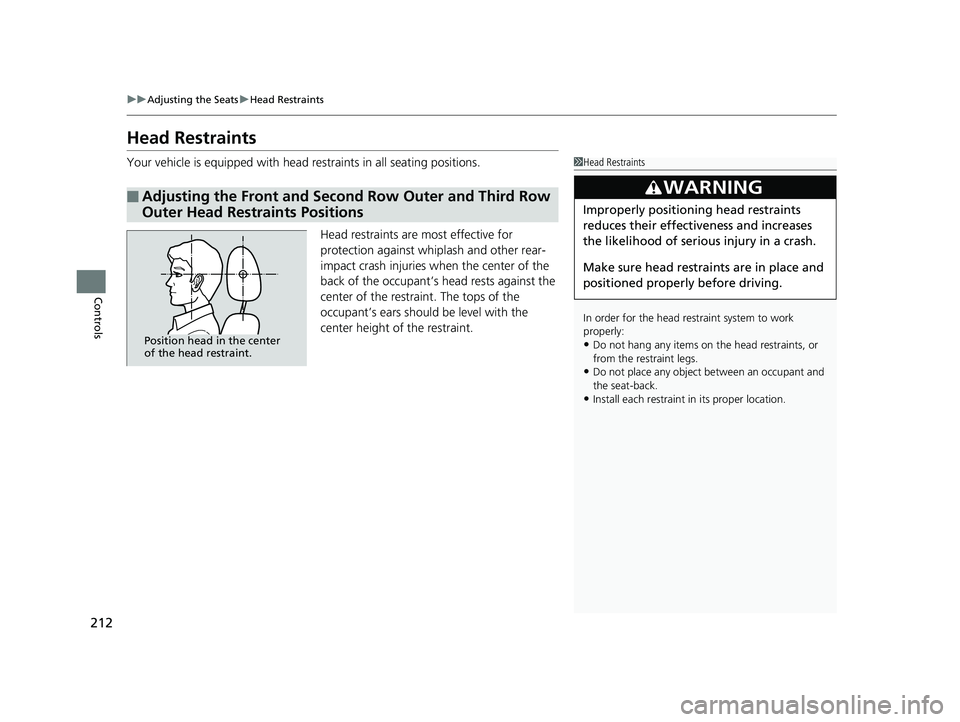
Head restraints are most effective for
protection against whiplash and other rear-
impact crash injuries when the center of the
back of the occupant’s head rests against the
center of the restraint. The tops of the
occupant’s ears should be level with the
center height of the restraint.
■Adjusting the Front and Second Row Outer and Third Row
Outer Head Restraints Positions
1Head Restraints
In order for the head restraint system to work
properly:
•Do not hang any items on the head restraints, or
from the restraint legs.
•Do not place any object be tween an occupant and
the seat-back.
•Install each restraint in its proper location.
3WARNING
Improperly positioning head restraints
reduces their effectiveness and increases
the likelihood of serious injury in a crash.
Make sure head restraints are in place and
positioned properly before driving.
Position head in the center
of the head restraint.
19 ODYSSEY-31THR6120.book 212 ページ 2018年12月6日 木曜日 午後4時35分
Page 216 of 767
uuAdjusting the Seats uHead Restraints
214
Controls
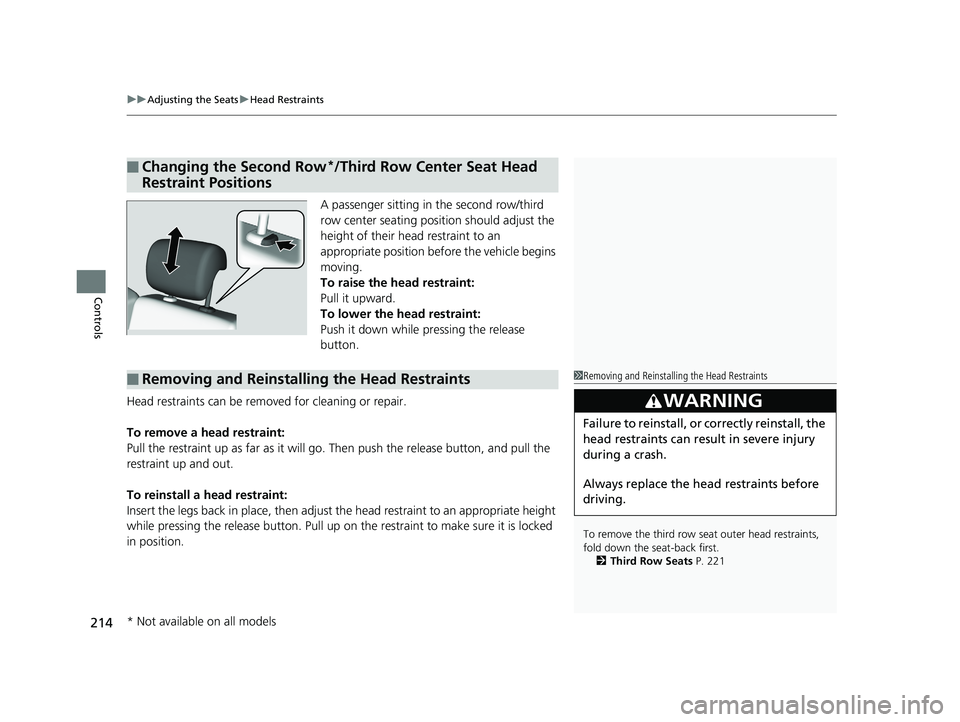
A passenger sitting in the second row/third
row center seating position should adjust the
height of their head restraint to an
appropriate position befo re the vehicle begins
moving.
To raise the head restraint:
Pull it upward.
To lower the head restraint:
Push it down while pressing the release
button.
Head restraints can be removed for cleaning or repair.
To remove a head restraint:
Pull the restraint up as far as it will go. Then push the release button, and pull the
restraint up and out.
To reinstall a head restraint:
Insert the legs back in place, then adjust the head restraint to an appropriate height
while pressing the release butto n. Pull up on the restraint to make sure it is locked
in position.
■Changing the Second Row*/Third Row Center Seat Head
Restraint Positions
■Removing and Reinstalling the Head Restraints1 Removing and Reinstalling the Head Restraints
To remove the third row seat outer head restraints,
fold down the seat-back first.
2 Third Row Seats P. 221
3WARNING
Failure to reinstall, or correctly reinstall, the
head restraints can result in severe injury
during a crash.
Always replace the he ad restraints before
driving.
* Not available on all models
19 ODYSSEY-31THR6120.book 214 ページ 2018年12月6日 木曜日 午後4時35分