Page 154 of 631
152
uuLocking and Unlocking the Doors uCustomizing the Auto Door Locking/Unlocking Setting
Controls
*1 : Default setting
*2 : Models with the smart entry system have an ENGINE START/STOP button instead of an ignition switch.
■Customizing Flow for Auto Door Locking Options
StepsDrive Lock Mode*1Off
1Apply the parking brake.
2The driver’s door must be closed at this stage.Open the driver’s door.
3Turn the ignition switch to ON (w*2.
4
Press and hold the front of the master door lock switch on the driver’s door. You will hear a click more than five seconds elapsed.
Release the switch.
5
Turn the ignition switch to OFF (0 within 20 seconds*2.
u Customization is completed.
u All doors unlock and all turn signals blink three times.
19 HR-V HDMC HDMG-31T7A6300.book 152 ページ 2018年6月1日 金曜日 午後1時14分
Page 155 of 631

153
uuLocking and Unlocking the Doors uCustomizing the Auto Door Locking/Unlocking Setting
Controls
*1 : Default setting
*2 : Models with the smart entry system have an ENGINE START/STOP button instead of an ignition switch.
■Customizing Flow for Auto Door Unlocking Options
StepsDriver Door Open Unlock Mode*1Park Unlock ModeOff
1
Apply the parking brake.
Move the shift lever out of
(P with the
brake pedal depressed.Apply the parking brake.
Move the shift lever to
(P.
Apply the parking brake.
Move the shift lever to
(P.
2The driver’s door must be closed at this stage.Open the driver’s door.
3Turn the ignition switch to ON (w*2.
4
Press and hold the rear of the master door lock switch on the driver’s door. You will hear a click more than five seconds elapsed.
Release the switch.
5
Turn the ignition switch to OFF (0 within 20 seconds*2.
u Customization is completed.
u All doors lock and all turn signals blink three times.
19 HR-V HDMC HDMG-31T7A6300.book 153 ページ 2018年6月1日 金曜日 午後1時14分
Page 171 of 631

169
uuOperating the Switches Around the Steering Wheel uLight Switches
Continued
Controls
Light Switches
Rotating the light switch turns the lights on
and off, regardless of the power mode setting
or position of the ignition switch.
■High beams
Push the lever forward until you hear a click.
■Low beams
When in high beams, pull the lever back to
return to low beams.
■Flashing the high beams
Pull the lever back, and release it.
■Lights off
Turn the lever to OFF either when:
• The shift lever is in
(P.
• The parking brake is applied.
To turn the light s on again, turn the lever to
OFF to cancel the lights off mode. Even if you
do not cancel the lights off mode, the lights
come on automatically when:
• The transmission is moved out of
(P and
the parking brake is released.
• The vehicle starts to move.
■Manual Operation1Light Switches
If you remove the key from the ignition switch while
the lights are on, a chime sounds when the driver’s
door is opened.
If you leave the power mode in VEHICLE OFF (LOCK)
while the lights are on, a chime sounds when the
driver’s door is opened.
When the lights are on, the lights on indicator in the
instrument pane l will be on.
2 Lights On Indicator P. 92
If you sense that the le vel of the headlights is
abnormal, have your vehicle inspected by a dealer.
Do not leave the lights on when the engine is off
because it will cause the battery to discharge.
Models without smart entry system
Models with smart entry system
High Beams
Flashing the high beams
Low Beams
Turns on position, side marker,
tail, and rear license plate lights
Turns on headlights, side
marker, position, tail, and rear
license plate lights
U.S. models
Canadian models
High Beams
Flashing the high beams
Low Beams
Canadian models
19 HR-V HDMC HDMG-31T7A6300.book 169 ページ 2018年6月1日 金曜日 午後1時14分
Page 178 of 631

176
uuOperating the Switches Around the Steering Wheel uDaytime Running Lights
Controls
Daytime Running Lights
The headlights come on slightly dimmer th an normal when the following conditions
have been met:
• The ignition switch is in ON
(w*1.
• The headlight switch is off, or in .
• The headlight switch is AUTO, or in .
• The parking brake is released.
The lights remain on even if you set th e parking brake. Turning off the ignition
switch or setting the power mode to VEHI CLE OFF will turn off the daytime running
lights.
The daytime running lights are off once the headlight switch is turned on, or when
the head light switch is in AUTO
* and it is getting darker outside.
*1: Models with the smart entry system have an ENGINE START/STOP button instead of an
ignition switch.
1 Daytime Running Lights
The daytime running lights come on dimmer when
the headlight switch is in than when it is in
AUTO
*. In AUTO*, if the ambient brightness is dark,
the low beam headlights come on.U.S. models
Canadian models
All models
* Not available on all models
19 HR-V HDMC HDMG-31T7A6300.book 176 ページ 2018年6月1日 金曜日 午後1時14分
Page 419 of 631

417
Driving
This chapter discusses driving and refueling.
Before DrivingDriving Preparation .......................... 418
Maximum Load Limit........................ 421
Towing a Trailer Towing Your Vehicle ........................ 423
Off-Highway Driving Guidelines ..... 424
When Driving Starting the Engine .................. 426, 429
Precautions While Driving................. 432
Continuously Variable Transmission.. 433
Shifting .................................... 434, 436
ECON Button ................................... 440
Cruise Control
*................................ 441
Vehicle Stability Assist® (VSA®), aka Electronic
Stability Control (ESC), System ...............444
LaneWatchTM*.................................. 446Real Time AWD with Intelligent Control
SystemTM*............................................. 448Tire Pressure Monito ring System (TPMS) ....449Tire Pressure Monitoring System (TPMS) -
Required Federal Explanation ......... 452
Honda Sensing ®
*.............................. 454
Collision Mitigati on Braking SystemTM
(CMBSTM) ....................................... 457
Adaptive Cruise Control (ACC)......... 467
Lane Keeping Assist System (LKAS) .. 480
Road Departure Mitigation (RDM) System .. 489
Front Sensor Camera ....................... 494
Radar Sensor ................................... 496
Braking Brake System ................................... 497
Anti-lock Brake System (ABS) ........... 502
Brake Assist System ......................... 503
Parking Your Vehicle When Stopped ................................ 504
Multi-View Rear Camera .................. 505
Refueling Fuel Information .............................. 507
How to Refuel ................................. 508
Fuel Economy and CO
2 Emissions .... 509
* Not available on all models
19 HR-V HDMC HDMG-31T7A6300.book 417 ページ 2018年6月1日 金曜日 午後1時14分
Page 428 of 631

426
Driving
When Driving
Starting the Engine
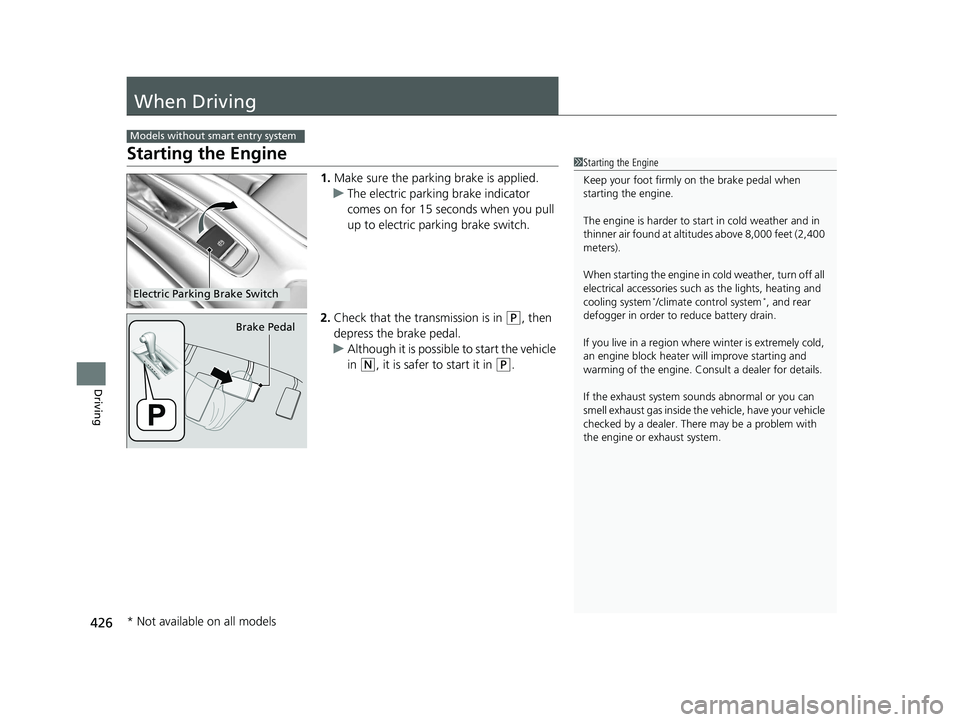
1.Make sure the parking brake is applied.
u The electric parking brake indicator
comes on for 15 seconds when you pull
up to electric parking brake switch.
2. Check that the tr ansmission is in
(P, then
depress the brake pedal.
u Although it is possibl e to start the vehicle
in
(N, it is safer to start it in (P.
Models without smart entry system
1 Starting the Engine
Keep your foot firmly on the brake pedal when
starting the engine.
The engine is harder to st art in cold weather and in
thinner air found at altitudes above 8,000 feet (2,400
meters).
When starting the engine in cold weather, turn off all
electrical accessories such as the lights, heating and
cooling system
*/climate control system*, and rear
defogger in order to reduce battery drain.
If you live in a region where winter is extremely cold,
an engine block heater will improve starting and
warming of the engine. Cons ult a dealer for details.
If the exhaust system sounds abnormal or you can
smell exhaust gas inside the vehicle, have your vehicle
checked by a dealer. There may be a problem with
the engine or exhaust system.Electric Parking Brake Switch
Brake Pedal
* Not available on all models
19 HR-V HDMC HDMG-31T7A6300.book 426 ページ 2018年6月1日 金曜日 午後1時14分
Page 429 of 631

Continued427
uuWhen Driving uStarting the Engine
Driving
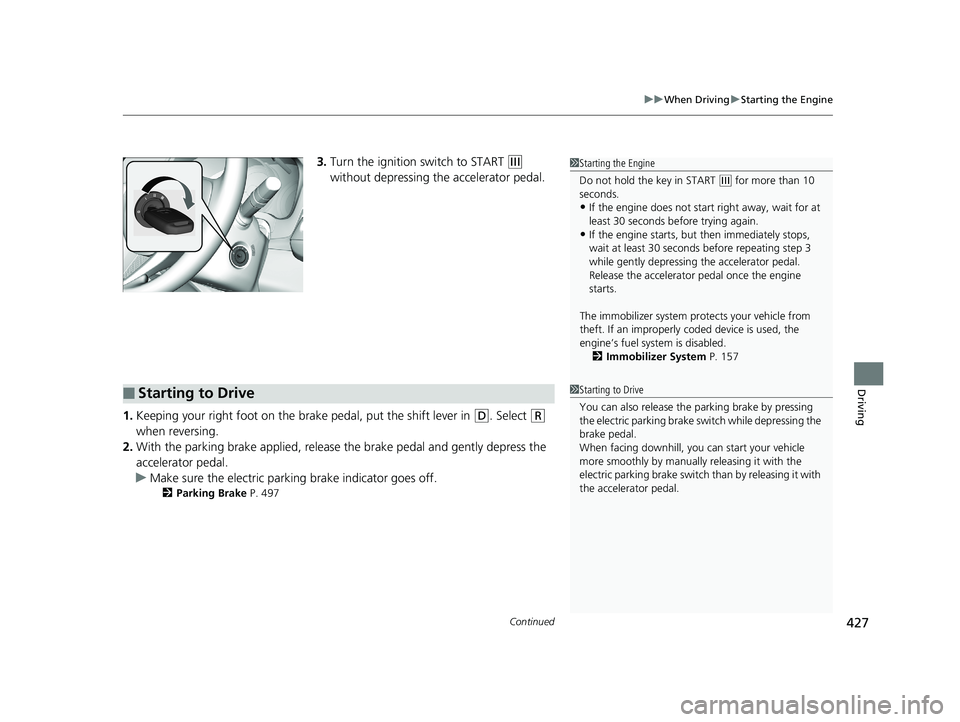
3. Turn the ignition switch to START (e
without depressing the accelerator pedal.
1. Keeping your right foot on the br ake pedal, put the shift lever in
(D. Select (R
when reversing.
2. With the parking brake applied, release the brake pedal and gently depress the
accelerator pedal.
u Make sure the electric parkin g brake indicator goes off.
2Parking Brake P. 497
1Starting the Engine
Do not hold the key in START
(e for more than 10
seconds.
•If the engine does not sta rt right away, wait for at
least 30 seconds before trying again.
•If the engine starts, but then immediately stops,
wait at least 30 seconds before repeating step 3
while gently depressing the accelerator pedal.
Release the accelerator pedal once the engine
starts.
The immobilizer system pr otects your vehicle from
theft. If an improperly c oded device is used, the
engine’s fuel system is disabled. 2 Immobilizer System P. 157
■Starting to Drive1Starting to Drive
You can also release the parking brake by pressing
the electric parking brake sw itch while depressing the
brake pedal.
When facing downhill, you can start your vehicle
more smoothly by manually releasing it with the
electric parking brake switch than by releasing it with
the accelerator pedal.
19 HR-V HDMC HDMG-31T7A6300.book 427 ページ 2018年6月1日 金曜日 午後1時14分
Page 430 of 631
uuWhen Driving uStarting the Engine
428
Driving
■Hill start assist system
Hill start assist keeps the brake engaged br iefly to help prevent the vehicle from
rolling on inclines as you move your fo ot from the brake pedal to the accelerator.
Put the transmission into
(D, (S, or (L when facing uphill, or (R when facing
downhill, then release the brake pedal.
1 Hill start assist system
Hill start assist may not prevent the vehicle from
rolling downhill on a very steep or slippe ry slope, and
will not operate on small inclines.
Hill start assist will operate even when VSA ® is
switched off.
Hill start assist is not a replacement for the parking
brake.
19 HR-V HDMC HDMG-31T7A6300.book 428 ページ 2018年6月1日 金曜日 午後1時14分