2019 HONDA CLARITY ELECTRIC window
[x] Cancel search: windowPage 364 of 559
362
Driving
Before Driving
Driving Preparation
Check the following items before you start driving.
• Make sure there are no obstructions on th e windows, door mirrors, exterior
lights, or other parts of the vehicle.
u Remove any frost, snow, or ice.
u Remove any snow on the roof, as this can slip down and obstruct your field of
vision while driving. If frozen solid , remove ice once it has softened.
u When removing ice from around the wheel s, be sure not to damage the wheel
or wheel components.
• Make sure the hood is securely closed.
u If the hood opens while driving, your front view will be blocked.
• Make sure the tires are in good condition.
u Check air pressures, and check for damage and excessive wear.
2Checking and Maintaining Tires P. 477
•Make sure there are no people or ob jects behind or around the vehicle.
u There are blind spots from the inside.
• Disconnect the charging cable.
■Exterior Checks1Exterior Checks
NOTICE
When doors are frozen s hut, use warm water around
the door edges to melt any ice. Do not try to force
them open, as this can damage the rubber trim
around the doors. When done, wipe dry to avoid
further freezing.
Do not pour warm water into the key cylinder.
You will be unable to insert the key if the water
freezes in the hole.
Heat from the power syst em can ignite flammable
materials left under the hood, causing a fire. If you’ve
parked your vehicle for an extended period, inspect
and remove any debris that may have collected, such
as dried grass and leaves th at have fallen or have
been carried in for use as a nest by a small animal.
Also check under the hood fo r leftover flammable
materials after you or so meone else has performed
maintenance on your vehicle.
19 CLARITY BEV-31TRV6200.book 362 ページ 2018年10月29日 月曜日 午前10時54分
Page 461 of 559
459
Maintenance
This chapter discusses basic maintenance.
Before Performing MaintenanceInspection and Maintenance ............ 460
Safety When Performing Maintenance...461
Parts and Fluids Used in Maintenance Service ........................................... 462
Maintenance Minder
TM..................... 463
Maintenance Under the Hood Maintenance Items Under the Hood .. 467
Opening the Hood ........................... 468
Cooling System ................................ 469
Transmission Fluid ............................ 470
Brake Fluid ....................................... 470 Refilling Window Washer Fluid......... 471
Replacing Light Bulbs ....................... 472
Checking and Maintaining Wiper
Blades .......................................... 474
Checking and Maintaining Tires
Checking Tires ................................. 477
Tire and Loading Information Label .. 478
Tire Labeling .................................... 478
DOT Tire Quality Grading (U.S. Vehicles).. 480
Wear Indicators................................ 482
Tire Service Life ................................ 482
Tire and Wheel Replacement............ 483 Tire Rotation .................................... 484
Winter Tires ..................................... 485
12-Volt Battery ................................. 486
Remote Transmitter Care Replacing the Button Battery ........... 488
Climate Control System Maintenance.. 489
CleaningInterior Care .................................... 490
Exterior Care.................................... 492
Accessories and Modifications ........ 496
19 CLARITY BEV-31TRV6200.book 459 ページ 2018年10月29日 月曜日 午前10時54分
Page 473 of 559
471
uuMaintenance Under the Hood uRefilling Window Washer Fluid
Maintenance
Refilling Window Washer Fluid
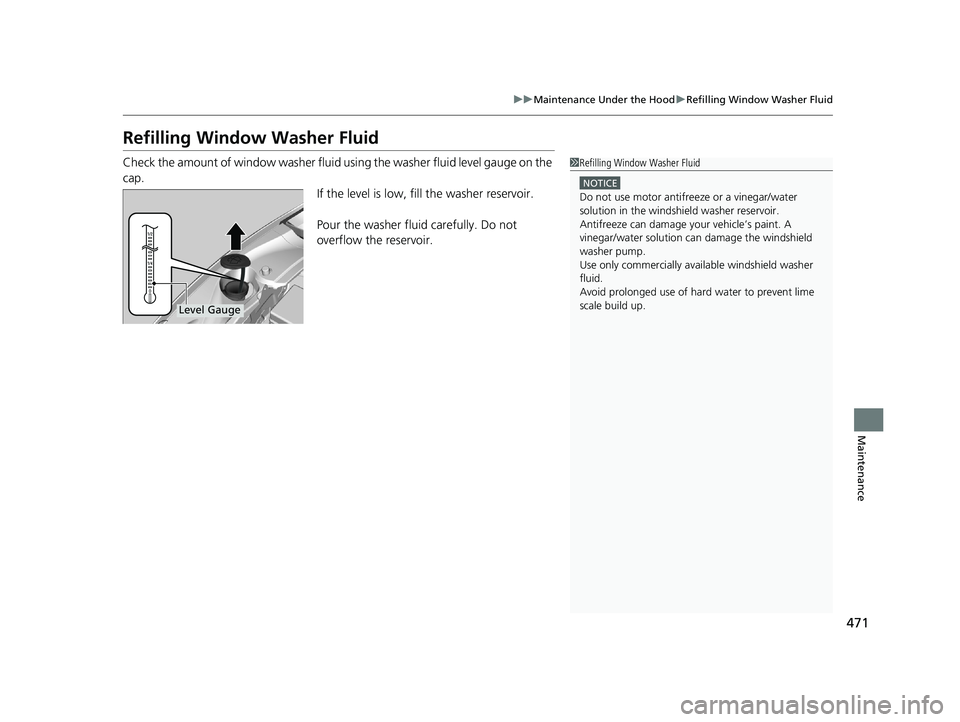
Check the amount of window washer fluid using the washer fluid level gauge on the
cap. If the level is low, fill the washer reservoir.
Pour the washer fluid carefully. Do not
overflow the reservoir.1Refilling Window Washer Fluid
NOTICE
Do not use motor antifreeze or a vinegar/water
solution in the windshield washer reservoir.
Antifreeze can damage y our vehicle’s paint. A
vinegar/water solution ca n damage the windshield
washer pump.
Use only commercially avai lable windshield washer
fluid.
Avoid prolonged use of hard water to prevent lime
scale build up.
Level Gauge
19 CLARITY BEV-31TRV6200.book 471 ページ 2018年10月29日 月曜日 午前10時54分
Page 476 of 559
474
Maintenance
Checking and Maintaining Wiper Blades
Checking Wiper Blades
If the wiper blade rubber has deteriorated, it will leave streaks and the hard surfaces
of the blade may scratch the window glass.
Changing the Wiper Blade Rubber
1. Set the power mode to VEHICLE OFF
(LOCK).
2. While holding the wiper switch in the
MIST position, set the power mode to ON,
then to VEHICLE OFF (LOCK).
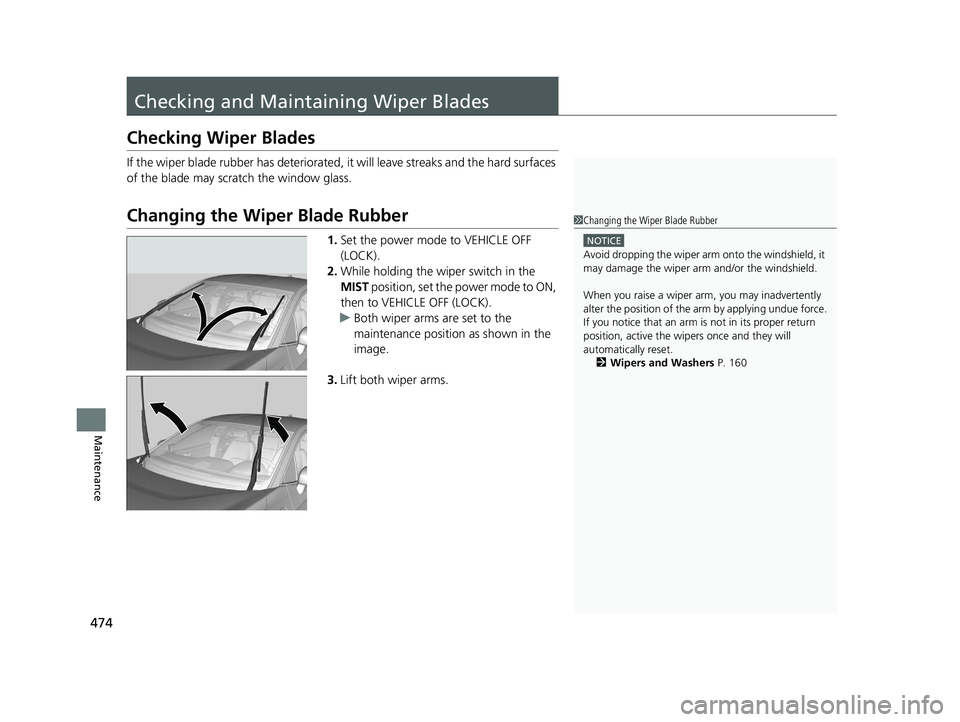
u Both wiper arms are set to the
maintenance position as shown in the
image.
3. Lift both wiper arms.
1Changing the Wiper Blade Rubber
NOTICE
Avoid dropping the wiper arm onto the windshield, it
may damage the wiper arm and/or the windshield.
When you raise a wiper arm, you may inadvertently
alter the position of the arm by applying undue force.
If you notice that an arm is not in its proper return
position, active the wipers once and they will
automatically reset. 2 Wipers and Washers P. 160
19 CLARITY BEV-31TRV6200.book 474 ページ 2018年10月29日 月曜日 午前10時54分
Page 488 of 559
486
Maintenance
12-Volt Battery
Checking the 12-Volt Battery
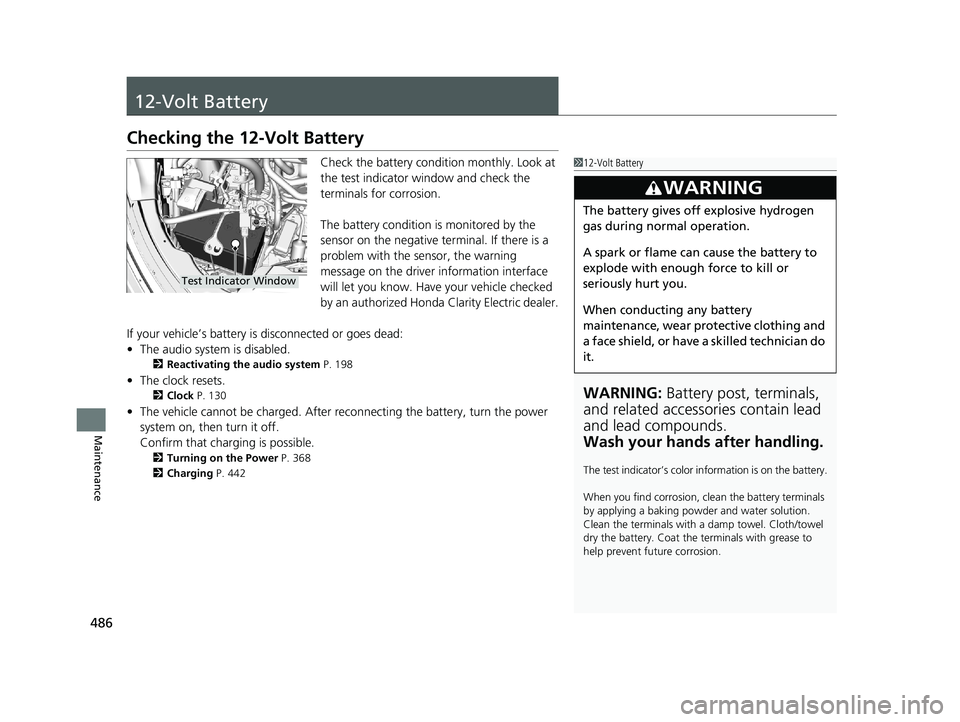
Check the battery condition monthly. Look at
the test indicator window and check the
terminals for corrosion.
The battery condition is monitored by the
sensor on the negative terminal. If there is a
problem with the sensor, the warning
message on the driver information interface
will let you know. Have your vehicle checked
by an authorized Honda Clarity Electric dealer.
If your vehicle’s battery is disconnected or goes dead:
• The audio system is disabled.
2 Reactivating the audio system P. 198
•The clock resets.
2 Clock P. 130
•The vehicle cannot be charged. After reconnecting the batte ry, turn the power
system on, then turn it off.
Confirm that charging is possible.
2 Turning on the Power P. 368
2 Charging P. 442
112-Volt Battery
WARNING: Battery post, terminals,
and related accessories contain lead
and lead compounds.
Wash your hands after handling.
The test indicator’s color in formation is on the battery.
When you find corrosion, cl ean the battery terminals
by applying a baking powder and water solution.
Clean the terminals with a damp towel. Cloth/towel
dry the battery. Coat the terminals with grease to
help prevent future corrosion.
3WARNING
The battery gives off explosive hydrogen
gas during normal operation.
A spark or flame can cause the battery to
explode with enough force to kill or
seriously hurt you.
When conducting any battery
maintenance, wear prot ective clothing and
a face shield, or have a skilled technician do
it.
Test Indicator Window
19 CLARITY BEV-31TRV6200.book 486 ページ 2018年10月29日 月曜日 午前10時54分
Page 491 of 559
489
Maintenance
Climate Control System Maintenance
Air Conditioning
To ensure proper and safe operation, the Society of Automotive Engineers (SAE
J2845) recommends that the refrigerant system only be serviced by trained and
certified technicians.
Never repair or replace the air conditio ning evaporator (cooling coil) with one
removed from a used or salvaged vehicle.
New replacement mobile air conditioning evaporators must be certified (and
labeled) as meeting SAE Standard J2842.
Dust and Pollen Filter
The climate control system is equipped with a dust and pollen filter that collects
pollen, dust, and other debris in the air. The Maintenance MinderTM messages will let
you know when to replace the filter.
We recommend that you replace the dust an d pollen filter sooner when using your
vehicle in areas with high concentrations of dust.
1 Climate Control System Maintenance
NOTICE
Vented refrigerant is harmful to the environment.
To avoid refrigerant from venting, never replace the
evaporator with one re moved from a used or
salvaged vehicle.
Refrigerant in your vehicle’s air conditioning system is
flammable and can be igni ted during servicing if
proper procedures are not followed.
The air conditioner labe l is found under the hood:
2 Safety Labels P. 80
2 Specifications P. 538
1Dust and Pollen Filter
If the airflow from the climate control system
deteriorates noticeably, and the windows fog up
easily, the filter may need to be replaced. Please
contact an authorized Honda Clarity Electric dealer
for replacement.
19 CLARITY BEV-31TRV6200.book 489 ページ 2018年10月29日 月曜日 午前10時54分
Page 493 of 559
491
uuCleaning uInterior Care
Maintenance
Wipe using a glass cleaner.
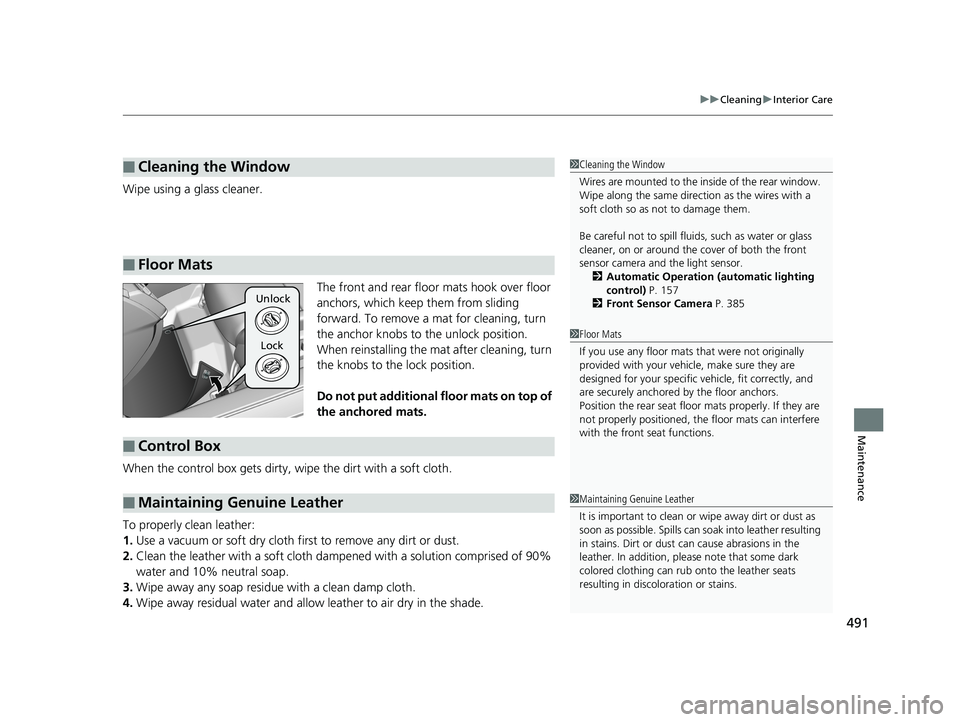
The front and rear floor mats hook over floor
anchors, which keep them from sliding
forward. To remove a mat for cleaning, turn
the anchor knobs to the unlock position.
When reinstalling the mat after cleaning, turn
the knobs to the lock position.
Do not put additional floor mats on top of
the anchored mats.
When the control box gets dirty, wipe the dirt with a soft cloth.
To properly clean leather:
1. Use a vacuum or soft dry cloth first to remove any dirt or dust.
2. Clean the leather with a soft cloth dampen ed with a solution comprised of 90%
water and 10% neutral soap.
3. Wipe away any soap residu e with a clean damp cloth.
4. Wipe away residual water and allo w leather to air dry in the shade.
■Cleaning the Window
■Floor Mats
1Cleaning the Window
Wires are mounted to the in side of the rear window.
Wipe along the same direct ion as the wires with a
soft cloth so as not to damage them.
Be careful not to spill flui ds, such as water or glass
cleaner, on or around the co ver of both the front
sensor camera and the light sensor.
2 Automatic Operation (automatic lighting
control) P. 157
2 Front Sensor Camera P. 385
1Floor Mats
If you use any floor mats that were not originally
provided with your vehicle, make sure they are
designed for your specific ve hicle, fit correctly, and
are securely anchored by the floor anchors.
Position the rear seat floor mats properly. If they are
not properly positioned, the floor mats can interfere
with the front seat functions.
Unlock
Lock
■Control Box
■Maintaining Genuine Leather1 Maintaining Genuine Leather
It is important to clean or wipe away dirt or dust as
soon as possible. Spills can soak into leather resulting
in stains. Dirt or dust ca n cause abrasions in the
leather. In addition, pl ease note that some dark
colored clothing can rub onto the leather seats
resulting in discol oration or stains.
19 CLARITY BEV-31TRV6200.book 491 ページ 2018年10月29日 月曜日 午前10時54分
Page 495 of 559
Continued493
uuCleaning uExterior Care
Maintenance
• Keep sufficient distance between the cleaning nozzle and the vehicle body.
• Take particular care around the windows. Standing too close may cause water to
enter the vehicle interior.
• Do not spray high pressure water directly into the motor compartment. Instead,
use low pressure water.
• Do not spray water under the hood wh ere the electric motor and other high
voltage system components are located. It could cause a malfunction.
• Do not spray water directly at the charging port.
A good coat of automotive body wax helps protect your vehicle’s paint from the
elements. Wax will wear off over time and expose your vehicle’s paint to the
elements, so reapply as necessary.
If you get coolant or battery fluid on resin coated parts, they may be stained or the
coating may peel. Promptly wipe it aw ay using a soft cloth and clean water.
Wipe using a glass cleaner.
■Using High Pressure Cleaners
■Applying Wax
■Maintaining the Bumpers and Other Resin Coated Parts
■Cleaning the Window
1 Applying Wax
NOTICE
Chemical solvents and strong cleaners can damage
the paint, metal, and plasti c on your vehicle. Wipe
away spills immediately.
1 Maintaining the Bumpers an d Other Resin Coated Parts
Ask an authorized Honda Clar ity Electric dealer about
the correct coating material when you want to repair
the painted surface of the parts made of resin.
1 Cleaning the Window
When you raise a wiper arm, you may inadvertently
alter the position of the arm by applying undue force.
If you notice that an arm is not in its proper return
position, active the wipers once and they will
automatically reset. 2 Wipers and Washers P. 160
19 CLARITY BEV-31TRV6200.book 493 ページ 2018年10月29日 月曜日 午前10時54分