2019 GMC SIERRA DENALI engine
[x] Cancel search: enginePage 337 of 472
GMC Sierra/Sierra Denali Owner Manual (GMNA-Localizing-U.S./Canada/
Mexico-1500-11698638) - 2019 - crc - 5/15/18
336 Vehicle Care turned on after new pads and wear
sensors are installed, a message
will display. Follow the prompts to
reset the system.
The brake pad life system can also
be manually reset:
1. Display Brake Pad Life on the
DIC.
See Driver Information Center
(DIC) (Midlevel and Uplevel)
0 160 or Driver Information
Center (DIC) (Base Level)
0 159 .
2. Press the thumbwheel or the
trip odometer reset stem if the
vehicle does not have DIC
buttons. Select front or rear
pads as appropriate.
3. Select YES on the confirmation
message, or press the trip
odometer reset stem on a base
level DIC. Repeat for pads on
the other axle if they were also
replaced. How to Disable the Brake Pad
Life System The brake pad life system can be
turned off. This may be necessary if
aftermarket brake pads without wear
sensors are installed. When the
system is turned off, the front and
rear brake pad life percentages will
not display. However, the built-in
wear indicators that make a
high-pitched warning sound when
the brake pads are worn can still
determine when the pads should be
replaced. See Brakes 0 335 .
To turn off the brake pad life system:
1. Display Brake Pad Life on the
DIC.
See Driver Information Center
(DIC) (Midlevel and Uplevel)
0 160 or Driver Information
Center (DIC) (Base Level)
0 159 .
2. Select DISABLE.
To turn the brake pad life system
back on, follow the above steps but
select ENABLE in Step 2. Brake Fluid The brake master cylinder reservoir
is filled with GM approved DOT 4
brake fluid as indicated on the
reservoir cap. See Engine
Compartment Overview 0 316 for
the location of the reservoir.
Checking Brake Fluid
With the vehicle in P (Park) on a
level surface, the brake fluid level
should be between the minimum
and maximum marks on the brake
fluid reservoir.
There are only two reasons why the
brake fluid level in the reservoir may
go down:
.
Normal brake lining wear. When
new linings are installed, the
fluid level goes back up.
Page 338 of 472
GMC Sierra/Sierra Denali Owner Manual (GMNA-Localizing-U.S./Canada/
Mexico-1500-11698638) - 2019 - crc - 5/15/18
Vehicle Care 337.
A fluid leak in the brake
hydraulic system. Have the
brake hydraulic system fixed.
With a leak, the brakes will not
work well.
Always clean the brake fluid
reservoir cap and the area around
the cap before removing it.
Do not top off the brake fluid.
Adding fluid does not correct a leak.
If fluid is added when the linings are
worn, there will be too much fluid
when new brake linings are
installed. Add or remove fluid, as
necessary, only when work is done
on the brake hydraulic system.
{ Warning
If too much brake fluid is added, it
can spill on the engine and burn,
if the engine is hot enough. You
or others could be burned, and
the vehicle could be damaged.
Add brake fluid only when work is
done on the brake hydraulic
system. When the brake fluid falls to a low
level, the brake warning light comes
on. See Brake System Warning
Light 0 151 .
Brake fluid absorbs water over time
which degrades the effectiveness of
the brake fluid. Replace brake fluid
at the specified intervals to prevent
increased stopping distance. See
Maintenance Schedule 0 415 .
What to Add
Use only GM approved DOT 4
brake fluid from a clean, sealed
container. See Recommended
Fluids and Lubricants 0 425 .
{ Warning
The wrong or contaminated brake
fluid could result in damage to the
brake system. This could result in
the loss of braking leading to a
possible injury. Always use the
proper GM approved brake fluid. CautionIf brake fluid is spilled on the
vehicle's painted surfaces, the
paint finish can be damaged.
Immediately wash off any painted
surface.
Battery - North America The original equipment battery is
maintenance free. Do not remove
the cap and do not add fluid.
Refer to the replacement number
shown on the original battery label
when a new battery is needed. See
Engine Compartment Overview
0 316 for battery location.
Stop/Start System
Vehicles equipped with a 2.7L L3B,
3.0L LM2, 5.3L L84 or 6.2L L87 are
equipped with a Stop/Start system
to shut off the engine to help
conserve fuel. See Stop/Start
System 0 222 .
Page 342 of 472
GMC Sierra/Sierra Denali Owner Manual (GMNA-Localizing-U.S./Canada/
Mexico-1500-11698638) - 2019 - crc - 5/15/18
Vehicle Care 341
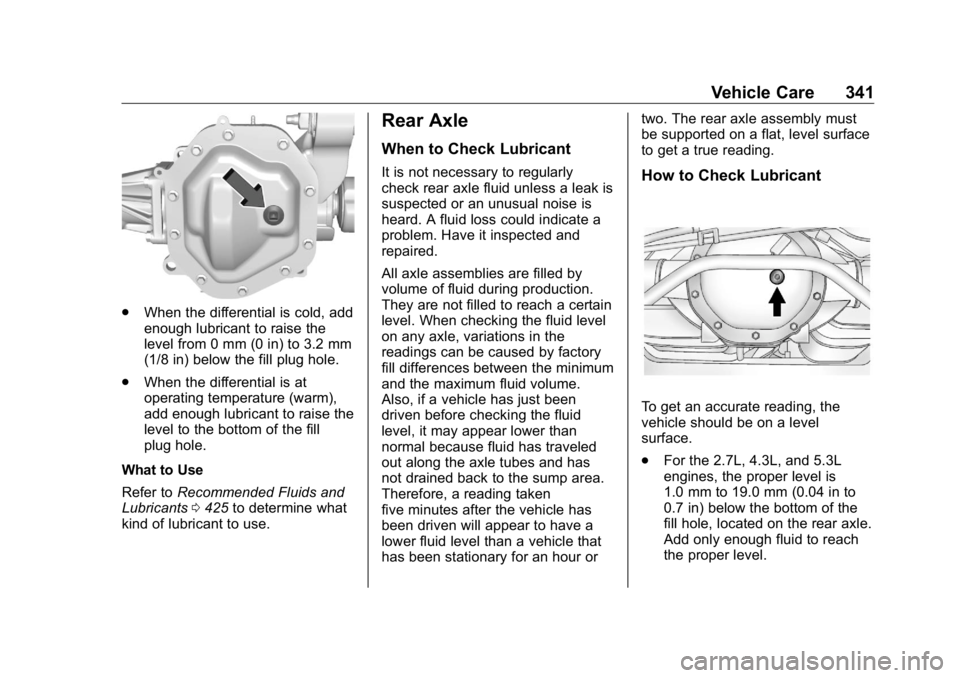
.
When the differential is cold, add
enough lubricant to raise the
level from 0 mm (0 in) to 3.2 mm
(1/8 in) below the fill plug hole.
.
When the differential is at
operating temperature (warm),
add enough lubricant to raise the
level to the bottom of the fill
plug hole.
What to Use
Refer to Recommended Fluids and
Lubricants 0 425 to determine what
kind of lubricant to use. Rear Axle When to Check Lubricant It is not necessary to regularly
check rear axle fluid unless a leak is
suspected or an unusual noise is
heard. A fluid loss could indicate a
problem. Have it inspected and
repaired.
All axle assemblies are filled by
volume of fluid during production.
They are not filled to reach a certain
level. When checking the fluid level
on any axle, variations in the
readings can be caused by factory
fill differences between the minimum
and the maximum fluid volume.
Also, if a vehicle has just been
driven before checking the fluid
level, it may appear lower than
normal because fluid has traveled
out along the axle tubes and has
not drained back to the sump area.
Therefore, a reading taken
five minutes after the vehicle has
been driven will appear to have a
lower fluid level than a vehicle that
has been stationary for an hour or two. The rear axle assembly must
be supported on a flat, level surface
to get a true reading.
How to Check Lubricant
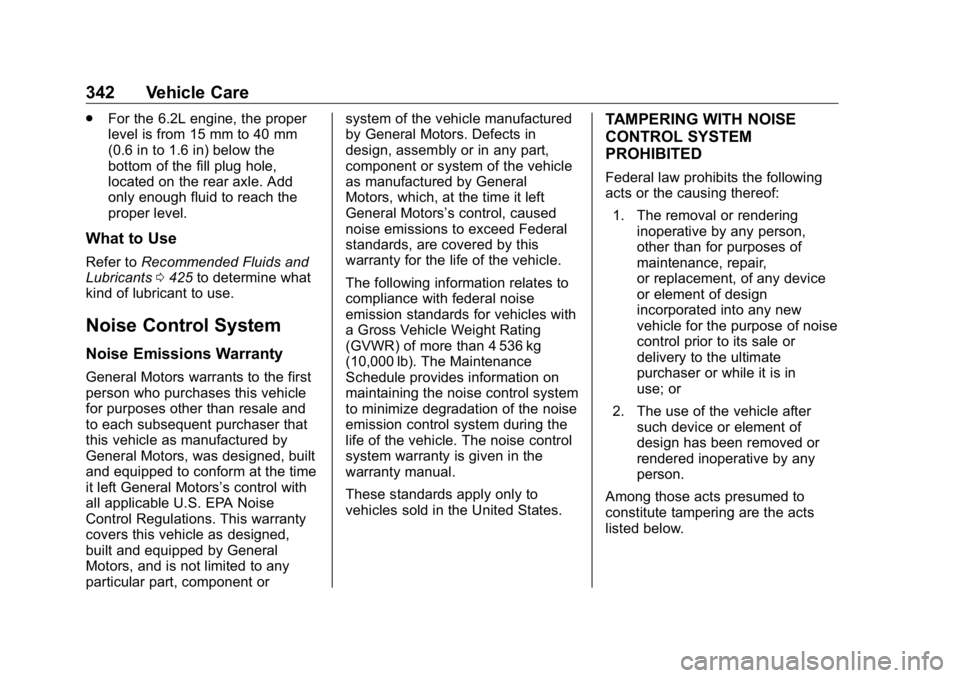
To get an accurate reading, the
vehicle should be on a level
surface.
.
For the 2.7L, 4.3L, and 5.3L
engines, the proper level is
1.0 mm to 19.0 mm (0.04 in to
0.7 in) below the bottom of the
fill hole, located on the rear axle.
Add only enough fluid to reach
the proper level.
Page 343 of 472
GMC Sierra/Sierra Denali Owner Manual (GMNA-Localizing-U.S./Canada/
Mexico-1500-11698638) - 2019 - crc - 5/15/18
342 Vehicle Care .
For the 6.2L engine, the proper
level is from 15 mm to 40 mm
(0.6 in to 1.6 in) below the
bottom of the fill plug hole,
located on the rear axle. Add
only enough fluid to reach the
proper level.
What to Use Refer to Recommended Fluids and
Lubricants 0 425 to determine what
kind of lubricant to use.
Noise Control System Noise Emissions Warranty General Motors warrants to the first
person who purchases this vehicle
for purposes other than resale and
to each subsequent purchaser that
this vehicle as manufactured by
General Motors, was designed, built
and equipped to conform at the time
it left General Motors ’ s control with
all applicable U.S. EPA Noise
Control Regulations. This warranty
covers this vehicle as designed,
built and equipped by General
Motors, and is not limited to any
particular part, component or system of the vehicle manufactured
by General Motors. Defects in
design, assembly or in any part,
component or system of the vehicle
as manufactured by General
Motors, which, at the time it left
General Motors ’ s control, caused
noise emissions to exceed Federal
standards, are covered by this
warranty for the life of the vehicle.
The following information relates to
compliance with federal noise
emission standards for vehicles with
a Gross Vehicle Weight Rating
(GVWR) of more than 4 536 kg
(10,000 lb). The Maintenance
Schedule provides information on
maintaining the noise control system
to minimize degradation of the noise
emission control system during the
life of the vehicle. The noise control
system warranty is given in the
warranty manual.
These standards apply only to
vehicles sold in the United States. TAMPERING WITH NOISE
CONTROL SYSTEM
PROHIBITED Federal law prohibits the following
acts or the causing thereof:
1. The removal or rendering
inoperative by any person,
other than for purposes of
maintenance, repair,
or replacement, of any device
or element of design
incorporated into any new
vehicle for the purpose of noise
control prior to its sale or
delivery to the ultimate
purchaser or while it is in
use; or
2. The use of the vehicle after
such device or element of
design has been removed or
rendered inoperative by any
person.
Among those acts presumed to
constitute tampering are the acts
listed below.
Page 344 of 472
GMC Sierra/Sierra Denali Owner Manual (GMNA-Localizing-U.S./Canada/
Mexico-1500-11698638) - 2019 - crc - 5/15/18
Vehicle Care 343Insulation:
Removal of the noise shields or any
underhood insulation.
Engine:
Removal or rendering the engine
speed governor, if equipped,
inoperative so as to allow engine
speed to exceed manufacturer
specifications.
Fan and Drive:
.
Removal of the fan clutch,
if equipped, or rendering the
clutch inoperative.
.
Removal of the fan shroud,
if equipped.
Air Intake:
.
Removal of the air cleaner
silencer.
.
Modification of the air cleaner.
Exhaust:
.
Removal of the muffler and/or
resonator.
.
Removal of the exhaust pipes
and exhaust pipe clamps. Starter Switch Check
{ WarningWhen you are doing this
inspection, the vehicle could
move suddenly. If the vehicle
moves, you or others could be
injured.
1. Before starting this check, be
sure there is enough room
around the vehicle.
2. Apply both the parking brake
and the regular brake.
Do not use the accelerator
pedal, and be ready to turn off
the engine immediately if it
starts.
3. Try to start the engine in each
gear. The vehicle should start
only in P (Park) or N (Neutral).
If the vehicle starts in any other
position, contact your dealer for
service. Ignition Transmission
Lock Check If equipped with Key Access
ignition, while parked, and with the
parking brake set, try to turn the
ignition off in each shift lever
position. The ignition should turn to
off only when the shift lever is in
P (Park).
The ignition key should come out
only when the ignition is off. Contact
your dealer if service is required.
Park Brake and P (Park)
Mechanism Check
{ Warning
When you are doing this check,
the vehicle could begin to move.
You or others could be injured
and property could be damaged.
Make sure there is room in front
of the vehicle in case it begins to
roll. Be ready to apply the regular
brake at once should the vehicle
begin to move.
Page 345 of 472
GMC Sierra/Sierra Denali Owner Manual (GMNA-Localizing-U.S./Canada/
Mexico-1500-11698638) - 2019 - crc - 5/15/18
344 Vehicle Care Park on a fairly steep hill, with the
vehicle facing downhill. Keeping
your foot on the regular brake, set
the parking brake.
.
To check the parking brake's
holding ability: With the engine
running and the transmission in
N (Neutral), slowly remove foot
pressure from the regular brake
pedal. Do this until the vehicle is
held by the parking brake only.
.
To check the P (Park)
mechanism's holding ability:
With the engine running, shift to
P (Park). Then release the
parking brake followed by the
regular brake.
Contact your dealer if service is
required.
Wiper Blade Replacement Windshield wiper blades should be
replaced periodically. See
Maintenance Schedule 0 415 . Replacement blades come in
different types and are removed in
different ways. For proper type and
length, see Maintenance
Replacement Parts 0 427 .
CautionAllowing the wiper arm to touch
the windshield when no wiper
blade is installed could damage
the windshield. Any damage that
occurs would not be covered by
the vehicle warranty. Do not allow
the wiper arm to touch the
windshield.
Front Wiper Blade
Replacement To replace the wiper blade:
1. Pull the wiper assembly away
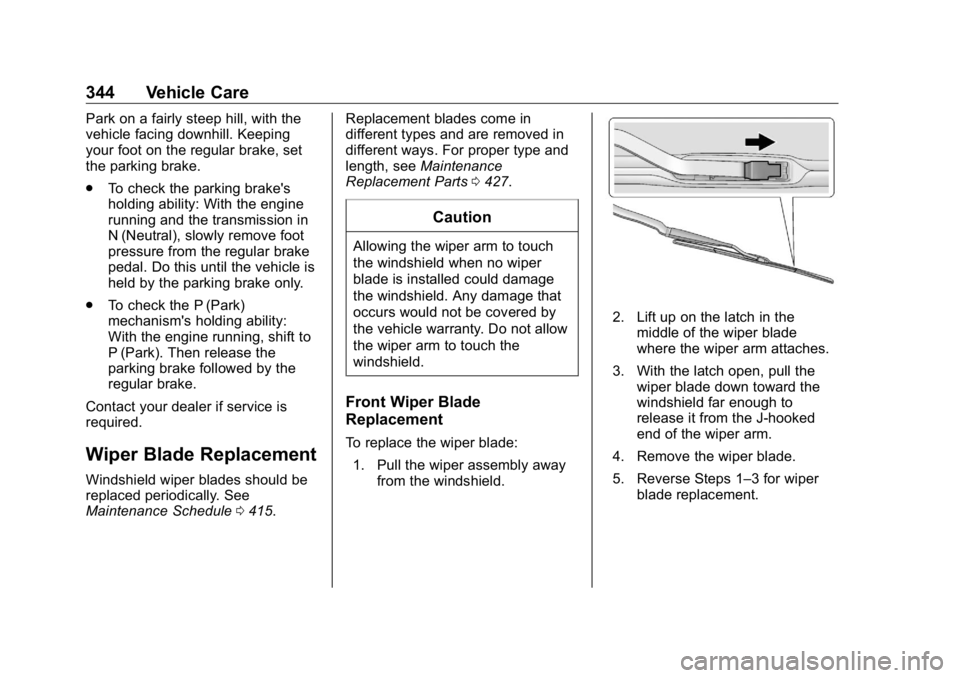
from the windshield. 2. Lift up on the latch in the
middle of the wiper blade
where the wiper arm attaches.
3. With the latch open, pull the
wiper blade down toward the
windshield far enough to
release it from the J-hooked
end of the wiper arm.
4. Remove the wiper blade.
5. Reverse Steps 1 – 3 for wiper
blade replacement.
Page 351 of 472
GMC Sierra/Sierra Denali Owner Manual (GMNA-Localizing-U.S./Canada/
Mexico-1500-11698638) - 2019 - crc - 5/15/18
350 Vehicle Care Windshield Wipers If the wiper motor overheats due to
heavy snow or ice, the windshield
wipers will stop until the motor cools
and will then restart.
Although the circuit is protected
from electrical overload, overload
due to heavy snow or ice may
cause wiper linkage damage.
Always clear ice and heavy snow
from the windshield before using the
windshield wipers.
If the overload is caused by an
electrical problem and not snow or
ice, be sure to get it fixed.
Fuses and Circuit
Breakers The wiring circuits in the vehicle are
protected from short circuits by a
combination of fuses and circuit
breakers. This greatly reduces the
chance of damage caused by
electrical problems. { DangerFuses and circuit breakers are
marked with their ampere rating.
Do not exceed the
specified amperage rating when
replacing fuses and circuit
breakers. Use of an oversized
fuse or circuit breaker can result
in a vehicle fire. You and others
could be seriously injured or
killed.
To check a fuse, look at the
silver-colored band inside the fuse.
If the band is broken or melted,
replace the fuse. Be sure to replace
a bad fuse with a new one of the
identical size and rating.
Fuses of the same amperage can
be temporarily borrowed from
another fuse location, if a fuse goes
out. Replace the fuse as soon as
possible. Engine Compartment
Fuse Block If the vehicle has a diesel engine,
see the Duramax diesel
supplement.
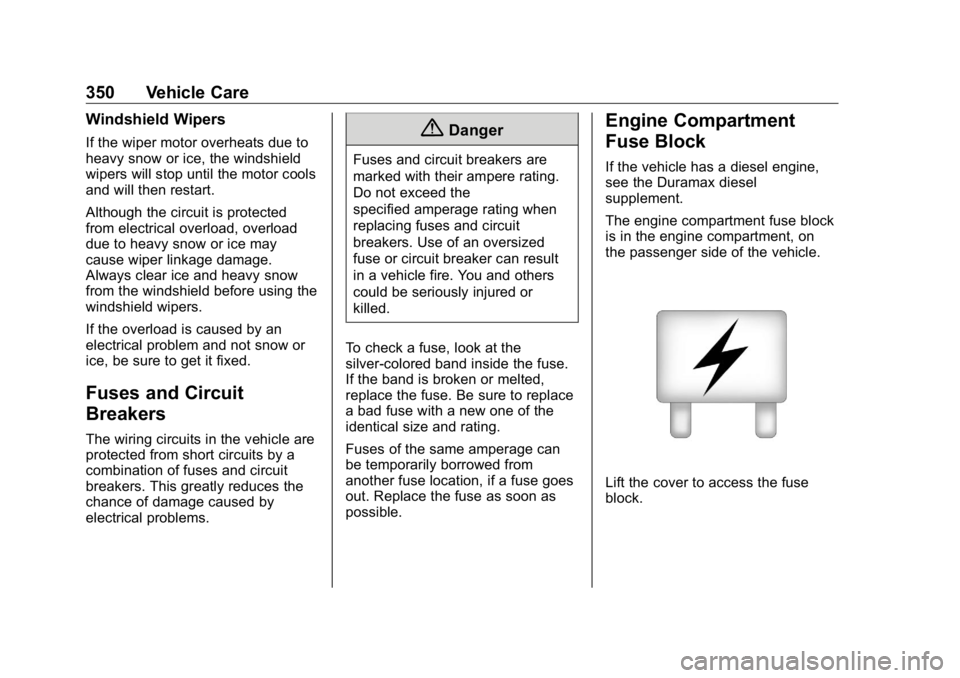
The engine compartment fuse block
is in the engine compartment, on
the passenger side of the vehicle.
Lift the cover to access the fuse
block.
Page 353 of 472
GMC Sierra/Sierra Denali Owner Manual (GMNA-Localizing-U.S./Canada/
Mexico-1500-11698638) - 2019 - crc - 5/15/18
352 Vehicle Care Fuses Usage
4 Headlamp right
6 TIM
7 –
8 Fog lamp
9 VKM
10 –
11 Police upfitter
12 –
13 Washer front
14 Washer rear
15 MSB driver
16 –
17 IECL 1
19 DC/AC inverter
20 IECR 2
21 MSB pass
22 IECL 2
24 Eboost 1
25 REC
26 – Fuses Usage
27 Horn
28 –
29 –
30 –
31 –
32 Rear window
defogger
33 Heated mirror
34 Parking lamp left
37 Euro trailer
38 TIM
39 –
40 Misc ignition
41 Trailer
parking lamp
42 Park lamp right
44 –
45 Second fuel pump
46 Engine control
module ignition Fuses Usage
47 Transmission
control module
ignition
48 –
49 Transmission
control module
50 A/C clutch
51 Transfer case
control module
52 Front wiper
53 Center
high-mounted
stop lamp
54 Trailer
reverse lamp
55 Trailer
back-up lamp
56 SADS
57 TTPM
58 Starter motor
60 Active fuel
management 1