2019 FORD TAURUS reset
[x] Cancel search: resetPage 95 of 515

Driver Assist
Traction Control
Blindspot High, Normal or Low
Sensitivity
Collision Warn
Cross Traffic Alert
Adaptive or Normal
Cruise Control
Driver Alert
Driver Alert
Driver Alert Disp.
Front Park Aid Alert, Aid or Both
Mode
Lane Keeping
High, Normal or Low
Intensity
Rear Park Aid
Settings
In this mode, you can configure different
driver setting choices. Note:
Some items are optional and may
not appear. Settings
Auto Engine Off Normal or Towing
DTE Calcula-
tion
Easy Entry/Exit
Auto Highbeam
Lighting
Off or number of seconds
Autolamp Delay
Autolock
Locks
Vehicle
AutounlockAll Doors or Driver's Door
Remote unlock
Remaining Life XXX% - Hold OK to Reset
Oil Life
Reset
92
Taurus (CPH) Canada/United States of America, enUSA, Edition date: 201806, First-Printing Information Displays
Page 121 of 515
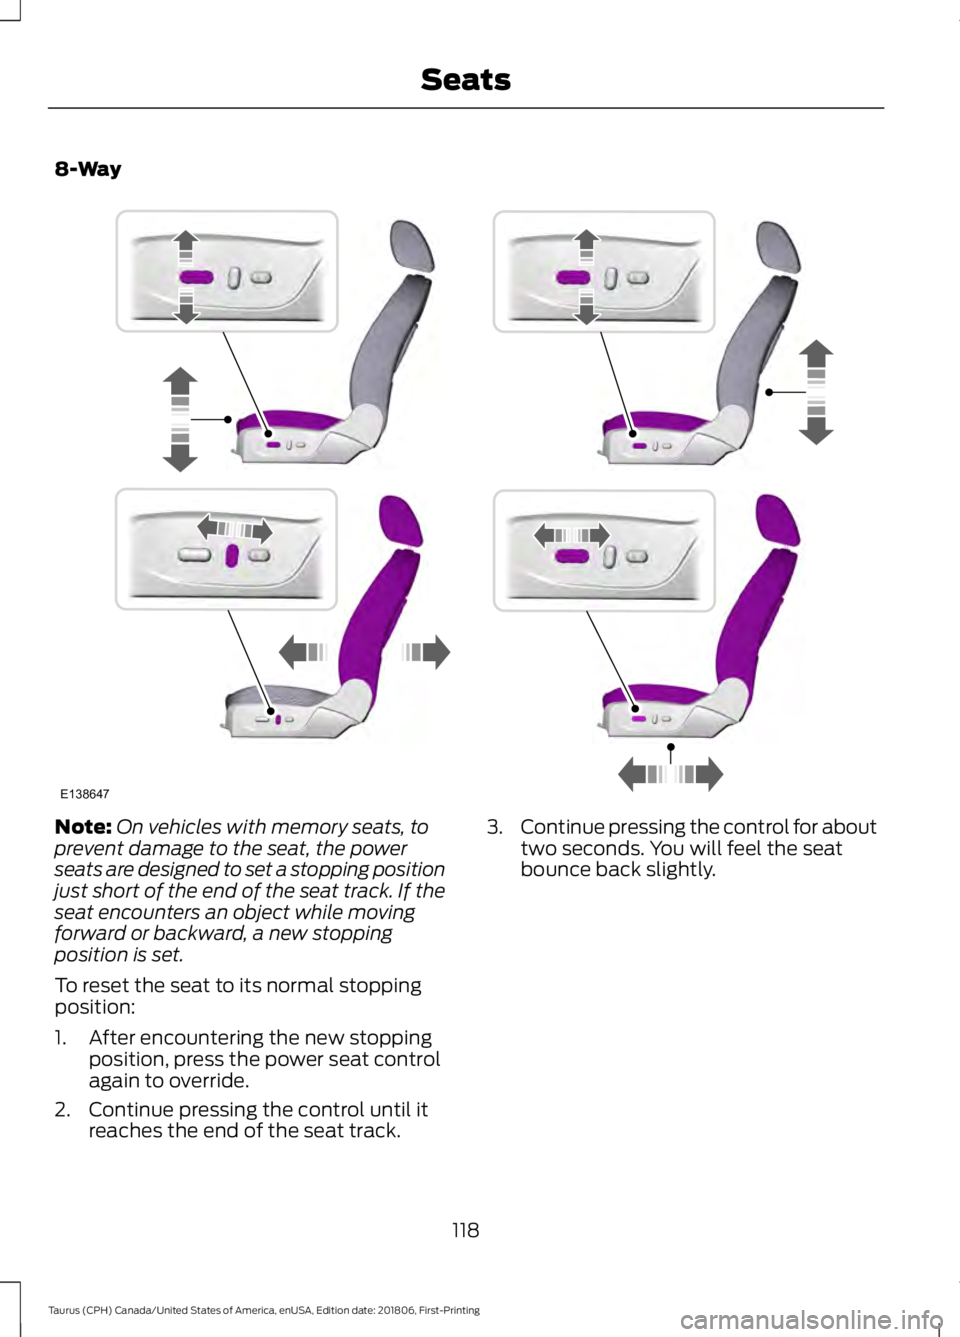
8-Way
Note:
On vehicles with memory seats, to
prevent damage to the seat, the power
seats are designed to set a stopping position
just short of the end of the seat track. If the
seat encounters an object while moving
forward or backward, a new stopping
position is set.
To reset the seat to its normal stopping
position:
1. After encountering the new stopping position, press the power seat control
again to override.
2. Continue pressing the control until it reaches the end of the seat track. 3.
Continue pressing the control for about
two seconds. You will feel the seat
bounce back slightly.
118
Taurus (CPH) Canada/United States of America, enUSA, Edition date: 201806, First-Printing SeatsE138647
Page 123 of 515

MEMORY FUNCTION
WARNING: Before activating the
memory seat, make sure that the area
immediately surrounding the seat is clear
of obstructions and that all occupants
are clear of moving parts. WARNING:
Do not use the
memory function when your vehicle is
moving.
This function automatically recalls the
position of the following:
• Driver seat.
• Power mirrors.
• Optional power adjustable pedals.
• Optional power steering column.
The memory control is on the side seat
panel. Type 1
A
Type 2
B Saving a Preset Position
1. Switch the ignition on.
2. Adjust the features to your desired
positions.
3. Press and hold the desired preset button until you hear a single tone.
You can save up to two preset memory
positions. You can save a memory preset
at any time.
Recalling a Preset Position
Press and release the desired memory
preset button to recall a saved memory
position.
Note: You can recall a programmed
memory position:
• In any gearshift position if you have
switched the ignition off.
• Only in park (P) or neutral (N) if you
have switched the ignition on.
You can also recall a preset memory
position by:
• Pressing the unlock button on your
intelligent access key fob if it is linked
to a preset position.
• Unlocking the intelligent driver door
handle if a linked key fob is present.
Note: When the ignition is off, a linked fob
used to recall your memory position moves
the seat and steering column to the Easy
Entry position if you enable the Easy Entry
and Exit feature in the information display.
Note: During a memory recall, pressing any
memory feature button cancels the
operation.
Linking a Preset Position to Your
Remote Control or Intelligent Access
Key
You can save the preset memory positions
for up to three remote controls or
intelligent access (IA) keys.
120
Taurus (CPH) Canada/United States of America, enUSA, Edition date: 201806, First-Printing SeatsE211293
Page 124 of 515
1.
With the ignition on, move the memory
positions to the desired positions.
2. Press and hold the desired preset button for five seconds. A tone sounds
after about two seconds. Continue
holding until you hear a second tone.
3. Within three seconds, press the lock button on the remote control you are
linking.
To unlink a remote control, follow the
same procedure – except in Step 3, press
the unlock button on the remote control.
Easy Entry and Exit Feature
If you enable the easy entry and exit
feature, it automatically moves the driver
seat position rearward up to 2 in (5 cm)
and the steering column up and forward
when you switch the ignition off.
When you switch the ignition on, the driver
seat and steering column return to the
previous position.
You can enable or disable this feature in
the information display. See Information
Displays
(page 85).
REAR SEATS
Split-folding Rear Seat WARNING:
Before returning the
seatback to its original position, make
sure that cargo or any objects are not
trapped behind the seatback. After
returning the seatback to its original
position, pull on the seatback to make
sure that it has fully latched. An
unlatched seat may become dangerous
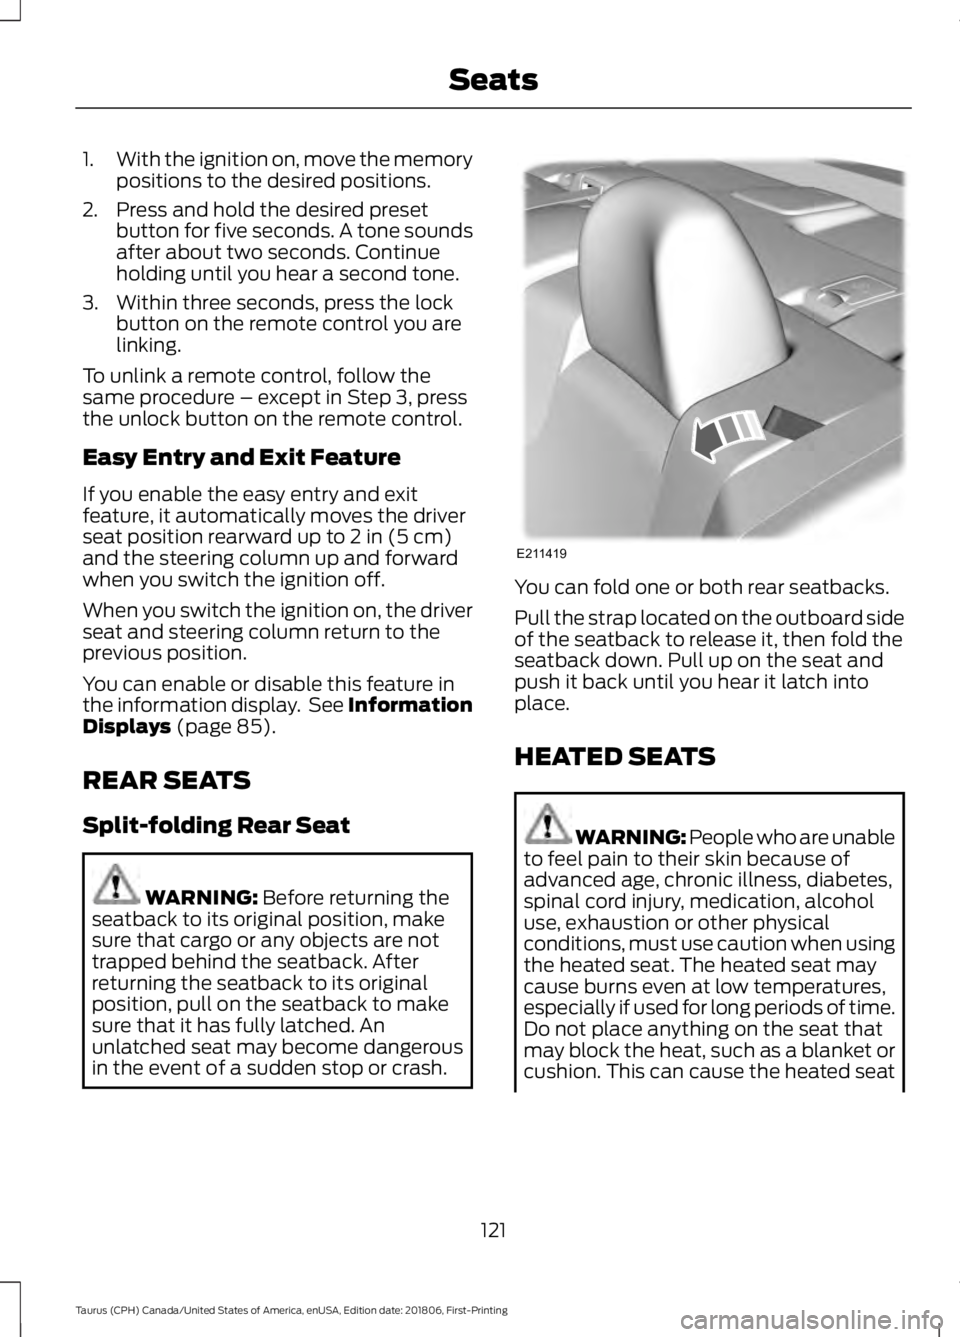
in the event of a sudden stop or crash. You can fold one or both rear seatbacks.
Pull the strap located on the outboard side
of the seatback to release it, then fold the
seatback down. Pull up on the seat and
push it back until you hear it latch into
place.
HEATED SEATS
WARNING: People who are unable
to feel pain to their skin because of
advanced age, chronic illness, diabetes,
spinal cord injury, medication, alcohol
use, exhaustion or other physical
conditions, must use caution when using
the heated seat. The heated seat may
cause burns even at low temperatures,
especially if used for long periods of time.
Do not place anything on the seat that
may block the heat, such as a blanket or
cushion. This can cause the heated seat
121
Taurus (CPH) Canada/United States of America, enUSA, Edition date: 201806, First-Printing SeatsE211419
Page 146 of 515

3. Apply the parking brake.
4. Fully open the fuel filler door.
5. Check the fuel tank filler valve for any
debris that may be restricting its
movement.
6. Remove any debris from the fuel tank filler valve.
7. Fully insert a fuel pump nozzle or the fuel filler funnel provided with your
vehicle into the fuel filler pipe. See
Fuel Filler Funnel Location (page
138). This action should dislodge any
debris that may be preventing the fuel
tank filler valve from fully closing.
8. Remove the fuel pump nozzle or fuel filler funnel from the fuel filler pipe.
9. Fully close the fuel filler door.
Note: The message may not immediately
reset. If the message continues to appear
and a warning lamp illuminates, have your
vehicle checked as soon as possible.
FUEL CONSUMPTION
Advertised Capacity
The advertised capacity is the maximum
amount of fuel that you can add to the fuel
tank when the fuel gauge indicates empty.
See
Capacities and Specifications
(page 298).
In addition, the fuel tank contains an empty
reserve. The empty reserve is an
unspecified amount of fuel that remains
in the fuel tank when the fuel gauge
indicates empty.
Note: The amount of fuel in the empty
reserve varies and should not be relied upon
to increase driving range. Filling the Fuel Tank
For consistent results when refueling:
•
Turn the ignition off before fueling; an
inaccurate reading results if the engine
is left running.
• Use the same fill rate
(low-medium-high) each time the tank
is filled.
• Allow no more than one automatic
shut-off when refueling.
Results are most accurate when the filling
method is consistent.
Calculating Fuel Economy
Your vehicle calculates fuel economy
figures through the trip computer average
fuel function.
See Information Displays
(page 85).
The first
1,000 mi (1,500 km) of driving is
the break-in period of the engine. A more
accurate measurement is obtained after
2,000 mi (3,000 km)
.
1. Completely fill the fuel tank and record
the initial odometer reading.
See
Refueling (page 140).
2. Each time you fill the fuel tank, record the amount of fuel added.
3. After at least three fill ups, fill the fuel tank and record the current odometer
reading.
4. Subtract your initial odometer reading from the current odometer reading.
To calculate L/100 km (liters per 100
kilometers) fuel consumption, multiply the
liters used by 100, then divide by kilometers
traveled. To calculate MPG (miles per
gallon) fuel consumption, divide miles
traveled by gallons used.
143
Taurus (CPH) Canada/United States of America, enUSA, Edition date: 201806, First-Printing Fuel and Refueling
Page 156 of 515
USING ALL-WHEEL DRIVE
All-wheel drive uses all four wheels to
power the vehicle. This increases traction,
enabling you to drive over terrain and road
conditions that a conventional two-wheel
drive vehicle cannot. The AWD system is
active all the time and requires no input
from the operator.
Note:
Your AWD vehicle is not intended for
off-road use. The AWD feature gives your
vehicle some limited off-road capabilities
in which driving surfaces are relatively level,
obstruction-free and otherwise similar to
normal on-road driving conditions.
Operating your vehicle under other than
those conditions could subject the vehicle
to excessive stress which might result in
damage which is not covered under your
warranty.
Note: The Power Transfer Unit (PTU) in
Taurus SHO™ performance package
vehicles does not require any normal
scheduled maintenance. The system is
electronically monitored and notifies the
driver of required service by displaying the
message Change AWD Power Transfer
Unit Lube in the information display. The
PTU lubricant will be more likely to require
a fluid change if the vehicle has experienced
extended periods of extreme or severe duty
cycle driving. Do not check or change the
PTU lubricant unless the unit shows signs
of leakage or a message indicating required
service is displayed. Contact an authorized
dealer for service if the PTU was submerged
in water and to reset the PTU lube life
monitor. Note:
When an AWD system fault is
present, the warning
Check AWD displays
in the information display. The AWD system
is not functioning correctly and defaulted
to front-wheel drive. When this warning
displays, have your vehicle serviced at an
authorized dealer.
Note: The
AWD OFF message may also
appear in the information display if the AWD
system overheats and defaults to
front-wheel drive. This may occur if the
vehicle is operated in extreme conditions
with excessive wheel slip, such as deep
sand. To resume normal AWD function as
soon as possible, stop the vehicle in a safe
location and stop the engine for at least 10
minutes. After the engine has been
restarted and the AWD system has
adequately cooled, the AWD OFF message
will turn off and normal AWD function
returns. If the engine is not stopped, the
AWD OFF
message turns off when the
system cools and normal AWD function
returns.
153
Taurus (CPH) Canada/United States of America, enUSA, Edition date: 201806, First-Printing All-Wheel Drive
(If Equipped)
Page 181 of 515
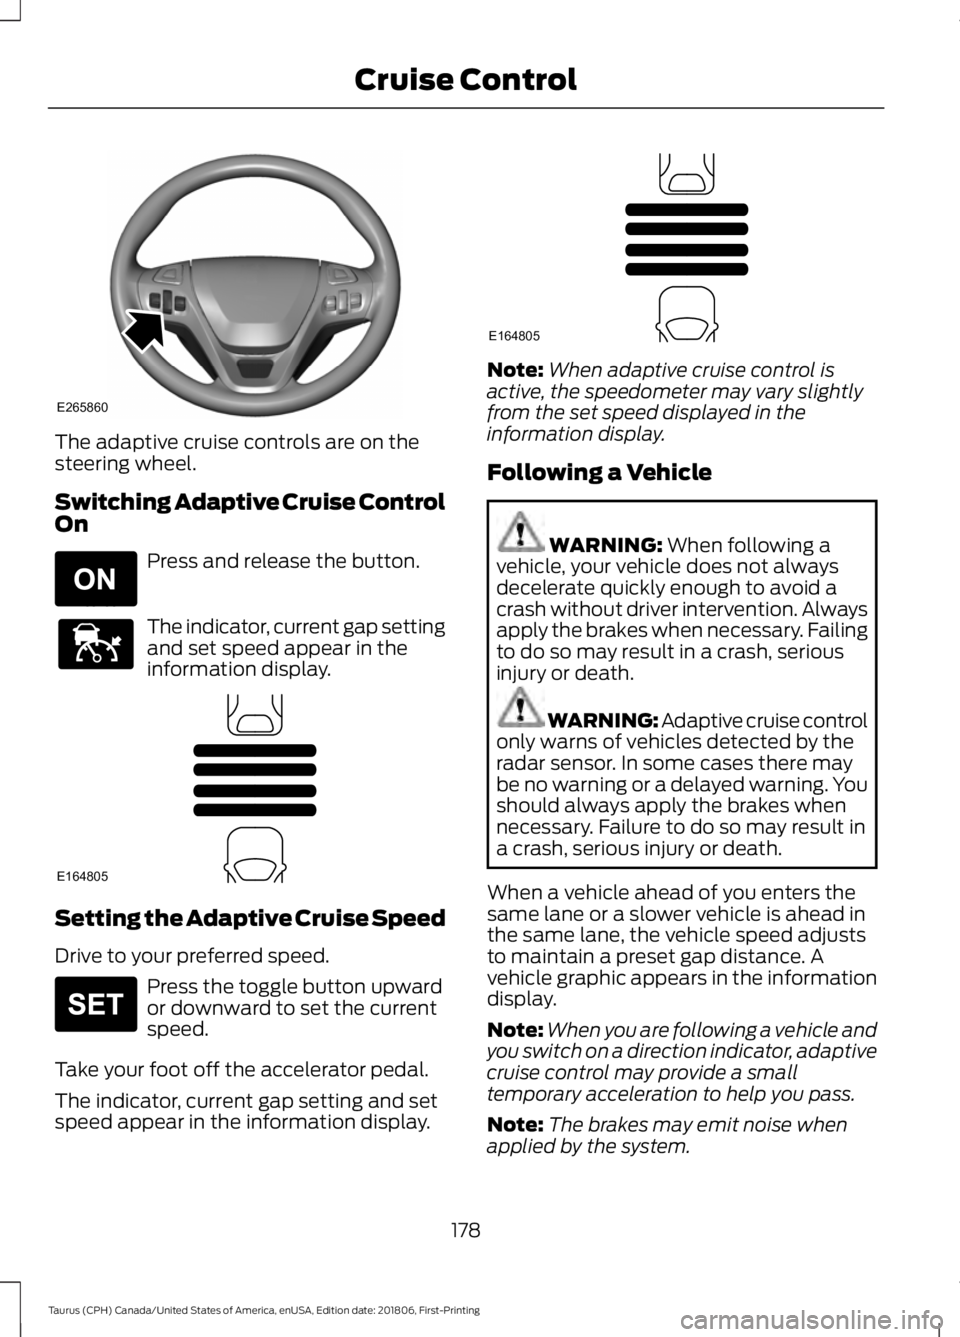
The adaptive cruise controls are on the
steering wheel.
Switching Adaptive Cruise Control
On
Press and release the button.
The indicator, current gap setting
and set speed appear in the
information display.
Setting the Adaptive Cruise Speed
Drive to your preferred speed.
Press the toggle button upward
or downward to set the current
speed.
Take your foot off the accelerator pedal.
The indicator, current gap setting and set
speed appear in the information display. Note:
When adaptive cruise control is
active, the speedometer may vary slightly
from the set speed displayed in the
information display.
Following a Vehicle WARNING: When following a
vehicle, your vehicle does not always
decelerate quickly enough to avoid a
crash without driver intervention. Always
apply the brakes when necessary. Failing
to do so may result in a crash, serious
injury or death. WARNING: Adaptive cruise control
only warns of vehicles detected by the
radar sensor. In some cases there may
be no warning or a delayed warning. You
should always apply the brakes when
necessary. Failure to do so may result in
a crash, serious injury or death.
When a vehicle ahead of you enters the
same lane or a slower vehicle is ahead in
the same lane, the vehicle speed adjusts
to maintain a preset gap distance. A
vehicle graphic appears in the information
display.
Note: When you are following a vehicle and
you switch on a direction indicator, adaptive
cruise control may provide a small
temporary acceleration to help you pass.
Note: The brakes may emit noise when
applied by the system.
178
Taurus (CPH) Canada/United States of America, enUSA, Edition date: 201806, First-Printing Cruise ControlE265860 E265296 E144529 E164805 E265306 E164805
Page 187 of 515
System Warnings
Note:
The system does not issue warnings
below approximately 40 mph (64 km/h).
The warning system has two stages. First,
the system issues a temporary warning
stating that you need to take a rest. This
message only appears for a short time. If
the system detects your driving alertness
reduces further, it may issue another
warning which remains in the information
display for a longer time. Press
OK on the
steering wheel control to clear the warning.
System Display
When active, the system runs
automatically in the background and only
issues a warning if required. You can view
the status at any time in the information
display.
See General Information (page
85).
Note: If you receive a warning you should
consider resting, even if the current
assessment is within the typical range.
Note: If the camera sensor cannot track the
road lane markings or if your vehicle speed
drops below approximately
40 mph
(64 km/h), the alertness level changes to
grey for a short time and the information
display informs you that the system is
unavailable.
Resetting the System
You can reset the system by either:
• Switching the ignition off and on.
• Stopping the vehicle and then opening
and closing the driver ’s door. LANE KEEPING SYSTEM
(If
Equipped) WARNING:
You are responsible
for controlling your vehicle at all times.
The system is designed to be an aid and
does not relieve you of your responsibility
to drive with due care and attention.
Failure to follow this instruction could
result in the loss of control of your
vehicle, personal injury or death. WARNING:
Always drive with due
care and attention when using and
operating the controls and features on
your vehicle. WARNING:
In cold and severe
weather conditions the system may not
function. Rain, snow and spray can all
limit sensor performance. WARNING:
The system will not
operate if the sensor cannot track the
road lane markings. WARNING:
The sensor may
incorrectly track lane markings as other
structures or objects. This can result in
a false or missed warning. WARNING:
Large contrasts in
outside lighting can limit sensor
performance. WARNING:
The system may not
operate properly if the sensor is blocked.
Keep the windshield free from
obstruction.
184
Taurus (CPH) Canada/United States of America, enUSA, Edition date: 201806, First-Printing Driving Aids