2019 FORD TAURUS light
[x] Cancel search: lightPage 290 of 515
How Temperature Affects Your Tire
Pressure
The tire pressure monitoring system
monitors tire pressure in each pneumatic
tire. While driving in a normal manner, a
typical passenger tire inflation pressure
may increase about 2
–4 psi (14– 28 kPa)
from a cold start situation. If the vehicle is
stationary overnight with the outside
temperature significantly lower than the
daytime temperature, the tire pressure may
decrease about 3 psi (21 kPa) for a drop of
30°F (17°C) in ambient temperature. This
lower pressure value may be detected by
the tire pressure monitoring system as
being significantly lower than the
recommended inflation pressure and
activate the system warning light for low
tire pressure. If the low tire pressure
warning light is on, visually check each tire
to verify that no tire is flat. If one or more
tires are flat, repair as necessary. Check
the air pressure in the road tires. If any tire
is under-inflated, carefully drive the vehicle
to the nearest location where air can be
added to the tires. Inflate all the tires to
the recommended inflation pressure.
CHANGING A ROAD WHEEL
(If
Equipped) WARNING:
If the tire pressure
monitor sensor becomes damaged it
may not function.
Note: The use of tire sealant may damage
your tire pressure monitoring system and
should only be used in roadside
emergencies. Note:
The tire pressure monitoring system
indicator light will illuminate when the spare
tire is in use. To restore the full function of
the monitoring system, all road wheels
equipped with tire pressure monitoring
sensors must be mounted on the vehicle.
If you get a flat tire while driving, do not
apply the brake heavily. Instead, gradually
decrease your speed. Hold the steering
wheel firmly and slowly move to a safe
place on the side of the road.
Have a flat serviced by an authorized
dealer in order to prevent damage to the
tire pressure monitoring system sensors.
See
Tire Pressure Monitoring System
(page 283). Replace the spare tire with a
road tire as soon as possible. During
repairing or replacing of the flat tire, have
the authorized dealer inspect the tire
pressure monitoring system sensor for
damage.
Dissimilar Spare Wheel and Tire
Assembly Information WARNING:
Failure to follow these
guidelines could result in an increased
risk of loss of vehicle control, injury or
death.
If you have a dissimilar spare wheel and
tire, then it is intended for temporary use
only. This means that if you need to use it,
you should replace it as soon as possible
with a road wheel and tire assembly that
is the same size and type as the road tires
and wheels that were originally provided
by Ford. If the dissimilar spare tire or wheel
is damaged, it should be replaced rather
than repaired.
A dissimilar spare wheel and tire assembly
is defined as a spare wheel and tire
assembly that is different in brand, size or
appearance from the road tires and wheels
and can be one of three types:
287
Taurus (CPH) Canada/United States of America, enUSA, Edition date: 201806, First-Printing Wheels and Tires
Page 310 of 515

BULB SPECIFICATION CHART
The specified replacement bulbs are in the
chart below. Headlamp bulbs must be
marked with an authorized D.O.T.
(Department of Transportation) for North
America to affirm lamp performance, light
brightness and pattern and safe visibility.
The correct bulbs will not damage the
lamp assembly or void the lamp assembly
warranty and will provide quality bulb burn
time. Trade number
Function
D3S
Headlamp (high intensity discharge) Low
and High 1
LED
Side marker - front 1
LED
Park lamp - front 1
7444NA
Turn lamp - front 1
LED
Signal indicator mirror lamp
LED
Approach lamp
LED
Tail and brake lamp 1
LED
Turn lamp - rear 1
LED
Backup lamp 1
W5W
License plate lamp
LED
High-mount brake lamp 1
W5W
Interior lamps
1 To replace these lamps, see an authorized dealer.
Note: To replace instrument panel lights, see an authorized dealer.
Note: LED lamps are not serviceable. See an authorized dealer if they fail.
307
Taurus (CPH) Canada/United States of America, enUSA, Edition date: 201806, First-Printing Capacities and Specifications
Page 312 of 515

Always handle discs by their edges only.
Clean the disc with an approved CD
cleaner only. Wipe it from the center of
the disc toward the edge. Do not clean in
a circular motion.
Do not expose discs to direct sunlight or
heat sources for extended periods.
MP3 and WMA Track and Folder
Structure
Audio systems capable of recognizing and
playing MP3 and WMA individual tracks
and folder structures work as follows:
•
There are two different modes for MP3
and WMA disc playback: MP3 and
WMA track mode (system default) and
MP3 and WMA folder mode.
• MP3 and WMA track mode ignores any
folder structure on the MP3 and WMA
disc. The player numbers each MP3
and WMA track on the disc (noted by
the MP3 or WMA file extension) from
T001 to a maximum of T255. The
maximum number of playable MP3 and
WMA files may be less depending on
the structure of the CD and exact
model of radio present.
• MP3 and WMA folder mode represents
a folder structure consisting of one
level of folders. The CD player numbers
all MP3 and WMA tracks on the disc
(noted by the MP3 or WMA file
extension) and all folders containing
MP3 and WMA files, from F001 (folder)
T001 (track) to F253 T255.
• Creating discs with only one level of
folders helps with navigation through
the disc files.
If you are burning your own MP3 and WMA
discs, it is important to understand how
the system reads the structures you create.
While various files may be present (files
with extensions other than MP3 and
WMA), only files with the MP3 and WMA extension are played; other files are
ignored by the system. This enables you to
use the same MP3 and WMA disc for a
variety of tasks on your work computer,
home computer and your in-vehicle
system.
In track mode, the system displays and
plays the structure as if it were only one
level deep (all MP3 and WMA files play,
regardless of being in a specific folder). In
folder mode, the system only plays the
MP3 and WMA files in the current folder.
AUDIO UNIT - VEHICLES WITH:
SYNC
WARNING: Driving while
distracted can result in loss of vehicle
control, crash and injury. We strongly
recommend that you use extreme
caution when using any device that may
take your focus off the road. Your
primary responsibility is the safe
operation of your vehicle. We
recommend against the use of any
hand-held device while driving and
encourage the use of voice-operated
systems when possible. Make sure you
are aware of all applicable local laws
that may affect the use of electronic
devices while driving.
Note: Some features, such as satellite
radio, may not be available in your location.
Check with an authorized dealer.
Note: Depending on your vehicle option
package, your system may look different
from what you see here.
Accessing the Auxiliary Media
Sources Press and release to access or
switch between media devices.
309
Taurus (CPH) Canada/United States of America, enUSA, Edition date: 201806, First-Printing Audio SystemE265277
Page 314 of 515
Ejecting the CD
Press and release to eject a CD.
Listening to a CD Press and release to listen to a
CD.
Listening to the Radio Press and release to listen to the
radio or change radio stations.
Listening to Satellite Radio Press and release to listen to
satellite radio.
Muting the Audio Press and release to mute the
playing audio.
Playing or Pausing Media Press and release to either play
or pause the audio.
Switching the Audio Unit On and
Off Press and release the button.
Using the Display Control
Use the up and down arrow buttons to
select the various settings. When you make
your selection, press the left and right
arrow buttons to change the settings. Press and release to confirm a
selection.
Press and release the function buttons
below the display to select different
functions of the audio system depending
on which mode you are in.
Using the Number Block
In radio mode, store and recall your favorite
radio stations. To store a radio station, tune
to the station, then press and hold a preset
button until sound returns. In phone mode,
enter a phone number.
Using Seek, Fast Forward and
Reverse In radio mode, select a frequency band and
press and release either button. The
system stops at the first station it finds in
that direction.
In satellite radio mode, press and release
to select the next or previous satellite radio
station. If you select a specific category,
such as jazz, rock or news, press to find the
next or previous station in the category you
select.
Menu Structure
Press MENU.
Press the up and down arrow buttons to
scroll through the options.
Press the right arrow to enter a menu.
Press the left arrow to exit a menu.
Press
OK to confirm a selection.
Note: Depending on your system, some
options may appear slightly different.
311
Taurus (CPH) Canada/United States of America, enUSA, Edition date: 201806, First-Printing Audio SystemE265032 E265039 E265033 E265034 E265043 E265041
Page 389 of 515
HD Radio technology is the digital
evolution of analog AM/FM radio. Your
system has a special receiver that allows
it to receive digital broadcasts (where
available) in addition to the analog
broadcasts, it already receives. Digital
broadcasts provide a better sound quality
than analog broadcasts with free,
crystal-clear audio and no static or
distortion. For more information, and a
guide to available stations and
programming, please visit:
Website
www.hdradio.com
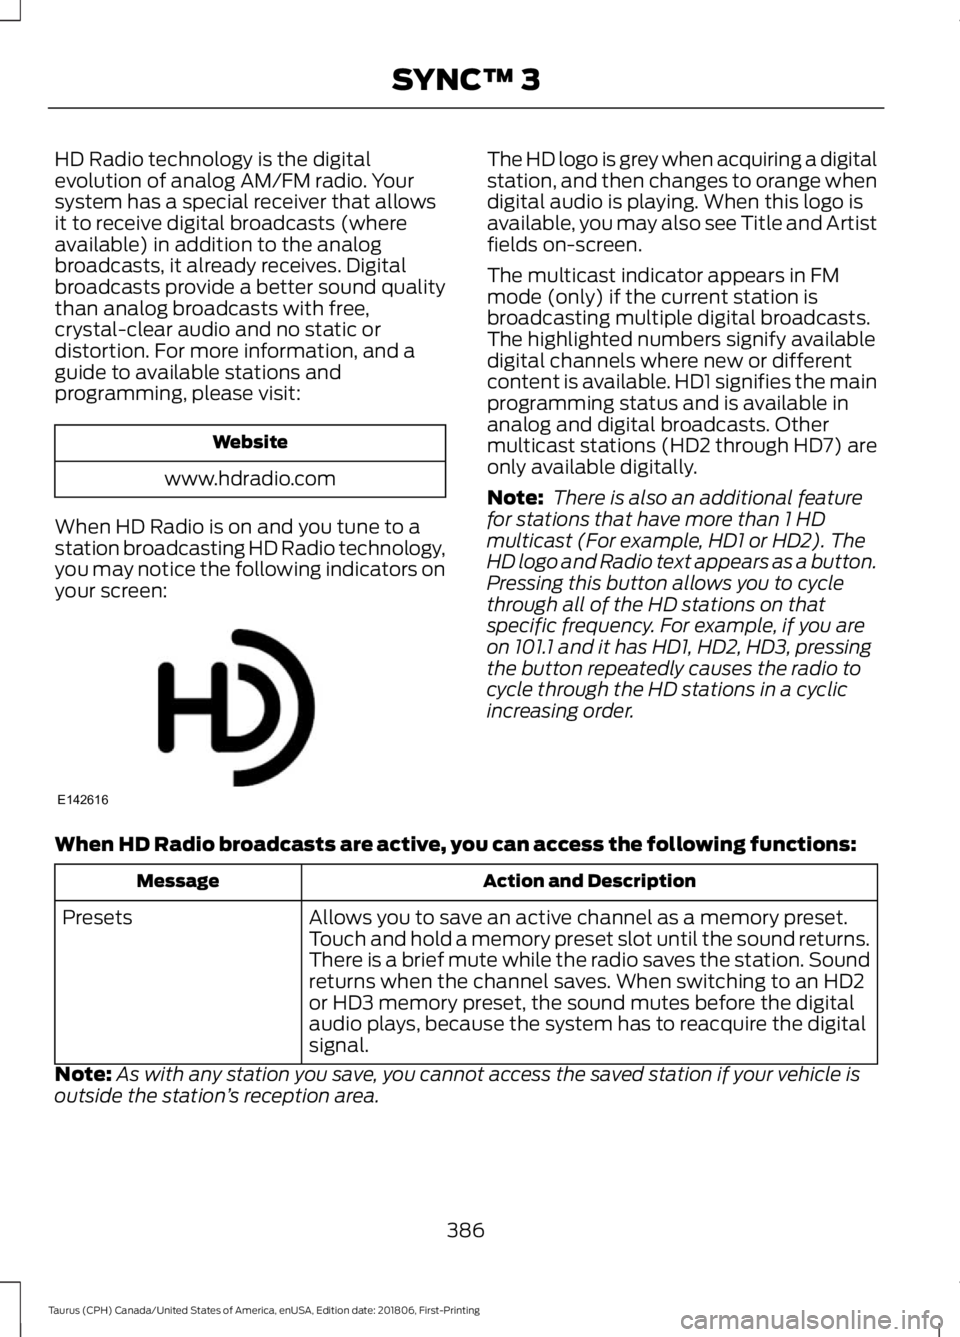
When HD Radio is on and you tune to a
station broadcasting HD Radio technology,
you may notice the following indicators on
your screen: The HD logo is grey when acquiring a digital
station, and then changes to orange when
digital audio is playing. When this logo is
available, you may also see Title and Artist
fields on-screen.
The multicast indicator appears in FM
mode (only) if the current station is
broadcasting multiple digital broadcasts.
The highlighted numbers signify available
digital channels where new or different
content is available. HD1 signifies the main
programming status and is available in
analog and digital broadcasts. Other
multicast stations (HD2 through HD7) are
only available digitally.
Note:
There is also an additional feature
for stations that have more than 1 HD
multicast (For example, HD1 or HD2). The
HD logo and Radio text appears as a button.
Pressing this button allows you to cycle
through all of the HD stations on that
specific frequency. For example, if you are
on 101.1 and it has HD1, HD2, HD3, pressing
the button repeatedly causes the radio to
cycle through the HD stations in a cyclic
increasing order.
When HD Radio broadcasts are active, you can access the following functions: Action and Description
Message
Allows you to save an active channel as a memory preset.
Touch and hold a memory preset slot until the sound returns.
There is a brief mute while the radio saves the station. Sound
returns when the channel saves. When switching to an HD2
or HD3 memory preset, the sound mutes before the digital
audio plays, because the system has to reacquire the digital
signal.
Presets
Note: As with any station you save, you cannot access the saved station if your vehicle is
outside the station ’s reception area.
386
Taurus (CPH) Canada/United States of America, enUSA, Edition date: 201806, First-Printing SYNC™ 3E142616
Page 390 of 515
HD Radio Reception and Station Troubleshooting
Potential Reception Issues
If you are listening to a multicast station and you are on the
fringe of the reception area, the station may mute due to
weak signal strength.
Reception area
If you are listening to HD1, the system changes back to the
analog broadcast until the digital broadcast is available again.
However, if you are listening to any of the possible HD2-HD7
multicast channels, the station mutes and stays muted unless
it is able to connect to the digital signal again.
When the system first receives a station (aside from HD2-
HD7 multicast stations), it first plays the station in the analog
version. Once the receiver verifies the station is an HD Radio
station, it shifts to the digital version. Depending on the station
quality, you may hear a slight sound change when the station
changes from analog to digital. Blending is the shift from
analog to digital sound or digital back to analog sound.
Station blending
In order to provide the best possible
experience, use the contact form to report
any station issues found while listening to
a station broadcasting with HD Radio
technology. Independent entities own and
operate each station. These stations are
responsible for ensuring all audio streams
and data fields are accurate. Potential Station Issues
Action
Cause
Issues
No action required. This is a
broadcast issue.
This is poor time alignment by
the radio broadcaster.
Echo, stutter, skip or
repeat in audio.
Increase or decrease in
audio volume.
No action required. The recep-
tion issue may clear up as you
continue to drive.
The radio is shifting between
analog and digital audio.
Sound fading or
blending in and out.
No action required. This is
normal behavior. Wait until the
audio is available.
The digital multicast is not
available until the HD Radio
broadcast is decoded. Once
decoded, the audio is available.
There is an audio mute
delay when selecting
HD2 or HD3, multicast
preset or Direct Tune.
387
Taurus (CPH) Canada/United States of America, enUSA, Edition date: 201806, First-Printing SYNC™ 3
Page 392 of 515
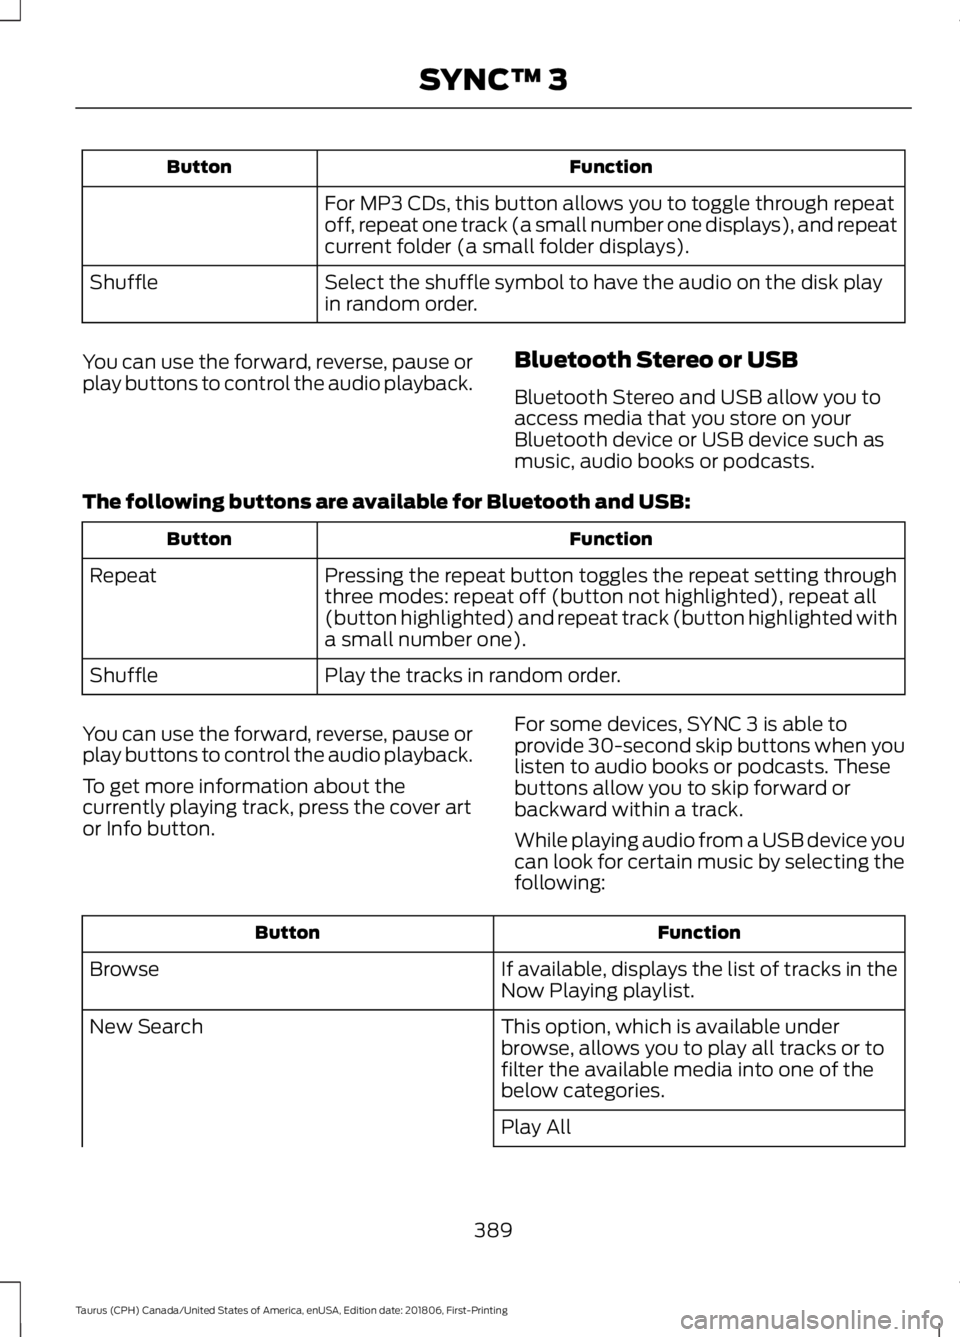
Function
Button
For MP3 CDs, this button allows you to toggle through repeat
off, repeat one track (a small number one displays), and repeat
current folder (a small folder displays).
Select the shuffle symbol to have the audio on the disk play
in random order.
Shuffle
You can use the forward, reverse, pause or
play buttons to control the audio playback. Bluetooth Stereo or USB
Bluetooth Stereo and USB allow you to
access media that you store on your
Bluetooth device or USB device such as
music, audio books or podcasts.
The following buttons are available for Bluetooth and USB: Function
Button
Pressing the repeat button toggles the repeat setting through
three modes: repeat off (button not highlighted), repeat all
(button highlighted) and repeat track (button highlighted with
a small number one).
Repeat
Play the tracks in random order.
Shuffle
You can use the forward, reverse, pause or
play buttons to control the audio playback.
To get more information about the
currently playing track, press the cover art
or Info button. For some devices, SYNC 3 is able to
provide 30-second skip buttons when you
listen to audio books or podcasts. These
buttons allow you to skip forward or
backward within a track.
While playing audio from a USB device you
can look for certain music by selecting the
following: Function
Button
If available, displays the list of tracks in the
Now Playing playlist.
Browse
This option, which is available under
browse, allows you to play all tracks or to
filter the available media into one of the
below categories.
New Search
Play All
389
Taurus (CPH) Canada/United States of America, enUSA, Edition date: 201806, First-Printing SYNC™ 3
Page 403 of 515
3D city models are complete 3D models
of entire city areas including navigable
roads, parks, rivers and rendered buildings.
3D landmarks and city models appear in
3D map mode only. Coverage of these
varies and improves with updated map
releases.
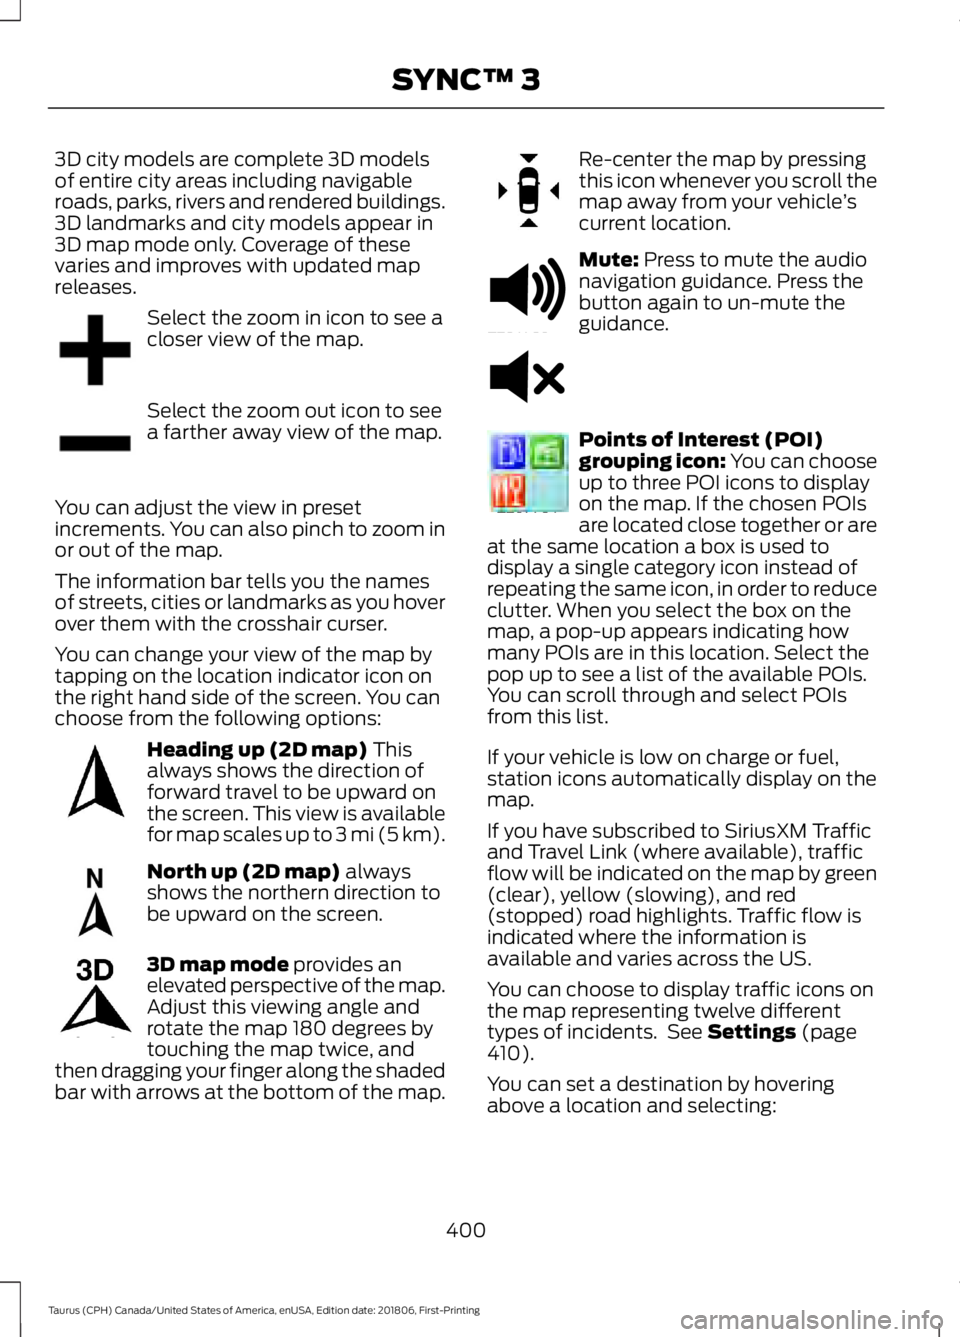
Select the zoom in icon to see a
closer view of the map.
Select the zoom out icon to see
a farther away view of the map.
You can adjust the view in preset
increments. You can also pinch to zoom in
or out of the map.
The information bar tells you the names
of streets, cities or landmarks as you hover
over them with the crosshair curser.
You can change your view of the map by
tapping on the location indicator icon on
the right hand side of the screen. You can
choose from the following options: Heading up (2D map) This
always shows the direction of
forward travel to be upward on
the screen. This view is available
for map scales up to
3 mi (5 km). North up (2D map)
always
shows the northern direction to
be upward on the screen. 3D map mode
provides an
elevated perspective of the map.
Adjust this viewing angle and
rotate the map 180 degrees by
touching the map twice, and
then dragging your finger along the shaded
bar with arrows at the bottom of the map. Re-center the map by pressing
this icon whenever you scroll the
map away from your vehicle
’s
current location. Mute:
Press to mute the audio
navigation guidance. Press the
button again to un-mute the
guidance. Points of Interest (POI)
grouping icon: You can choose
up to three POI icons to display
on the map. If the chosen POIs
are located close together or are
at the same location a box is used to
display a single category icon instead of
repeating the same icon, in order to reduce
clutter. When you select the box on the
map, a pop-up appears indicating how
many POIs are in this location. Select the
pop up to see a list of the available POIs.
You can scroll through and select POIs
from this list.
If your vehicle is low on charge or fuel,
station icons automatically display on the
map.
If you have subscribed to SiriusXM Traffic
and Travel Link (where available), traffic
flow will be indicated on the map by green
(clear), yellow (slowing), and red
(stopped) road highlights. Traffic flow is
indicated where the information is
available and varies across the US.
You can choose to display traffic icons on
the map representing twelve different
types of incidents. See
Settings (page
410).
You can set a destination by hovering
above a location and selecting:
400
Taurus (CPH) Canada/United States of America, enUSA, Edition date: 201806, First-Printing SYNC™ 3E207752 E207753 E207750 E207749 E207748 E207751 E251780 E251779 E207754