2019 FORD RANGER lights
[x] Cancel search: lightsPage 204 of 512

Zone coverage also decreases when
parking at narrow angles. The sensor on
the left-hand side is mostly obstructed and
zone coverage on that side is severely
reduced.
System Lights, Messages and
Audible Alerts
When the system detects a vehicle, an
indicator illuminates in the exterior mirror
on the side the approaching vehicle is
coming from. A tone sounds and a
message appears in the information
display. Blocked Sensors
The system uses radar sensors that are in
the tail lamp on each side of your vehicle.
Note:
Keep the sensors free from snow, ice
and large accumulations of dirt.
Note: Do not cover the sensors with bumper
stickers, repair compound or other objects.
Note: Blocked sensors could affect system
performance.
201
Ranger (TFG) Canada/United States of America, enUSA, Edition date: 201809, Fourth-Printing Driving AidsE142441 E142442 E280125
Page 206 of 512

lose the ability to steer the vehicle
manually nor will it cause permanent
damage. Typical steering and driving
maneuvers will allow the system to cool
down and steering assist will return to
normal.
Steering Tips
If the steering wanders or pulls, check for:
•
An improperly inflated tire.
• Uneven tire wear.
• Loose or worn suspension
components.
• Loose or worn steering components.
• Improper vehicle alignment.
A high crown in the road or high crosswinds
may also make the steering seem to
wander or pull.
PRE-COLLISION ASSIST (IF
EQUIPPED) WARNING:
You are responsible
for controlling your vehicle at all times.
The system is designed to be an aid and
does not relieve you of your responsibility
to drive with due care and attention.
Failure to follow this instruction could
result in the loss of control of your
vehicle, personal injury or death. WARNING:
The system does not
detect vehicles that are driving in a
different direction, cyclists or animals.
Failure to take care may result in the loss
of control of your vehicle, serious
personal injury or death. WARNING:
The system does not
operate during hard acceleration or
steering. Failure to take care may lead
to a crash or personal injury. WARNING:
The system may fail
or operate with reduced function during
cold and severe weather conditions.
Snow, ice, rain, spray and fog can
adversely affect the system. Keep the
front camera and radar free of snow and
ice. Failure to take care may result in the
loss of control of your vehicle, serious
personal injury or death. WARNING: In situations where the
vehicle camera has limited detection
capability, this may reduce system
performance. These situations include
but are not limited to direct or low
sunlight, vehicles at night without tail
lights, unconventional vehicle types,
pedestrians with complex backgrounds,
running pedestrians, partly obscured
pedestrians, or pedestrians that the
system cannot distinguish from a group.
Failure to take care may result in the loss
of control of your vehicle, serious
personal injury or death. WARNING:
The system cannot
help prevent all crashes. Do not rely on
this system to replace driver judgment
and the need to maintain a safe distance
and speed.
Note: To achieve full system performance,
you must break in the braking system.
See
General Information (page 165).
Note: The warning indicator may flash for
a short period of time when you start your
vehicle.
Using the Pre-Collision Assist
System
The Pre-Collision Assist system is active
at speeds above approximately
3 mph
(5 km/h) and pedestrian detection is active
at speeds up to
50 mph (80 km/h).
203
Ranger (TFG) Canada/United States of America, enUSA, Edition date: 201809, Fourth-Printing Driving Aids
Page 222 of 512

See Load limits in the Load Carrying
chapter for load specification terms found
on the tire label and Safety Compliance
label and instructions on calculating your
vehicle's load. See Load Limit (page 207).
Remember to account for the trailer
tongue weight as part of your vehicle load
when calculating the total vehicle weight.
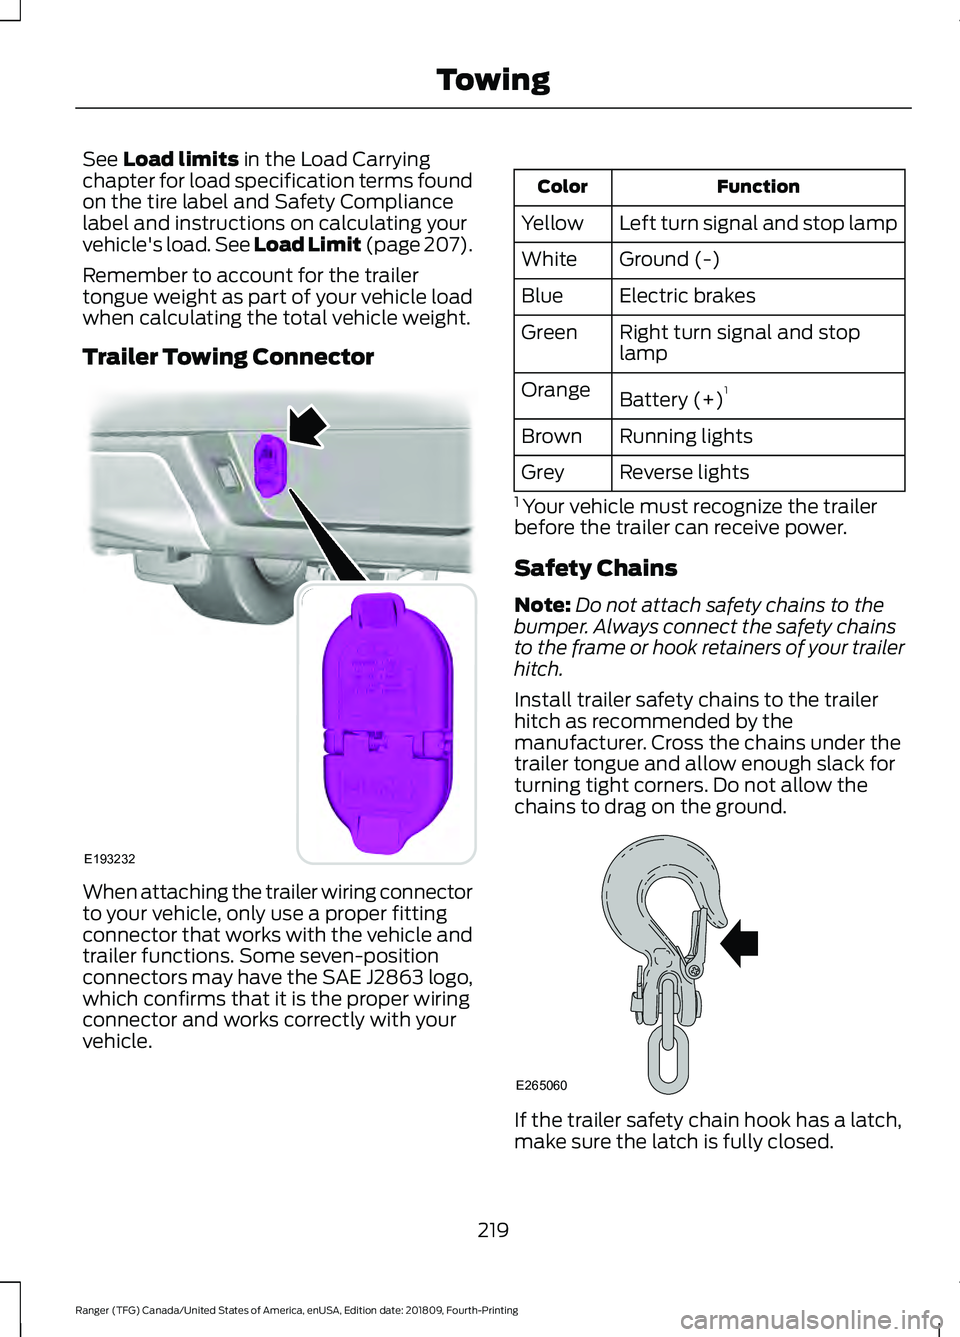
Trailer Towing Connector When attaching the trailer wiring connector
to your vehicle, only use a proper fitting
connector that works with the vehicle and
trailer functions. Some seven-position
connectors may have the SAE J2863 logo,
which confirms that it is the proper wiring
connector and works correctly with your
vehicle. Function
Color
Left turn signal and stop lamp
Yellow
Ground (-)
White
Electric brakes
Blue
Right turn signal and stop
lamp
Green
Battery (+) 1
Orange
Running lights
Brown
Reverse lights
Grey
1 Your vehicle must recognize the trailer
before the trailer can receive power.
Safety Chains
Note: Do not attach safety chains to the
bumper. Always connect the safety chains
to the frame or hook retainers of your trailer
hitch.
Install trailer safety chains to the trailer
hitch as recommended by the
manufacturer. Cross the chains under the
trailer tongue and allow enough slack for
turning tight corners. Do not allow the
chains to drag on the ground. If the trailer safety chain hook has a latch,
make sure the latch is fully closed.
219
Ranger (TFG) Canada/United States of America, enUSA, Edition date: 201809, Fourth-Printing TowingE193232 E265060
Page 223 of 512

Trailer Brakes
WARNING: Do not connect a
trailer's hydraulic brake system directly
to your vehicle's brake system. Your
vehicle may not have enough braking
power and your chances of having a
collision greatly increase.
Electric brakes and manual, automatic or
surge-type trailer brakes are safe if you
install them properly and adjust them to
the manufacturer's specifications. The
trailer brakes must meet local and federal
regulations.
The rating for the tow vehicle's braking
system operation is at the gross vehicle
weight rating, not the gross combined
weight rating.
Separate functioning brake systems
are required for safe control of towed
vehicles and trailers weighing more
than 1500 lb (680 kg) when loaded.
Trailer Lamps WARNING:
Never connect any
trailer lamp wiring to the vehicle's tail
lamp wiring; this may damage the
electrical system resulting in fire. Contact
your authorized dealer as soon as
possible for assistance in proper trailer
tow wiring installation. Additional
electrical equipment may be required.
Trailer lamps are required on most towed
vehicles. Make sure all running lights, brake
lights, turn signals and hazard lights are
working. Before Towing a Trailer
Practice turning, stopping and backing up
to get the feel of your vehicle-trailer
combination before starting on a trip.
When turning, make wider turns so the
trailer wheels clear curbs and other
obstacles.
When Towing a Trailer
•
Do not drive faster than
70 mph
(113 km/h) during the first 500 mi
(800 km).
• Do not make full-throttle starts.
• Check your hitch, electrical connections
and trailer wheel lug nuts thoroughly
after you have traveled 50 mi (80 km).
• When stopped in congested or heavy
traffic during hot weather, place the
transmission in park (P) to aid engine
and transmission cooling and to help
A/C performance.
• Turn off the speed control with heavy
loads or in hilly terrain. The speed
control may turn off automatically
when you are towing on long, steep
grades.
• Shift to a lower gear when driving down
a long or steep hill. Do not apply the
brakes continuously, as they may
overheat and become less effective.
• If your transmission is equipped with a
Grade Assist or Tow/Haul feature, use
this feature when towing. This provides
engine braking and helps eliminate
excessive transmission shifting for
optimum fuel economy and
transmission cooling.
• If your vehicle is equipped with
AdvanceTrac with RSC, this system
may turn on during typical cornering
maneuvers with a heavily loaded trailer.
This is normal. Turning the corner at a
slower speed while towing may reduce
this tendency.
220
Ranger (TFG) Canada/United States of America, enUSA, Edition date: 201809, Fourth-Printing Towing
Page 230 of 512

•
Check that the exterior lights work.
• Turn the steering wheel to check that
the steering power assist works.
FLOOR MATS WARNING: Use a floor mat
designed to fit the footwell of your
vehicle that does not obstruct the pedal
area. Failure to follow this instruction
could result in the loss of control of your
vehicle, personal injury or death. WARNING:
Pedals that cannot
move freely can cause loss of vehicle
control and increase the risk of serious
personal injury. WARNING:
Secure the floor mat
to both retention devices so that it
cannot slip out of position and interfere
with the pedals. Failure to follow this
instruction could result in the loss of
control of your vehicle, personal injury or
death. WARNING:
Do not place
additional floor mats or any other
covering on top of the original floor mats.
This could result in the floor mat
interfering with the operation of the
pedals. Failure to follow this instruction
could result in the loss of control of your
vehicle, personal injury or death. WARNING: Always make sure that
objects cannot fall into the driver foot
well while your vehicle is moving. Objects
that are loose can become trapped
under the pedals causing a loss of
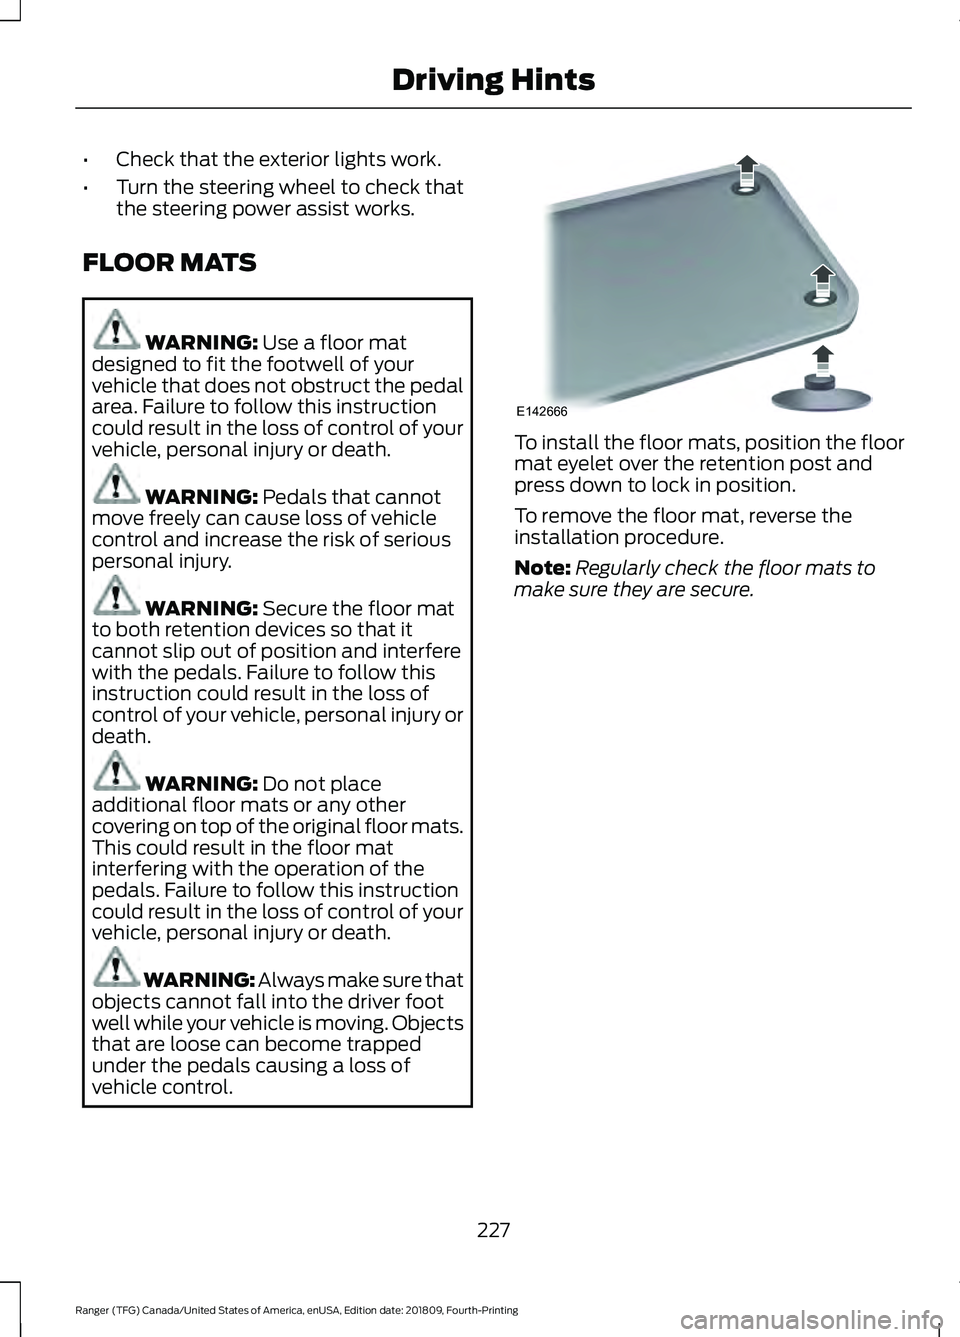
vehicle control. To install the floor mats, position the floor
mat eyelet over the retention post and
press down to lock in position.
To remove the floor mat, reverse the
installation procedure.
Note:
Regularly check the floor mats to
make sure they are secure.
227
Ranger (TFG) Canada/United States of America, enUSA, Edition date: 201809, Fourth-Printing Driving HintsE142666
Page 268 of 512

To maintain correct operation of the
battery management system, if you add
any electrical devices to your vehicle, do
not connect the ground connection directly
to the negative battery terminal. A
connection at the negative battery terminal
can cause inaccurate measurements of
the battery condition and potential
incorrect system operation.
Note:
Electrical accessories or components
added to your vehicle by you or an
authorized dealer, may adversely affect
battery performance, durability and the
performance of other electrical systems on
your vehicle.
If a replacement battery is required, we
recommend you use a Ford replacement
battery that matches the electrical
requirements of your vehicle.
If you disconnect or replace the battery
and your vehicle has an automatic
transmission, transmission must relearn
its adaptive strategy. Because of this, the
transmission may shift firmly when first
driven. This is normal operation while the
transmission fully updates its operation to
optimum shift feel.
Remove and Reinstall the Battery
To disconnect or remove the battery, do
the following:
1. Apply the parking brake and switch the
ignition off.
2. Switch all electrical equipment off, for
example lights and radio.
3. Wait a minimum of two minutes before
disconnecting the battery.
Note: The engine management system has
a power hold function and remains powered
for a period after you switch the ignition off.
This is to allow diagnostic and adaptive
tables to be stored. Disconnecting the
battery without waiting can cause damage
not covered by the vehicle Warranty. 4. Disconnect the negative (-) battery
cable terminal first.
5. Disconnect the positive (+) battery cable terminal last.
6. Remove the battery securing clamp.
7. Remove the battery.
8. Install in the reverse order.
Note: Before reconnecting the battery,
make sure the ignition remains switched off.
Note: If you only disconnect the negative
battery cable terminal, make sure it is
isolated or placed away from the battery
terminal to avoid un-intended connection
or arcing.
Note: Make sure the battery cable terminals
are fully tightened.
Note: If you disconnect or replace the
battery, you must reset the clock and the
pre-set radio stations once the battery is
reconnected.
Battery Disposal Make sure that you dispose of
old batteries in an
environmentally friendly way.
Seek advice from your local authority
about recycling old batteries.
265
Ranger (TFG) Canada/United States of America, enUSA, Edition date: 201809, Fourth-Printing MaintenanceE107998
Page 391 of 512

Description
Item
Callout
This button lights up when the passenger controls are
active. To switch the dual zone operation off and link
the passenger temperature to the driver temperature,
touch the DUAL button to switch it off.
DUAL
F
Touch up or down to adjust the temperature.
Right-hand front
seat temper-
ature
G
Touch up or down to increase or decrease the volume
of air circulated in your vehicle.
Fan speed
H
A popup appears on the screen to display the air
conditioning options.
A/C
I
Touch to cool your vehicle with recircu-
lated air. Touch again for normal A/C
operation. MAX A/C distributes air through
instrument panel vents and may help
reduce odors from entering your vehicle.
MAX A/C is more economical and efficient
than normal A/C mode.
MAX A/C
Touch to switch the air conditioning on or
off. Use A/C with recirculated air to
improve cooling performance and effi-
ciency. A/C engages automatically in MAX
A/C, defrost and footwell/defrost
A/C
Touch to switch the recirculated air on or
off which may reduce the amount of time
needed to cool down the interior and help
reduce odors from reaching the interior.
Recirculated air also engages automatic-
ally when you select MAX A/C. You can
engage this manually in any airflow mode
except defrost. It may also turn off in all
airflow modes except MAX A/C to reduce
fog potential.
Recircu-
lated air:
Select these controls individually, together, or with
Defrost to direct the air flow to the area you desire.
Manual airflow
distribution
controls
J
Distributes air through the instrument panel vents.
Panel
Distributes air through the demister vents, floor vents
and rear seat floor vents.
Floor
388
Ranger (TFG) Canada/United States of America, enUSA, Edition date: 201809, Fourth-Printing SYNC™ 3 (If Equipped)
Page 398 of 512

3D city models are complete 3D models
of entire city areas including navigable
roads, parks, rivers and rendered buildings.
3D landmarks and city models appear in
3D map mode only. Coverage of these
varies and improves with updated map
releases.
Select the zoom in icon to see a
closer view of the map.
Select the zoom out icon to see
a farther away view of the map.
You can adjust the view in preset
increments. You can also pinch to zoom in
or out of the map.
The information bar tells you the names
of streets, cities or landmarks as you hover
over them with the crosshair curser.
You can change your view of the map by
tapping on the location indicator icon on
the right hand side of the screen. You can
choose from the following options: Heading up (2D map) This
always shows the direction of
forward travel to be upward on
the screen. This view is available
for map scales up to
3 mi (5 km). North up (2D map)
always
shows the northern direction to
be upward on the screen. 3D map mode
provides an
elevated perspective of the map.
Adjust this viewing angle and
rotate the map 180 degrees by
touching the map twice, and
then dragging your finger along the shaded
bar with arrows at the bottom of the map. Re-center the map by pressing
this icon whenever you scroll the
map away from your vehicle
’s
current location. Mute:
Press to mute the audio
navigation guidance. Press the
button again to un-mute the
guidance. Points of Interest (POI)
grouping icon: You can choose
up to three POI icons to display
on the map. If the chosen POIs
are located close together or are
at the same location a box is used to
display a single category icon instead of
repeating the same icon, in order to reduce
clutter. When you select the box on the
map, a pop-up appears indicating how
many POIs are in this location. Select the
pop up to see a list of the available POIs.
You can scroll through and select POIs
from this list.
If your vehicle is low on charge or fuel,
station icons automatically display on the
map.
If you have subscribed to SiriusXM Traffic
and Travel Link (where available), traffic
flow will be indicated on the map by green
(clear), yellow (slowing), and red
(stopped) road highlights. Traffic flow is
indicated where the information is
available and varies across the US.
You can choose to display traffic icons on
the map representing twelve different
types of incidents. See
Settings (page
405).
You can set a destination by hovering
above a location and selecting:
395
Ranger (TFG) Canada/United States of America, enUSA, Edition date: 201809, Fourth-Printing SYNC™ 3
(If Equipped)E207752 E207753 E207750 E207749 E207748 E207751 E251780 E251779 E207754