2019 FORD POLICE INTERCEPTOR wheel
[x] Cancel search: wheelPage 50 of 370
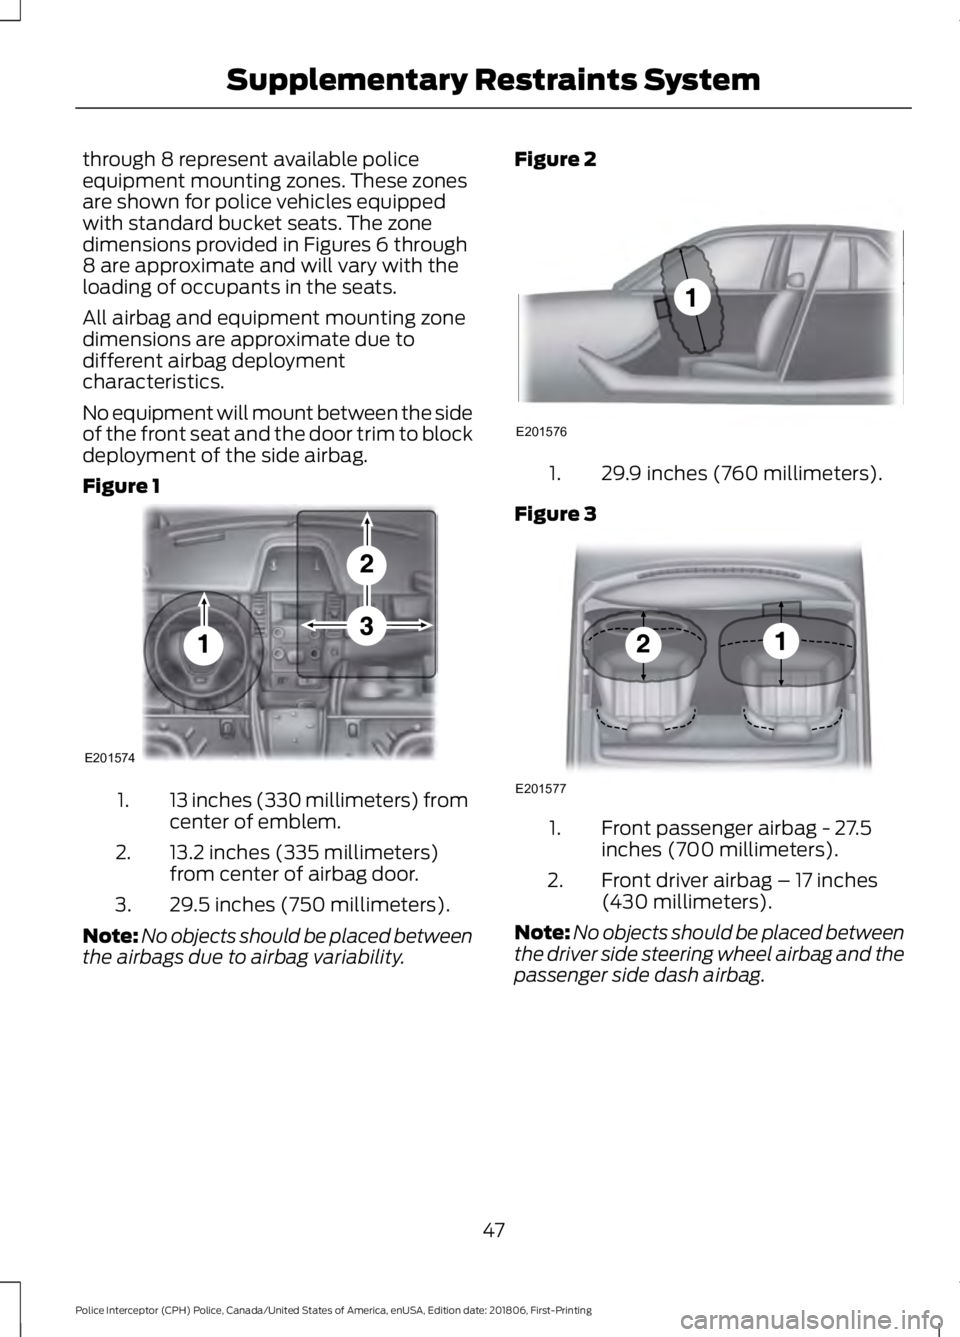
through 8 represent available police
equipment mounting zones. These zones
are shown for police vehicles equipped
with standard bucket seats. The zone
dimensions provided in Figures 6 through
8 are approximate and will vary with the
loading of occupants in the seats.
All airbag and equipment mounting zone
dimensions are approximate due to
different airbag deployment
characteristics.
No equipment will mount between the side
of the front seat and the door trim to block
deployment of the side airbag.
Figure 1
13 inches (330 millimeters) from
center of emblem.
1.
13.2 inches (335 millimeters)
from center of airbag door.
2.
29.5 inches (750 millimeters).
3.
Note: No objects should be placed between
the airbags due to airbag variability. Figure 2 29.9 inches (760 millimeters).
1.
Figure 3 Front passenger airbag - 27.5
inches (700 millimeters).
1.
Front driver airbag – 17 inches
(430 millimeters).
2.
Note: No objects should be placed between
the driver side steering wheel airbag and the
passenger side dash airbag.
47
Police Interceptor (CPH) Police, Canada/United States of America, enUSA, Edition date: 201806, First-Printing Supplementary Restraints SystemE201574 E201576 E201577
Page 60 of 370
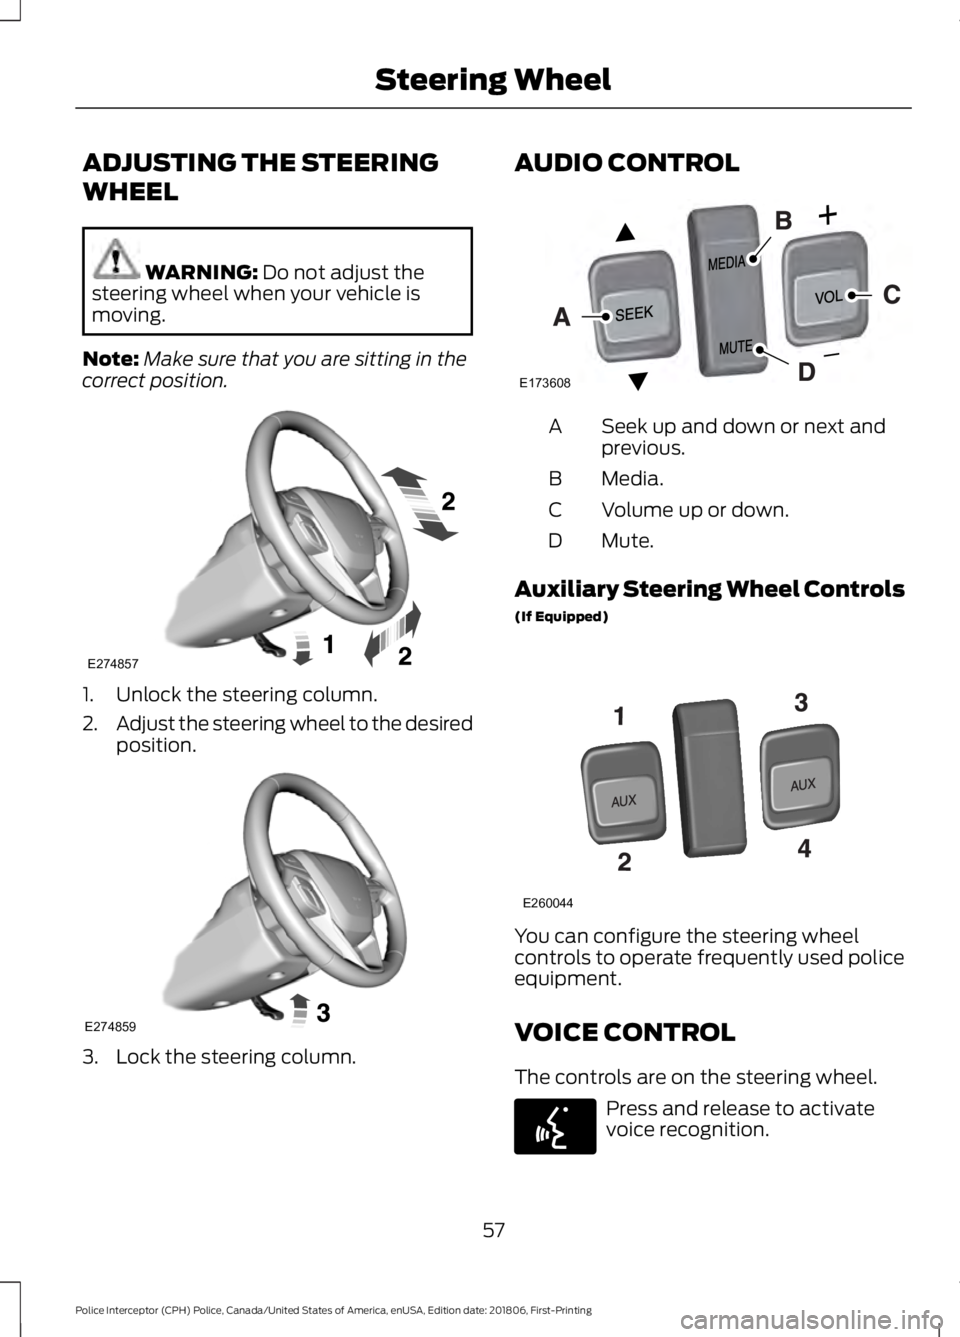
ADJUSTING THE STEERING
WHEEL
WARNING: Do not adjust the
steering wheel when your vehicle is
moving.
Note: Make sure that you are sitting in the
correct position. 1. Unlock the steering column.
2.
Adjust the steering wheel to the desired
position. 3. Lock the steering column. AUDIO CONTROL
Seek up and down or next and
previous.
A
Media.
B
Volume up or down.
C
Mute.
D
Auxiliary Steering Wheel Controls
(If Equipped) You can configure the steering wheel
controls to operate frequently used police
equipment.
VOICE CONTROL
The controls are on the steering wheel.
Press and release to activate
voice recognition.
57
Police Interceptor (CPH) Police, Canada/United States of America, enUSA, Edition date: 201806, First-Printing Steering WheelE274857 E274859 E173608 E260044 E142599
Page 61 of 370
Press and release to connect or
disconnect a phone call.
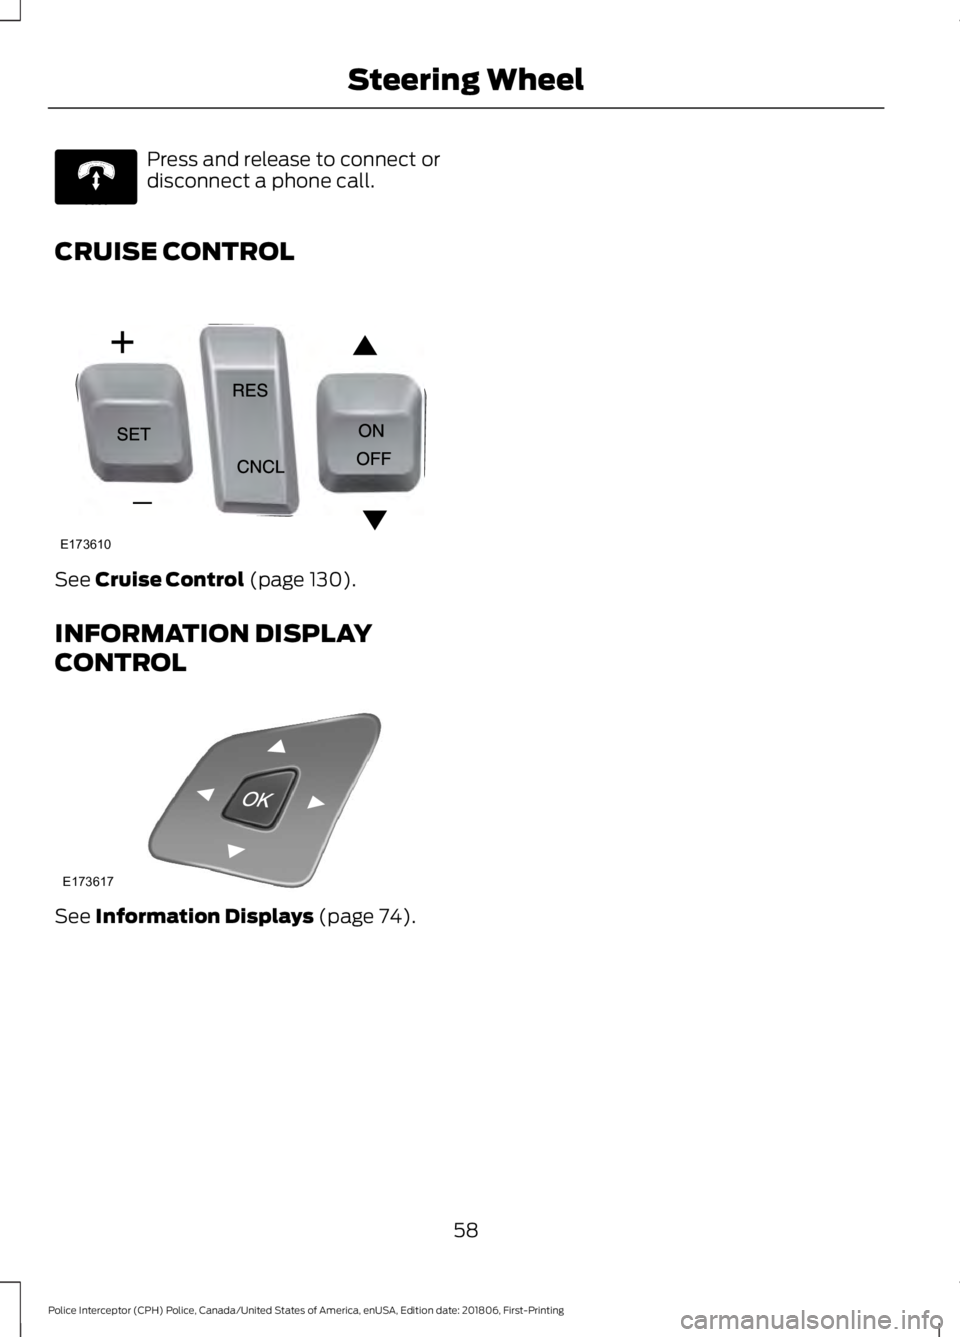
CRUISE CONTROL See Cruise Control (page 130).
INFORMATION DISPLAY
CONTROL See
Information Displays (page 74).
58
Police Interceptor (CPH) Police, Canada/United States of America, enUSA, Edition date: 201806, First-Printing Steering WheelE270559 E173610 E173617
Page 77 of 370
GENERAL INFORMATION
WARNING: Driving while
distracted can result in loss of vehicle
control, crash and injury. We strongly
recommend that you use extreme
caution when using any device that may
take your focus off the road. Your
primary responsibility is the safe
operation of your vehicle. We
recommend against the use of any
hand-held device while driving and
encourage the use of voice-operated
systems when possible. Make sure you
are aware of all applicable local laws
that may affect the use of electronic
devices while driving.
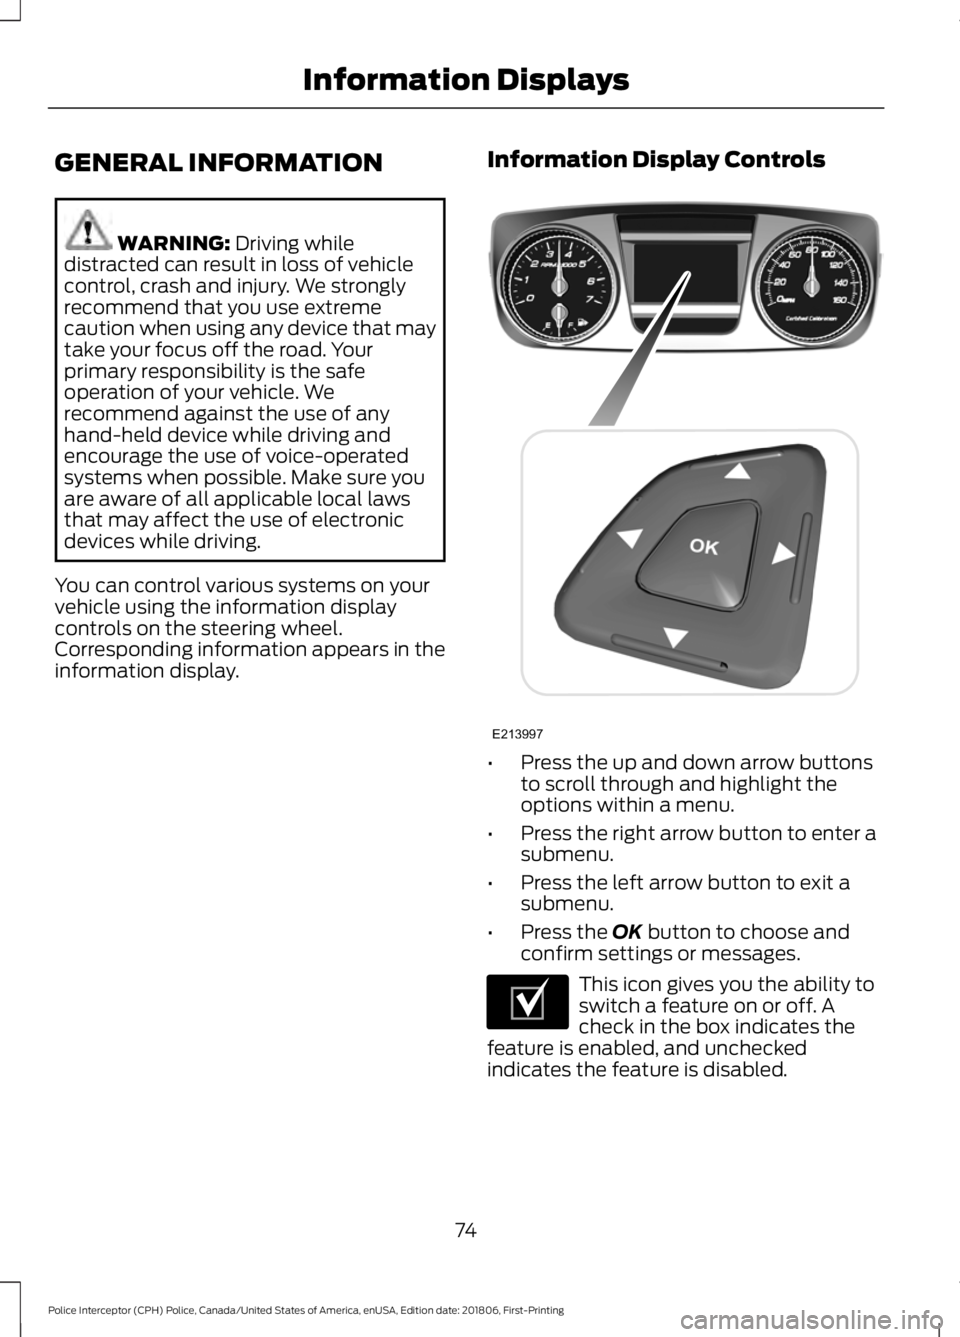
You can control various systems on your
vehicle using the information display
controls on the steering wheel.
Corresponding information appears in the
information display. Information Display Controls •
Press the up and down arrow buttons
to scroll through and highlight the
options within a menu.
• Press the right arrow button to enter a
submenu.
• Press the left arrow button to exit a
submenu.
• Press the
OK button to choose and
confirm settings or messages. This icon gives you the ability to
switch a feature on or off. A
check in the box indicates the
feature is enabled, and unchecked
indicates the feature is disabled.
74
Police Interceptor (CPH) Police, Canada/United States of America, enUSA, Edition date: 201806, First-Printing Information DisplaysE213997 E204495
Page 78 of 370

Trip 1 & 2
You can access the menu using the
information display control.
Note:
Some options may appear slightly
different or not at all if the items are
optional. Trip 1 & 2
Digital Speedometer
Trip Odometer
Trip Timer
Average Fuel
• Digital Speedometer - Shows a digital display of your vehicle speed.
• Trip Odometer — Registers the distance of individual journeys.
• Trip Timer — The timer stops when you turn your vehicle off and restarts when you
restart your vehicle.
• Average Fuel — Shows the average fuel economy for a given trip.
Note: Press and hold OK on the current screen to reset the respective trip, distance, time
and fuel information.
Fuel Economy Fuel Economy
Dist to empty
Inst Fuel Econ
Average Fuel
• Distance to Empty - Shows the approximate distance your vehicle can travel before
running out of fuel.
• Inst Fuel Economy - Shows a visual graph of your instantaneous fuel economy along
with your Avg MPG since the function was last reset.
• Average Fuel — Shows the average fuel economy since last reset.
Note: You can reset your average fuel economy by pressing and holding the
OK button on
the left hand steering wheel controls.
75
Police Interceptor (CPH) Police, Canada/United States of America, enUSA, Edition date: 201806, First-Printing Information Displays
Page 89 of 370
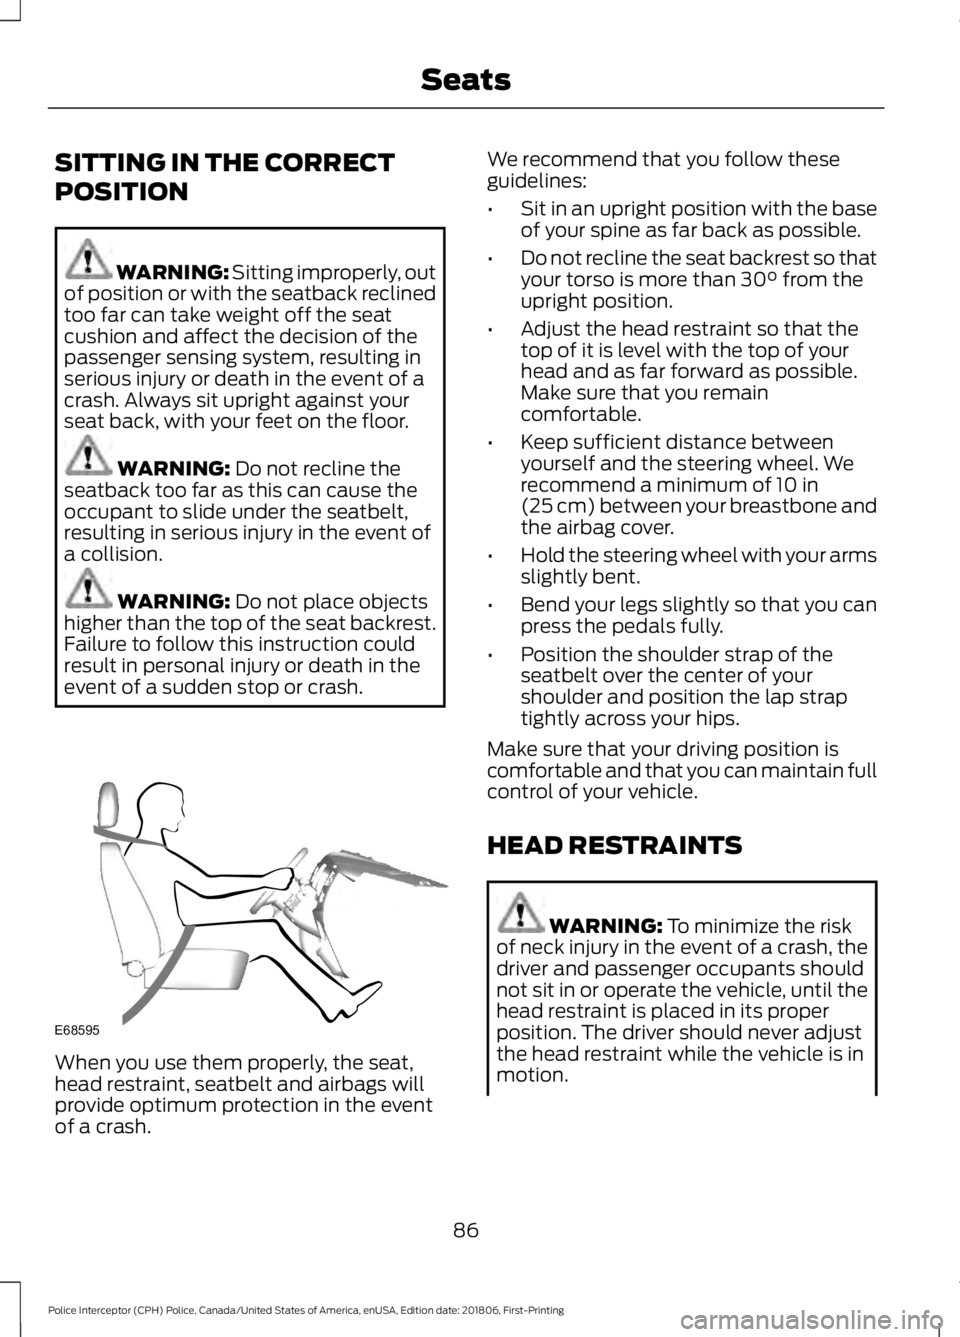
SITTING IN THE CORRECT
POSITION
WARNING: Sitting improperly, out
of position or with the seatback reclined
too far can take weight off the seat
cushion and affect the decision of the
passenger sensing system, resulting in
serious injury or death in the event of a
crash. Always sit upright against your
seat back, with your feet on the floor. WARNING:
Do not recline the
seatback too far as this can cause the
occupant to slide under the seatbelt,
resulting in serious injury in the event of
a collision. WARNING:
Do not place objects
higher than the top of the seat backrest.
Failure to follow this instruction could
result in personal injury or death in the
event of a sudden stop or crash. When you use them properly, the seat,
head restraint, seatbelt and airbags will
provide optimum protection in the event
of a crash. We recommend that you follow these
guidelines:
•
Sit in an upright position with the base
of your spine as far back as possible.
• Do not recline the seat backrest so that
your torso is more than
30° from the
upright position.
• Adjust the head restraint so that the
top of it is level with the top of your
head and as far forward as possible.
Make sure that you remain
comfortable.
• Keep sufficient distance between
yourself and the steering wheel. We
recommend a minimum of
10 in
(25 cm) between your breastbone and
the airbag cover.
• Hold the steering wheel with your arms
slightly bent.
• Bend your legs slightly so that you can
press the pedals fully.
• Position the shoulder strap of the
seatbelt over the center of your
shoulder and position the lap strap
tightly across your hips.
Make sure that your driving position is
comfortable and that you can maintain full
control of your vehicle.
HEAD RESTRAINTS WARNING:
To minimize the risk
of neck injury in the event of a crash, the
driver and passenger occupants should
not sit in or operate the vehicle, until the
head restraint is placed in its proper
position. The driver should never adjust
the head restraint while the vehicle is in
motion.
86
Police Interceptor (CPH) Police, Canada/United States of America, enUSA, Edition date: 201806, First-Printing SeatsE68595
Page 113 of 370

AUTOMATIC TRANSMISSION
WARNING: Always apply the
parking brake fully and make sure you
shift into park (P). Switch the ignition off
and remove the key whenever you leave
your vehicle. WARNING:
Do not apply the brake
pedal and accelerator pedal
simultaneously. Applying both pedals
simultaneously for more than a few
seconds will limit engine performance,
which may result in difficulty maintaining
speed in traffic and could lead to serious
injury.
Understanding the Positions of
Your Automatic Transmission
Putting your vehicle in or out of gear:
1. Fully press down the brake pedal.
2. Move the gearshift lever into the desired gear.
3. Come to a complete stop.
4. Move the gearshift lever and securely latch it in park (P). Park (P)
This position locks the transmission and
prevents the wheels from turning.
Reverse (R)
With the gearshift lever in reverse (R), your
vehicle will move backward. Always come
to a complete stop before shifting into and
out of reverse (R).
Neutral (N)
With the gearshift lever in neutral (N), your
vehicle can be started and is free to roll.
Hold the brake pedal down while in this
position.
Drive (D)
Drive (D) is the normal driving position for
the best fuel economy. The overdrive
function allows automatic upshifts and
downshifts through gears one through six.
Low (L)
The low (L) button is located at the end
of the column shifter. Activating low (L)
gear:
•
Provides maximum engine braking.
• Will downshift to the lowest available
gear for the current vehicle speed;
allows for first gear when vehicle
reaches lower speeds.
• Is not intended for use under extended
or normal driving conditions and results
in lower fuel economy.
Brake-Shift Interlock WARNING:
Do not drive your
vehicle until you verify that the brake
lamps are working.
110
Police Interceptor (CPH) Police, Canada/United States of America, enUSA, Edition date: 201806, First-Printing TransmissionE206672
Page 114 of 370

WARNING: When doing this
procedure, you need to take the
transmission out of park (P) which
means your vehicle can roll freely. To
avoid unwanted vehicle movement,
always fully apply the parking brake prior
to doing this procedure. Use wheels
chocks if appropriate. WARNING:
If the parking brake is
fully released, but the brake warning
lamp remains illuminated, the brakes
may not be working properly. Have your
vehicle checked as soon as possible.
Your vehicle is equipped with a brake-shift
interlock feature that prevents moving the
gearshift lever from park (P) when the
ignition is in the on position and the brake
pedal is not pressed.
If you cannot move the gearshift lever out
of park (P) position with the ignition in the
on position and the brake pedal pressed,
a malfunction may have occurred. It is
possible that a fuse has blown or your
vehicle ’s brake lamps are not operating
properly. See
Fuse Specification Chart
(page 164).
If the fuse is not blown and the brake
lamps are working properly, the following
procedure will allow you to move the
gearshift lever from park (P):
1. Apply the parking brake. Turn the ignition key to the off position, then
remove the key.
2. Move the steering column to the full down and full rearward position
(toward the driver ’s seat).
3. Remove the gearshift lever boot. 4. Place fingers into gearshift lever boot
hole and pull top half of shroud up and
forward to separate it from the lower
half of the shroud. There is a hinge at
the forward edge of the top shroud.
Roll the top half of the shroud upward
on the hinge point to clear the hazard
flasher button, then pull straight
rearward toward the driver ’s seat to
remove.
5. Remove the top half of the shroud.
6. Remove the three fasteners under the column that secure the lower shroud
half to the column. 7. Pull the tilt steering lock lever into the
full unlocked position and remove the
lower shroud cover by pulling the lever
handle through the slot in the cover. 8. Apply the brake, pull the white disk
then move the shifter to neutral (N).
111
Police Interceptor (CPH) Police, Canada/United States of America, enUSA, Edition date: 201806, First-Printing TransmissionE163185 E163186