2019 FORD POLICE INTERCEPTOR headlamp
[x] Cancel search: headlampPage 76 of 370
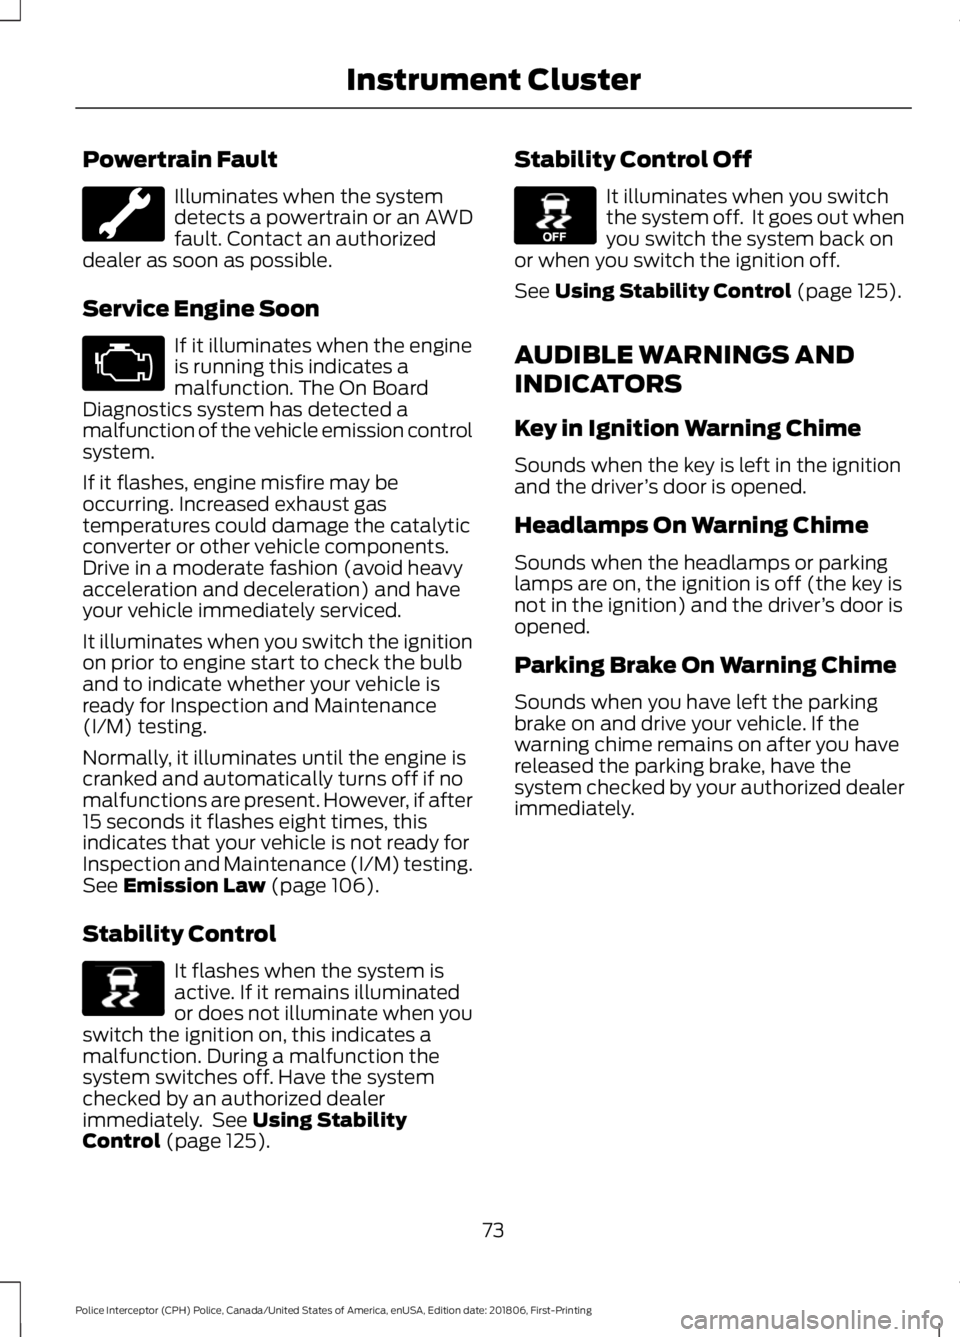
Powertrain Fault
Illuminates when the system
detects a powertrain or an AWD
fault. Contact an authorized
dealer as soon as possible.
Service Engine Soon If it illuminates when the engine
is running this indicates a
malfunction. The On Board
Diagnostics system has detected a
malfunction of the vehicle emission control
system.
If it flashes, engine misfire may be
occurring. Increased exhaust gas
temperatures could damage the catalytic
converter or other vehicle components.
Drive in a moderate fashion (avoid heavy
acceleration and deceleration) and have
your vehicle immediately serviced.
It illuminates when you switch the ignition
on prior to engine start to check the bulb
and to indicate whether your vehicle is
ready for Inspection and Maintenance
(I/M) testing.
Normally, it illuminates until the engine is
cranked and automatically turns off if no
malfunctions are present. However, if after
15 seconds it flashes eight times, this
indicates that your vehicle is not ready for
Inspection and Maintenance (I/M) testing.
See Emission Law (page 106).
Stability Control It flashes when the system is
active. If it remains illuminated
or does not illuminate when you
switch the ignition on, this indicates a
malfunction. During a malfunction the
system switches off. Have the system
checked by an authorized dealer
immediately. See
Using Stability
Control (page 125). Stability Control Off It illuminates when you switch
the system off. It goes out when
you switch the system back on
or when you switch the ignition off.
See
Using Stability Control (page 125).
AUDIBLE WARNINGS AND
INDICATORS
Key in Ignition Warning Chime
Sounds when the key is left in the ignition
and the driver ’s door is opened.
Headlamps On Warning Chime
Sounds when the headlamps or parking
lamps are on, the ignition is off (the key is
not in the ignition) and the driver ’s door is
opened.
Parking Brake On Warning Chime
Sounds when you have left the parking
brake on and drive your vehicle. If the
warning chime remains on after you have
released the parking brake, have the
system checked by your authorized dealer
immediately.
73
Police Interceptor (CPH) Police, Canada/United States of America, enUSA, Edition date: 201806, First-Printing Instrument Cluster E138639 E130458
Page 96 of 370
STARTING A GASOLINE
ENGINE
When you start the engine, the idle speed
increases. This helps to warm up the
engine. If the engine idle speed does not
slow down automatically, have your
vehicle checked by an authorized dealer.
Note:
You can crank the engine for a total
of 60 seconds without the engine starting
before the starting system temporarily
disables. The 60 seconds does not have to
be all at once. For example, if you crank the
engine three times for 20 seconds each
time, without the engine starting, you
reached the 60-second time limit. A
message appears in the information display
alerting you that you exceeded the cranking
time. You cannot attempt to start the
engine for at least 15 minutes. After 15
minutes, you are limited to a 15-second
engine cranking time. You need to wait 60
minutes before you can crank the engine for
60 seconds again.
Before starting your vehicle, check the
following:
• Make sure all occupants have fastened
their safety belts.
• Make sure the headlamps and
electrical accessories are off.
• Make sure the parking brake is on.
• Make sure the transmission is in park
(P).
To start the engine, do the following:
Note: Do not touch the accelerator pedal.
1. Fully depress the brake pedal.
2. Turn the key to the start position to start the engine.
Note: The engine may continue cranking
for up to 15 seconds or until it starts.
Note: If you cannot start the engine on the
first try, wait for a short period and try again. Failure to Start
If you cannot start the engine after three
attempts, wait 10 seconds and follow this
procedure:
1. Fully depress the brake pedal.
2. Shift into park (P).
3. Fully press the accelerator pedal and
hold it there.
4. Start the engine.
Cold Weather Starting - Flex Fuel
Vehicles WARNING: Do not use starting
fluid, for example ether, in the air intake
system. Such fluid could cause
immediate explosive damage to the
engine and possible personal injury.
The starting characteristics of all grades
of E85 ethanol make it unsuitable for use
when ambient temperatures fall below
0°F (-18°C)
. Consult your fuel distributor
for the availability of winter grade ethanol.
As the outside temperature approaches
freezing, ethanol fuel distributors should
supply winter grade ethanol, the same as
with unleaded gasoline. If summer grade
ethanol is used in cold weather conditions,
0°F to 32°F (-18°C to 0°C), you may
experience increased cranking times, rough
idle or hesitation until the engine has
warmed up.
You may experience a decrease in peak
performance when the engine is cold when
operating on E85 ethanol.
Do not crank the engine for more than 10
seconds at a time. This may cause
damage to the starter motor. If the engine
does not start, turn the key to the off
position and wait 30 seconds before trying
again.
93
Police Interceptor (CPH) Police, Canada/United States of America, enUSA, Edition date: 201806, First-Printing Starting and Stopping the Engine
Page 175 of 370

Protected Components
Fuse Amp Rating
Fuse or Relay
Number
Not used (spare).
15A
28
Radio.
20A
29
Global positioning system module.
Front park lamps.
15A
30
Brake signal for police equipment.
5A
31
Master window and mirror switch.
15A
32
Lock switch illumination.
Police console inline delayed accessory
feed.
Delayed accessory feed.
Not used (spare).
10A
33
Reverse park aid module.
10A
34
Blind spot monitor module.
Rear video camera.
Motorized humidity sensor.
5A
35
Overdrive cancel switch (Low gear switch
feed).
Column shift – low gear.
Not used (spare).
10A
36
Not used (spare).
10A
37
Auto–dimming mirror.
10A
38
Rear camera display mirror.
High beam headlamp shutters.
15A
39
Rear park lamps.
10A
40
Extended power module.
7.5A
41
Police 4-button steering wheel control
module.
5A
42
Not used (spare).
10A
43
Not used (spare).
10A
44
Not used (spare).
5A
45
Climate control module.
10A
46
172
Police Interceptor (CPH) Police, Canada/United States of America, enUSA, Edition date: 201806, First-Printing Fuses
Page 195 of 370
CHANGING THE WIPER
BLADES
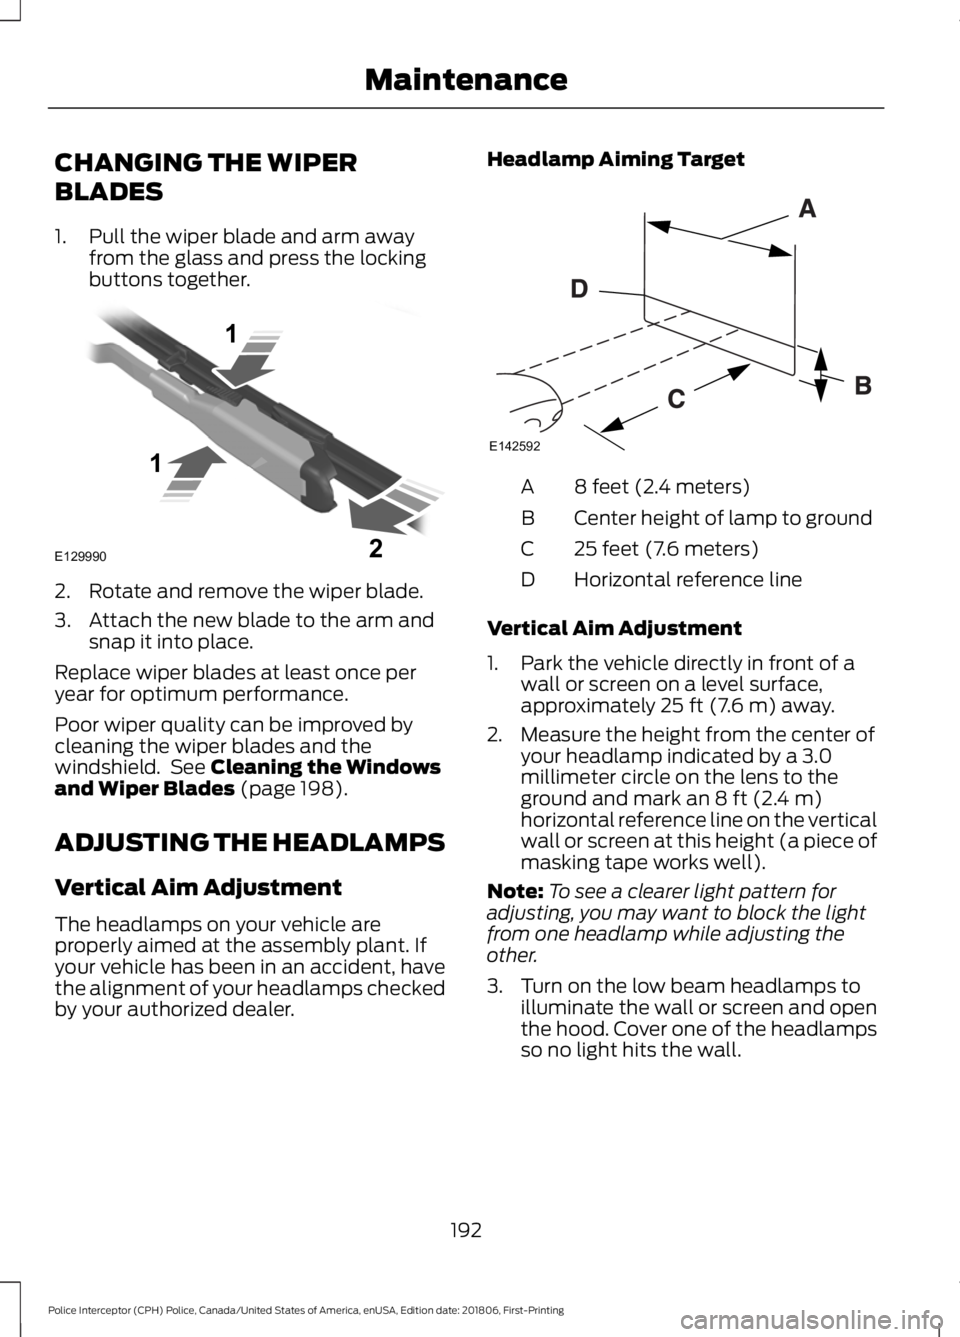
1. Pull the wiper blade and arm away
from the glass and press the locking
buttons together. 2. Rotate and remove the wiper blade.
3. Attach the new blade to the arm and
snap it into place.
Replace wiper blades at least once per
year for optimum performance.
Poor wiper quality can be improved by
cleaning the wiper blades and the
windshield. See Cleaning the Windows
and Wiper Blades (page 198).
ADJUSTING THE HEADLAMPS
Vertical Aim Adjustment
The headlamps on your vehicle are
properly aimed at the assembly plant. If
your vehicle has been in an accident, have
the alignment of your headlamps checked
by your authorized dealer. Headlamp Aiming Target
8 feet (2.4 meters)
A
Center height of lamp to ground
B
25 feet (7.6 meters)
C
Horizontal reference line
D
Vertical Aim Adjustment
1. Park the vehicle directly in front of a wall or screen on a level surface,
approximately
25 ft (7.6 m) away.
2. Measure the height from the center of your headlamp indicated by a 3.0
millimeter circle on the lens to the
ground and mark an
8 ft (2.4 m)
horizontal reference line on the vertical
wall or screen at this height (a piece of
masking tape works well).
Note: To see a clearer light pattern for
adjusting, you may want to block the light
from one headlamp while adjusting the
other.
3. Turn on the low beam headlamps to illuminate the wall or screen and open
the hood. Cover one of the headlamps
so no light hits the wall.
192
Police Interceptor (CPH) Police, Canada/United States of America, enUSA, Edition date: 201806, First-Printing MaintenanceE129990
1
1 2 E142592
Page 196 of 370
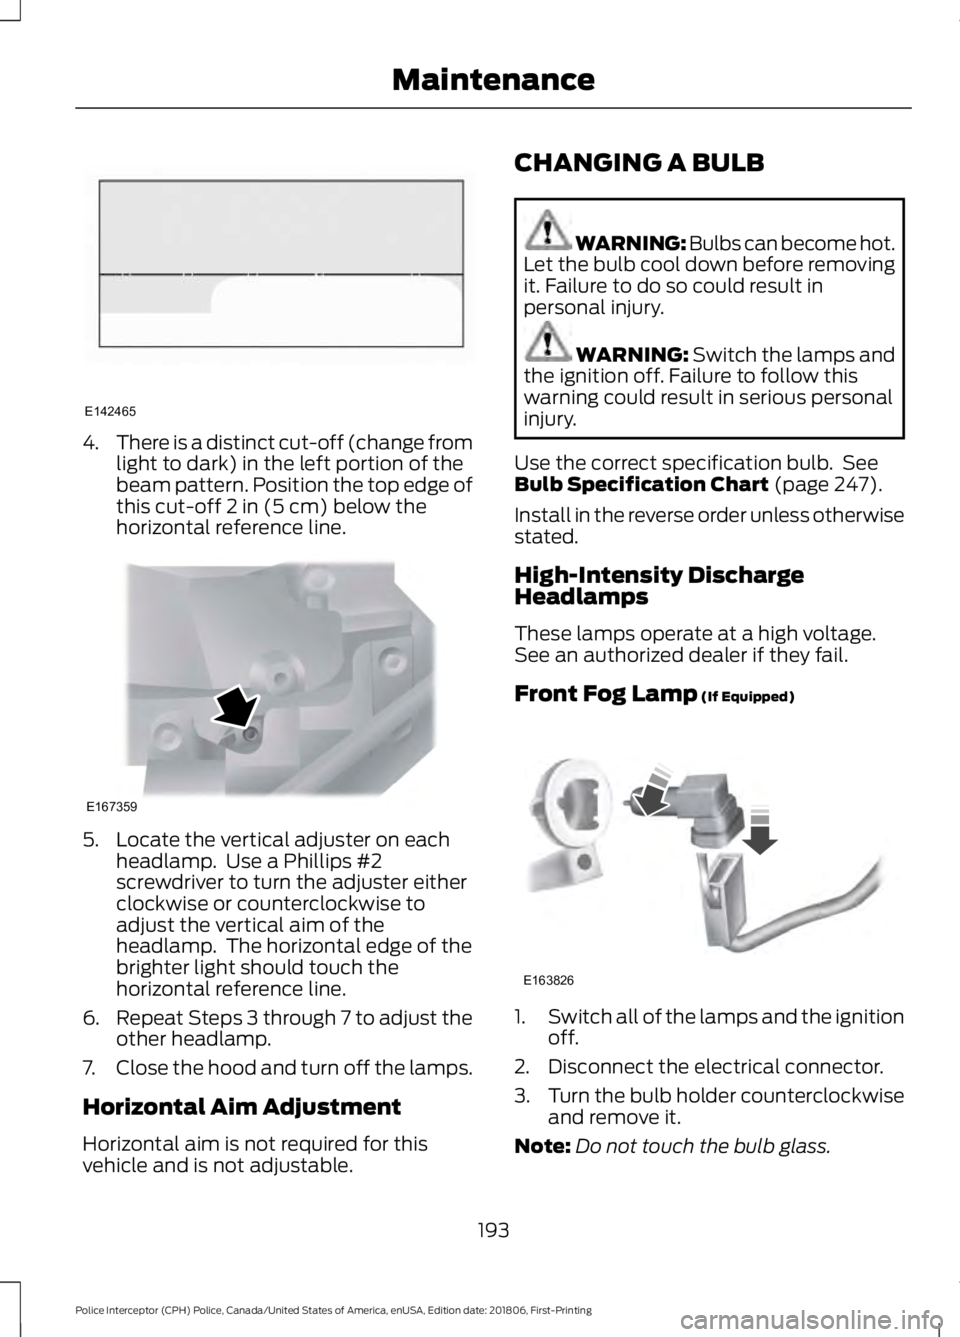
4.
There is a distinct cut-off (change from
light to dark) in the left portion of the
beam pattern. Position the top edge of
this cut-off 2 in (5 cm) below the
horizontal reference line. 5. Locate the vertical adjuster on each
headlamp. Use a Phillips #2
screwdriver to turn the adjuster either
clockwise or counterclockwise to
adjust the vertical aim of the
headlamp. The horizontal edge of the
brighter light should touch the
horizontal reference line.
6. Repeat Steps 3 through 7 to adjust the
other headlamp.
7. Close the hood and turn off the lamps.
Horizontal Aim Adjustment
Horizontal aim is not required for this
vehicle and is not adjustable. CHANGING A BULB WARNING: Bulbs can become hot.
Let the bulb cool down before removing
it. Failure to do so could result in
personal injury. WARNING:
Switch the lamps and
the ignition off. Failure to follow this
warning could result in serious personal
injury.
Use the correct specification bulb. See
Bulb Specification Chart
(page 247).
Install in the reverse order unless otherwise
stated.
High-Intensity Discharge
Headlamps
These lamps operate at a high voltage.
See an authorized dealer if they fail.
Front Fog Lamp
(If Equipped) 1.
Switch all of the lamps and the ignition
off.
2. Disconnect the electrical connector.
3. Turn the bulb holder counterclockwise
and remove it.
Note: Do not touch the bulb glass.
193
Police Interceptor (CPH) Police, Canada/United States of America, enUSA, Edition date: 201806, First-Printing MaintenanceE142465 E167359 E163826
Page 200 of 370
•
Dry your vehicle with a chamois or soft
terry cloth towel to eliminate water
spotting.
• Immediately remove fuel spillages, bird
droppings, insect deposits and road tar.
These may cause damage to your
vehicle ’s paintwork or trim over time.
We recommend Motorcraft Bug and
Tar Remover.
• Remove any exterior accessories, for
example antennas, before entering a
car wash.
• When filling with AdBlue®, remove any
residue on painted surfaces
immediately.
Note: Suntan lotions and insect repellents
can damage painted surfaces. If these
substances come in contact with your
vehicle, wash the affected area as soon as
possible.
Cleaning the Headlamps
Note: Do not scrape the headlamp lenses
or use abrasives, alcoholic solvents or
chemical solvents to clean them.
Note: Do not wipe the headlamps when
they are dry.
Exterior Chrome Parts
• Apply a high quality-cleaning product
to bumpers and other chrome parts.
Follow the manufacturer ’s instructions.
We recommend Motorcraft Custom
Bright Metal Cleaner.
• Do not apply the cleaning product to
hot surfaces. Do not leave the cleaning
product on chrome surfaces longer
than the time recommended.
• Using non-recommended cleaners can
result in severe and permanent
cosmetic damage.
Note: Never use abrasive materials, for
example steel wool or plastic pads as they
can scratch the chrome surface. Note:
Do not use chrome cleaner, metal
cleaner or polish on wheels or wheel covers.
Exterior Plastic Parts
For routine cleaning we recommend
Motorcraft Detail Wash. If tar or grease
spots are present, we recommend
Motorcraft Bug and Tar Remover.
Stripes or Graphics (If Equipped)
Hand washing your vehicle is preferred
however, pressure washing may be used
under the following conditions:
• Do not use water pressure higher than
2,000 psi (14,000 kPa)
.
• Do not use water hotter than
179°F
(82°C).
• Use a spray with a
40° wide spray
angle pattern.
• Keep the nozzle at a
12 in (305 mm)
distance and 90° angle to your
vehicle's surface.
Note: Holding the pressure washer nozzle
at an angle to the vehicle's surface may
damage graphics and cause the edges to
peel away from the vehicle's surface.
Underbody
Regularly clean the underside of your
vehicle using water. Keep body and door
drain holes free of debris or foreign
material.
Under Hood
For removing black rubber marks from
under the hood we recommend Motorcraft
Wheel and Tire Cleaner or Motorcraft Bug
and Tar Remover.
197
Police Interceptor (CPH) Police, Canada/United States of America, enUSA, Edition date: 201806, First-Printing Vehicle Care
Page 250 of 370
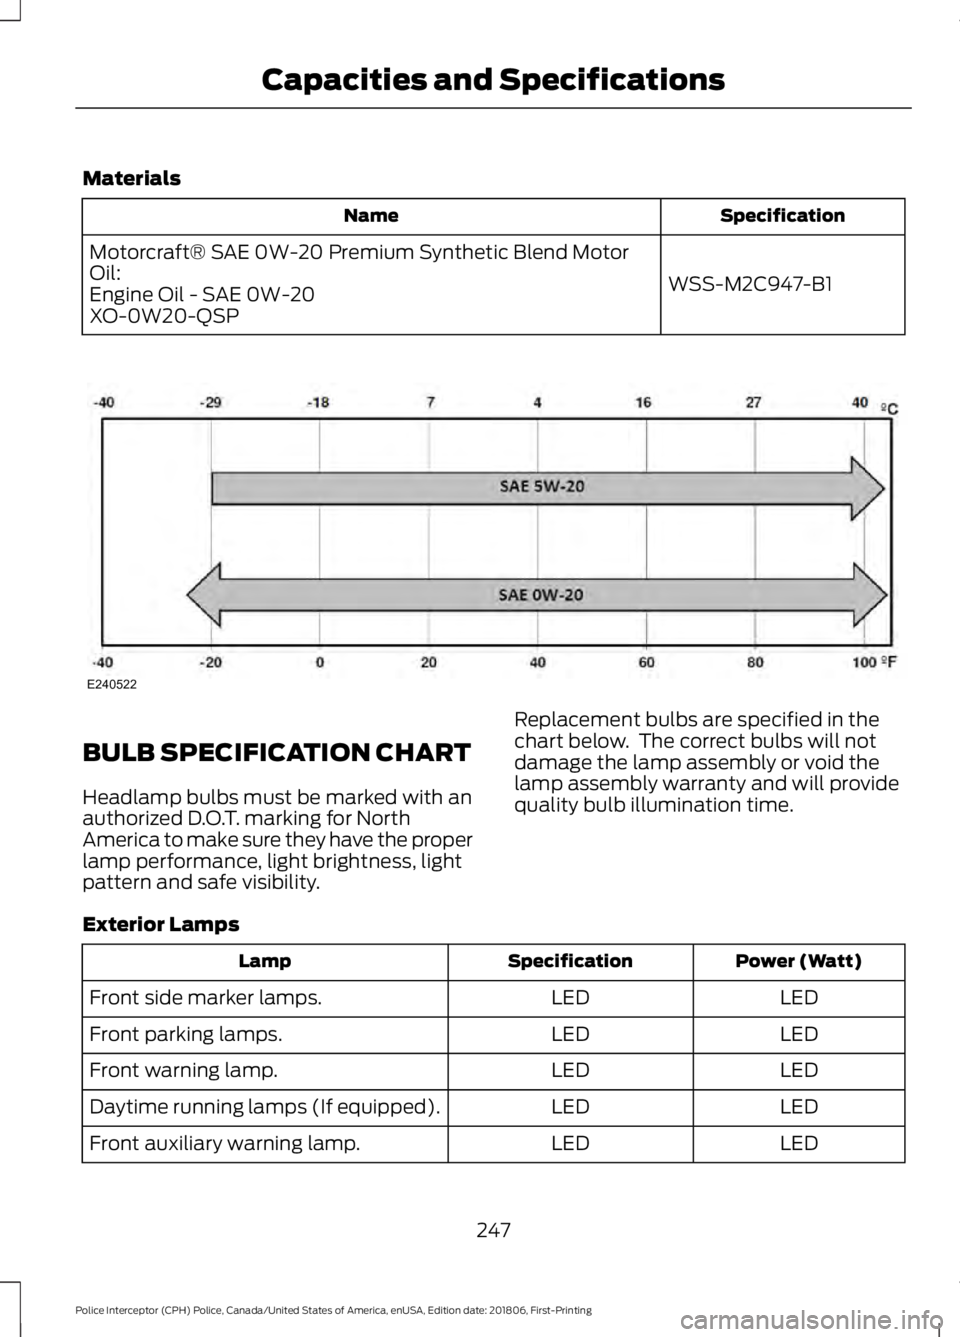
Materials
Specification
Name
WSS-M2C947-B1
Motorcraft® SAE 0W-20 Premium Synthetic Blend Motor
Oil:
Engine Oil - SAE 0W-20
XO-0W20-QSP BULB SPECIFICATION CHART
Headlamp bulbs must be marked with an
authorized D.O.T. marking for North
America to make sure they have the proper
lamp performance, light brightness, light
pattern and safe visibility.
Replacement bulbs are specified in the
chart below. The correct bulbs will not
damage the lamp assembly or void the
lamp assembly warranty and will provide
quality bulb illumination time.
Exterior Lamps Power (Watt)
Specification
Lamp
LED
LED
Front side marker lamps.
LED
LED
Front parking lamps.
LED
LED
Front warning lamp.
LED
LED
Daytime running lamps (If equipped).
LED
LED
Front auxiliary warning lamp.
247
Police Interceptor (CPH) Police, Canada/United States of America, enUSA, Edition date: 201806, First-Printing Capacities and SpecificationsE240522
Page 251 of 370
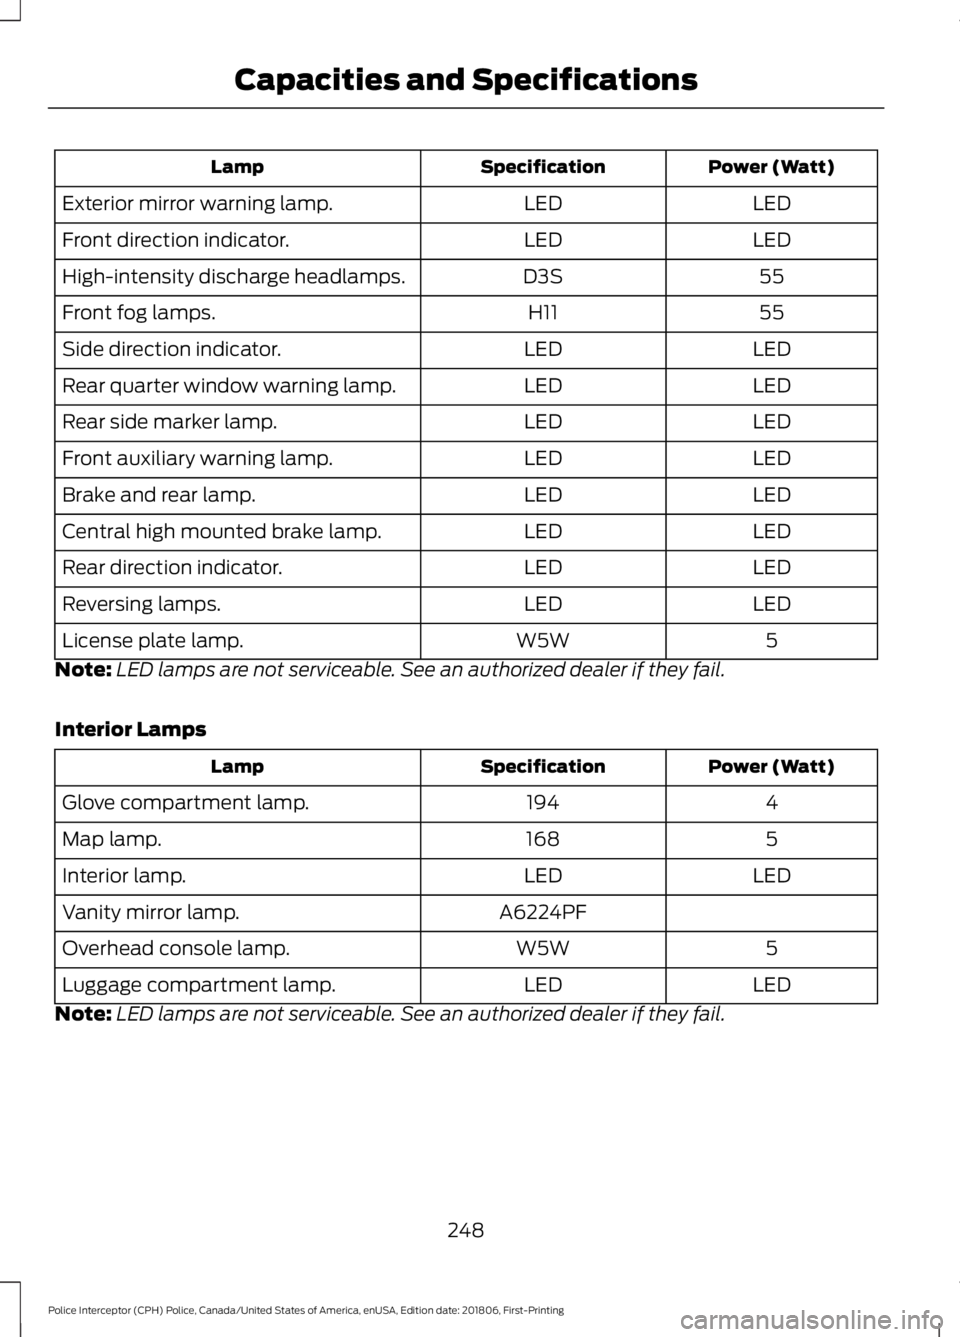
Power (Watt)
Specification
Lamp
LED
LED
Exterior mirror warning lamp.
LED
LED
Front direction indicator.
55
D3S
High-intensity discharge headlamps.
55
H11
Front fog lamps.
LED
LED
Side direction indicator.
LED
LED
Rear quarter window warning lamp.
LED
LED
Rear side marker lamp.
LED
LED
Front auxiliary warning lamp.
LED
LED
Brake and rear lamp.
LED
LED
Central high mounted brake lamp.
LED
LED
Rear direction indicator.
LED
LED
Reversing lamps.
5
W5W
License plate lamp.
Note: LED lamps are not serviceable. See an authorized dealer if they fail.
Interior Lamps Power (Watt)
Specification
Lamp
4
194
Glove compartment lamp.
5
168
Map lamp.
LED
LED
Interior lamp.
A6224PF
Vanity mirror lamp.
5
W5W
Overhead console lamp.
LED
LED
Luggage compartment lamp.
Note: LED lamps are not serviceable. See an authorized dealer if they fail.
248
Police Interceptor (CPH) Police, Canada/United States of America, enUSA, Edition date: 201806, First-Printing Capacities and Specifications