2019 FORD F650/750 hood open
[x] Cancel search: hood openPage 196 of 387
To top up the engine oil level do the
following:
1. Clean the area surrounding the engine
oil filler cap before you remove it.
2. Remove the engine oil filler cap. See Under Hood Overview (page 190).
Turn it counterclockwise and remove
it.
3. Add engine oil of the proper viscosity and grade that meets Ford
specifications. See
Capacities and
Specifications (page 261). You may
have to use a funnel to pour the engine
oil into the opening.
4. Recheck the oil level.
5. If the oil level is correct, replace the dipstick and make sure it is fully seated.
6. Replace the engine oil filler cap. Turn it clockwise until you feel a strong
resistance.
Note: Do not add oil further than the
maximum mark. Oil levels above the
maximum mark may cause engine damage.
Note: Make sure you install the oil filler cap
correctly.
Note: Soak up any spillage with an
absorbent cloth immediately.
Engine lubrication for severe
service operation
The following conditions define severe
operation for which engine operation with
SAE 5W-40 oil which meets Ford
specification, WSS-M2C171-F1, is
recommended. Oil and oil filter change
intervals will be determined by the
Intelligent Oil Life Monitor™ as noted
previously.
ENGINE OIL CHECK - 6.8L
To check the engine oil level consistently
and accurately, do the following: 1.
Make sure the parking brake is on. Make
sure the transmission is in park (P) or
neutral (N).
2. Run the engine until it reaches normal operating temperature.
3. Make sure that your vehicle is on level ground.
4. Switch the engine off and wait 15 minutes for the oil to drain into the oil
pan. Checking the engine oil level too
soon after you switch the engine off
may result in an inaccurate reading.
5. Open the hood. See
Maintenance
(page 187).
6. Remove the dipstick and wipe it with a clean, lint-free cloth. See
Maintenance
(page 187).
7. Replace the dipstick and remove it again to check the oil level. See
Maintenance
(page 187).
8. Make sure that the oil level is between
the maximum and minimum marks. If
the oil level is at the minimum mark,
add oil immediately. See
Capacities
and Specifications (page 255).
9. If the oil level is correct, replace the dipstick and make sure it is fully seated.
Note: Do not remove the dipstick when the
engine is running.
Note: If the oil level is between the
maximum and minimum marks, the oil level
is acceptable. Do not add oil.
Note: The oil consumption of new engines
reaches its normal level after approximately
3,000 mi (5,000 km)
.
Adding Engine Oil WARNING:
Do not remove the
filler cap when the engine is running.
193
F650750 (TBC) , enUSA, Edition date: 201804, Second-Printing Maintenance
Page 207 of 387
AUTOMATIC TRANSMISSION
FLUID CHECK
The transmission does not consume fluid.
However, the fluid level should be checked
if the transmission is not working properly,
for example if the transmission slips, shifts
slowly or if there are signs of fluid loss.
The transmission fluid and filter on your
vehicle must be replaced at the specified
service interval. See Scheduled
Maintenance (page 322).
Automatic transmission fluid expands
when warmed. To check the fluid level
consistently and accurately, do the
following:
1. Drive the vehicle until it reaches normal
operating temperature. This may take
up to
20 mi (30 km).
2. Make sure that your vehicle is on level ground.
3. With the engine running, parking brake
engaged and your foot on the brake
pedal, move the gearshift lever through
all of the gear ranges. Allow sufficient
time for each gear to engage.
4. Make sure the parking brake is on. Make
sure the transmission is in park (P) or
neutral (N) and leave the engine
running.
5. Open the hood. See
Opening and
Closing the Hood (page 188).
6. Remove the dipstick and wipe it with a clean, lint-free cloth. See
Under
Hood Overview (page 191).
7. Replace the dipstick and remove it again to check the fluid level.
8. If the fluid level is correct, replace the dipstick and make sure it is fully seated.
Note: If the fluid level is between the
maximum and minimum marks, the fluid
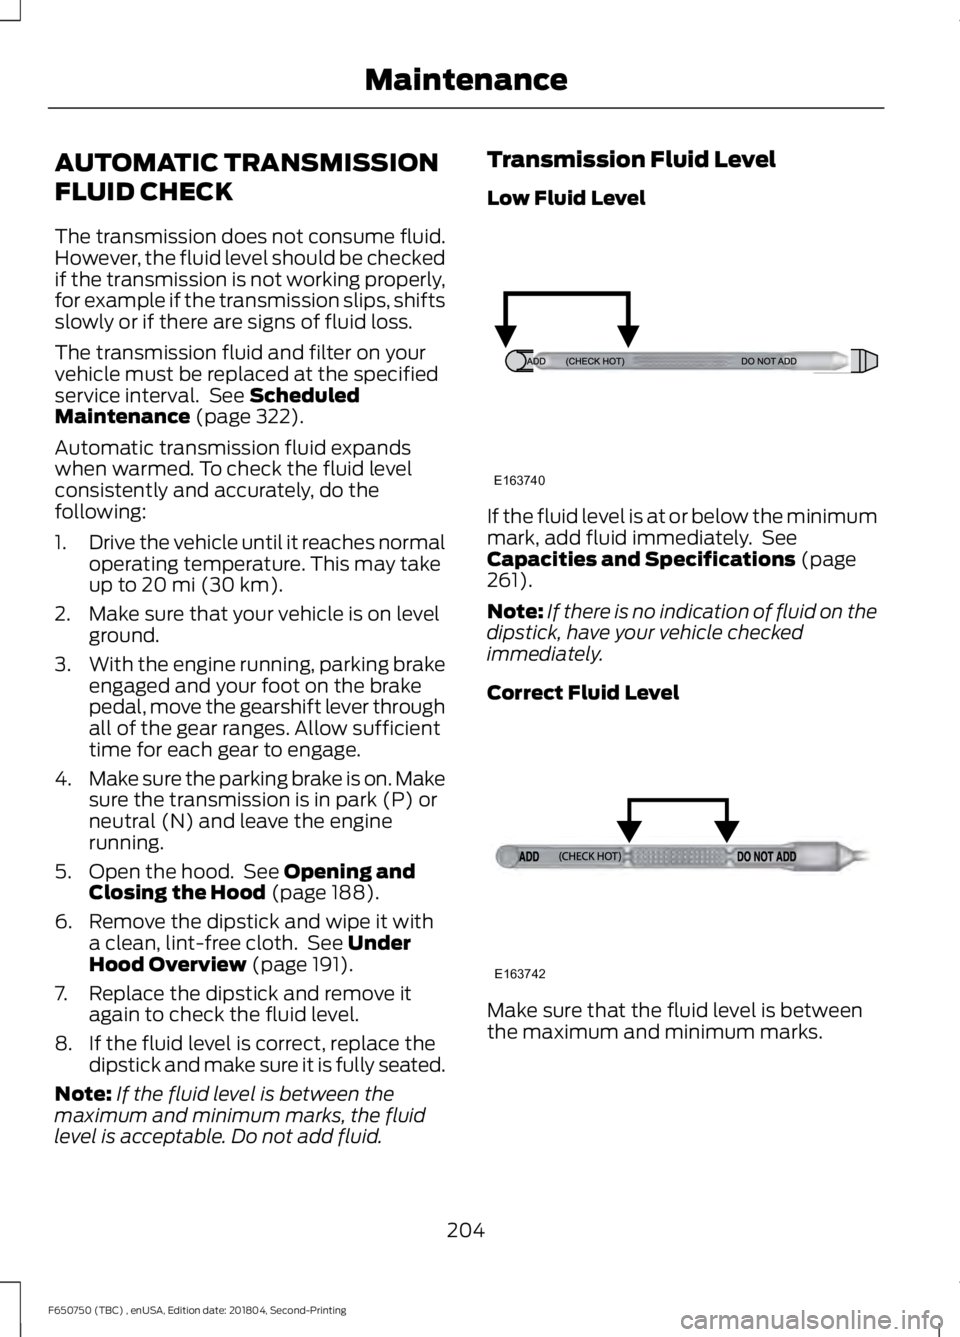
level is acceptable. Do not add fluid. Transmission Fluid Level
Low Fluid Level
If the fluid level is at or below the minimum
mark, add fluid immediately. See
Capacities and Specifications
(page
261).
Note: If there is no indication of fluid on the
dipstick, have your vehicle checked
immediately.
Correct Fluid Level Make sure that the fluid level is between
the maximum and minimum marks.
204
F650750 (TBC) , enUSA, Edition date: 201804, Second-Printing MaintenanceE163740 E163742
Page 214 of 387
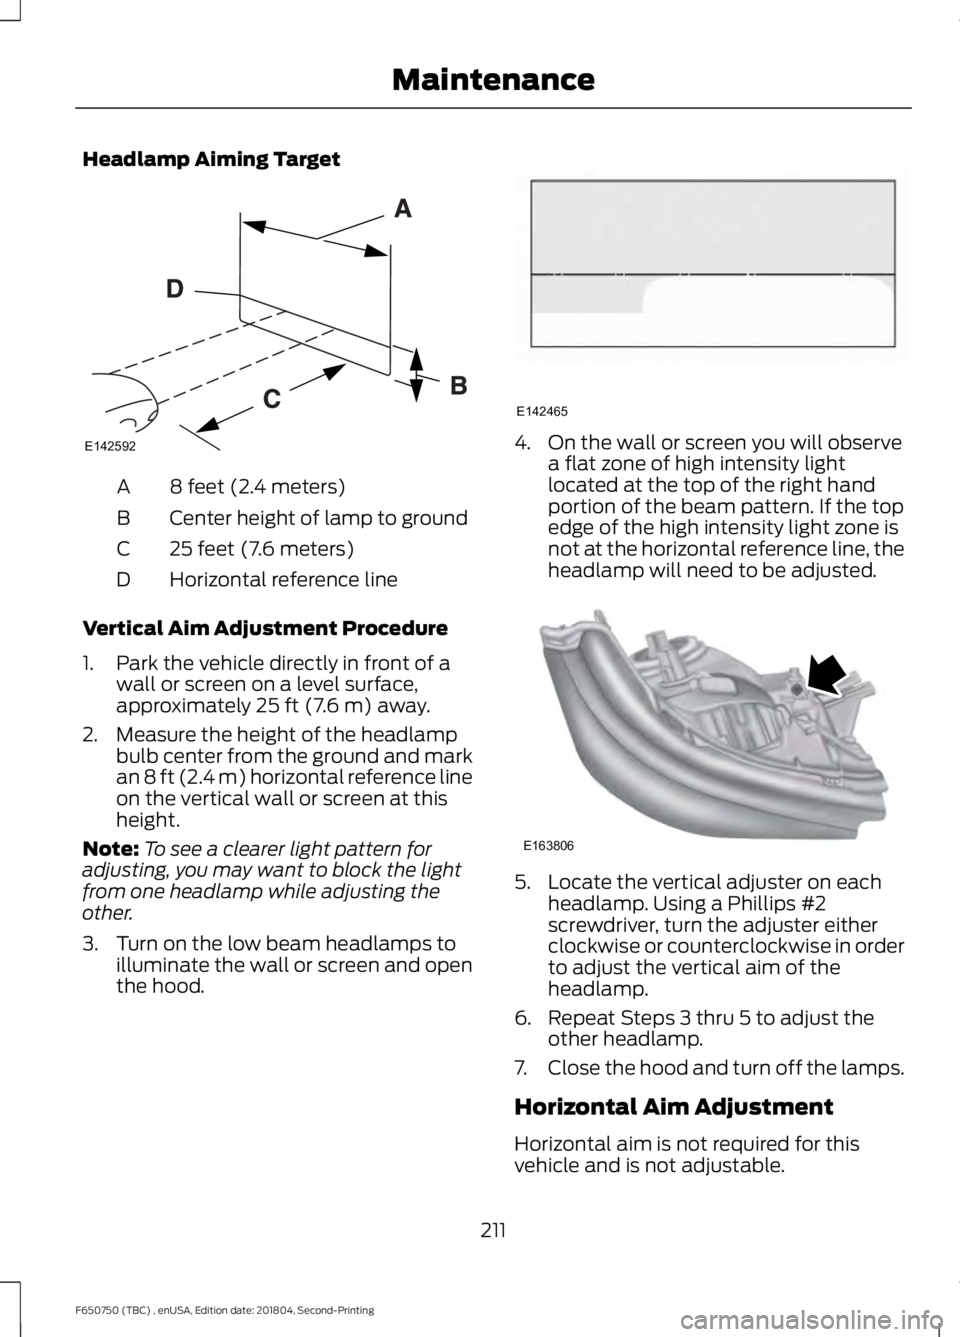
Headlamp Aiming Target
8 feet (2.4 meters)
A
Center height of lamp to ground
B
25 feet (7.6 meters)
C
Horizontal reference line
D
Vertical Aim Adjustment Procedure
1. Park the vehicle directly in front of a wall or screen on a level surface,
approximately 25 ft (7.6 m) away.
2. Measure the height of the headlamp bulb center from the ground and mark
an
8 ft (2.4 m) horizontal reference line
on the vertical wall or screen at this
height.
Note: To see a clearer light pattern for
adjusting, you may want to block the light
from one headlamp while adjusting the
other.
3. Turn on the low beam headlamps to illuminate the wall or screen and open
the hood. 4. On the wall or screen you will observe
a flat zone of high intensity light
located at the top of the right hand
portion of the beam pattern. If the top
edge of the high intensity light zone is
not at the horizontal reference line, the
headlamp will need to be adjusted. 5. Locate the vertical adjuster on each
headlamp. Using a Phillips #2
screwdriver, turn the adjuster either
clockwise or counterclockwise in order
to adjust the vertical aim of the
headlamp.
6. Repeat Steps 3 thru 5 to adjust the other headlamp.
7. Close the hood and turn off the lamps.
Horizontal Aim Adjustment
Horizontal aim is not required for this
vehicle and is not adjustable.
211
F650750 (TBC) , enUSA, Edition date: 201804, Second-Printing MaintenanceE142592 E142465 E163806
Page 216 of 387
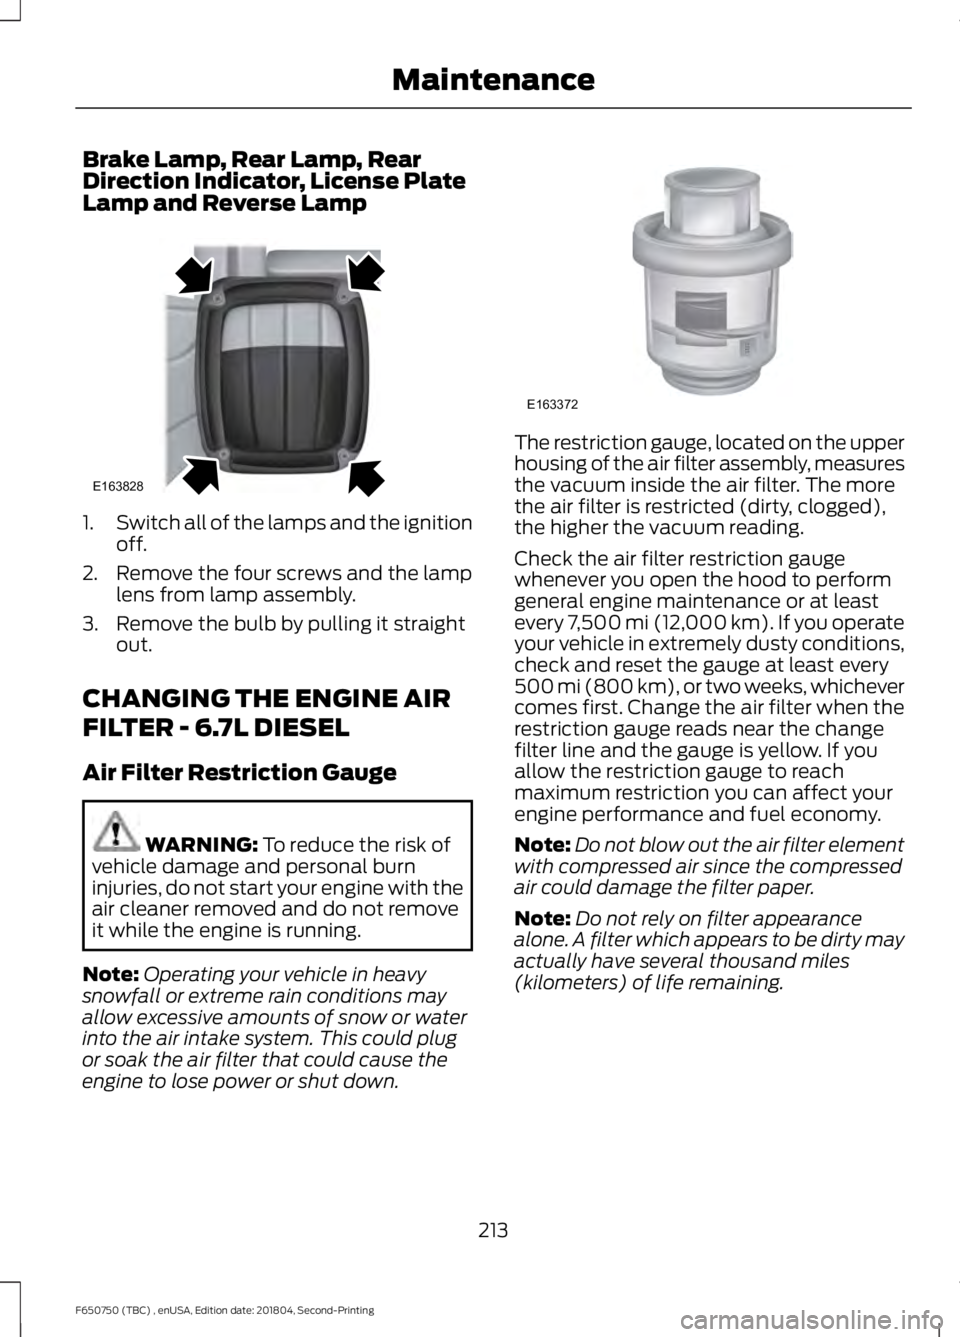
Brake Lamp, Rear Lamp, Rear
Direction Indicator, License Plate
Lamp and Reverse Lamp
1.
Switch all of the lamps and the ignition
off.
2. Remove the four screws and the lamp lens from lamp assembly.
3. Remove the bulb by pulling it straight out.
CHANGING THE ENGINE AIR
FILTER - 6.7L DIESEL
Air Filter Restriction Gauge WARNING: To reduce the risk of
vehicle damage and personal burn
injuries, do not start your engine with the
air cleaner removed and do not remove
it while the engine is running.
Note: Operating your vehicle in heavy
snowfall or extreme rain conditions may
allow excessive amounts of snow or water
into the air intake system. This could plug
or soak the air filter that could cause the
engine to lose power or shut down. The restriction gauge, located on the upper
housing of the air filter assembly, measures
the vacuum inside the air filter. The more
the air filter is restricted (dirty, clogged),
the higher the vacuum reading.
Check the air filter restriction gauge
whenever you open the hood to perform
general engine maintenance or at least
every 7,500 mi (12,000 km). If you operate
your vehicle in extremely dusty conditions,
check and reset the gauge at least every
500 mi (800 km), or two weeks, whichever
comes first. Change the air filter when the
restriction gauge reads near the change
filter line and the gauge is yellow. If you
allow the restriction gauge to reach
maximum restriction you can affect your
engine performance and fuel economy.
Note:
Do not blow out the air filter element
with compressed air since the compressed
air could damage the filter paper.
Note: Do not rely on filter appearance
alone. A filter which appears to be dirty may
actually have several thousand miles
(kilometers) of life remaining.
213
F650750 (TBC) , enUSA, Edition date: 201804, Second-Printing MaintenanceE163828 E163372
Page 217 of 387
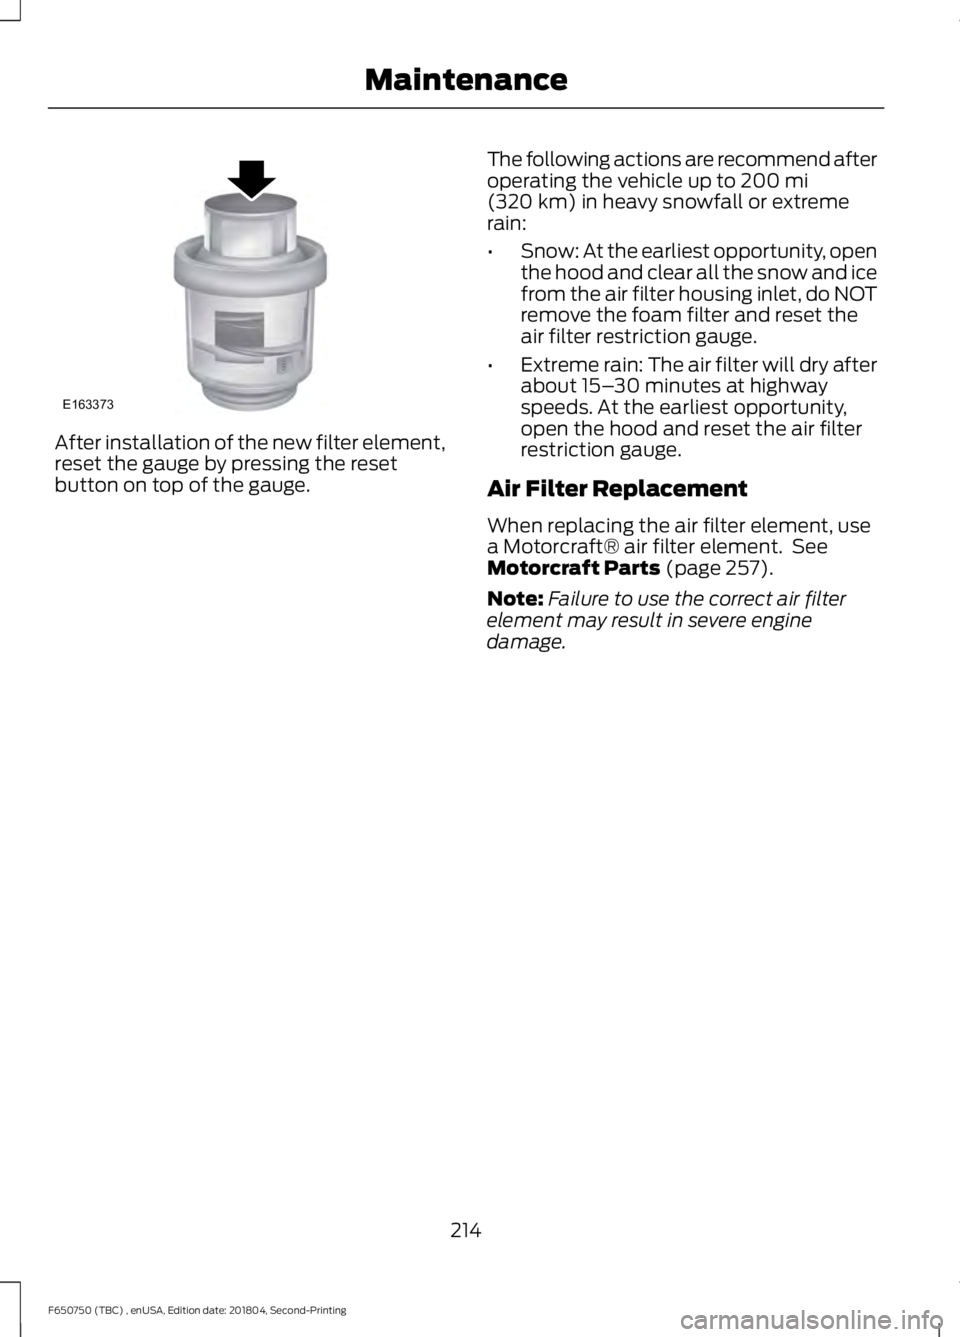
After installation of the new filter element,
reset the gauge by pressing the reset
button on top of the gauge.
The following actions are recommend after
operating the vehicle up to 200 mi
(320 km) in heavy snowfall or extreme
rain:
• Snow: At the earliest opportunity, open
the hood and clear all the snow and ice
from the air filter housing inlet, do NOT
remove the foam filter and reset the
air filter restriction gauge.
• Extreme rain: The air filter will dry after
about 15– 30 minutes at highway
speeds. At the earliest opportunity,
open the hood and reset the air filter
restriction gauge.
Air Filter Replacement
When replacing the air filter element, use
a Motorcraft® air filter element. See
Motorcraft Parts
(page 257).
Note: Failure to use the correct air filter
element may result in severe engine
damage.
214
F650750 (TBC) , enUSA, Edition date: 201804, Second-Printing MaintenanceE163373
Page 379 of 387
Automatic Transmission.............................115
Brake-Shift Interlock.......................................... 118
If Your Vehicle Gets Stuck In Mud or Snow................................................................... 119
Understanding the Shift Positions of a 6– Speed Automatic Transmission..........115
Understanding your SelectShift™ Automatic transmission.............................. 116
Automatic Transmission Fluid Check............................................................204
Transmission Fluid Level................................ 204
Auxiliary Power Points.................................83 110 Volt AC Power Point..................................... 83
12 Volt DC Power Point....................................... 83
Locations................................................................. 83
Auxiliary Switches........................................318
Axle Inspection.............................................225 Front Axle.............................................................. 225
B
Battery See: Changing the 12V Battery..................... 208
Bonnet Lock See: Opening and Closing the Hood...........188
Booster Seats...................................................27
Types of Booster Seats...................................... 28
Brake Fluid Check........................................205
Brakes................................................................122 General Information........................................... 122
Brake System Inspection
..........................222
Air Brakes.............................................................. 223
Driveline Parking Brake.................................... 225
Hydraulic Brakes................................................. 224
Breaking-In......................................................149
Bulb Specification Chart...........................275
C
Capacities and Specifications - 6.7L Diesel..............................................................261
Engine Oil Specifications................................ 267
Specifications..................................................... 263
Capacities and Specifications - 6.8L................................................................269
Alternative Engine Oil for Extremely Cold Climates............................................................ 274
Specifications..................................................... 270Capacities and Specifications
................255
Car Wash See: Cleaning the Exterior.............................. 229
Catalytic Converter
......................................103
On-Board Diagnostics (OBD-II)................... 104
Readiness for Inspection and Maintenance (I/M) Testing................................................... 104
Changing a Bulb............................................212 Brake Lamp, Rear Lamp, Rear Direction
Indicator, License Plate Lamp and
Reverse Lamp.................................................. 213
Front Clearance and Identification Lamp................................................................... 212
Headlamp Bulbs................................................. 212
Changing a Fuse
............................................176
Fuses........................................................................\
176
Changing a Road Wheel............................251 Tire Change Procedure..................................... 251
Changing the 12V Battery.........................208 Battery Management System (If
Equipped)....................................................... 209
Changing the Crankcase Vent Filter Element - 6.7L Diesel...............................195
Changing the Engine Air Filter - 6.7L Diesel..............................................................213
Air Filter Replacement...................................... 214
Air Filter Restriction Gauge.............................. 213
Changing the Engine Air Filter - 6.8L.................................................................216
Changing the Engine-Mounted and Diesel Fuel Conditioner Module Fuel
Filters..............................................................218
Diesel Fuel Conditioner Module Filter.........219
Engine-mounted Fuel Filter........................... 220
Changing the Engine Oil and Oil Filter................................................................194
Engine lubrication for severe service operation.......................................................... 195
Changing the Wiper Blades
......................210
Checking the Wiper Blades......................210
Child Restraint and Seatbelt Maintenance.................................................39
Child Restraint Positioning.........................29
Child Safety
.......................................................19
General Information............................................. 19
Child Safety Locks...........................................31
Cleaning Products
.......................................229
Materials............................................................... 229
376
F650750 (TBC) , enUSA, Edition date: 201804, Second-Printing Index
Page 382 of 387

Engine Oil Pressure Gauge................................
57
Fuel Gauge.............................................................. 57
Gasoline Engines.................................................. 56
Gauge Package...................................................... 57
Information Display............................................. 58
Transmission Fluid Temperature Gauge................................................................... 57
Gearbox See: Transmission............................................... 115
General Driving Points................................149
Backing Up............................................................ 149
General Information.......................................... 149
Parking .................................................................... 150
General Information on Radio Frequencies..................................................40
General Maintenance Information
........322
Multi-point Inspection..................................... 326
Owner Checks and Services.......................... 324
Protecting Your Investment........................... 322
Why Maintain Your Vehicle?.......................... 322
Why Maintain Your Vehicle at Your Dealership?..................................................... 322
Getting Assistance Outside the U.S. and Canada..........................................................163
Getting the Services You Need...............160 Away From Home.............................................. 160
H
Handbrake See: Parking Brake.............................................. 123
Hazard Flashers
.............................................155
Headlamp Adjusting See: Adjusting the Headlamps...................... 210
Headlamp Removal See: Removing a Headlamp........................... 212
Headrest See: Head Restraints........................................... 75
Head Restraints...............................................75 Adjusting the Head Restraint........................... 76
Heated Exterior Mirrors.................................74
Heating See: Climate Control........................................... 72
Hints on Controlling the Interior Climate
............................................................73
Defogging the Side Windows in Cold
Weather............................................................... 74
General Hints.......................................................... 73Quickly Cooling the Interior...............................
73
Quickly Heating the Interior.............................. 73
Recommended Settings for Cooling.............73
Recommended Settings for Heating............73
Vehicle Stationary for Extended Periods During Extreme High Ambient
Temperatures.................................................... 74
Hints on Driving With Anti-Lock Brakes.............................................................123
Hood Lock See: Opening and Closing the Hood...........188
I
Ignition Switch
................................................86
In California (U.S. Only)..............................161
Information Display Control.......................47
Information Displays
....................................64
General Information........................................... 64
Information Messages
..................................67
Diesel Messages................................................... 67
Engine....................................................................... 70
Fuel........................................................................\
.... 70
Key........................................................................\
....... 71
Maintenance............................................................ 71
Park Brake................................................................. 71
Installing Child Restraints...........................20 Child Restraints..................................................... 20
Tether Strap Attachment.................................. 26
Using Cinch Tongue Lap and Shoulder Belts (All Front Center, Super Cab and Crew
Cab Rear Center Positions)......................... 23
Using Lap and Shoulder Belts.......................... 21
Using Lower Anchors and Tethers for CHildren (LATCH)............................................ 25
Using Tether Straps............................................. 25
Instrument Cluster
........................................56
Instrument Lighting Dimmer.....................50
Instrument Panel Overview.........................17
Interior Lamps
..................................................51
Interior Mirror...................................................55
Introduction.........................................................7
J
Jump Starting the Vehicle.........................156 Connecting the Jumper Cables..................... 156
Jump Starting....................................................... 157
379
F650750 (TBC) , enUSA, Edition date: 201804, Second-Printing Index
Page 383 of 387
Preparing Your Vehicle.....................................
156
Removing the Jumper Cables........................ 157
K
Keys and Remote Controls........................40
L
Lighting Control..............................................49 Flashing the Headlamp High Beam..............50
Headlamp High Beam........................................ 49
Lighting..............................................................49 General Information............................................ 49
Limited Slip Differential.............................120
Load Carrying..................................................141
Load Limit.........................................................141
Unloaded or Lightly Loaded Vehicles..........141
Locking and Unlocking
.................................42
Autolock................................................................... 42
Battery Saver......................................................... 43
Illuminated Entry.................................................. 43
Power Door Locks................................................ 42
Remote Control..................................................... 42
Smart Unlocks....................................................... 42
Lug Nuts See: Changing a Road Wheel......................... 251
M
Maintenance...................................................187 General Information.......................................... 187
Manual Climate Control
...............................72
Directing the Air..................................................... 72
Setting the Blower Motor Speed.................... 72
Setting the Temperature.................................... 72
Switching Defrost On and Off.......................... 72
Switching Maximum Air Conditioning On and Off................................................................. 73
Switching Recirculated Air On and Off.........73
Switching the Air Conditioning On and Off........................................................................\
.. 72
Switching the Climate Control On and Off........................................................................\
.. 72
Manual Seats....................................................77 Manual Lumbar .................................................... 78
Moving the Seat Backward and Forward................................................................ 77Recline Adjustment..............................................
77
Tilting the Seatback Forward (Two-Passenger Bench Seat).................... 78
Media Hub
......................................................285
Message Center See: Information Displays................................. 64
Mirrors See: Windows and Mirrors................................ 52
Mobile Communications Equipment......14
Motorcraft Parts - 6.7L Diesel..................257
Motorcraft Parts - 6.8L..............................258
N
Noise Pollution Control.................................16 Air Intake System.................................................. 16
Body........................................................................\
... 16
Cooling System...................................................... 16
Engine........................................................................\
16
Exhaust System..................................................... 16
Transmission Enclosure...................................... 16
Normal Scheduled Maintenance..........326 Intelligent Oil-Life Monitor™ (Diesel Engine
Only).................................................................. 326
Normal Maintenance Intervals..................... 328
O
Oil Change Indicator Reset.......................196
Oil Check See: Engine Oil Check - 6.7L Diesel..............192
See: Engine Oil Check - 6.8L.......................... 193
Opening and Closing the Hood..............188 Closing the Hood................................................ 189
Opening the Hood............................................. 188
Ordering Additional Owner's Literature......................................................164
Obtaining a French Owner ’s Manual..........165
Overhead Console
.........................................85
P
Parking Brake..................................................123 Air Brakes............................................................... 124
Hydraulic Brakes.................................................. 123
Passive Anti-Theft System........................44 SecuriLock®........................................................... 44
380
F650750 (TBC) , enUSA, Edition date: 201804, Second-Printing Index