2019 FORD F-450 trailer
[x] Cancel search: trailerPage 187 of 666

FUEL QUALITY - E85
Choosing the Right Fuel - Flex Fuel
Vehicles
Flex fuel vehicles have one of the following
identifiers:
•
Yellow fuel filler cap.
• Yellow bezel around the fuel filler inlet.
• Yellow fuel filler housing.
• Yellow E85 label on the fuel tank filler
door. Your vehicle is designed to operate on
regular unleaded gasoline with a minimum
pump (R+M)/2 octane rating of 87 or
regular unleaded gasoline blended with a
maximum of 85% ethanol (E85).
Some fuel stations, particularly those in
high altitude areas, offer fuels posted as
regular unleaded gasoline with an octane
rating below 87. The use of these fuels
could result in engine damage that will not
be covered by the vehicle warranty.
For best overall vehicle and engine
performance, premium fuel with an octane
rating of 91 or higher is recommended. The
performance gained by using premium fuel
is most noticeable in hot weather as well
as other conditions, for example when
towing a trailer. See Towing (page 273). Do not be concerned if the engine
sometimes knocks lightly. However, if the
engine knocks heavily while using fuel with
the recommended octane rating, contact
an authorized dealer to prevent any engine
damage.
We recommend Top Tier detergent
gasolines, where available to help minimize
engine deposits and maintain optimal
vehicle and engine performance. For
additional information, refer to
www.toptiergas.com.
Note:
Use of any fuel for which the vehicle
was not designed can impair the emission
control system, cause loss of vehicle
performance, and cause damage to the
engine which may not be covered by the
vehicle Warranty.
Do not use:
• Diesel fuel.
• Fuels containing kerosene or paraffin.
• Fuels containing more than 85%
ethanol or E100 fuel.
• Fuels containing methanol.
• Fuels containing metallic-based
additives, including manganese-based
compounds.
• Fuels containing the octane booster
additive, methylcyclopentadienyl
manganese tricarbonyl (MMT).
• Leaded fuel, using leaded fuel is
prohibited by law.
The use of fuels with metallic compounds
such as methylcyclopentadienyl
manganese tricarbonyl (commonly known
as MMT), which is a manganese-based
fuel additive, will impair engine
performance and affect the emission
control system.
184
Super Duty (TFE) Canada/United States of America, enUSA, Edition date: 201804, Fourth-Printing Fuel and RefuelingE161513
Page 190 of 666

Biodiesel fuels degrade more easily than
diesel fuels not containing biodiesel and
should not be stored in the fuel tank for
more than 1 month. If you plan to park or
store your vehicle for more than 1 month,
then you should empty your vehicle fuel
tank of biodiesel fuel. You should fill the
tank with a pure petroleum-based diesel
fuel and run your vehicle for a minimum of
30 minutes.
Note:
Degraded or oxidized biodiesel can
damage fuel system seals and plastics and
corrode steel parts.
During cold weather, if you have problems
operating on biodiesel, you may need to
use a diesel fuel with lower biodiesel
content, try another brand, or discontinue
the use of biodiesel.
Diesel Fuel Additives
It should not be necessary to add any
aftermarket additives to your fuel if you
use a high quality diesel fuel that conforms
to ASTM industry specifications.
Aftermarket additives can damage the fuel
injector system or engine.
Use Motorcraft® cetane booster or an
equivalent cetane booster additive if you
suspect fuel has low cetane. Use
Motorcraft® anti-gel & performance
improver or an equivalent additive if there
is fuel gelling.
Do not use alcohol-based additives to
improve cetane quality, to prevent fuel
gelling or any other use. The use of alcohol
additives may result in damage to the fuel
injectors and system. See Capacities and
Specifications (page 431).
The Vehicle Warranty may not cover
repairs needed to correct the effects of
using an aftermarket product that does
not meet Ford specifications in your fuel. FUEL QUALITY - GASOLINE
Choosing the Right Fuel
Your vehicle is designed to operate on
regular unleaded gasoline with a minimum
pump (R+M)/2 octane rating of 87.
Some fuel stations, particularly those in
high altitude areas, offer fuels posted as
regular unleaded gasoline with an octane
rating below 87. The use of these fuels
could result in engine damage that will not
be covered by the vehicle warranty.
For best overall vehicle and engine
performance, premium fuel with an octane
rating of 91 or higher is recommended. The
performance gained by using premium fuel
is most noticeable in hot weather as well
as other conditions, for example when
towing a trailer. See
Towing (page 273).
Do not be concerned if the engine
sometimes knocks lightly. However, if the
engine knocks heavily while using fuel with
the recommended octane rating, contact
an authorized dealer to prevent any engine
damage.
We recommend Top Tier detergent
gasolines, where available to help minimize
engine deposits and maintain optimal
vehicle and engine performance. For
additional information, refer to
www.toptiergas.com.
187
Super Duty (TFE) Canada/United States of America, enUSA, Edition date: 201804, Fourth-Printing Fuel and RefuelingE161513
Page 210 of 666

Second (2)
Transmission operates in second (2) gear
only. Use second (2) gear to start-up on
slippery roads.
First (1)
•
Transmission operates in first (1) gear
only.
• Provides maximum engine braking.
• Allows upshifts by moving gearshift
lever.
• Does not downshift into first (1) gear
at high speeds; allows for first (1) gear
when vehicle reaches slower speeds.
Forced downshifts
• Allowed in drive (D) with the tow/haul
feature on or off.
• Press the accelerator to the floor.
• Allows transmission to select an
appropriate gear.
Tow/Haul Mode WARNING: Do not use tow/haul
when the road surface is slippery. Failure
to follow this instruction could result in
the loss of control of your vehicle. To activate tow/haul, press the
button on the gearshift lever
once. The TOW HAUL indicator
light illuminates in the instrument cluster. The tow/haul feature:
•
Delays upshifts to reduce the frequency
of transmission shifting.
• Provides engine braking in all forward
gears, which slows your vehicle and
assists you in controlling your vehicle
when descending a grade.
• Depending on driving conditions and
load conditions, may downshift the
transmission, slow your vehicle and
control your vehicle speed when
descending a hill, without pressing the
accelerator pedal. The amount of
downshift braking provided varies
based upon the amount you press the
brake pedal.
The tow/haul feature improves
transmission operation when towing a
trailer or a heavy load. All transmission
gear ranges are available when using
tow/haul.
Note: If your vehicle is equipped with the
Adaptive Steering System, enabling the
tow/haul feature adjusts the steering
response. In tow/haul mode the Adaptive
Steering system reduces vehicle sensitivity
to steering inputs at higher vehicle speeds
when maintaining the ease of parking and
maneuverability at low speeds.
See
Steering (page 260).
To deactivate the tow/haul feature and
return to normal driving mode, press the
button on the gearshift lever when
tow/haul is active. The TOW HAUL light
deactivates. Tow/haul also deactivates
when you power down your vehicle.
207
Super Duty (TFE) Canada/United States of America, enUSA, Edition date: 201804, Fourth-Printing TransmissionE161509
Page 227 of 666

This feature increases engine braking at
higher engine speeds to provide better
grade descent control with less brake and
transmission wear and tear.
Note:
Use this when driving downhill and
carrying heavy loads or trailering.
Benefits of engine braking are:
• Lower brake temperature.
• Reduced brake fade.
• Longer brake life.
• Improved driving and trailering control. Press the button on the switch
bank next to the audio unit to
switch the system on or off.
There are two engine brake modes, manual
and automatic.
Manual Engine Braking
1. Press the button to switch on manual engine braking.
2. Release the accelerator pedal to maximize engine braking.
3. Apply the brakes. The transmission downshifts to lower gears.
Note: The engine braking feature only
functions when you release the accelerator.
Note: You can shift the transmission to
lower gears with progressive range selection
(PRS) or manual shifting independent of
pressing the brakes.
Note: You can also use manual engine
braking with cruise control to improve grade
descent control.
Note: If your vehicle has Adaptive Cruise
Control, the speed control system uses the
selected engine brake mode, transmission
gears, and brakes to maintain the set speed
and distance to the vehicle being followed. Automatic Engine Braking
1. Press the button twice to switch on
automatic engine braking.
2. Release the accelerator or brake pedal.
The system remembers your vehicle
speed.
Note: This feature offers smoother, less
aggressive engine braking during downhill
descents. It may not apply braking if the
vehicle speed is not increasing, although it
will apply full engine braking force when
needed to prevent acceleration. The system
automatically activates the engine brake
and, if necessary, downshifts the
transmission to lower gears to not exceed
your vehicle's set speed when the brake or
accelerator were last released.
Warning Lamp Conditions
• Illuminates when this feature is
switched on and the system is
operating properly. See Warning
Lamps and Indicators (page 107).
• Flashes when the engine brake is
disabled due to a fault or the engine
does not meet the required braking
conditions.
• Does not illuminate when the switch
or indicator is faulty.
You can switch the system on at anytime.
The system becomes active once the
braking conditions are met.
Braking Conditions
• Your vehicle is in a forward gear.
• The engine speed is above about 1500
RPM.
• Your foot is off the accelerator.
224
Super Duty (TFE) Canada/United States of America, enUSA, Edition date: 201804, Fourth-Printing BrakesE171217
Page 228 of 666

You can use this feature with tow/haul or
progressive range selection to provide
further increased engine braking. The
transmission automatically upshifts to
prevent the engine from entering the red
zone on the tachometer. See Automatic
Transmission (page 206).
HINTS ON DRIVING WITH
ANTI-LOCK BRAKES
The anti-lock braking system does not
eliminate the risks when:
• You drive too closely to the vehicle in
front of you.
• Your vehicle is hydroplaning.
• You take corners too fast.
• The road surface is poor.
Note: If the system activates, the brake
pedal may pulse and may travel further.
Maintain pressure on the brake pedal. You
may also hear a noise from the system. This
is normal.
PARKING BRAKE WARNING:
Always set the parking
brake fully and make sure the
transmission is placed in park (P). Failure
to set the parking brake and engage park
could result in vehicle roll-away, property
damage or bodily injury. Turn the ignition
to the lock position and remove the key
whenever you leave your vehicle.
Apply the parking brake whenever your
vehicle is parked. Press the pedal
downward to set the parking brake. The
brake warning lamp in the instrument
cluster will illuminate and remains
illuminated until the parking brake is
released. To release, pull the brake release lever
located at the lower left side of the
instrument panel.
If you are parking your vehicle on a grade
or with a trailer, press and hold the brake
pedal down, then set the parking brake.
There may be a little vehicle movement as
the parking brake sets to hold the vehicle's
weight. This is normal and should be no
reason for concern. If needed, press and
hold the service brake pedal down, then
try reapplying the parking brake. Chock the
wheels if required. If the parking brake
cannot hold the weight of the vehicle, the
parking brake may need to be serviced or
the vehicle may be overloaded.
HILL START ASSIST
WARNING:
The system does not
replace the parking brake. When you
leave your vehicle, always apply the
parking brake. WARNING:
You must remain in
your vehicle when the system turns on.
At all times, you are responsible for
controlling your vehicle, supervising the
system and intervening, if required.
Failure to take care may result in the loss
of control of your vehicle, serious
personal injury or death. WARNING:
The system will turn
off if a malfunction is apparent or if you
rev the engine excessively. Failure to take
care may result in the loss of control of
your vehicle, serious personal injury or
death.
The system makes it easier to pull away
when your vehicle is on a slope without the
need to use the parking brake.
225
Super Duty (TFE) Canada/United States of America, enUSA, Edition date: 201804, Fourth-Printing Brakes
Page 236 of 666

PRINCIPLE OF OPERATION
WARNING: To help avoid personal
injury, always use caution when in
reverse (R) and when using the sensing
system. WARNING: The system may not
detect objects with surfaces that absorb
reflection. Always drive with due care
and attention. Failure to take care may
result in a crash. WARNING:
Traffic control
systems, inclement weather, air brakes,
external motors and fans may affect the
correct operation of the sensing
system.This may cause reduced
performance or false alerts. WARNING:
The system may not
detect small or moving objects,
particularly those close to the ground.
Note: Certain add-on devices installed
around the bumper or fascia may create
false beeps. For example, large trailer
hitches, bike or surfboard racks, license plate
brackets, bumper covers or any other device
that may block the normal detection zone
of the system.
Note: Keep the sensors, located on the
bumper or fascia, free from snow, ice and
large accumulations of dirt. If the sensors
are covered, the system ’s accuracy can be
affected. Do not clean the sensors with
sharp objects.
Note: If your vehicle sustains damage to
the bumper or fascia, leaving it misaligned
or bent, the sensing zone may be altered
causing inaccurate measurement of
obstacles or false alarms. See your
authorized technician. Note:
When a trailer is connected to your
vehicle, the rear parking aid may detect the
trailer and therefore provide warnings.
Disable the rear parking aid when a trailer
is connected to prevent these warnings.
Note: The sensing system cannot be turned
off when a MyKey is present. See Principle
of Operation
(page 65).
The sensing system warns the driver of
obstacles within a certain range of your
vehicle. The system turns on automatically
whenever you switch the ignition on.
When receiving a detection warning, the
radio volume reduces to a predetermined
level. After the warning goes away, the
radio volume returns to the previous level.
The sensing system can be switched off
through the information display menu or
from the pop-up message that appears
once you shift the transmission into reverse
(R). See General Information (page 112).
If a fault is present in the system, a warning
message appears in the information
display and you cannot switch the system
on through the pop-up message. See
Information Messages
(page 128).
REAR PARKING AID
(IF EQUIPPED)
The rear sensors are only active when the
transmission is in reverse (R). As your
vehicle moves closer to the obstacle, the
rate of the audible warning increases.
When the obstacle is less than
11.81 in
(30 cm) away, the warning sounds
continuously. If the system detects a
stationary or receding object farther than
11.81 in (30 cm)
from the corners of the
bumper, the tone sounds for only two
seconds. Once the system detects an
object approaching, the warning sounds
again.
233
Super Duty (TFE) Canada/United States of America, enUSA, Edition date: 201804, Fourth-Printing Parking Aids
Page 238 of 666

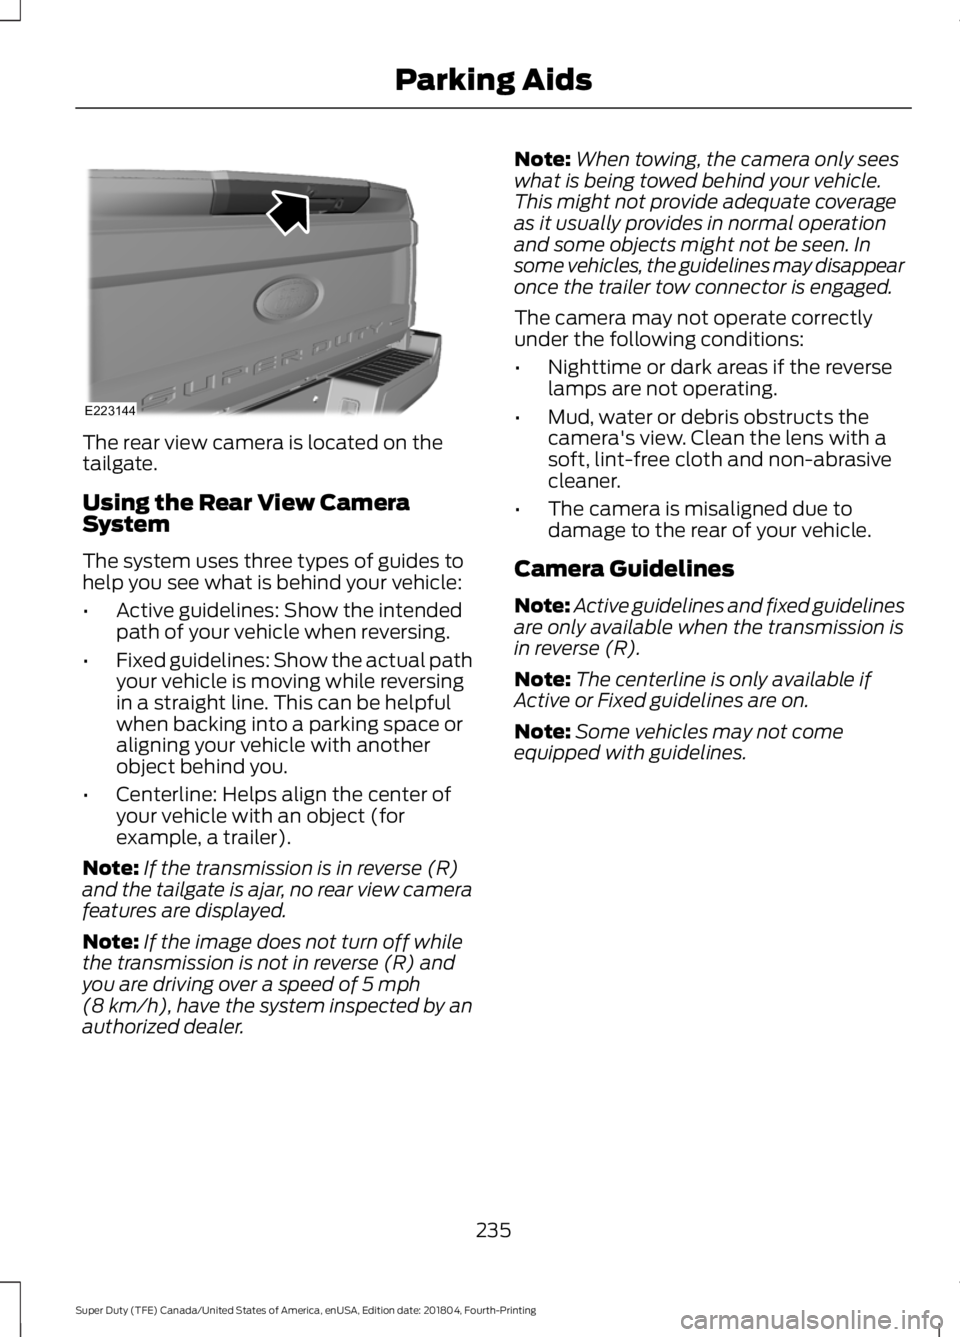
The rear view camera is located on the
tailgate.
Using the Rear View Camera
System
The system uses three types of guides to
help you see what is behind your vehicle:
•
Active guidelines: Show the intended
path of your vehicle when reversing.
• Fixed guidelines: Show the actual path
your vehicle is moving while reversing
in a straight line. This can be helpful
when backing into a parking space or
aligning your vehicle with another
object behind you.
• Centerline: Helps align the center of
your vehicle with an object (for
example, a trailer).
Note: If the transmission is in reverse (R)
and the tailgate is ajar, no rear view camera
features are displayed.
Note: If the image does not turn off while
the transmission is not in reverse (R) and
you are driving over a speed of 5 mph
(8 km/h), have the system inspected by an
authorized dealer. Note:
When towing, the camera only sees
what is being towed behind your vehicle.
This might not provide adequate coverage
as it usually provides in normal operation
and some objects might not be seen. In
some vehicles, the guidelines may disappear
once the trailer tow connector is engaged.
The camera may not operate correctly
under the following conditions:
• Nighttime or dark areas if the reverse
lamps are not operating.
• Mud, water or debris obstructs the
camera's view. Clean the lens with a
soft, lint-free cloth and non-abrasive
cleaner.
• The camera is misaligned due to
damage to the rear of your vehicle.
Camera Guidelines
Note: Active guidelines and fixed guidelines
are only available when the transmission is
in reverse (R).
Note: The centerline is only available if
Active or Fixed guidelines are on.
Note: Some vehicles may not come
equipped with guidelines.
235
Super Duty (TFE) Canada/United States of America, enUSA, Edition date: 201804, Fourth-Printing Parking AidsE223144
Page 241 of 666

•
Front Split View: Provides an
extended view of what is in front of
your vehicle.
• Rear High View:
Provides an image
of your truck bed and can be used to
assist you when backing up to align and
hitch a fifth wheel or gooseneck trailer.
• Auxiliary View:
Provides a rear view
image from the back of your trailer
while reversing.
The following camera views can be
accessed when you shift into reverse (R):
• Rear 360 + Normal:
Contains the
normal rear camera view next to a 360
degree camera view. Press the zoom
(+) button to quickly access Rear
Normal View from this screen.
• Rear Normal View: Provides an image
of what is directly behind your vehicle.
• Rear Split View:
Provides an
extended view of what is behind your
vehicle.
• Rear High View:
Provides an image
of your truck bed and can be used to
assist you when backing up to align and
hitch a fifth wheel or gooseneck trailer.
• Auxiliary View:
Provides a rear view
image from the back of your trailer
while reversing.
• Trailer Reverse Guidance View:
Provides an image of the rear of your
vehicle using the side cameras, useful
when reversing with a trailer. Use the
arrows at the bottom of the screen to
adjust the side camera position. See
Trailer Reversing Aids
(page 275). Keep Out Zone
The Keep Out Zone is represented by the
yellow dotted lines running parallel to your
vehicle. It is designed to give you the
indication on the ground of the fully
extended outside mirror position.
Front Camera
WARNING:
The front camera
system still requires the driver to use it
in conjunction with looking out of your
vehicle. 238
Super Duty (TFE) Canada/United States of America, enUSA, Edition date: 201804, Fourth-Printing Parking AidsE184448 E184044