2019 FORD F-350 transmission
[x] Cancel search: transmissionPage 132 of 666

Adaptive Cruise Control
Action
Message
A radar malfunction is preventing the adaptive cruise controlfrom engaging. See Using Adaptive Cruise Control (page
242).
Adaptive Cruise
Malfunction
A condition exists such that the adaptive cruise cannot func-tion properly. See
Using Adaptive Cruise Control (page
242).
Adaptive Cruise Not
Available
You have a blocked sensor due to bad weather, ice, mud or
water in front of the radar sensor. You can typically clean the
sensor to resolve. See Using Adaptive Cruise Control
(page
242).
Adaptive Cruise Not
Available Sensor
Blocked See Manual
The system has disabled the automatic braking.
Normal Cruise Active
Adaptive Braking Off
A radar malfunction is preventing the adaptive cruise controlfrom engaging.
Front Sensor Not Aligned
The adaptive cruise has reinstated controls to the driver.
Adaptive Cruise - Driver
Resume Control
Your vehicle speed is too slow to activate the adaptive cruise.
Adaptive Cruise Speed
Too Low to Activate
The adaptive cruise is automatically adjusting the gap
distance and you need to shift the transmission into a lower gear.
Adaptive Cruise Shift
Down
129
Super Duty (TFE) Canada/United States of America, enUSA, Edition date: 201804, Fourth-Printing Information Displays
Page 139 of 666

Driver Alert
Action
Message
Stop and rest as soon as it is safe to do so.
Driver Alert Warning Rest
Now
Take a rest soon.
Driver Alert Warning Rest
Suggested
Drivetrain Action
Message
The electronic locking differential requests that you slow toa certain speed to engage.
To Engage Locking
Differential Slow to XX mph/km/h
The electronic locking differential requests that you releasethe accelerator in order to engage.
To Engage Locking
Differential Release Accelerator Pedal
An electronic locking differential (ELD) system fault is
present. Contact an authorized dealer as soon as possible.
Check Locking Differen-
tial
The transfer case is in the neutral position. This message
indicates that your vehicle is safe to tow with all four wheels on the ground.
Neutral Tow Enabled
Leave Transmission in Neutral
The transfer case is NOT in the neutral position. This messageindicates that your vehicle is NOT safe to be towed with all four wheels on the ground.
Neutral Tow Disabled
Engine Action
Message
The engine has reduced power to help reduce highengine temperature.
Power Reduced to Lower Engine
Temp
136
Super Duty (TFE) Canada/United States of America, enUSA, Edition date: 201804, Fourth-Printing Information Displays
Page 142 of 666

MyKey
Action
Message
You did not program a MyKey.
MyKey not Created
MyKey is active.
MyKey Active Drive
Safely
When switching on your vehicle and MyKey is in use, displaysthat the MyKey speed limit is on.
Speed Limited to XX
MPH/km/h
MyKey is in use and the MyKey speed limit is on and the vehiclespeed is approaching 81 mph (130 km/h).
Near Vehicle Top Speed
You have reached the speed limit set for your MyKey.
Vehicle at Top Speed of
MyKey Setting
You have an active MyKey with a programmed set speed limit.
Check Speed Drive
Safely
Belt-Minder turns on with a MyKey in use.
Buckle Up to Unmute
Audio
With a MyKey in use, AdvanceTrac turns on.
AdvanceTrac On -
MyKey Setting
With a MyKey in use, traction control turns on.
Traction Control On -
MyKey Setting
With a MyKey in use, park aid is always on.
MyKey Park Aid Cannot
be Deactivated
With a MyKey in use, lane keeping alert turns on.
Lane Keeping Alert On
MyKey Setting
Off Road Action
Message
Hill descent control mode is active.
Hill Descent Control Active
Hill descent control mode is inactive.
Hill Descent Control OFF
Your vehicle speed requirement for off-road modeentry has not been met.
For Hill Descent Reduce Speed
XX MPH/km/h or Less
You need to select a transmission gear for hill descentmode.
For Hill Descent Select Gear
139
Super Duty (TFE) Canada/United States of America, enUSA, Edition date: 201804, Fourth-Printing Information Displays
Page 161 of 666

MEMORY FUNCTION (IF EQUIPPED)
WARNING:
Before activating the
memory seat, make sure that the area
immediately surrounding the seat is clear
of obstructions and that all occupants
are clear of moving parts. WARNING:
Do not use the
memory function when your vehicle is
moving.
This feature automatically recalls the
position of the following:
• Driver seat.
• Power mirrors.
• Optional adjustable pedals.
The memory control is on the driver door. Saving a Preset Position
1. Switch the ignition on.
2.
Adjust the features to the positions you
desire.
3. Press and hold the preset button until you hear a single tone.
Note: You can save up to three preset
memory positions.
Note: You can save a memory preset at any
time. Recalling a Preset Position
1. Switch the ignition on.
2. Press and release the preset button
associated with your desired driving
position. The seat and mirrors move to
the position stored for that preset.
Note: You can only recall preset memory
positions when you switch the ignition off,
or when the transmission is in park (P) or
neutral (N) if you switch the ignition on.
Note: You can also recall a preset memory
position by pressing the unlock button on
your remote control if it is linked to a preset
position.
Note: Using a linked key fob to recall your
memory position when the ignition is off
moves the seat to the easy entry position.
Note: Pressing any active memory feature
control - power seat, mirror (or any memory
button) during a memory recall cancels the
operation.
Linking a PreSet Position to your
Remote Control or Intelligent
Access Key Fob
Your vehicle can save the preset memory
positions for up to two remote controls.
1. With the ignition on, move the memory
positions to the positions you desire.
2. Press and hold the desired preset button for about five seconds. A tone
sounds after about two seconds.
Continue holding until you hear a
second tone.
3. Within three seconds, press the lock button on the remote control you are
linking.
To unlink a remote control, follow the
same procedure – except in step 3, press
the unlock button on the remote control.
158
Super Duty (TFE) Canada/United States of America, enUSA, Edition date: 201804, Fourth-Printing SeatsE142554
Page 162 of 666

Note:
If more than one linked remote
control or intelligent access key is in range,
the memory function moves to the settings
of the first key to initiate a memory recall.
Easy Entry and Exit Feature (If
Equipped)
If you enable the easy entry and exit
feature, it automatically moves the driver
seat rearward up to
2 in (5 cm) when you
put the transmission in park (P) and
remove the key from the ignition.
The driver seat returns to the previous
position when you put the key in the
ignition.
You can enable or disable this feature
through the information display. See
Information Displays
(page 112).
REAR SEATS
(IF EQUIPPED)
Folding Up the Rear Seat Cushion
The rear seat has a split 60/40 cushion.
You can flip each seat cushion up into a
vertical storage position. Rotate the seat cushion up until it locks
into the vertical storage position. Cushion Lock (If Equipped)
The locking key is in the keyfob. See
Remote Control
(page 58).
Turn the key to lock or unlock.
Returning the Seat to the Seating
Position
WARNING:
Check under the seat
cushion to make sure no cargo or objects
are under the seat cushion before
returning the seat cushion to its original
position, and that the seat cushion locks
into place. Failure to do so may prevent
the seat from operating properly in the
event of a crash, which could increase
the risk of serious injury.
159
Super Duty (TFE) Canada/United States of America, enUSA, Edition date: 201804, Fourth-Printing SeatsE181250 E224956
Page 167 of 666

UNIVERSAL GARAGE DOOR
OPENER
HomeLink Wireless Control
System
WARNING: Do not use the system
with any garage door opener that does
not have the safety stop and reverse
feature as required by U.S. Federal
Safety Standards (this includes any
garage door opener manufactured
before April 1, 1982). A garage door
opener which cannot detect an object,
signaling the door to stop and reverse,
does not meet current federal safety
standards. Using a garage door opener
without these features increases the risk
of serious injury or death.
Note: Make sure that the garage door and
security device are free from obstruction
when you are programming. Do not program
the system with the vehicle in the garage.
Note: Make sure you keep the original
remote control transmitter for use in other
vehicles as well as for future system
programming.
Note: We recommend that upon the sale
or lease termination of your vehicle, you
erase the programmed function buttons for
security reasons. See Erasing the Function
Button Codes
later in this section.
Note: You can program a maximum of
three devices. To change or replace any of
the three devices after it has been initially
programmed, you must first erase the
current settings. See Erasing the Function
Button Codes
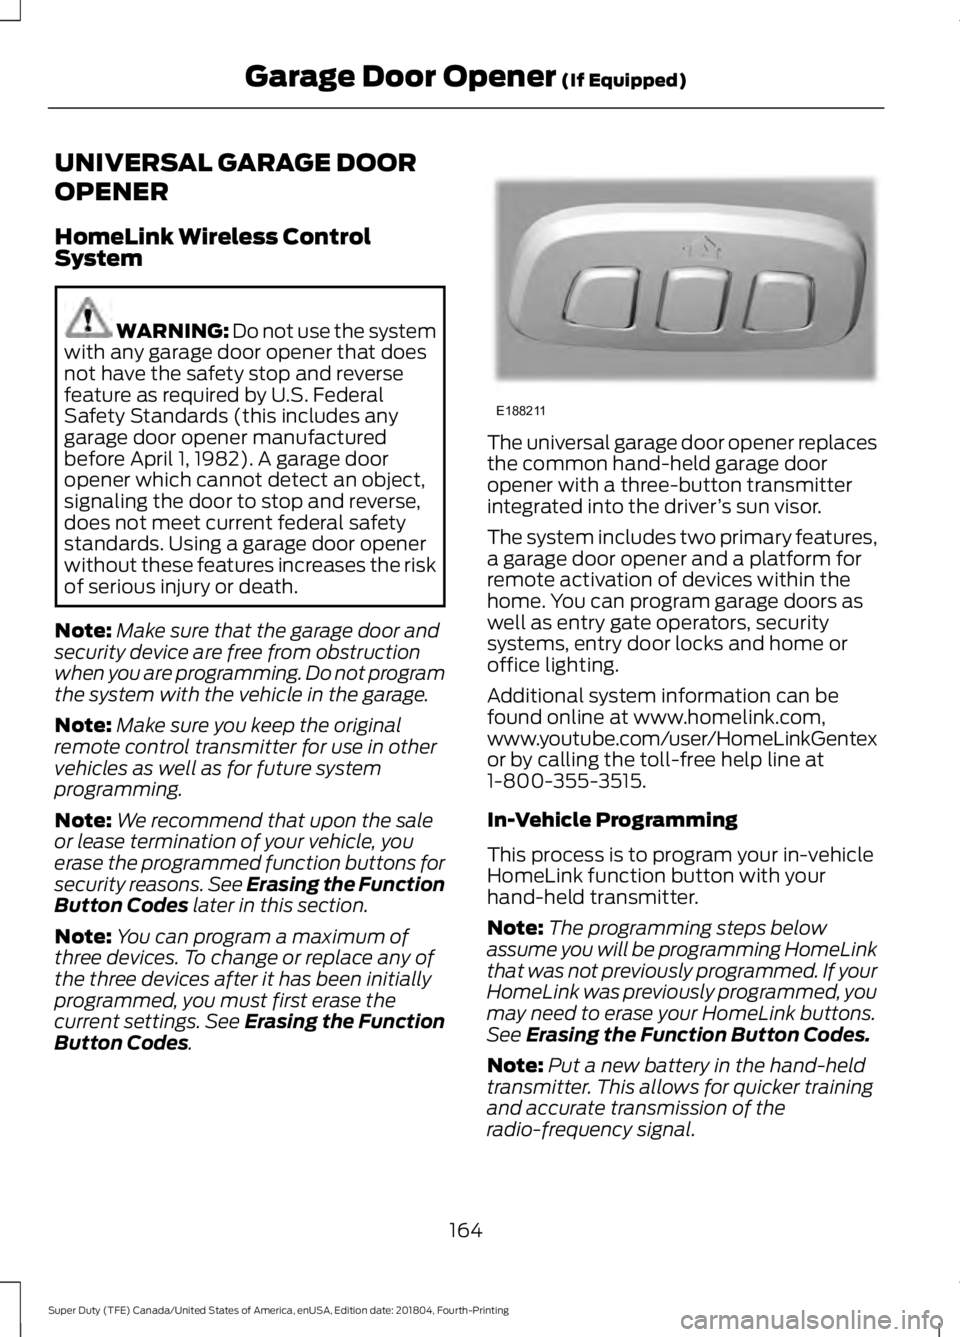
. The universal garage door opener replaces
the common hand-held garage door
opener with a three-button transmitter
integrated into the driver
’s sun visor.
The system includes two primary features,
a garage door opener and a platform for
remote activation of devices within the
home. You can program garage doors as
well as entry gate operators, security
systems, entry door locks and home or
office lighting.
Additional system information can be
found online at www.homelink.com,
www.youtube.com/user/HomeLinkGentex
or by calling the toll-free help line at
1-800-355-3515.
In-Vehicle Programming
This process is to program your in-vehicle
HomeLink function button with your
hand-held transmitter.
Note: The programming steps below
assume you will be programming HomeLink
that was not previously programmed. If your
HomeLink was previously programmed, you
may need to erase your HomeLink buttons.
See Erasing the Function Button Codes.
Note: Put a new battery in the hand-held
transmitter. This allows for quicker training
and accurate transmission of the
radio-frequency signal.
164
Super Duty (TFE) Canada/United States of America, enUSA, Edition date: 201804, Fourth-Printing Garage Door Opener
(If Equipped)E188211
Page 169 of 666

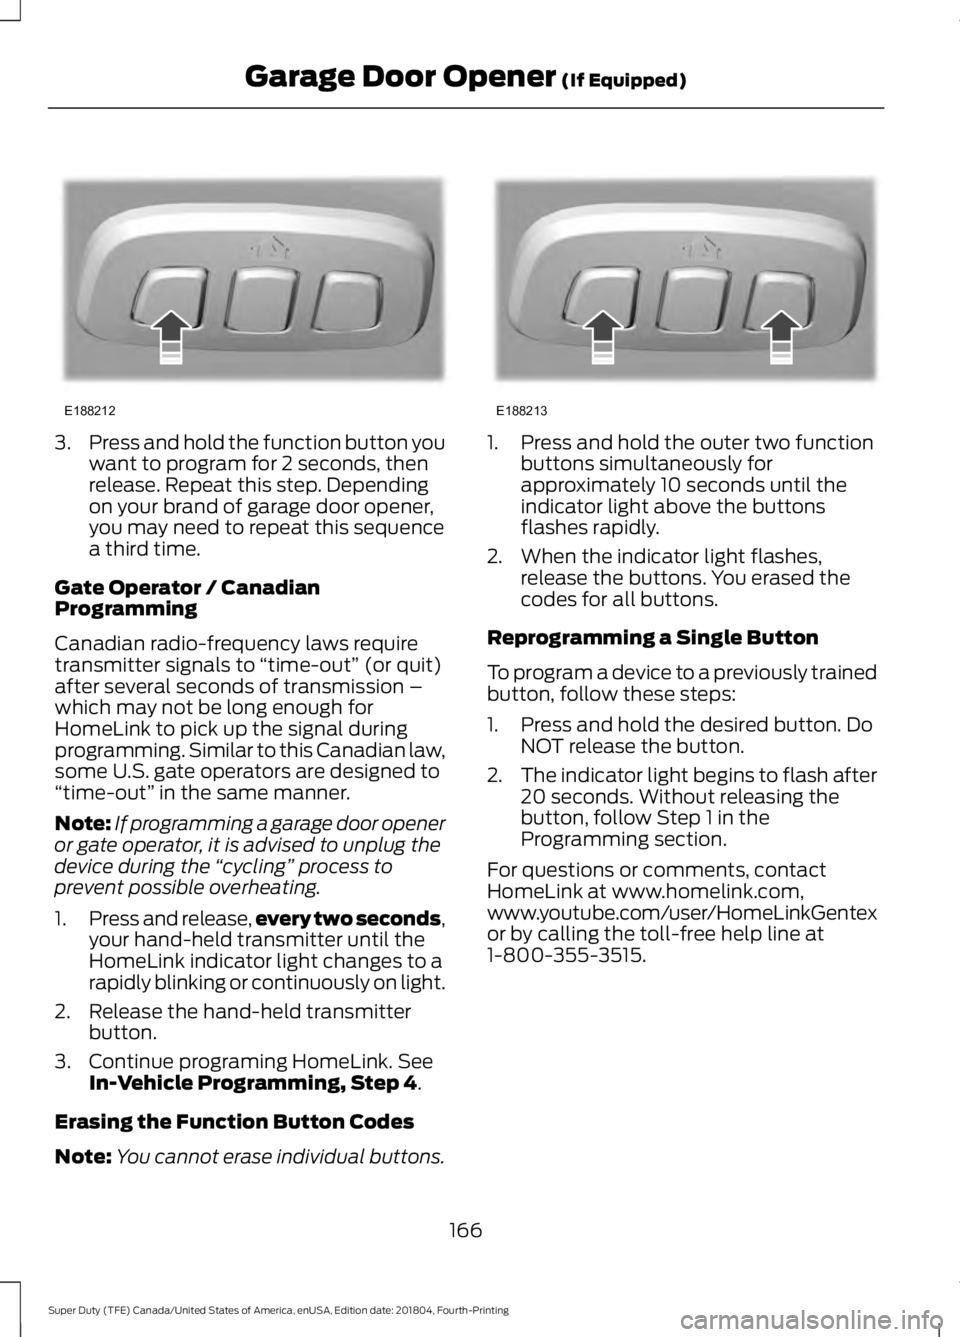
3.
Press and hold the function button you
want to program for 2 seconds, then
release. Repeat this step. Depending
on your brand of garage door opener,
you may need to repeat this sequence
a third time.
Gate Operator / Canadian
Programming
Canadian radio-frequency laws require
transmitter signals to “time-out” (or quit)
after several seconds of transmission –
which may not be long enough for
HomeLink to pick up the signal during
programming. Similar to this Canadian law,
some U.S. gate operators are designed to
“time-out” in the same manner.
Note: If programming a garage door opener
or gate operator, it is advised to unplug the
device during the “cycling” process to
prevent possible overheating.
1. Press and release, every two seconds,
your hand-held transmitter until the
HomeLink indicator light changes to a
rapidly blinking or continuously on light.
2. Release the hand-held transmitter button.
3. Continue programing HomeLink. See In-Vehicle Programming, Step 4.
Erasing the Function Button Codes
Note: You cannot erase individual buttons. 1. Press and hold the outer two function
buttons simultaneously for
approximately 10 seconds until the
indicator light above the buttons
flashes rapidly.
2. When the indicator light flashes, release the buttons. You erased the
codes for all buttons.
Reprogramming a Single Button
To program a device to a previously trained
button, follow these steps:
1. Press and hold the desired button. Do NOT release the button.
2. The indicator light begins to flash after
20 seconds. Without releasing the
button, follow Step 1 in the
Programming section.
For questions or comments, contact
HomeLink at www.homelink.com,
www.youtube.com/user/HomeLinkGentex
or by calling the toll-free help line at
1-800-355-3515.
166
Super Duty (TFE) Canada/United States of America, enUSA, Edition date: 201804, Fourth-Printing Garage Door Opener
(If Equipped)E188212 E188213
Page 177 of 666

Note:
Do not leave the ignition key in this
position for too long. This could cause your
vehicle battery to lose charge.
II (on) - All electrical circuits are
operational and the warning lamps and
indicators illuminate.
III
(start) - Cranks the engine.
KEYLESS STARTING
Note: The keyless starting system may not
function if the key is close to metal objects
or electronic devices such as cellular
phones.
Note: A valid key must be located inside
your vehicle to switch the ignition on and
start the engine.
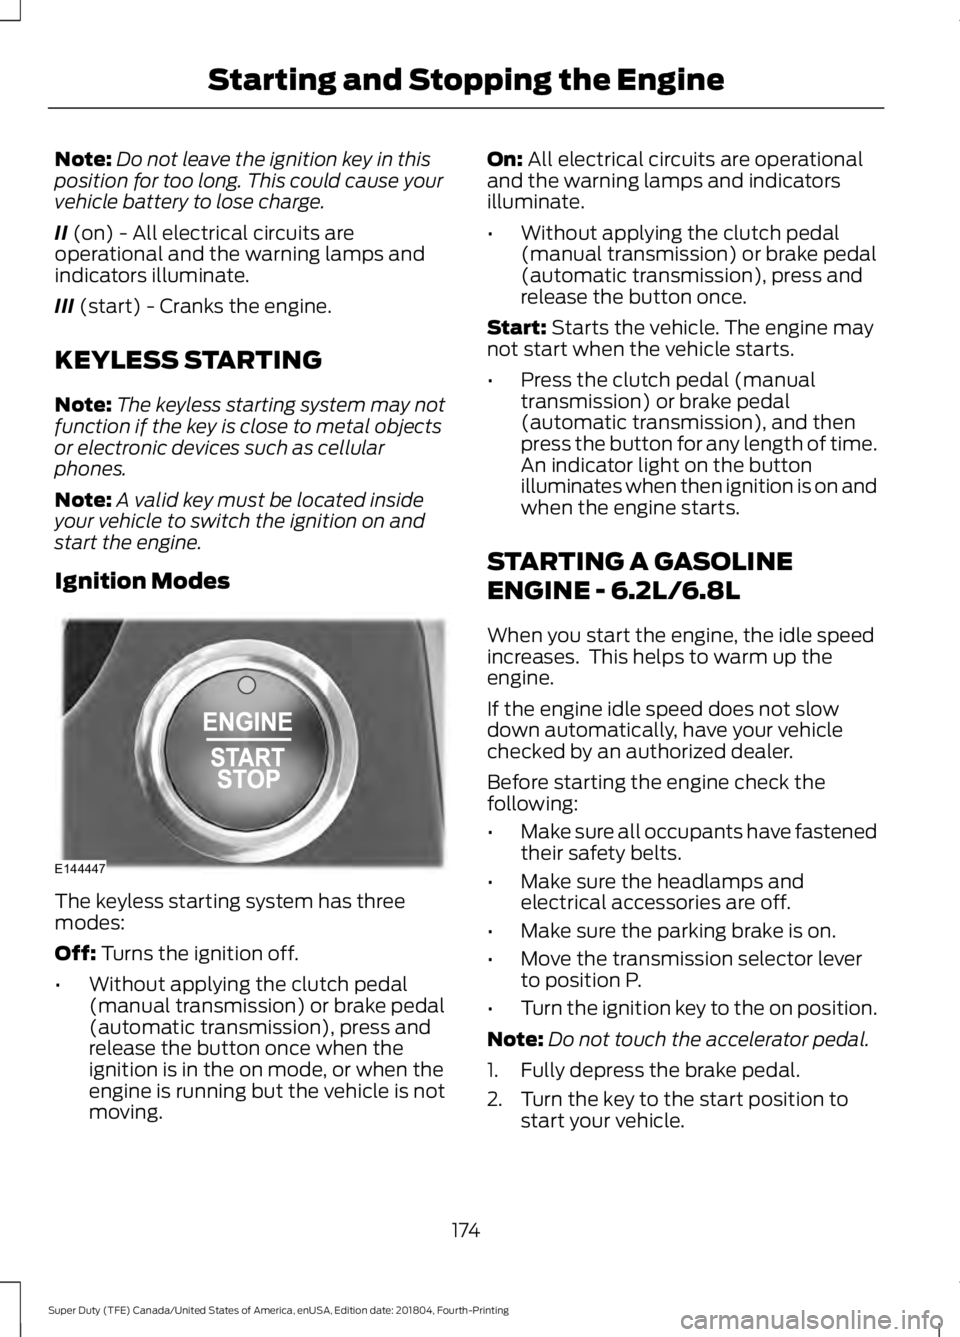
Ignition Modes The keyless starting system has three
modes:
Off:
Turns the ignition off.
• Without applying the clutch pedal
(manual transmission) or brake pedal
(automatic transmission), press and
release the button once when the
ignition is in the on mode, or when the
engine is running but the vehicle is not
moving. On:
All electrical circuits are operational
and the warning lamps and indicators
illuminate.
• Without applying the clutch pedal
(manual transmission) or brake pedal
(automatic transmission), press and
release the button once.
Start:
Starts the vehicle. The engine may
not start when the vehicle starts.
• Press the clutch pedal (manual
transmission) or brake pedal
(automatic transmission), and then
press the button for any length of time.
An indicator light on the button
illuminates when then ignition is on and
when the engine starts.
STARTING A GASOLINE
ENGINE - 6.2L/6.8L
When you start the engine, the idle speed
increases. This helps to warm up the
engine.
If the engine idle speed does not slow
down automatically, have your vehicle
checked by an authorized dealer.
Before starting the engine check the
following:
• Make sure all occupants have fastened
their safety belts.
• Make sure the headlamps and
electrical accessories are off.
• Make sure the parking brake is on.
• Move the transmission selector lever
to position P.
• Turn the ignition key to the on position.
Note: Do not touch the accelerator pedal.
1. Fully depress the brake pedal.
2. Turn the key to the start position to start your vehicle.
174
Super Duty (TFE) Canada/United States of America, enUSA, Edition date: 201804, Fourth-Printing Starting and Stopping the EngineE144447