2019 FORD F-250 open hood
[x] Cancel search: open hoodPage 332 of 666
GENERAL INFORMATION
Have your vehicle serviced regularly to help
maintain its roadworthiness and resale
value. There is a large network of
authorized dealers that are there to help
you with their professional servicing
expertise. We believe that their specially
trained technicians are best qualified to
service your vehicle properly and expertly.
They are supported by a wide range of
highly specialized tools developed
specifically for servicing your vehicle.
If your vehicle requires professional service,
an authorized dealer can provide the
necessary parts and service. Check your
warranty information to find out which
parts and services are covered.
Use only recommended fuels, lubricants,
fluids and service parts conforming to
specifications. Motorcraft® parts are
designed and built to provide the best
performance in your vehicle.
Precautions
•
Do not work on a hot engine.
• Make sure that nothing gets caught in
moving parts.
• Do not work on a vehicle with the
engine running in an enclosed space,
unless you are sure you have enough
ventilation.
• Keep all open flames and other burning
material (such as cigarettes) away
from the battery and all fuel related
parts.
Working with the Engine Off
1. Set the parking brake and shift the transmission to park (P).
2. Switch off the engine.
3. Block the wheels. Working with the Engine On WARNING: To reduce the risk of
vehicle damage and personal burn
injuries, do not start your engine with the
air cleaner removed and do not remove
it while the engine is running.
1. Set the parking brake and shift the transmission to park (P).
2. Block the wheels.
OPENING AND CLOSING THE
HOOD
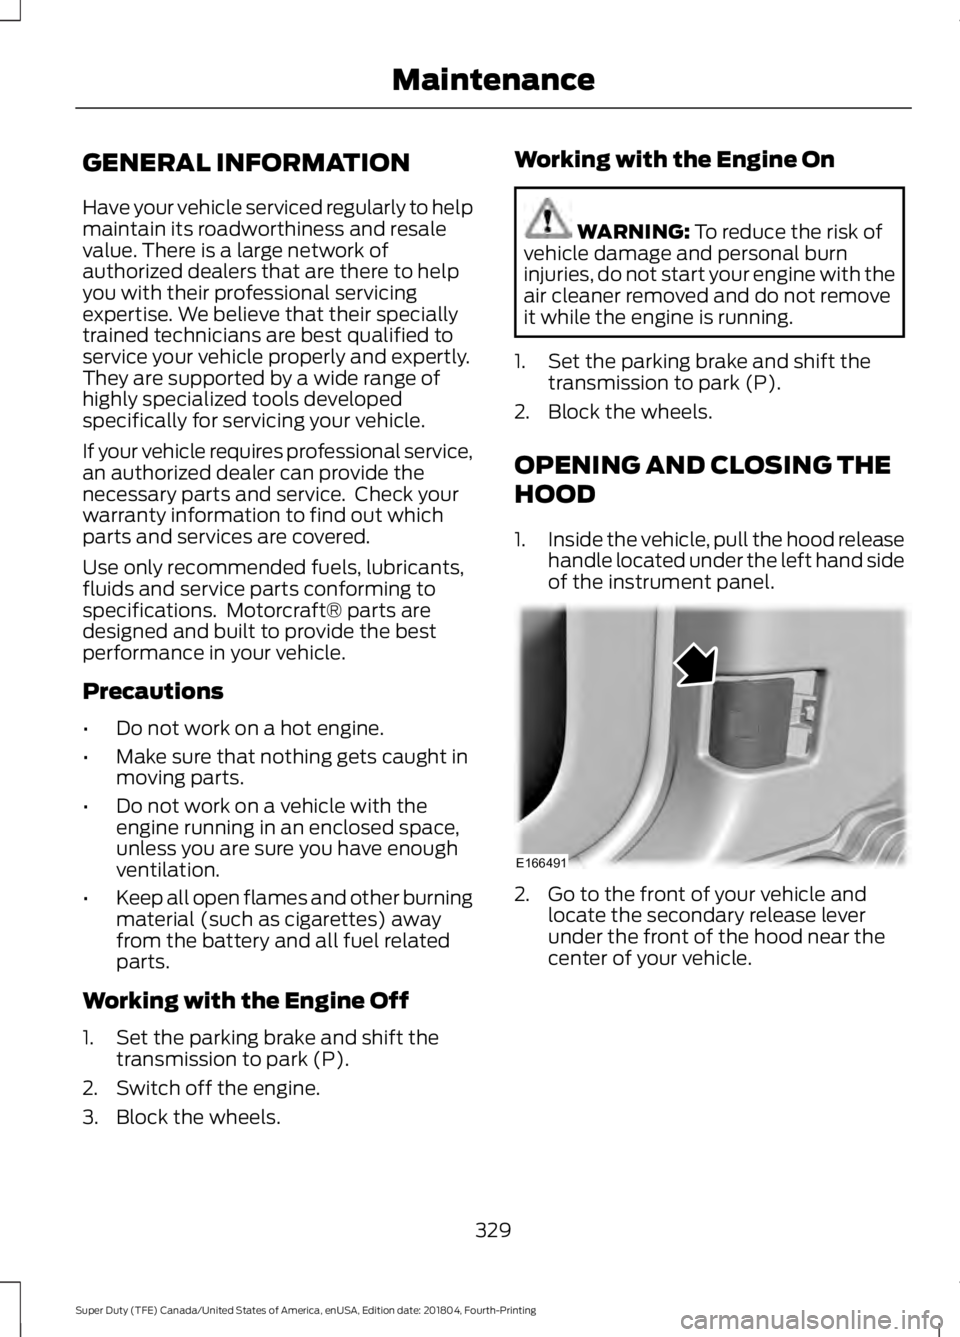
1. Inside the vehicle, pull the hood release
handle located under the left hand side
of the instrument panel. 2. Go to the front of your vehicle and
locate the secondary release lever
under the front of the hood near the
center of your vehicle.
329
Super Duty (TFE) Canada/United States of America, enUSA, Edition date: 201804, Fourth-Printing MaintenanceE166491
Page 333 of 666

3. Raise the hood until the lift cylinders
hold it open.
4. To close, lower the hood and make sure that it is closed properly and fully
latched.
UNDER HOOD OVERVIEW - 6.2L Air filter. See Changing the Engine Air Filter (page 361).
A.
Engine compartment fuse box. See
Fuse Specification Chart (page 318).
B.
Automatic transmission fluid dipstick - vehicles with 6R140 transmission. See
Automatic Transmission Fluid Check
(page 346).
C.
Brake fluid reservoir. See
Brake Fluid Check (page 350).
D.
330
Super Duty (TFE) Canada/United States of America, enUSA, Edition date: 201804, Fourth-Printing MaintenanceE190266 ABC
JEFHI
D
E222143
G
Page 337 of 666
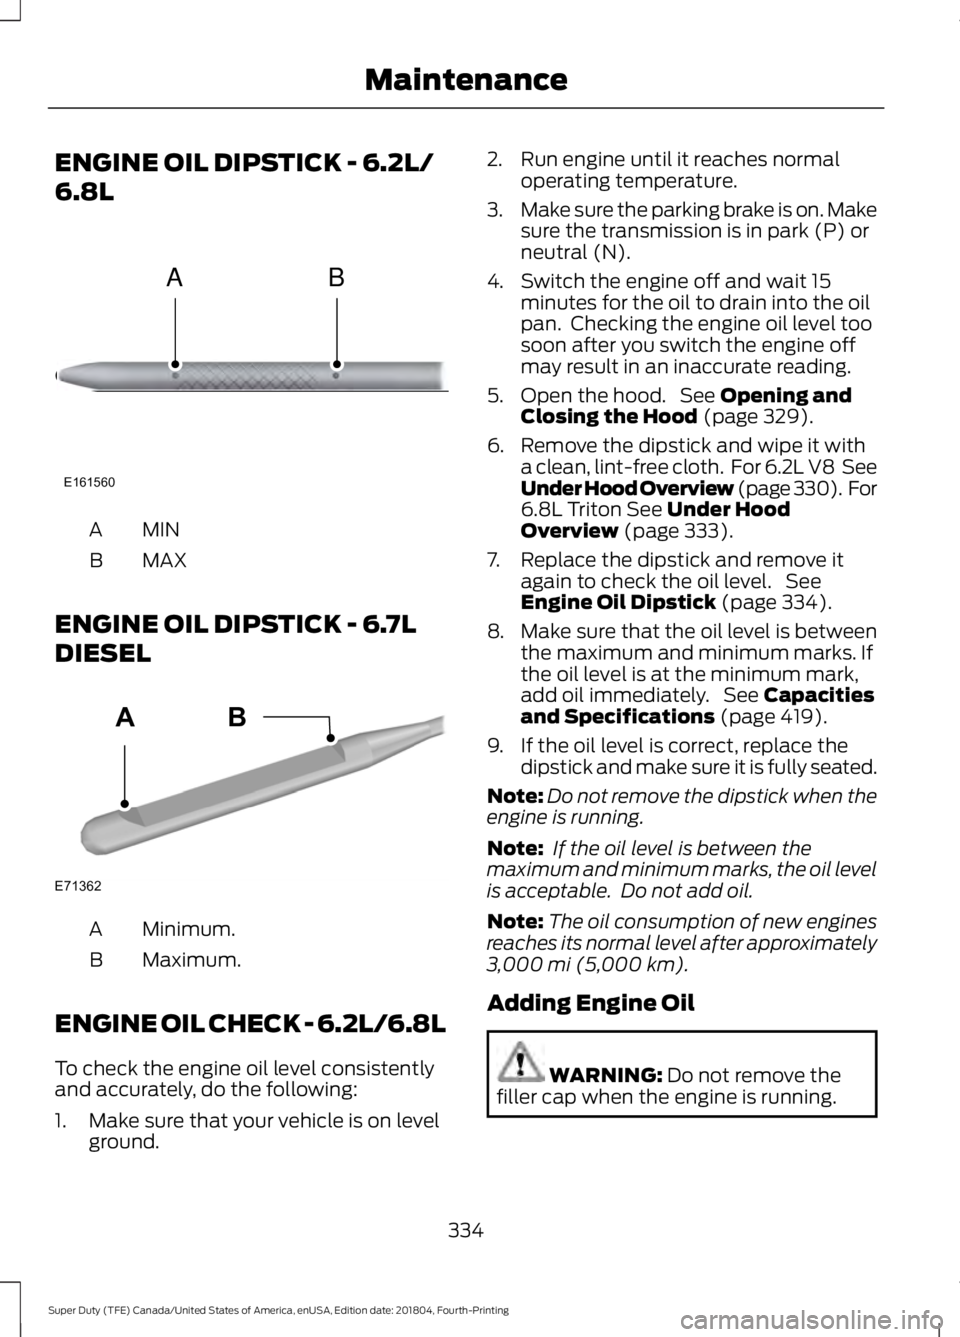
ENGINE OIL DIPSTICK - 6.2L/
6.8L
MINA
MAX
B
ENGINE OIL DIPSTICK - 6.7L
DIESEL Minimum.
A
Maximum.
B
ENGINE OIL CHECK - 6.2L/6.8L
To check the engine oil level consistently
and accurately, do the following:
1. Make sure that your vehicle is on level ground. 2. Run engine until it reaches normal
operating temperature.
3. Make sure the parking brake is on. Make
sure the transmission is in park (P) or
neutral (N).
4. Switch the engine off and wait 15 minutes for the oil to drain into the oil
pan. Checking the engine oil level too
soon after you switch the engine off
may result in an inaccurate reading.
5. Open the hood. See Opening and
Closing the Hood (page 329).
6. Remove the dipstick and wipe it with a clean, lint-free cloth. For 6.2L V8 See
Under Hood Overview (page 330). For
6.8L Triton
See Under Hood
Overview (page 333).
7. Replace the dipstick and remove it again to check the oil level. See
Engine Oil Dipstick
(page 334).
8. Make sure that the oil level is between
the maximum and minimum marks. If
the oil level is at the minimum mark,
add oil immediately. See
Capacities
and Specifications (page 419).
9. If the oil level is correct, replace the dipstick and make sure it is fully seated.
Note: Do not remove the dipstick when the
engine is running.
Note: If the oil level is between the
maximum and minimum marks, the oil level
is acceptable. Do not add oil.
Note: The oil consumption of new engines
reaches its normal level after approximately
3,000 mi (5,000 km)
.
Adding Engine Oil WARNING:
Do not remove the
filler cap when the engine is running.
334
Super Duty (TFE) Canada/United States of America, enUSA, Edition date: 201804, Fourth-Printing MaintenanceE161560
AB E71362
AB
Page 338 of 666
Do not use supplemental engine oil
additives because they are unnecessary
and could lead to engine damage that may
not be covered by the vehicle Warranty.
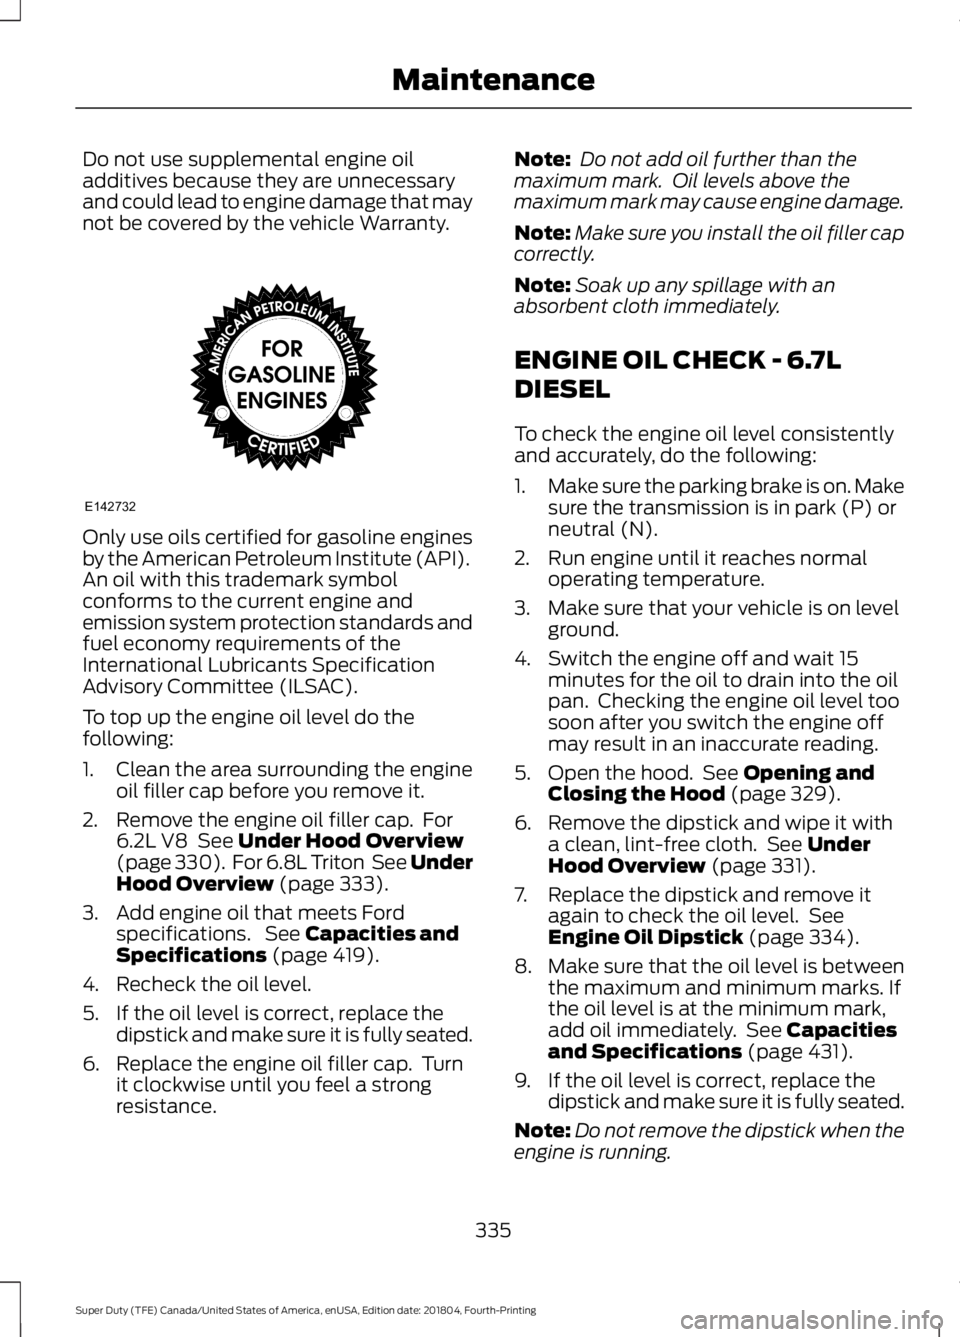
Only use oils certified for gasoline engines
by the American Petroleum Institute (API).
An oil with this trademark symbol
conforms to the current engine and
emission system protection standards and
fuel economy requirements of the
International Lubricants Specification
Advisory Committee (ILSAC).
To top up the engine oil level do the
following:
1. Clean the area surrounding the engine
oil filler cap before you remove it.
2. Remove the engine oil filler cap. For 6.2L V8 See Under Hood Overview
(page 330). For 6.8L Triton See Under
Hood Overview
(page 333).
3. Add engine oil that meets Ford specifications. See
Capacities and
Specifications (page 419).
4. Recheck the oil level.
5. If the oil level is correct, replace the dipstick and make sure it is fully seated.
6. Replace the engine oil filler cap. Turn it clockwise until you feel a strong
resistance. Note:
Do not add oil further than the
maximum mark. Oil levels above the
maximum mark may cause engine damage.
Note: Make sure you install the oil filler cap
correctly.
Note: Soak up any spillage with an
absorbent cloth immediately.
ENGINE OIL CHECK - 6.7L
DIESEL
To check the engine oil level consistently
and accurately, do the following:
1. Make sure the parking brake is on. Make
sure the transmission is in park (P) or
neutral (N).
2. Run engine until it reaches normal operating temperature.
3. Make sure that your vehicle is on level ground.
4. Switch the engine off and wait 15 minutes for the oil to drain into the oil
pan. Checking the engine oil level too
soon after you switch the engine off
may result in an inaccurate reading.
5. Open the hood. See
Opening and
Closing the Hood (page 329).
6. Remove the dipstick and wipe it with a clean, lint-free cloth. See
Under
Hood Overview (page 331).
7. Replace the dipstick and remove it again to check the oil level. See
Engine Oil Dipstick
(page 334).
8. Make sure that the oil level is between
the maximum and minimum marks. If
the oil level is at the minimum mark,
add oil immediately. See
Capacities
and Specifications (page 431).
9. If the oil level is correct, replace the dipstick and make sure it is fully seated.
Note: Do not remove the dipstick when the
engine is running.
335
Super Duty (TFE) Canada/United States of America, enUSA, Edition date: 201804, Fourth-Printing MaintenanceE142732
Page 339 of 666
Note:
If the oil level is between the
maximum and minimum marks, the oil level
is acceptable. Do not add oil.
Note: The oil consumption of new engines
reaches its normal level after approximately
3,000 mi (5,000 km).
Adding Engine Oil WARNING:
Do not remove the
filler cap when the engine is running.
Do not use supplemental engine oil
additives because they are unnecessary
and could lead to engine damage that may
not be covered by the vehicle Warranty.
To top up the engine oil level do the
following:
1. Clean the area surrounding the engine oil filler cap before you remove it.
2. Remove the engine oil filler cap. See Under Hood Overview
(page 331).
Turn it counterclockwise and remove
it.
3. Add engine oil of the proper viscosity and grade that meets Ford
specifications. See
Capacities and
Specifications (page 431). You may
have to use a funnel to pour the engine
oil into the opening.
4. Recheck the oil level.
5. If the oil level is correct, replace the dipstick and make sure it is fully seated.
6. Replace the engine oil filler cap. Turn it clockwise until you feel a strong
resistance.
Note: Do not add oil further than the
maximum mark. Oil levels above the
maximum mark may cause engine damage.
Note: Make sure you install the oil filler cap
correctly. Note:
Soak up any spillage with an
absorbent cloth immediately.
Engine lubrication for severe
service operation
The following conditions define severe
operation for which engine operation with
SAE 5W-40 oil which meets Ford
specification, WSS-M2C171-F1, is
recommended. Oil and oil filter change
intervals will be determined by the
Intelligent Oil Life Monitor™ as noted
previously.
CHANGING THE ENGINE OIL
AND OIL FILTER WARNING:
Do not handle a hot
oil filter with bare hands. WARNING:
Continuous contact
with used motor oil has caused cancer
in laboratory mice. Protect your skin by
washing with soap and water.
If your vehicle is equipped with a diesel
engine, an Intelligent Oil Life Monitor™
calculates the proper oil change service
interval. When the information display
indicates: OIL CHANGE REQUIRED, change
the engine oil and oil filter. See
Information Displays
(page 112).
The engine oil filter protects your engine
by filtering harmful, abrasive or sludge
particles and particles significantly smaller
than most available will-fit filters. See
Motorcraft Parts
(page 421).
1. Unscrew the oil filter and oil pan drain plug and wait for the oil to drain.
2. Replace the filter.
3. Reinstall the oil pan drain plug.
336
Super Duty (TFE) Canada/United States of America, enUSA, Edition date: 201804, Fourth-Printing Maintenance
Page 360 of 666

Headlamp Aiming Target
8 feet (2.4 meters)
A
Center height of lamp to ground
B
25 feet (7.6 meters)
C
Horizontal reference line
D
Vertical Aim Adjustment Procedure
1. Park the vehicle directly in front of a wall or screen on a level surface,
approximately 25 ft (7.6 m) away.
2. Measure the height of the headlamp bulb center from the ground and mark
an
8 ft (2.4 m) horizontal reference line
on the vertical wall or screen at this
height.
Note: To see a clearer light pattern for
adjusting, you may want to block the light
from one headlamp while adjusting the
other.
3. Turn on the low beam headlamps to illuminate the wall or screen and open
the hood. 4. On the wall or screen you will observe
a flat zone of high intensity light
located at the top of the right hand
portion of the beam pattern. If the top
edge of the high intensity light zone is
not at the horizontal reference line, the
headlamp will need to be adjusted. 5. Locate the vertical adjuster on each
headlamp. Using a Phillips #2
screwdriver, turn the adjuster either
clockwise or counterclockwise in order
to adjust the vertical aim of the
headlamp.
Note: A. LED headlamp.
B. Halogen headlamp.
357
Super Duty (TFE) Canada/United States of America, enUSA, Edition date: 201804, Fourth-Printing MaintenanceE142592 E142465 A
B
E223774
Page 367 of 666
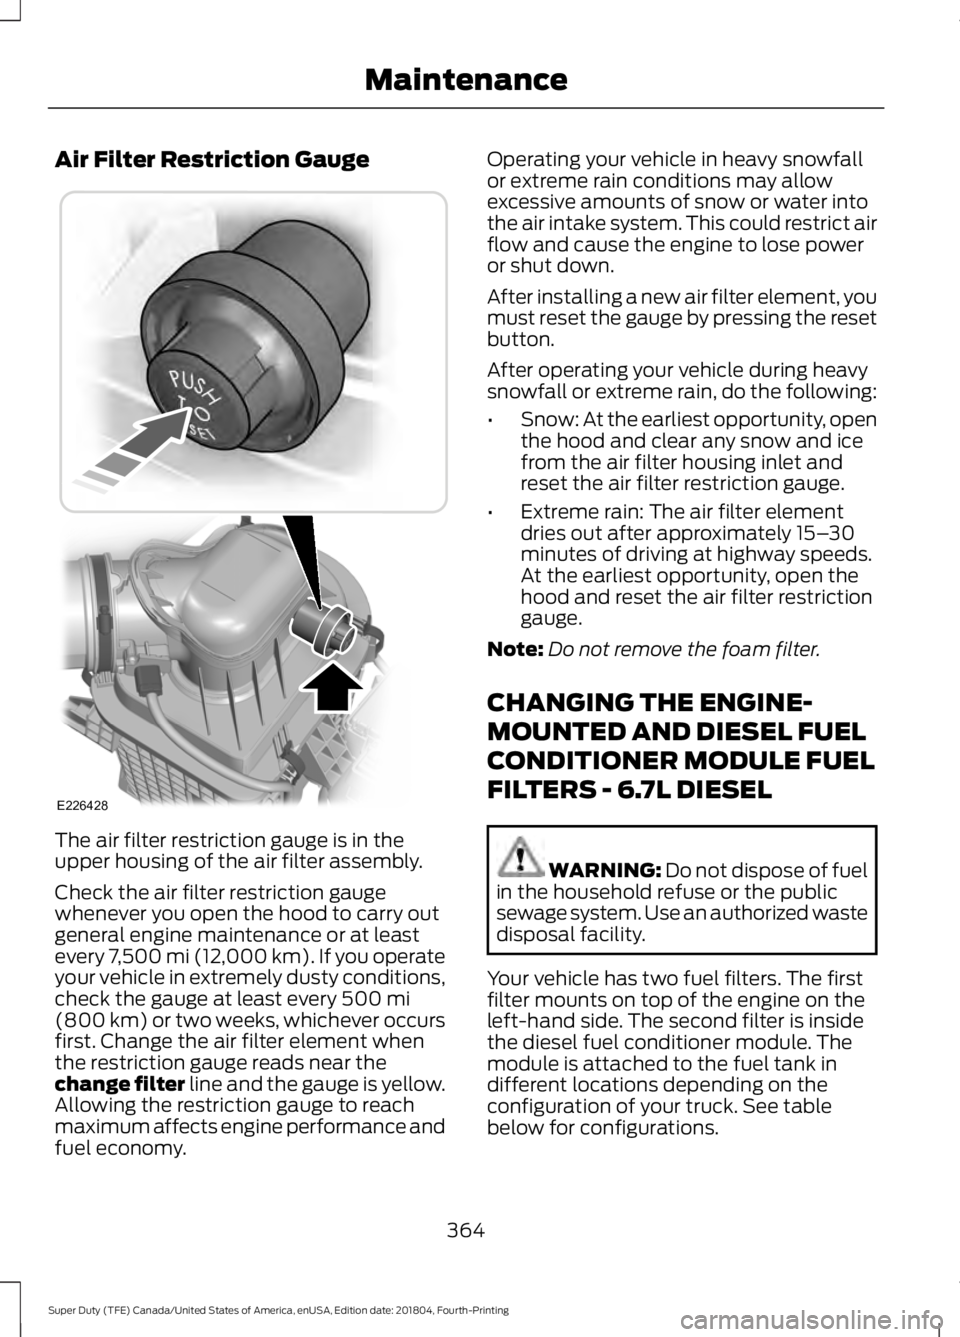
Air Filter Restriction Gauge
The air filter restriction gauge is in the
upper housing of the air filter assembly.
Check the air filter restriction gauge
whenever you open the hood to carry out
general engine maintenance or at least
every 7,500 mi (12,000 km). If you operate
your vehicle in extremely dusty conditions,
check the gauge at least every 500 mi
(800 km) or two weeks, whichever occurs
first. Change the air filter element when
the restriction gauge reads near the
change filter line and the gauge is yellow.
Allowing the restriction gauge to reach
maximum affects engine performance and
fuel economy. Operating your vehicle in heavy snowfall
or extreme rain conditions may allow
excessive amounts of snow or water into
the air intake system. This could restrict air
flow and cause the engine to lose power
or shut down.
After installing a new air filter element, you
must reset the gauge by pressing the reset
button.
After operating your vehicle during heavy
snowfall or extreme rain, do the following:
•
Snow: At the earliest opportunity, open
the hood and clear any snow and ice
from the air filter housing inlet and
reset the air filter restriction gauge.
• Extreme rain: The air filter element
dries out after approximately 15– 30
minutes of driving at highway speeds.
At the earliest opportunity, open the
hood and reset the air filter restriction
gauge.
Note: Do not remove the foam filter.
CHANGING THE ENGINE-
MOUNTED AND DIESEL FUEL
CONDITIONER MODULE FUEL
FILTERS - 6.7L DIESEL WARNING:
Do not dispose of fuel
in the household refuse or the public
sewage system. Use an authorized waste
disposal facility.
Your vehicle has two fuel filters. The first
filter mounts on top of the engine on the
left-hand side. The second filter is inside
the diesel fuel conditioner module. The
module is attached to the fuel tank in
different locations depending on the
configuration of your truck. See table
below for configurations.
364
Super Duty (TFE) Canada/United States of America, enUSA, Edition date: 201804, Fourth-Printing MaintenanceE226428
Page 653 of 666

Audio Unit - Vehicles With: AM/FM/
Touchscreen Display...............................446
Adjusting the Volume...................................... 446
Changing Radio Stations............................... 446
Selecting the Audio Modes............................ 447
Setting a Memory Preset................................ 447
Switching the Audio Unit On and Off.........447
Using Seek, Fast Forward and Reverse............................................................. 447
Audio Unit - Vehicles With: AM/ FM..................................................................444
Accessing the Auxiliary Media Sources............................................................ 444
Accessing the Menu......................................... 444
Adjusting the Volume...................................... 445
Changing Radio Stations................................ 445
Displaying the Clock......................................... 445
Selecting the Audio Modes........................... 445
Setting the Memory Presets......................... 445
Switching the Audio Unit On and Off........445
Using Seek, Fast Forward and Reverse............................................................. 445
Autolamps
........................................................92
Windshield Wiper Activated
Headlamps........................................................ 92
Automatic Climate Control......................146 Directing the Airflow.......................................... 146
Setting the Blower Motor Speed................... 147
Setting the Temperature.................................. 147
Switching Auto Mode On and Off.................147
Switching Dual Zone Mode On and Off........................................................................\
147
Switching Maximum Air Conditioning On and Off............................................................... 147
Switching Maximum Defrost On and Off....................................................................... 148
Switching Recirculated Air On and Off....................................................................... 148
Switching the Air Conditioning On and Off........................................................................\
147
Switching the Climate Control On and Off........................................................................\
147
Automatic High Beam Control..................93 Automatic High Beam Indicator..................... 94
Switching the System On and Off.................94
Automatic Transmission
..........................206
Brake-Shift Interlock........................................ 209If Your Vehicle Gets Stuck In Mud or
Snow.................................................................. 210
Understanding the Shift Positions of Your Automatic Transmission........................... 206
Understanding your SelectShift Automatic ™ transmission........................ 208
Automatic Transmission Fluid Check............................................................346
Checking Automatic Transmission Fluid.................................................................... 347
Autowipers.......................................................89
Auxiliary Power Points...............................168 400 Watt AC Power Point.............................. 168
DC Power Point................................................... 168
Locations............................................................... 169
Auxiliary Switches
........................................574
Upfitter Interface Module................................ 577
B
Battery See: Changing the 12V Battery..................... 354
Bed Extender
....................................................76
Grocery mode......................................................... 77
Tailgate mode........................................................ 76
Bed Ramps
.....................................................270
Installing the Ramp Holder............................ 272
Stowing the Bed Ramp.................................... 272
Using the Bed Ramp.......................................... 271
Blind Spot Information System..............253 Blind Spot Information System with Trailer
Tow..................................................................... 255
Switching the System Off and On...............257
System Errors....................................................... 257
Using the System............................................... 254
BLIS See: Blind Spot Information System..........253
Bonnet Lock See: Opening and Closing the Hood..........329
Booster Seats..................................................33 Types of Booster Seats...................................... 33
Brake Fluid Check........................................350
Brakes...............................................................223 General Information.......................................... 223
Breaking-In....................................................299
Bulb Specification Chart..........................442
650
Super Duty (TFE) Canada/United States of America, enUSA, Edition date: 201804, Fourth-Printing Index