2019 FORD F-250 change time
[x] Cancel search: change timePage 122 of 666

Towing
Follow onscreen
directions to
confirm or modify
your settings.
Change Trailer
Setup
Trailer Rev. Guid-
ance
Conventional
Connection Checklist
Fifth Wheel
Gooseneck Off Road
Off Road Status
Displays pitch, steering angle and roll. Settings
Auto Regen
Blind Spot
Cross Traffic Alert Select Your Setting
DTE Calcula-
tion
Rear Park Aid
Trailer Blind Spot
Auto Engine Off
Vehicle
Advanced
Settings
Easy Entry/Exit
Select Your Setting
Autolamp
Delay
Lighting
Daytime Lights
Autolock
Locks
AutounlockSelect Your Setting
Remote
Unlock
119
Super Duty (TFE) Canada/United States of America, enUSA, Edition date: 201804, Fourth-Printing Information Displays
Page 169 of 666
3.
Press and hold the function button you
want to program for 2 seconds, then
release. Repeat this step. Depending
on your brand of garage door opener,
you may need to repeat this sequence
a third time.
Gate Operator / Canadian
Programming
Canadian radio-frequency laws require
transmitter signals to “time-out” (or quit)
after several seconds of transmission –
which may not be long enough for
HomeLink to pick up the signal during
programming. Similar to this Canadian law,
some U.S. gate operators are designed to
“time-out” in the same manner.
Note: If programming a garage door opener
or gate operator, it is advised to unplug the
device during the “cycling” process to
prevent possible overheating.
1. Press and release, every two seconds,
your hand-held transmitter until the
HomeLink indicator light changes to a
rapidly blinking or continuously on light.
2. Release the hand-held transmitter button.
3. Continue programing HomeLink. See In-Vehicle Programming, Step 4.
Erasing the Function Button Codes
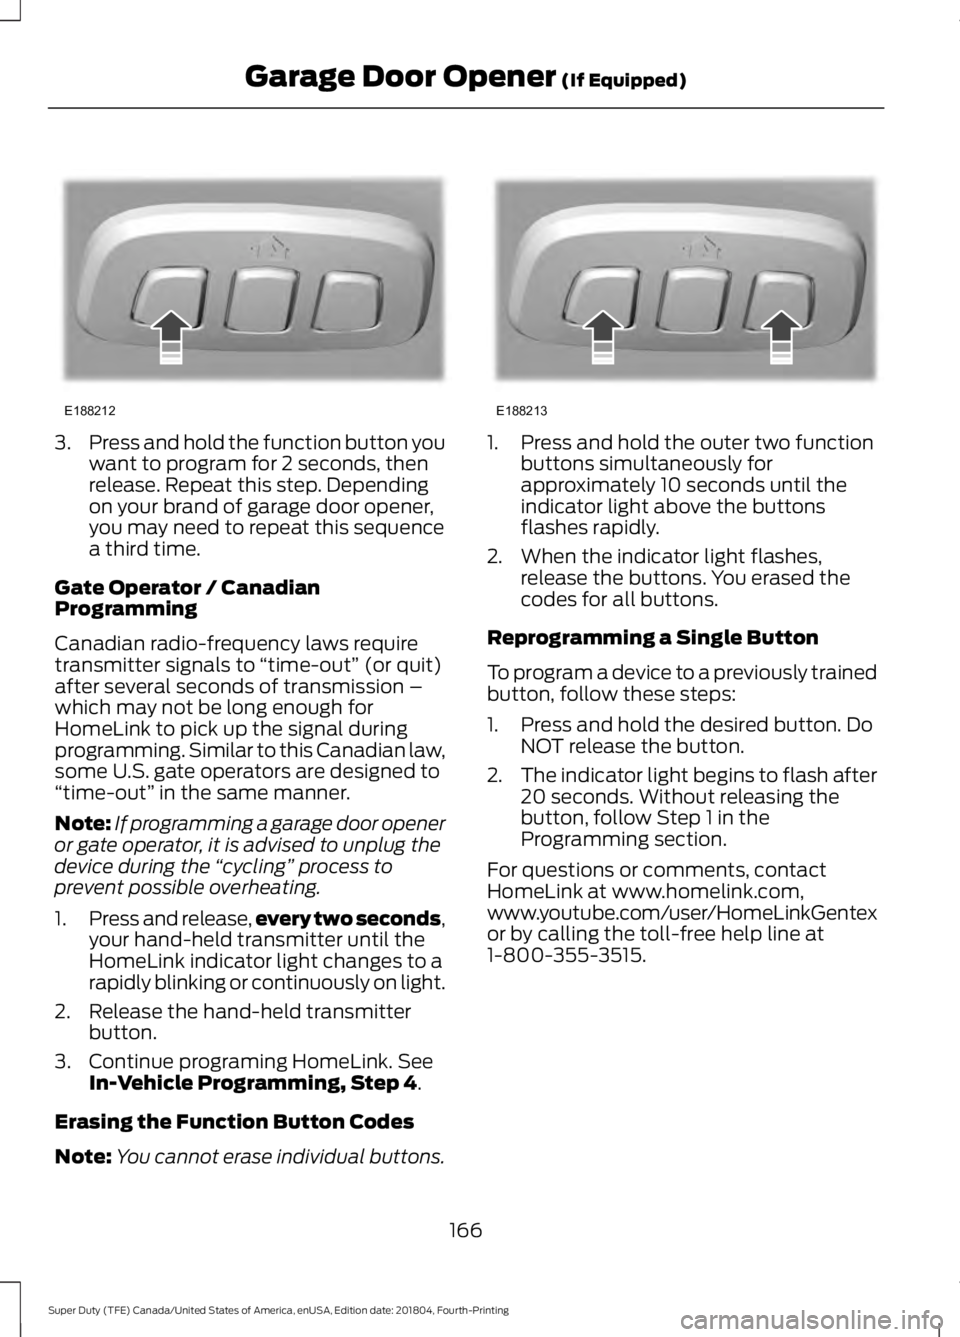
Note: You cannot erase individual buttons. 1. Press and hold the outer two function
buttons simultaneously for
approximately 10 seconds until the
indicator light above the buttons
flashes rapidly.
2. When the indicator light flashes, release the buttons. You erased the
codes for all buttons.
Reprogramming a Single Button
To program a device to a previously trained
button, follow these steps:
1. Press and hold the desired button. Do NOT release the button.
2. The indicator light begins to flash after
20 seconds. Without releasing the
button, follow Step 1 in the
Programming section.
For questions or comments, contact
HomeLink at www.homelink.com,
www.youtube.com/user/HomeLinkGentex
or by calling the toll-free help line at
1-800-355-3515.
166
Super Duty (TFE) Canada/United States of America, enUSA, Edition date: 201804, Fourth-Printing Garage Door Opener
(If Equipped)E188212 E188213
Page 181 of 666

coolant temperature, barometric pressure
sensor and environmental temperature
sensor to determine how long the glow
plugs stay energized. The required time for
the glow plugs to be energized decreases
as the coolant temperature, barometric
pressure and environmental temperature
increase.
Automatic Engine Shutdown
If your vehicle is equipped with a keyless
ignition, it has a feature that automatically
shuts down the engine if it has been idling
for an extended period. The ignition also
turns off in order to save battery power.
Before the engine shuts down, a message
appears in the information display showing
a timer counting down from 30 seconds.
If you do not intervene within 30 seconds,
the engine shuts down. Another message
appears in the information display to
inform you that the engine has shut down
in order to save fuel. Start your vehicle as
you normally do.
Cold Weather Starting
WARNING: Do not use starting
fluid, for example ether, in the air intake
system. Such fluid could cause
immediate explosive damage to the
engine and possible personal injury. WARNING:
Do not add gasoline,
gasohol, alcohol or kerosene to diesel
fuel. This creates a serious fire hazard
and causes engine performance
problems.
We recommend that the engine block
heater be used for starting when the
temperature is -9°F (-23°C) or colder. See
Engine Block Heater
(page 181). When operating in cold weather, you may
use Motorcraft® cetane improvers or
non-alcohol-based cetane improvers from
a reputable manufacturer as needed. Switch the ignition on. Do not
start the engine until the
glow-plug indicator turns off.
When the glow plug pre-heat indicator
turns off, turn the key to start. After you
start the engine, the glow plugs may
remain on for a period. If you do not start
the engine before the glow plug activation
time ends, you will need to reset the glow
plugs by switching the ignition off. After
the engine starts, allow it to idle for about
15 seconds. This protects the engine. Do
not increase engine speed until the oil
pressure gauge indicates normal pressure.
Cold Weather Operation
Note: Idling in cold weather does not heat
the engine to its normal operating
temperature. Long periods of idling,
especially in cold weather, can cause a
buildup of deposits which can cause engine
damage.
Change to a lighter grade engine oil to
make starting easier under these
conditions. Refer to engine oil
specifications. See
Capacities and
Specifications (page 431).
Diesel fuel is adjusted seasonally for cold
temperatures. Diesel fuel which has not
been properly formulated for the ambient
conditions may gel which can clog the fuel
filters. One indication that the fuel filter(s)
may be clogged is if the engine starts, stalls
after a short time, and then does not
restart. If you have been using biodiesel,
you may need to use a fuel with lower
biodiesel content, try another brand, or
discontinue using biodiesel. Do not use
178
Super Duty (TFE) Canada/United States of America, enUSA, Edition date: 201804, Fourth-Printing Starting and Stopping the Engine
Page 198 of 666

Illumination of the service engine soon
indicator, charging system warning light or
the temperature warning light, fluid leaks,
strange odors, smoke or loss of engine
power could indicate that the emission
control system is not working properly.
An improperly operating or damaged
exhaust system may allow exhaust to
enter the vehicle. Have a damaged or
improperly operating exhaust system
inspected and repaired immediately.
Do not make any unauthorized changes to
your vehicle or engine. By law, vehicle
owners and anyone who manufactures,
repairs, services, sells, leases, trades
vehicles, or supervises a fleet of vehicles
are not permitted to intentionally remove
an emission control device or prevent it
from working. Information about your
vehicle
’s emission system is on the Vehicle
Emission Control Information Decal
located on or near the engine. This decal
also lists engine displacement.
Please consult your warranty information
for complete details.
On-Board Diagnostics (OBD-II)
Your vehicle has a computer known as the
on-board diagnostics system (OBD-II) that
monitors the engine ’s emission control
system. The system protects the
environment by making sure that your
vehicle continues to meet government
emission standards. The OBD-II system
also assists a service technician in properly
servicing your vehicle. When the service engine soon
indicator illuminates, the OBD-II
system has detected a
malfunction. Temporary malfunctions may
cause the service engine soon indicator to
illuminate. Examples are: 1. Your vehicle has run out of fuel
—the
engine may misfire or run poorly.
2. Poor fuel quality or water in the fuel —the engine may misfire or run
poorly.
3. The fuel fill inlet may not have closed properly. See Refueling (page 188).
4. Driving through deep water —the
electrical system may be wet.
You can correct these temporary
malfunctions by filling the fuel tank with
good quality fuel, properly closing the fuel
fill inlet or letting the electrical system dry
out. After three driving cycles without these
or any other temporary malfunctions
present, the service engine soon indicator
should stay off the next time you start the
engine. A driving cycle consists of a cold
engine startup followed by mixed city and
highway driving. No additional vehicle
service is required.
If the service engine soon indicator remains
on, have your vehicle serviced at the first
available opportunity. Although some
malfunctions detected by the OBD-II may
not have symptoms that are apparent,
continued driving with the service engine
soon indicator on can result in increased
emissions, lower fuel economy, reduced
engine and transmission smoothness and
lead to more costly repairs.
Readiness for Inspection and
Maintenance (I/M) Testing
Some state and provincial and local
governments may have
Inspection/Maintenance (I/M) programs
to inspect the emission control equipment
on your vehicle. Failure to pass this
inspection could prevent you from getting
a vehicle registration. If the service engine soon
indicator is on or the bulb does
not work, your vehicle may need
service. See On-Board Diagnostics.
195
Super Duty (TFE) Canada/United States of America, enUSA, Edition date: 201804, Fourth-Printing Engine Emission Control
Page 204 of 666
Note:
Avoid running out of fuel.
Note: During regeneration at low speed or
engine idle, you may smell a hot metallic
odor and could notice a clicking metallic
sound. This is due to high temperatures
reached during regeneration and is normal.
Note: Changes in the engine or exhaust
sound may be heard during the regeneration
process.
The diesel particulate filter on your vehicle
requires periodic regeneration to maintain
its correct function. Your vehicle will carry
out this process automatically.
If your journeys meet one of the following
conditions:
• You drive only short distances.
• You frequently switch the ignition on
and off.
• Your journeys contain a high level of
acceleration and deceleration.
You must carry out occasional trips with
the following conditions to assist the
regeneration process:
• Drive your vehicle in more favorable
conditions, which you will find at higher
vehicle speeds in normal driving, on a
main road or freeway for a minimum
of 20 minutes. This drive may include
short stops that will not affect the
regeneration process.
• Avoid prolonged idling and always
observe speed limits and road
conditions.
• Do not switch the ignition off.
• Select a suitable gear to ideally
maintain engine speed between 1500
and 3000 RPM. Oxidation Catalytic Converter and
Diesel Particulate Filter System (If
Equipped) WARNING:
The normal operating
temperature of the exhaust system is
very high. Never work around or attempt
to repair any part of the exhaust system
until it has cooled. Use special care when
working around the diesel oxidation
catalytic converter or the diesel
particulate filter. The diesel oxidation
catalytic converter and the diesel
particulate filter heat up to very high
temperatures after only a short period
of engine operation and remain hot after
you switch the engine off.
Your vehicle has a diesel particulate filter.
The diesel particulate filter is an inline filter
in the exhaust system that reduces carbon
emissions by trapping exhaust particles
before they reach the tailpipe. The diesel
particulate filter looks similar to a
traditional exhaust catalyst and is part of
the exhaust system under your vehicle. The
filter couples to a diesel oxidation catalyst
that reduces the amount of harmful
exhaust emitted from the tailpipe. As soot
gathers in the system, it begins to restrict
the filter. The system must periodically
clean the soot that gathers inside the filter.
This is carried out in two ways, passive
regeneration and active regeneration. Both
methods occur automatically and require
no actions from the driver. During either
one of these regeneration methods, you
may notice a change in exhaust tone. At
certain times, the information display
shows various messages related to the
diesel particulate filter. See
Information
Messages (page 128).
201
Super Duty (TFE) Canada/United States of America, enUSA, Edition date: 201804, Fourth-Printing Engine Emission Control
Page 207 of 666
Information Display Procedure
Start with your vehicle engine and when it
has reached the normal operating
temperature, press the information display
control button on the steering wheel. See
Information Display Control (page 87).
If a message advising that the exhaust
filter is full appears in the information
display, press the OK button as instructed.
Answer yes to this prompt and then follow
the next prompts regarding the exhaust
position required to initiate operator
commanded regeneration. Be sure to
understand each prompt. If you are not
sure what is being asked by each prompt,
contact an authorized dealer. The display
confirms the operation has started and
when it has finished.
If the diesel particulate filter is near or at
saturation, a message requesting
permission to initiate filter cleaning
appears in the information display. See
Information Messages
(page 128).
Answer yes to this prompt and then follow
the next prompts regarding exhaust
position required to initiate operator
commanded regeneration. Be sure to
understand each prompt. If you are not
sure what is being asked by each prompt,
contact an authorized dealer. The display
confirms the operation has started and
when it has finished. You can also drive to
clean the filter. When the system is at the point
of oversaturation, the service
engine warning lamp illuminates
and a message appears in the information
display. You cannot initiate filter cleaning.
You must have your vehicle checked as
soon as possible.
Once operator commanded regeneration
starts, engine speed increases to
approximately 2000 rpm and the cooling
fan speed increases. You will hear a
change in audible sound due to engine
speed and cooling fan speed increases. It is not necessary to open the hood on the
engine compartment. Once operator
commanded regeneration completes, the
engine speed returns to normal idling. The
exhaust system remains very hot for
several minutes even after regeneration is
complete. Do not reposition the vehicle
over materials that could burn until the
exhaust system has had sufficient time to
cool. Depending on the amount of soot
collected by the diesel particulate filter,
ambient temperature and altitude,
operator commanded regeneration lasts
approximately 30 minutes.
Operator Commanded Regeneration
with Automatic Regeneration Control
(If Equipped)
If your vehicle is operated with significant
stationary operation, low speed drive
cycles less than
25 mph (40 km/h), short
drive cycles, drive time less than 15 minutes
or the vehicle does not fully warm up,
passive and active regeneration may not
sufficiently clean the diesel particulate
filter system. You can switch off automatic
regeneration until better driving conditions
are available, for example steady high
speed driving. You can then switch
automatic regeneration back on to clean
the diesel particulate filter.
Switching Automatic Regeneration
Control On and Off
To switch operator commanded
regeneration on and off, use the
information display control on the steering
wheel. See Information Display Control
(page
87). Scroll to the exhaust cleaning
message, a check in the box indicates the
feature is enabled, and unchecked
indicates the feature is disabled.
204
Super Duty (TFE) Canada/United States of America, enUSA, Edition date: 201804, Fourth-Printing Engine Emission Control
Page 211 of 666
Understanding your SelectShift
Automatic
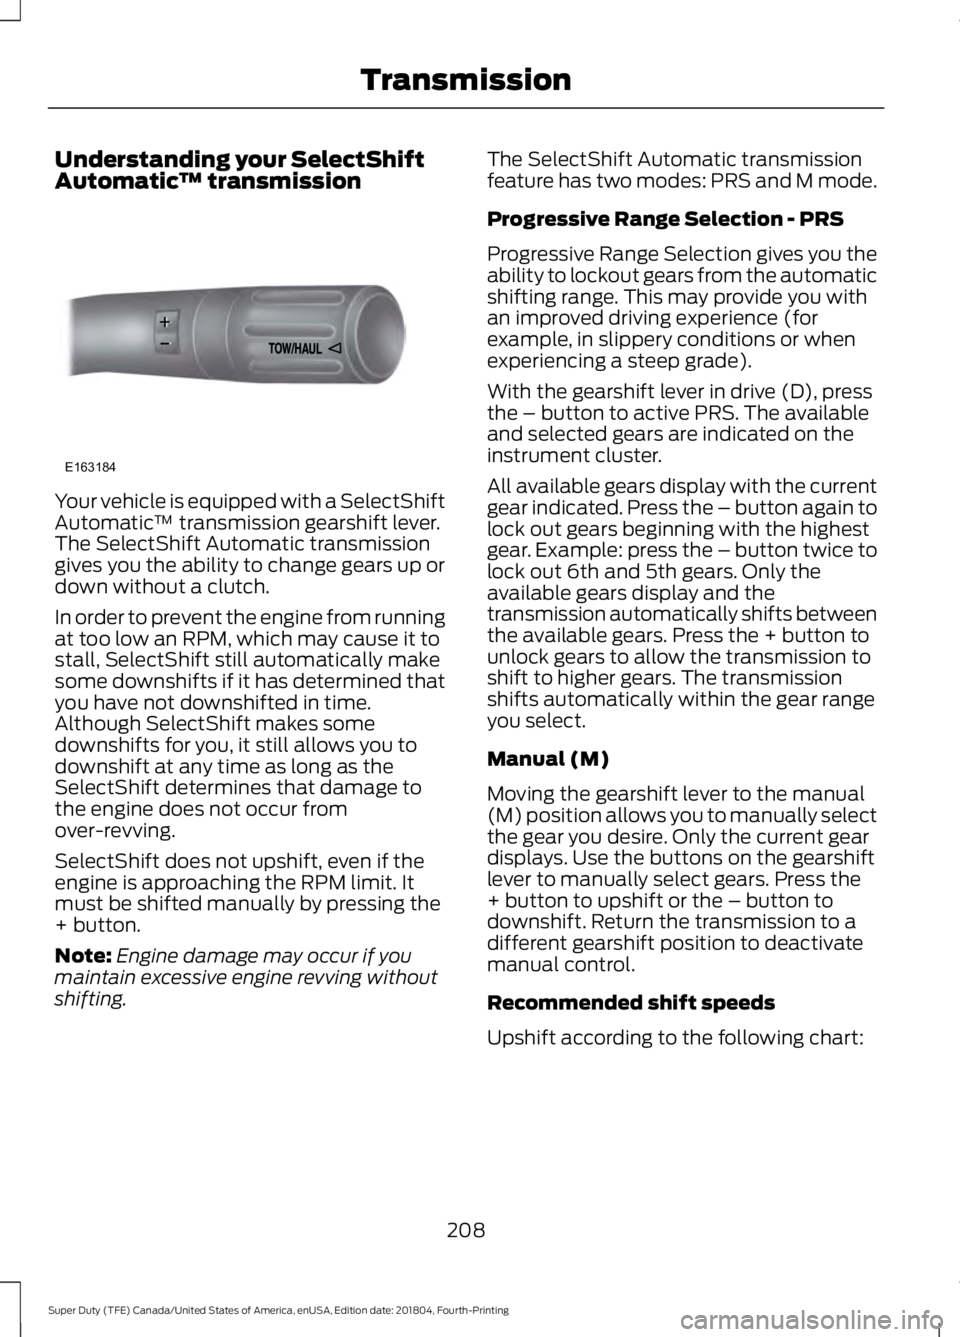
™ transmissionYour vehicle is equipped with a SelectShift
Automatic
™ transmission gearshift lever.
The SelectShift Automatic transmission
gives you the ability to change gears up or
down without a clutch.
In order to prevent the engine from running
at too low an RPM, which may cause it to
stall, SelectShift still automatically make
some downshifts if it has determined that
you have not downshifted in time.
Although SelectShift makes some
downshifts for you, it still allows you to
downshift at any time as long as the
SelectShift determines that damage to
the engine does not occur from
over-revving.
SelectShift does not upshift, even if the
engine is approaching the RPM limit. It
must be shifted manually by pressing the
+ button.
Note: Engine damage may occur if you
maintain excessive engine revving without
shifting. The SelectShift Automatic transmission
feature has two modes: PRS and M mode.
Progressive Range Selection - PRS
Progressive Range Selection gives you the
ability to lockout gears from the automatic
shifting range. This may provide you with
an improved driving experience (for
example, in slippery conditions or when
experiencing a steep grade).
With the gearshift lever in drive (D), press
the – button to active PRS. The available
and selected gears are indicated on the
instrument cluster.
All available gears display with the current
gear indicated. Press the – button again to
lock out gears beginning with the highest
gear. Example: press the – button twice to
lock out 6th and 5th gears. Only the
available gears display and the
transmission automatically shifts between
the available gears. Press the + button to
unlock gears to allow the transmission to
shift to higher gears. The transmission
shifts automatically within the gear range
you select.
Manual (M)
Moving the gearshift lever to the manual
(M) position allows you to manually select
the gear you desire. Only the current gear
displays. Use the buttons on the gearshift
lever to manually select gears. Press the
+ button to upshift or the – button to
downshift. Return the transmission to a
different gearshift position to deactivate
manual control.
Recommended shift speeds
Upshift according to the following chart:
208
Super Duty (TFE) Canada/United States of America, enUSA, Edition date: 201804, Fourth-Printing TransmissionE163184
Page 219 of 666
If Shift Delayed Pull Forward appears in
the information display, transfer case gear
tooth blockage is present. To alleviate this
condition, place the transmission in a
forward gear, move the vehicle forward
approximately
5 ft (1.5 m), and shift the
transmission back to neutral to allow the
transfer case to complete the range shift.
How Your Vehicle Differs From
Other Vehicles WARNING: Vehicles with a higher
center of gravity (utility and four-wheel
drive vehicles) handle differently than
vehicles with a lower center of gravity
(passenger cars). Avoid sharp turns,
excessive speed and abrupt steering in
these vehicles. Failure to drive cautiously
increases the risk of losing control of your
vehicle, vehicle rollover, personal injury
and death.
Truck and utility vehicles can differ from
some other vehicles. Your vehicle may be
higher to allow it to travel over rough
terrain without getting hung up or
damaging underbody components.
The differences that make your vehicle so
versatile also make it handle differently
than an ordinary passenger car.
Maintain steering wheel control at all
times, especially in rough terrain. Since
sudden changes in terrain can result in
abrupt steering wheel motion, make sure
you grip the steering wheel from the
outside. Do not grip the spokes.
Drive cautiously to avoid vehicle damage
from concealed objects such as rocks and
stumps. You should either know the terrain or
examine maps of the area before driving.
Map out your route before driving in the
area. To maintain steering and braking
control of your vehicle, you must have all
four wheels on the ground and they must
be rolling, not sliding or spinning.
Driving Off-Road With Truck and
Utility Vehicles
Note:
On some models, the initial shift from
two-wheel drive to four-wheel drive while
the vehicle is moving can cause some
momentary clunk and ratcheting sounds.
This is the front drivetrain coming up to
speed and the automatic locking hubs
engaging and is not cause for concern.
Note: Your vehicle may be equipped with
a front air dam that can become damaged
(due to reduced ground clearance) when
taking your vehicle off-road. This air dam
can be taken off by removing 15 bolts.
Four-wheel drive vehicles are specially
equipped for driving on sand, snow, mud
and rough terrain and have operating
characteristics that are somewhat
different from conventional vehicles, both
on and off the road.
Power is supplied to all four wheels
through a transfer case. On four-wheel
drive vehicles, the transfer case allows you
to select 4WD when necessary.
Information on transfer case operation and
shifting procedures can be found in this
chapter. Information on transfer case
maintenance can be found in the
Maintenance chapter. You should become
thoroughly familiar with this information
before you operate your vehicle.
Four-wheel drive (when you select a 4WD
mode) uses all four wheels to power the
vehicle. This increases traction, enabling
you to drive over terrain and road
conditions that a conventional two-wheel
drive vehicle cannot.
216
Super Duty (TFE) Canada/United States of America, enUSA, Edition date: 201804, Fourth-Printing Four-Wheel Drive
(If Equipped)