2019 FORD F-150 jacking
[x] Cancel search: jackingPage 87 of 644

USING POWER RUNNING
BOARDS
WARNING: In extreme climates,
excessive ice buildup may occur, causing
the running boards not to deploy. Make
sure that the running boards have
deployed, and have finished moving
before attempting to step on them. The
running boards will resume normal
function once the blockage is cleared. WARNING:
Switch off the running
boards before jacking or placing any
object under your vehicle. Never place
your hand between the extended running
board and your vehicle. A moving running
board may cause injury.
Note: Do not use the running boards, front
and rear hinge assemblies, running board
motors, or the running board underbody
mounts to lift your vehicle when jacking.
Always use proper jacking points.
Note: The running boards may operate
more slowly in cool temperatures.
Note: The running board mechanism may
trap debris such as mud, dirt, snow, ice and
salt. This may cause unwanted noise. If this
happens, manually set the running boards
to the deployed position. Then, wash the
system, in particular the front and rear hinge
arms, with a high-pressure car wash wand. Automatic Power Deploy The running boards automatically extend
down and out when you open the door.
This can help you enter and exit your
vehicle.
Automatic Power Stow
When you close the doors, the running
boards return to the stowed position after
a two-second delay.
Manual Power Deploy
You can manually operate the running
boards in the information display.
1. Select
Settings.
2. Select
Advanced Settings.
3. Select
Vehicle.
4. Select
Power Running Boards.
5. Select your desired power running board setting.
Set the running boards in the deployed
position to access the roof.
The running boards return to the stowed
position and enter automatic mode when
the vehicle speed exceeds 3 mph (5 km/h).
84
F-150 (TFC) Canada/United States of America, enUSA, Edition date: 201808, Third-Printing- Power Running Boards
(If Equipped)E166682
Page 284 of 644

- 1200 = - 240 pounds. No, you do
not have enough cargo capacity
to carry that much weight. In
metric units, the calculation would
be: 635 kilograms - (2 x 99
kilograms) - (12 x 45 kilograms) =
635 - 198 - 540 = -103 kilograms.
You will need to reduce the load
weight by at least 240 pounds
(104 kilograms). If you remove
three 100-pound (45-kilogram)
cement bags, then the load
calculation would be:1400 - (2 x
220) - (9 x 100) = 1400 - 440 -
900 = 60 pounds. Now you have
the load capacity to transport the
cement and your friend home. In
metric units, the calculation would
be: 635 kilograms - (2 x 99
kilograms) - (9 x 45 kilograms) =
635 - 198 - 405 = 32 kilograms.
The above calculations also
assume that the loads are
positioned in your vehicle in a
manner that does not overload
the front or the rear gross axle
weight rating specified for your
vehicle on the Safety Compliance
Certification label.
Special Loading Instructions
for Owners of Pick-up Trucks
and Utility-type Vehicles
WARNING: When loading
the roof racks, we recommend
you evenly distribute the load,
as well as maintain a low center
of gravity. Loaded vehicles, with
higher centers of gravity, may handle differently than unloaded
vehicles. Take extra precautions,
such as slower speeds and
increased stopping distance,
when driving a heavily loaded
vehicle.
BED ACCESS
(IF EQUIPPED)
Box Side Step
Use the step for easier access to the
vehicle bed.
Note: Close the step before driving.
Note: Do not exceed
500 lb (227 kg) on
the step. This includes you plus cargo.
Note: Do not use the step to lift the vehicle.
Only use proper jacking points.
Note: The step may operate more slowly
in cool temperatures.
Note: The step mechanism may trap debris
such as mud, dirt, snow, ice and salt. This
may prevent the step from deploying
automatically when you press the button.
If this happens, make sure that you press
the button down and carefully pull out the
step manually. Wash off the debris with a
high-pressure sprayer and stow the step.
Deploying the Step 281
F-150 (TFC) Canada/United States of America, enUSA, Edition date: 201808, Third-Printing- Load CarryingE167268
Page 414 of 644

WARNING: The jack should be
used on level firm ground wherever
possible. WARNING:
Check that the vehicle
jack is not damaged or deformed and
the thread is lubricated and clean. WARNING:
Never place anything
between the vehicle jack and the ground. WARNING:
Never place anything
between the vehicle jack and your
vehicle. WARNING:
It is recommended
that the wheels of the vehicle be
chocked, and that no person should
remain in a vehicle that is being jacked. WARNING:
Switch off the running
boards before jacking or placing any
object under your vehicle. Never place
your hand between the extended running
board and your vehicle. A moving running
board may cause injury.
Note: Only use the spare tire carrier to stow
the tire and wheel combination provided
with your vehicle. Other tire and wheel
combinations can cause the tire carrier to
fail.
Note: Do not use impact tools or power
tools operating at over 200 RPM on the
spare tire carrier, this may cause a winch
malfunction and prevent a secure fit.
Override the winch at least three times,
there's an audible click each time, to make
sure the wheel and tire have been tightened
securely.
Note: Passengers should not remain in the
vehicle when the vehicle is being jacked. Park on a level surface, activate the hazard
flashers and set the parking brake. Then,
place the transmission in park (P) and turn
the engine off.
Remove the Vehicle Jack and Tool
Bag
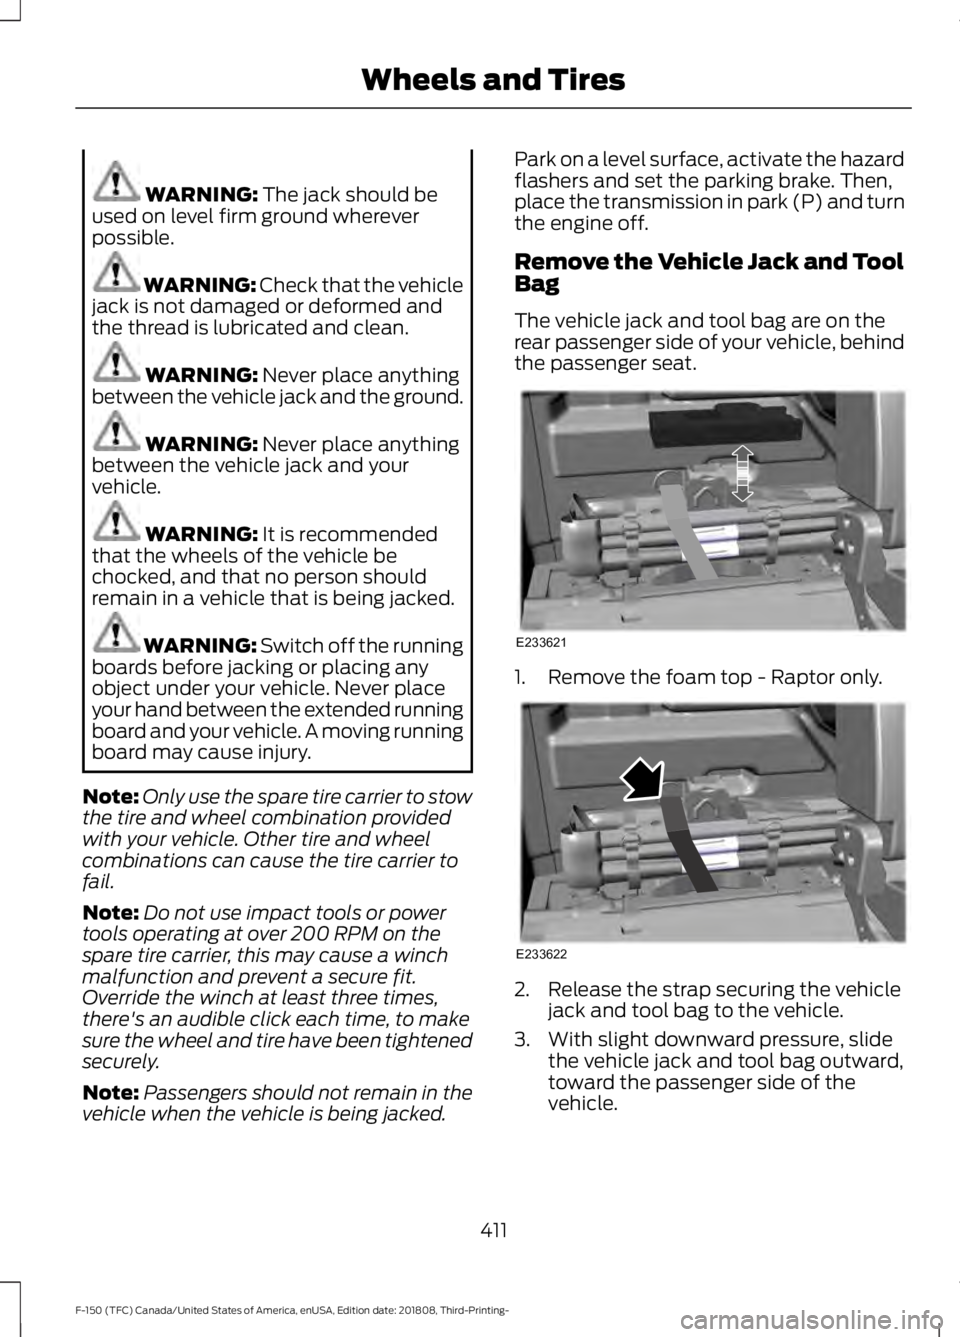
The vehicle jack and tool bag are on the
rear passenger side of your vehicle, behind
the passenger seat.
1. Remove the foam top - Raptor only.
2. Release the strap securing the vehicle
jack and tool bag to the vehicle.
3. With slight downward pressure, slide the vehicle jack and tool bag outward,
toward the passenger side of the
vehicle.
411
F-150 (TFC) Canada/United States of America, enUSA, Edition date: 201808, Third-Printing- Wheels and TiresE233621 E233622
Page 416 of 644

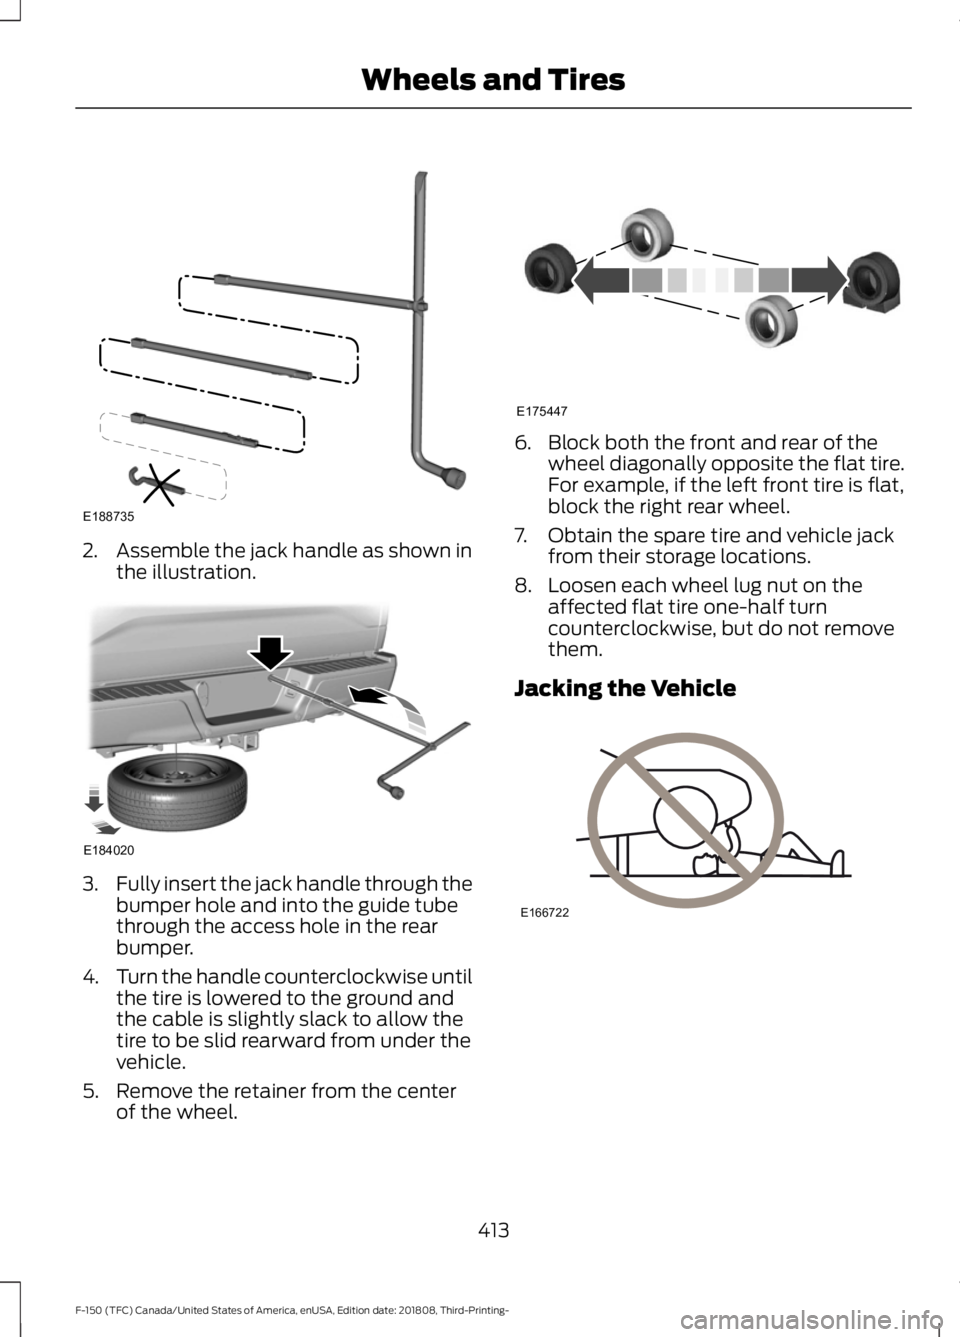
2. Assemble the jack handle as shown in
the illustration. 3.
Fully insert the jack handle through the
bumper hole and into the guide tube
through the access hole in the rear
bumper.
4. Turn the handle counterclockwise until
the tire is lowered to the ground and
the cable is slightly slack to allow the
tire to be slid rearward from under the
vehicle.
5. Remove the retainer from the center of the wheel. 6. Block both the front and rear of the
wheel diagonally opposite the flat tire.
For example, if the left front tire is flat,
block the right rear wheel.
7. Obtain the spare tire and vehicle jack from their storage locations.
8. Loosen each wheel lug nut on the affected flat tire one-half turn
counterclockwise, but do not remove
them.
Jacking the Vehicle 413
F-150 (TFC) Canada/United States of America, enUSA, Edition date: 201808, Third-Printing- Wheels and TiresE188735 E184020 E175447 E166722
Page 417 of 644

Front Jacking Points
Note:
Use the frame rail as the front jacking
location point, not the control arm. The
frame rail is marked with an arrow. Rear Jacking Points
Note:
Jack at the specified locations to
avoid damage to the vehicle.
1. Place the vehicle jack at the jacking point next to the tire you are changing.
Turn the jack handle clockwise until
the wheel is completely off the ground.
2. Remove the lug nuts with the lug wrench.
3. Replace the flat tire with the spare tire,
making sure the valve stem is facing
outward. Reinstall the lug nuts until the
wheel is snug against the hub. Do not
fully tighten the lug nuts until the wheel
has been lowered.
4. Lower the wheel by turning the jack handle counterclockwise.
414
F-150 (TFC) Canada/United States of America, enUSA, Edition date: 201808, Third-Printing- Wheels and TiresE183709 E272477
Page 632 of 644

BLIS
See: Blind Spot Information System..........262
Body Styling Kits..........................................385
Bonnet Lock See: Opening and Closing the Hood..........350
Booster Seats..................................................33 Types of Booster Seats...................................... 34
Brake Fluid Check........................................364
Brakes..............................................................228 General Information......................................... 228
Breaking-In......................................................319
Bulb Specification Chart..........................450
C
Cabin Air Filter................................................153
Capacities and Specifications - 2.7L EcoBoost™.................................................428
Alternative Engine Oil for Extremely Cold Climates............................................................ 431
Specifications..................................................... 429
Capacities and Specifications - 3.0L Diesel.............................................................432
Specifications..................................................... 433
Capacities and Specifications - 3.3L................................................................436
Alternative Engine Oil for Extremely Cold Climates.......................................................... 440
Specifications...................................................... 437
Capacities and Specifications - 3.5L Ecoboost™..................................................441
Alternative Engine Oil for Extremely Cold Climates........................................................... 445
Specifications..................................................... 442
Capacities and Specifications - 5.0L...............................................................446
Alternative Engine Oil for Extremely Cold Climates........................................................... 449
Specifications......................................................447
Capacities and Specifications.................419
Cargo Lamps...................................................98
Car Wash See: Cleaning the Exterior............................... 377
Catalytic Converter....................................200 On-Board Diagnostics (OBD-II)................... 201
Readiness for Inspection and Maintenance (I/M) Testing.................................................. 202
Center Console
...............................................172 Changing a Bulb...........................................370
Accessing the Halogen High Beam, Low
Beam and Direction Indicator
Bulbs.................................................................. 370
Replacing Brake, Rear, Direction Indicator and Reverse Lamp Bulbs............................ 372
Replacing Cargo Lamp and High-mount Brake Lamp Bulbs......................................... 373
Replacing Exterior Mounted Mirror Direction Indicator Lamp Bulbs.................................. 374
Replacing Fog Lamp Bulbs............................. 372
Replacing LED Brake, Rear, Direction Indicator and Reverse Lamp Bulbs........373
Replacing LED Cargo Lamp, Spot Lamp and High-mount Brake Lamp Bulbs...............373
Replacing LED Direction Indicator and Side Marker Bulbs................................................... 372
Replacing LED Fog lamp Bulbs..................... 372
Replacing LED Headlamp Bulbs.................. 372
Replacing Side Marker Bulb........................... 372
Replacing the Halogen High Beam, Low Beam and Direction Indicator
Bulbs................................................................... 371
Replacing the License Plate Lamp Bulb.................................................................... 373
Changing a Fuse..........................................348 Fuses...................................................................... 348
Changing a Road Wheel
..........................409
Dissimilar Spare Wheel and Tire Assembly
Information..................................................... 409
Jacking the Vehicle............................................. 413
Remove the Vehicle Jack and Tool Bag....................................................................... 411
Removing the Spare Tire................................. 412
Stowing the Flat or Spare Tire....................... 415
Stowing the Vehicle Jack and Tool Bag...................................................................... 415
Tire Change Procedure.................................... 410
Changing the 12V Battery
.........................366
Battery Management System....................... 367
Changing the Engine Air Filter - Diesel.............................................................374
Air Filter Restriction Gauge............................. 375
Changing the Engine Air Filter - Gasoline........................................................374
Changing the Wi-Fi Hotspot Name or Password.....................................................452
Changing the Wiper Blades....................368
629
F-150 (TFC) Canada/United States of America, enUSA, Edition date: 201808, Third-Printing- Index