2019 FORD EXPLORER height adjustment
[x] Cancel search: height adjustmentPage 4 of 571

Introduction
About This Manual
..........................................7
Symbols Glossary ............................................
7
Data Recording .................................................
9
Perchlorate ........................................................
11
Ford Credit .........................................................
11
Replacement Parts Recommendation ........................................................................\
....
12
Special Notices ...............................................
12
Mobile Communications Equipment ........................................................................\
....
13
Export Unique Options ................................
14
Environment
Protecting the Environment .......................
15
At a Glance
Instrument Panel Overview .......................
16
Child Safety
General Information ......................................
18
Installing Child Restraints ...........................
19
Booster Seats .................................................
29
Child Restraint Positioning .........................
31
Child Safety Locks .........................................
33
Seatbelts
Principle of Operation .................................
35
Fastening the Seatbelts .............................
36
Seatbelt Height Adjustment .....................
39
Seatbelt Warning Lamp and Indicator Chime ............................................................
40
Seatbelt Reminder .......................................
40
Child Restraint and Seatbelt Maintenance ...............................................
42
Seatbelt Extension .......................................
42
Personal Safety System ™
Personal Safety System ™.........................
43 Supplementary Restraints
System
Principle of Operation .................................
44
Driver and Passenger Airbags ..................
45
Front Passenger Sensing System ...........
46
Side Airbags ....................................................
48
Passenger Knee Airbag ...............................
49
Safety Canopy ™...........................................
49
Crash Sensors and Airbag Indicator ........
51
Airbag Disposal ..............................................
52
Keys and Remote Controls
General Information on Radio Frequencies .................................................
53
Remote Control .............................................
53
Replacing a Lost Key or Remote Control ........................................................................\
..
59
MyKey ™
Principle of Operation .................................
60
Creating a MyKey ...........................................
61
Clearing All MyKeys ......................................
62
Checking MyKey System Status ..............
62
Using MyKey With Remote Start Systems ........................................................
63
MyKey – Troubleshooting ..........................
63
Doors and Locks
Locking and Unlocking ................................
65
Keyless Entry ..................................................
68
Liftgate
Manual Liftgate ..............................................
70
Power Liftgate ..................................................
71
Security
Passive Anti-Theft System ........................
75
Anti-Theft Alarm ...........................................
76
1
Explorer (TUB) Canada/United States of America, enUSA, Edition date: 201807, Second-Printing Table of Contents
Page 40 of 571

Pregnant women should always wear their
seatbelt. Position the lap belt portion of a
combination lap and shoulder belt low
across the hips below the belly and worn
as tight as comfort allows. Position the
shoulder belt to cross the middle of the
shoulder and the center of the chest.
Seatbelt Locking Modes
WARNING: If your vehicle is
involved in a crash, have the seatbelts
and associated components inspected
as soon as possible. Failure to follow this
instruction could result in personal injury
or death.
All safety restraints in the vehicle are
combination lap and shoulder belts. The
driver seatbelt has the vehicle sensitive
locking mode. The front outboard
passenger and rear seatbelts have both
the vehicle sensitive locking mode and the
automatic locking mode.
Vehicle Sensitive Mode
This is the normal retractor mode, which
allows free shoulder belt length
adjustment to your movements and
locking in response to vehicle movement.
For example, if the driver brakes suddenly
or turns a corner sharply, or the vehicle
receives an impact of about
5 mph
(8 km/h) or more, the combination
seatbelts lock to help reduce forward
movement of the driver and passengers.
In addition, the retractor is designed to lock
if you pull the webbing out too quickly. If
the seatbelt retractor locks, slowly lower
the height adjuster to allow the seatbelt
to retract. If the retractor does not unlock,
pull the seatbelt out slowly then feed a small length of webbing back toward the
stowed position. For rear seatbelts, recline
the rear seat backrest or push the seat
backrest cushion away from the seatbelt.
Feed a small length of webbing back
toward the stowed position.
Automatic Locking Mode
In this mode, the shoulder belt
automatically pre-locks. The belt still
retracts to remove any slack in the
shoulder belt. The automatic locking mode
is not available on the driver seatbelt.
When to Use the Automatic Locking
Mode
Use this mode when you install a child
safety seat, except a booster, in the
passenger front or rear seating positions.
Properly restrain children 12 years old and
under in a rear seating position whenever
possible. See
Child Safety (page 18).
How to Use the Automatic Locking
Mode
Non-Inflatable Seatbelts 1. Buckle the combination lap and
shoulder belt.
37
Explorer (TUB) Canada/United States of America, enUSA, Edition date: 201807, Second-Printing SeatbeltsE142591
Page 42 of 571

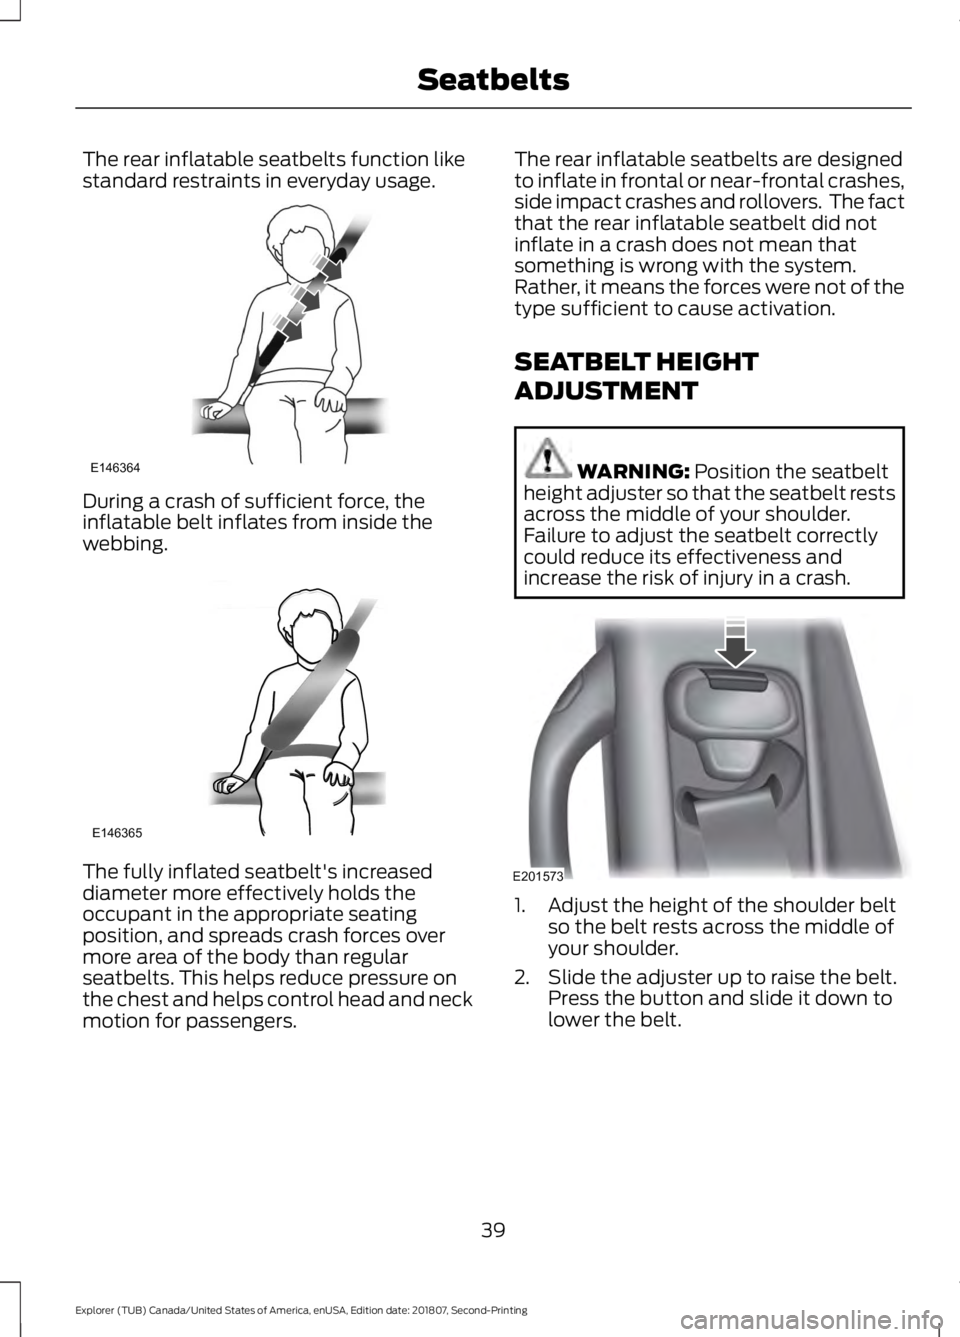
The rear inflatable seatbelts function like
standard restraints in everyday usage.
During a crash of sufficient force, the
inflatable belt inflates from inside the
webbing.
The fully inflated seatbelt's increased
diameter more effectively holds the
occupant in the appropriate seating
position, and spreads crash forces over
more area of the body than regular
seatbelts. This helps reduce pressure on
the chest and helps control head and neck
motion for passengers. The rear inflatable seatbelts are designed
to inflate in frontal or near-frontal crashes,
side impact crashes and rollovers. The fact
that the rear inflatable seatbelt did not
inflate in a crash does not mean that
something is wrong with the system.
Rather, it means the forces were not of the
type sufficient to cause activation.
SEATBELT HEIGHT
ADJUSTMENT
WARNING: Position the seatbelt
height adjuster so that the seatbelt rests
across the middle of your shoulder.
Failure to adjust the seatbelt correctly
could reduce its effectiveness and
increase the risk of injury in a crash. 1. Adjust the height of the shoulder belt
so the belt rests across the middle of
your shoulder.
2. Slide the adjuster up to raise the belt. Press the button and slide it down to
lower the belt.
39
Explorer (TUB) Canada/United States of America, enUSA, Edition date: 201807, Second-Printing SeatbeltsE146364 E146365 E201573
Page 253 of 571

ESSENTIAL TOWING CHECKS
Follow these guidelines for safe towing:
•
Do not tow a trailer until you drive your
vehicle at least 1,000 mi (1,600 km).
• Consult your local motor vehicle laws
for towing a trailer.
• See the instructions included with
towing accessories for the proper
installation and adjustment
specifications.
• Service your vehicle more frequently if
you tow a trailer. See your scheduled
maintenance information.
• If you use a rental trailer, follow the
instructions the rental agency gives
you.
You can find information on load
specification terms found on the tire label
and Safety Compliance label as well as
instructions on calculating your vehicle's
load in the Load Carrying chapter. See
Load Limit
(page 241).
Remember to account for the trailer
tongue weight as part of your vehicle load
when calculating the total vehicle weight.
Hitches
Do not use a hitch that either clamps onto
the bumper or attaches to the axle.
Distribute the trailer load so 10-15% of the
total trailer weight is on the tongue.
Weight-distributing Hitches WARNING:
Do not adjust the
spring bars so that your vehicle's rear
bumper is higher than before attaching
the trailer. Doing so will defeat the
function of the weight-distributing hitch,
which may cause unpredictable
handling, and could result in serious
personal injury. When hooking-up a trailer using a
weight-distributing hitch, always use the
following procedure:
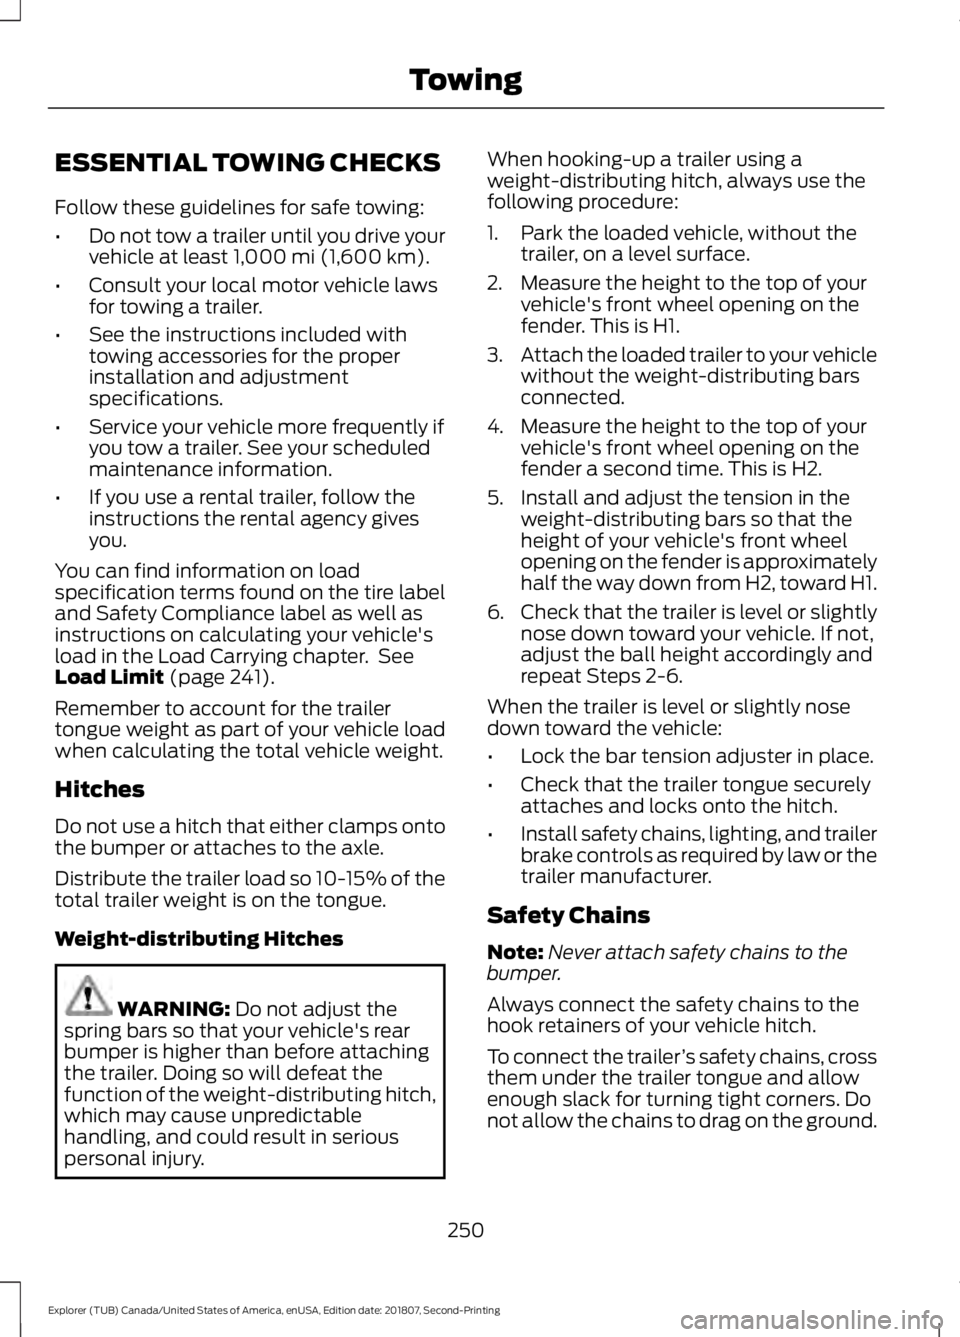
1. Park the loaded vehicle, without the
trailer, on a level surface.
2. Measure the height to the top of your vehicle's front wheel opening on the
fender. This is H1.
3. Attach the loaded trailer to your vehicle
without the weight-distributing bars
connected.
4. Measure the height to the top of your vehicle's front wheel opening on the
fender a second time. This is H2.
5. Install and adjust the tension in the weight-distributing bars so that the
height of your vehicle's front wheel
opening on the fender is approximately
half the way down from H2, toward H1.
6. Check that the trailer is level or slightly
nose down toward your vehicle. If not,
adjust the ball height accordingly and
repeat Steps 2-6.
When the trailer is level or slightly nose
down toward the vehicle:
• Lock the bar tension adjuster in place.
• Check that the trailer tongue securely
attaches and locks onto the hitch.
• Install safety chains, lighting, and trailer
brake controls as required by law or the
trailer manufacturer.
Safety Chains
Note: Never attach safety chains to the
bumper.
Always connect the safety chains to the
hook retainers of your vehicle hitch.
To connect the trailer ’s safety chains, cross
them under the trailer tongue and allow
enough slack for turning tight corners. Do
not allow the chains to drag on the ground.
250
Explorer (TUB) Canada/United States of America, enUSA, Edition date: 201807, Second-Printing Towing
Page 302 of 571

Rear Window Wiper Blade
1. Lift the wiper arm.
Note:
Do not hold the wiper blade when
lifting the wiper arm.
Note: Make sure that the wiper arm does
not spring back against the glass when the
wiper blade is not attached.
2. Remove the wiper blade.
Note: Make sure that the wiper blade locks
into place.
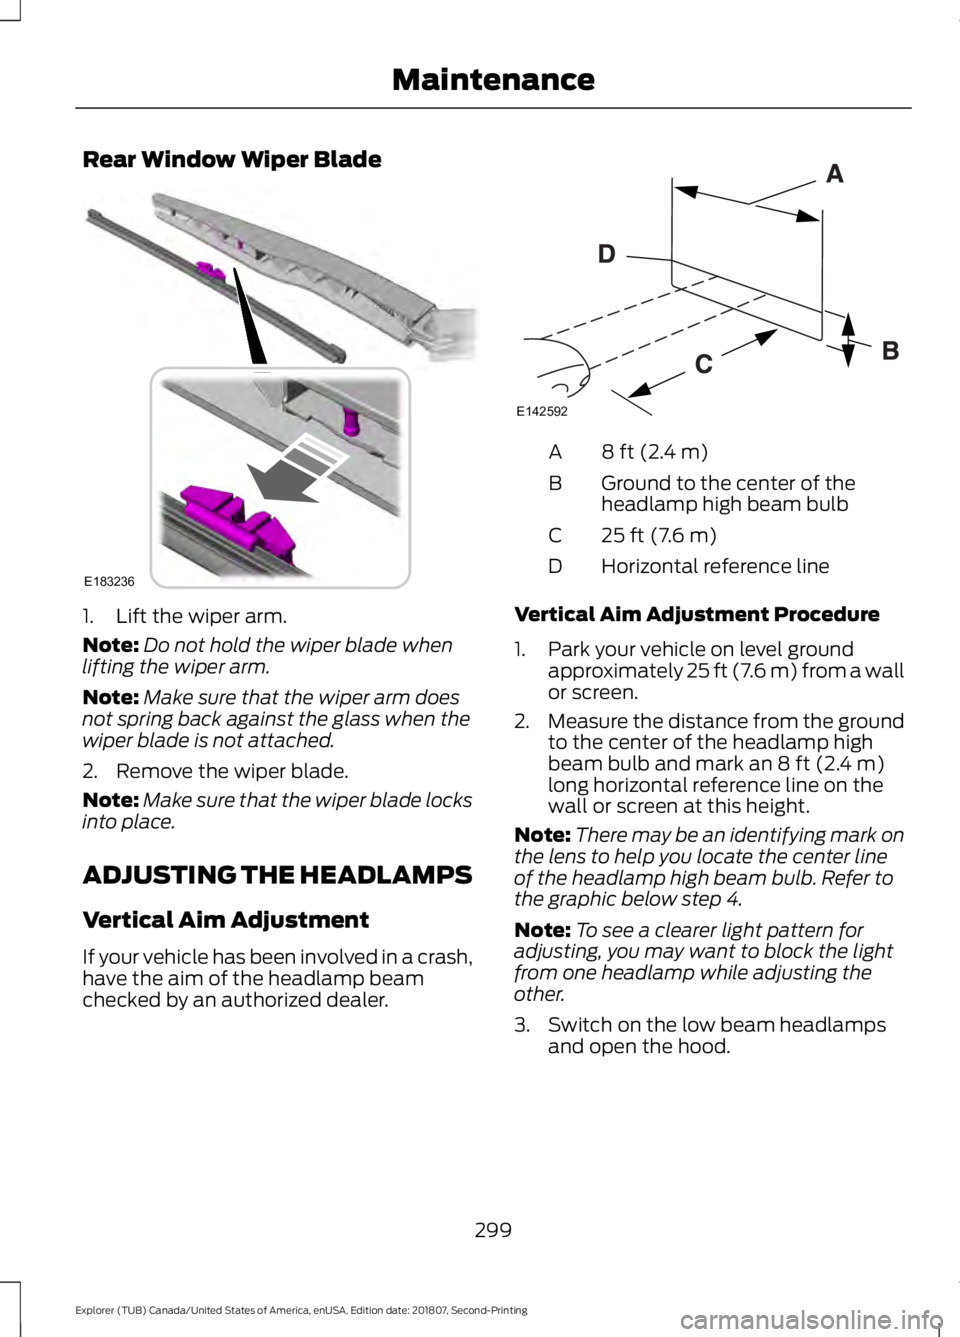
ADJUSTING THE HEADLAMPS
Vertical Aim Adjustment
If your vehicle has been involved in a crash,
have the aim of the headlamp beam
checked by an authorized dealer. 8 ft (2.4 m)
A
Ground to the center of the
headlamp high beam bulb
B
25 ft (7.6 m)
C
Horizontal reference line
D
Vertical Aim Adjustment Procedure
1. Park your vehicle on level ground approximately 25 ft (7.6 m) from a wall
or screen.
2. Measure the distance from the ground
to the center of the headlamp high
beam bulb and mark an
8 ft (2.4 m)
long horizontal reference line on the
wall or screen at this height.
Note: There may be an identifying mark on
the lens to help you locate the center line
of the headlamp high beam bulb. Refer to
the graphic below step 4.
Note: To see a clearer light pattern for
adjusting, you may want to block the light
from one headlamp while adjusting the
other.
3. Switch on the low beam headlamps and open the hood.
299
Explorer (TUB) Canada/United States of America, enUSA, Edition date: 201807, Second-Printing MaintenanceE183236 E142592
Page 567 of 571

Rear Under Floor Storage.........................239
Adjustable Load Floor...................................... 239
Cargo Management System......................... 239
Rear View Camera........................................212 Camera Guidelines............................................. 213
Manual Zoom....................................................... 215
Obstacle Distance Indicator........................... 214
Rear Camera Delay............................................ 215
Using the Rear View Camera System.........213
Rear View Camera See: Rear View Camera.................................... 212
Rear Window Wiper and Washers...........83 Rear Camera Washer.......................................... 83
Rear Window Washer......................................... 83
Rear Window Wiper Blade............................... 83
Recommended Towing Weights...........248
Refueling..........................................................176 Refueling System Overview............................ 176
Refueling System Warning.............................. 178
Refueling Your Vehicle....................................... 177
Remote Control..............................................53 Car Finder................................................................ 58
Integrated Keyhead Transmitter..................... 53
Intelligent Access Key......................................... 54
Memory Feature.................................................... 57
Remote Start......................................................... 58
Replacing the Battery......................................... 55
Sounding the Panic Alarm................................ 58
Remote Start
.................................................138
Automatic Settings............................................ 138
Heated and Cooled Features......................... 138
Last Settings........................................................ 138
Repairing Minor Paint Damage.................311
Replacement Parts Recommendation........................................12
Collision Repairs.................................................... 12
Scheduled Maintenance and Mechanical Repairs.................................................................. 12
Warranty on Replacement Parts..................... 12
Replacing a Lost Key or Remote Control............................................................59
Reporting Safety Defects (Canada Only)..............................................................269
Reporting Safety Defects (U.S. Only)..............................................................269
Roadside Assistance..................................258 Vehicles Sold in Canada: Getting Roadside
Assistance....................................................... 259Vehicles Sold in the United States: Getting
Roadside Assistance................................... 258
Vehicles Sold in the United States: Using Roadside Assistance................................... 258
Roadside Emergencies
..............................258
Roof Racks and Load Carriers................240
Adjusting the Crossbar..................................... 241
Thumbwheel Kit.................................................. 241
Running-In See: Breaking-In................................................. 255
Running Out of Fuel.....................................174 Adding Fuel From a Portable Fuel
Container........................................................... 175
Filling a Portable Fuel Container................... 175
S
Safety Canopy ™
............................................49
Safety Precautions.......................................172
Satellite Radio
...............................................372
Satellite Radio Electronic Serial Number
(ESN)................................................................. 373
Satellite Radio Reception Factors...............373
SiriusXM Satellite Radio Service.................. 373
Troubleshooting................................................. 374
Scheduled Maintenance Record...........503
Scheduled Maintenance
..........................495
Seatbelt Extension........................................42
Seatbelt Height Adjustment......................39
Seatbelt Reminder
........................................40
Belt-Minder™....................................................... 40
Seatbelts...........................................................35 Principle of Operation......................................... 35
Seatbelt Warning Lamp and Indicator Chime..............................................................40
Conditions of operation.................................... 40
Seats.................................................................139
Security...............................................................75
Settings...........................................................463 911 Assist.............................................................. 468
Ambient Lighting................................................ 475
Bluetooth.............................................................. 465
Clock...................................................................... 465
Display.................................................................... 476
General................................................................... 473
Media Player....................................................... 464
Mobile Apps.......................................................... 471
Navigation............................................................ 469
564
Explorer (TUB) Canada/United States of America, enUSA, Edition date: 201807, Second-Printing Index