Page 287 of 571
Engine coolant reservoir. See
Engine Coolant Check (page
289).
A
Engine oil dipstick. See
Engine
Oil Dipstick (page 286).
B
Engine oil filler cap. See Engine
Oil Check
(page 287).
C
Brake fluid reservoir. See
Brake
Fluid Check (page 295).
D Battery. See
Changing the 12V
Battery (page 296).
E
Engine compartment fusebox.
See
Changing a Fuse (page
280).
F
Air filter assembly. See
Changing the Engine Air Filter
(page
304).
G
Windshield washer fluid
reservoir. See
Washer Fluid
Check (page 296).
H
UNDER HOOD OVERVIEW - 3.5L DURATEC
284
Explorer (TUB) Canada/United States of America, enUSA, Edition date: 201807, Second-Printing MaintenanceE270722
Page 288 of 571
Engine coolant reservoir. See
Engine Coolant Check (page
289).
A
Brake fluid reservoir. See
Brake
Fluid Check (page 295).
B
Battery. See
Changing the 12V
Battery (page 296).
C
Engine compartment fusebox.
See
Fuse Specification Chart
(page 271).
D
Air filter assembly. See
Changing the Engine Air Filter
(page
304).
E Automatic transmission fluid
dipstick. See
Automatic
Transmission Fluid Check
(page
293).
F
Engine oil dipstick. See
Engine
Oil Dipstick (page 287).
G
Engine oil filler cap. See Engine
Oil Check
(page 287).
H
Windshield washer fluid
reservoir. See
Washer Fluid
Check (page 296).
I
UNDER HOOD OVERVIEW - 3.5L ECOBOOST™
285
Explorer (TUB) Canada/United States of America, enUSA, Edition date: 201807, Second-Printing MaintenanceIEFGH
ABCD
E223186
Page 289 of 571
Engine coolant reservoir. See
Engine Coolant Check (page
289).
A.
Engine oil filler cap.
See Engine
Oil Check (page 287).
B.
Engine oil dipstick.
See Engine
Oil Dipstick (page 287).
C.
Brake fluid reservoir.
See Brake
Fluid Check (page 295).
D.
Battery.
See Changing the 12V
Battery (page 296).
E.
Engine compartment fuse box.
See
Fuses (page 271).
F.
Air filter assembly. See
Changing the Engine Air Filter
(page
304).
G.
Automatic transmission dipstick.
See
Automatic Transmission
Fluid Check (page 293).
H.
Washer fluid reservoir. See
Washer Fluid Check (page 296
).
I. ENGINE OIL DIPSTICK - 2.3L
ECOBOOST™
Minimum.
A
Maximum.
B
286
Explorer (TUB) Canada/United States of America, enUSA, Edition date: 201807, Second-Printing MaintenanceE270723 E161560
AB
Page 298 of 571

*
Vehicles With Turbocharged Engines WARNING: Do not start the engine
with the air filter removed. This can
cause damage not covered by the
vehicle Warranty and can result in
serious injury.
1. Loosen the clamp holding the air filter assembly to the rubber hose.
2. Remove the air filter assembly securing
bolts.
3. Lift the air filter assembly to disengage
the locating pins.
4. Rotate the air filter assembly slightly in a counterclockwise direction.
5. Check the transmission fluid level.
6. Install the air filter assembly in reverse
order. Tighten the air filter assembly
securing bolts until you feel a strong
resistance.
BRAKE FLUID CHECK WARNING: Do not use any fluid
other than the recommended brake fluid
as this will reduce brake efficiency. Use
of incorrect fluid could result in the loss
of vehicle control, serious personal injury
or death. WARNING:
Only use brake fluid
from a sealed container. Contamination
with dirt, water, petroleum products or
other materials may result in brake
system damage or failure. Failure to
adhere to this warning could result in the
loss of vehicle control, serious personal
injury or death. WARNING:
Do not allow the fluid
to touch your skin or eyes. If this
happens, rinse the affected areas
immediately with plenty of water and
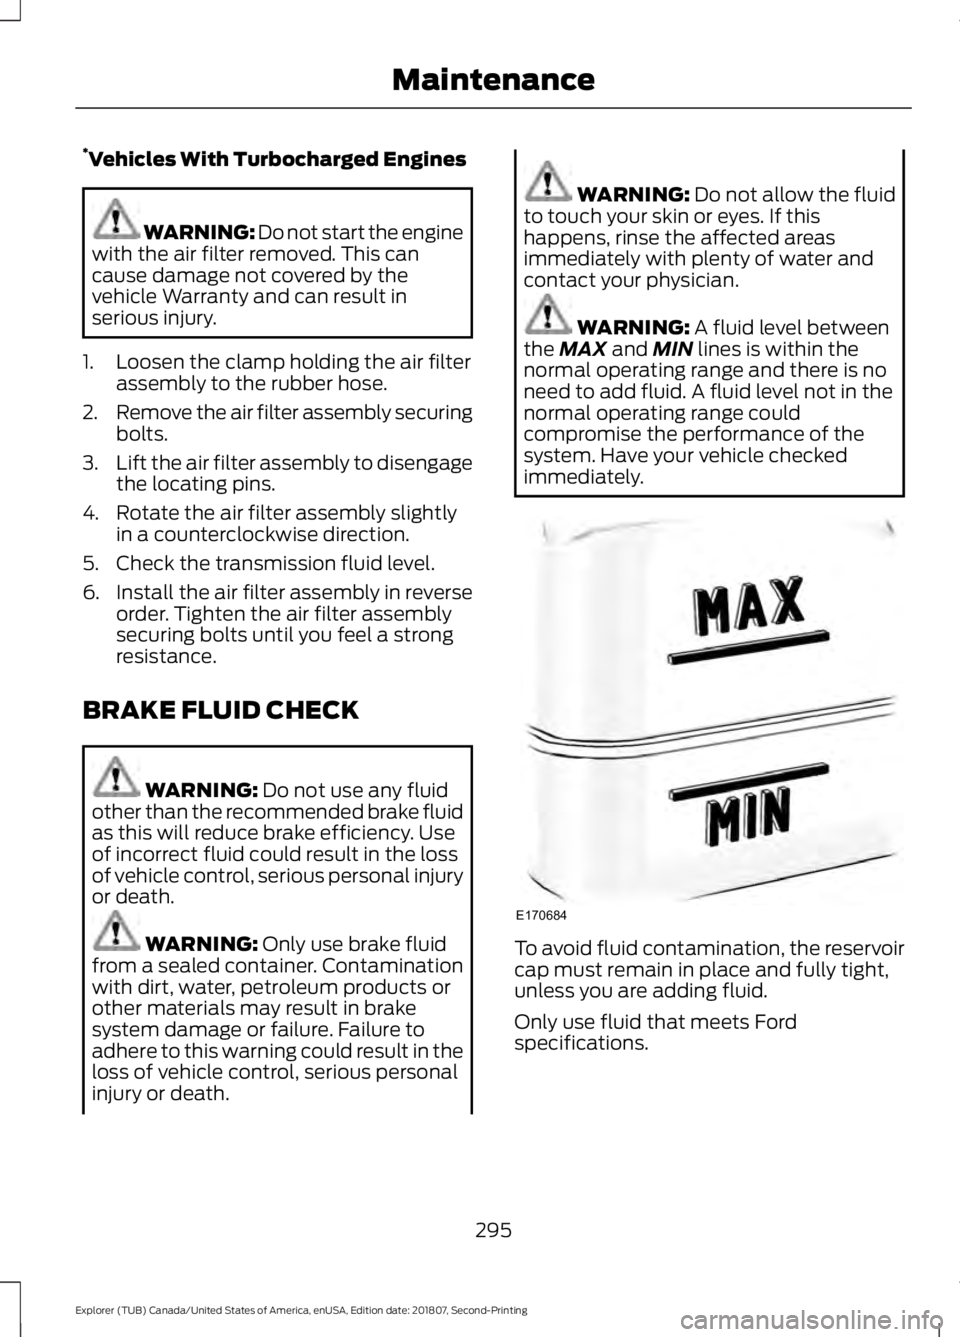
contact your physician. WARNING:
A fluid level between
the MAX and MIN lines is within the
normal operating range and there is no
need to add fluid. A fluid level not in the
normal operating range could
compromise the performance of the
system. Have your vehicle checked
immediately. To avoid fluid contamination, the reservoir
cap must remain in place and fully tight,
unless you are adding fluid.
Only use fluid that meets Ford
specifications.
295
Explorer (TUB) Canada/United States of America, enUSA, Edition date: 201807, Second-Printing MaintenanceE170684
Page 307 of 571

•
Brake and rear lamp.
• Central high mounted brake lamp.
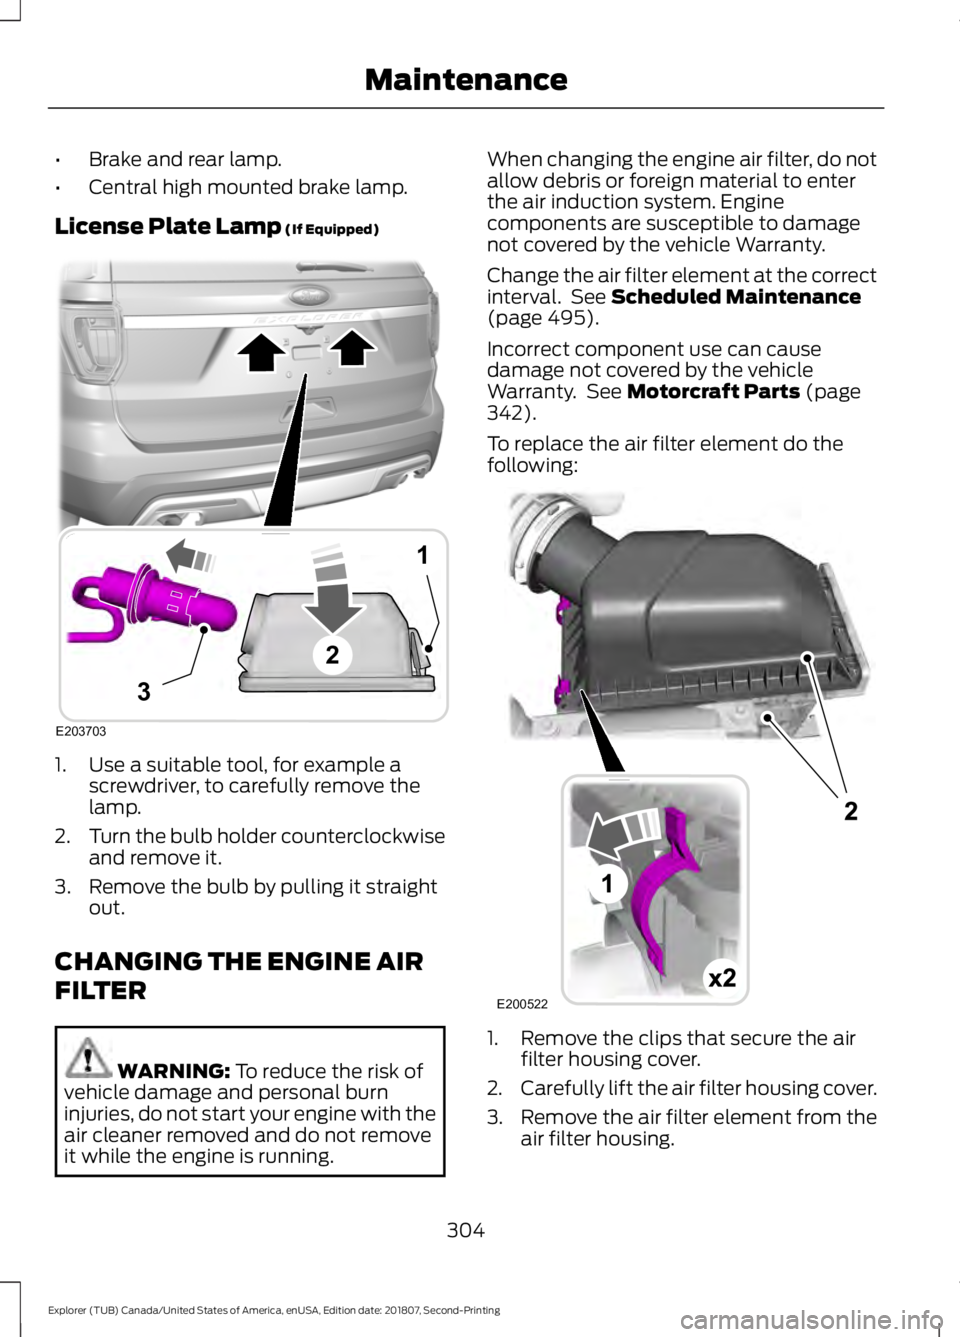
License Plate Lamp (If Equipped) 1. Use a suitable tool, for example a
screwdriver, to carefully remove the
lamp.
2. Turn the bulb holder counterclockwise
and remove it.
3. Remove the bulb by pulling it straight out.
CHANGING THE ENGINE AIR
FILTER WARNING:
To reduce the risk of
vehicle damage and personal burn
injuries, do not start your engine with the
air cleaner removed and do not remove
it while the engine is running. When changing the engine air filter, do not
allow debris or foreign material to enter
the air induction system. Engine
components are susceptible to damage
not covered by the vehicle Warranty.
Change the air filter element at the correct
interval. See
Scheduled Maintenance
(page 495).
Incorrect component use can cause
damage not covered by the vehicle
Warranty. See
Motorcraft Parts (page
342).
To replace the air filter element do the
following: 1. Remove the clips that secure the air
filter housing cover.
2. Carefully lift the air filter housing cover.
3. Remove the air filter element from the
air filter housing.
304
Explorer (TUB) Canada/United States of America, enUSA, Edition date: 201807, Second-Printing MaintenanceE203703
1
3
2 E200522
Page 308 of 571
4.
Wipe any dirt or debris from the air filter
housing and cover to make sure no dirt
gets in the engine and that you have a
good seal.
5. Install a new air filter element. Be careful not to crimp the filter element
edges between the air filter housing
and cover. This could cause filter
damage and allow unfiltered air to
enter the engine if it is not properly
seated.
6. Install the air filter housing cover.
7. Engage the clips to secure the air filter housing cover to the air filter housing.
305
Explorer (TUB) Canada/United States of America, enUSA, Edition date: 201807, Second-Printing Maintenance
Page 311 of 571

WAXING
Regular waxing is necessary to protect your
car's paint from the elements. We
recommend that you wash and wax the
painted surface once or twice a year.
When washing and waxing, park your
vehicle in a shaded area out of direct
sunlight. Always wash your vehicle before
applying wax.
•
Use a quality wax that does not contain
abrasives.
• Follow the manufacturer ’s instructions
to apply and remove the wax.
• Apply a small amount of wax in a
back-and-forth motion, not in circles.
• Do not allow wax to come in contact
with any non-body (low-gloss black)
colored trim. The wax will discolor or
stain the parts over time.
•Roof racks.
• Bumpers.
• Grained door handles.
• Side moldings.
• Mirror housings.
• Windshield cowl area.
• Do not apply wax to glass areas.
• After waxing, your car's paint should
feel smooth, and be free of streaks and
smudges.
CLEANING THE ENGINE
Engines are more efficient when they are
clean because grease and dirt buildup keep
the engine warmer than normal. When washing:
•
Take care when using a power washer
to clean the engine. The high-pressure
fluid could penetrate the sealed parts
and cause damage.
• Do not spray a hot engine with cold
water to avoid cracking the engine
block or other engine components.
• Spray Motorcraft Engine Shampoo and
Degreaser on all parts that require
cleaning and pressure rinse clean. In
Canada, use Motorcraft Engine
Shampoo.
• Never wash or rinse the engine while it
is hot or running; water in the running
engine may cause internal damage.
• Never wash or rinse any ignition coil,
spark plug wire or spark plug well, or
the area in and around these locations.
• Cover the battery, power distribution
box, and air filter assembly to prevent
water damage when cleaning the
engine.
CLEANING THE WINDOWS AND
WIPER BLADES
Car wash chemicals and environmental
fallout can result in windshield and wiper
blade contamination. Dirty windshield and
wipers will result in poor windshield wiper
operation. Keep the windshield and wiper
blades clean to maintain windshield wiper
performance.
308
Explorer (TUB) Canada/United States of America, enUSA, Edition date: 201807, Second-Printing Vehicle Care
Page 315 of 571

•
Cover interior trim to prevent fading.
• Keep all rubber parts free from oil and
solvents.
Engine
• Change the engine oil and filter prior to
storage because used engine oil
contains contaminates which may
cause engine damage.
• Start the engine every 15 days for a
minimum of 15 minutes. Run at fast idle
with the climate controls set to defrost
until the engine reaches normal
operating temperature.
• With your foot on the brake, shift
through all the gears while the engine
is running.
• We recommend that you change the
engine oil before you use your vehicle
again.
Fuel system
• Fill the fuel tank with high-quality fuel
until the first automatic shutoff of the
fuel pump nozzle.
Cooling system
• Protect against freezing temperatures.
• When removing your vehicle from
storage, check coolant fluid level.
Confirm that there are no cooling
system leaks and that fluid is at the
recommended level.
Battery
• Check and recharge as necessary. Keep
connections clean.
• If storing your vehicle for more than 30
days without recharging the battery,
we recommend that you disconnect
the battery cables to maintain battery
charge for quick starting. Note:
It is necessary to reset memory
features if battery cables are disconnected.
Brakes
• Make sure the brakes and parking brake
release fully.
Tires
• Maintain recommended air pressure.
Miscellaneous
• Make sure all linkages, cables, levers
and pins under your vehicle are covered
with grease to prevent rust.
• Move vehicles at least 25 ft (7.5 m)
every 15 days to lubricate working parts
and prevent corrosion.
Removing Vehicle From Storage
When your vehicle is ready to come out of
storage, do the following:
• Wash your vehicle to remove any dirt
or grease film build-up on window
surfaces.
• Check windshield wipers for any
deterioration.
• Check under the hood for any foreign
material that may have collected
during storage such as mice or squirrel
nests.
• Check the exhaust for any foreign
material that may have collected
during storage.
• Check tire pressures and set tire
inflation per the Tire Label.
• Check brake pedal operation. Drive
your vehicle
15 ft (4.5 m) back and
forth to remove rust build-up.
312
Explorer (TUB) Canada/United States of America, enUSA, Edition date: 201807, Second-Printing Vehicle Care