2019 FORD EXPEDITION instrument panel
[x] Cancel search: instrument panelPage 145 of 583
MANUAL CLIMATE CONTROL
Directing Air to the Instrument
Panel Air Vents
Press and release the button to
direct airflow to instrument
panel air vents.
Directing Air to the Footwell Air
Vents Press and release the button to
direct airflow to footwell air
vents.
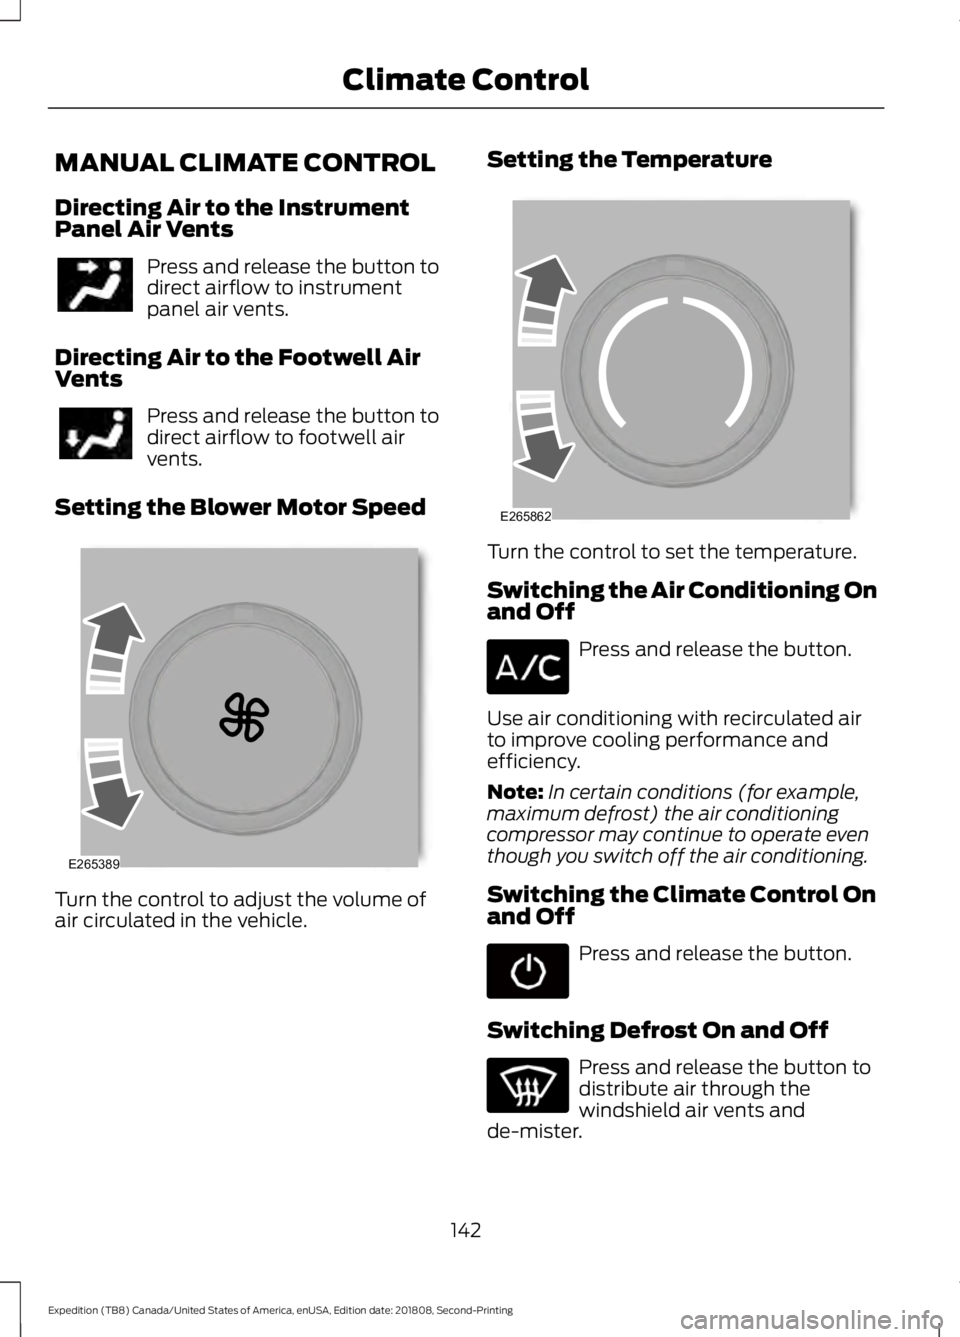
Setting the Blower Motor Speed Turn the control to adjust the volume of
air circulated in the vehicle. Setting the Temperature
Turn the control to set the temperature.
Switching the Air Conditioning On
and Off
Press and release the button.
Use air conditioning with recirculated air
to improve cooling performance and
efficiency.
Note: In certain conditions (for example,
maximum defrost) the air conditioning
compressor may continue to operate even
though you switch off the air conditioning.
Switching the Climate Control On
and Off Press and release the button.
Switching Defrost On and Off Press and release the button to
distribute air through the
windshield air vents and
de-mister.
142
Expedition (TB8) Canada/United States of America, enUSA, Edition date: 201808, Second-Printing Climate Control E265389 E265862
Page 146 of 583
Air directed to the instrument panel and
footwell air vents turns off. You can also
use this setting to defog and clear the
windshield of a thin covering of ice.
Switching Maximum Air
Conditioning On and Off
Turn the temperature control
counterclockwise to the lowest
setting for maximum cooling.
The left-hand and right-hand settings set
to LO, recirculated air flows through the
instrument panel air vents, air conditioning
turns on and the blower motor adjusts to
the highest speed.
Switching Maximum Defrost On
and Off Turn the temperature control
clockwise to the highest setting
for maximum defrosting.
The left-hand and right-hand settings set
to HI, air flows through the windshield air
vents, and the blower motor adjusts to the
highest speed.
You can also use this setting to defog and
clear the windshield of a thin covering of
ice.
Note: To prevent window fogging, you
cannot select recirculated air when
maximum defrost is on.
Note: The heated rear window also turns
on when you select maximum defrost.
Switching Recirculated Air On and
Off Press and release the button to
switch between outside air and
recirculated air. The air currently in the passenger
compartment recirculates. This may
reduce the time needed to cool the interior
(when used with A/C) and reduce
unwanted odors from entering your vehicle.
Note: Recirculated air may turn off (or
prevent you from switching on) in all air flow
modes except
MAX A/C to reduce the risk
of fogging. Recirculation may also turn on
and off in various air distribution control
combinations during hot weather to improve
cooling efficiency.
Locking the Rear Climate Control Press and release the button.
When illuminated, you can only operate
the rear passenger settings through the
front controls.
Setting the Rear Blower Motor
Speed Press and release + or - to adjust
the volume of air circulated in
the rear passenger
compartment.
Setting the Rear Temperature Press and release
+ or - to set
the temperature in the rear
passenger compartment.
Switching the Rear Climate
Control On and Off Press and release the button.
143
Expedition (TB8) Canada/United States of America, enUSA, Edition date: 201808, Second-Printing Climate Control E266664 E265400
Page 147 of 583
AUTOMATIC CLIMATE
CONTROL
Note:
The touchscreen system controls
some of the climate features.
Accessing Rear Climate Controls Press and release the button to
access additional controls for
the rear climate system. See
Climate Control (page 142).
Directing Air to the Instrument
Panel Air Vents Press and release the button to
direct airflow to instrument
panel air vents.
Directing Air to the Footwell Air
Vents Press and release the button to
direct airflow to footwell air
vents.
Setting the Blower Motor Speed Press and release + or - to adjust
the volume of air circulated in
the vehicle. Setting the Temperature Turn the control on the left-hand side of
the climate control to set the left-hand
temperature.
Note:
This control also sets the right-hand
side temperature when you switch off dual
zone mode.
Turn the control on the right-hand side of
the climate control to set the right-hand
temperature.
Switching Auto Mode On and Off Press and release the button to
cycle through the automatic
settings and off, then set the
temperature.
When three indicators are on, the blower
motor adjusts to the highest speed to
reach the selected temperature as quickly
as possible.
When two indicators are on, the blower
motor adjusts to a medium speed to reach
the selected temperature with a reduced
amount of cabin noise.
144
Expedition (TB8) Canada/United States of America, enUSA, Edition date: 201808, Second-Printing Climate ControlE270447 E265862
Page 148 of 583
When one indicator is on, the blower motor
adjusts to the lowest speed to reach the
selected temperature with the least
amount of cabin noise.
Note:
The system starts at the previous fan
setting when you switch on AUTO.
Note: You can also switch off dual zone
mode by pressing and holding the button
for more than two seconds.
Switching Defrost On and Off Press and release the button to
distribute air through the
windshield air vents and
de-mister.
Air directed to the instrument panel and
footwell air vents turns off. You can also
use this setting to defog and clear the
windshield of a thin covering of ice.
Switching the Air Conditioning On
and Off Press and release the button.
Use air conditioning with recirculated air
to improve cooling performance and
efficiency.
Note: In certain conditions (for example,
maximum defrost) the air conditioning
compressor may continue to operate even
though you switch off the air conditioning.
Switching the Climate Control On
and Off Press and release the button. Switching Dual Zone Mode On and
Off Press and release the button to
switch on temperature control
for the right-hand side of the
vehicle.
Switching the Heated Seats On
and Off Press and release the button to
cycle through the various heat
settings and off.
See
Heated Seats (page 166).
Switching Maximum Air
Conditioning On and Off Press and release the button for
maximum cooling.
The left-hand and right-hand settings set
to LO, recirculated air flows through the
instrument panel air vents, air conditioning
turns on and the blower motor adjusts to
the highest speed.
Switching Maximum Defrost On
and Off Press and release the button for
maximum defrosting.
The left-hand and right-hand settings set
to HI, air flows through the windshield air
vents, and the blower motor adjusts to the
highest speed.
You can also use this setting to defog and
clear the windshield of a thin covering of
ice.
Note: To prevent window fogging, you
cannot select recirculated air when
maximum defrost is on.
Note: The heated rear window also turns
on when you select maximum defrost.
145
Expedition (TB8) Canada/United States of America, enUSA, Edition date: 201808, Second-Printing Climate Control E265280
Page 149 of 583
Switching Recirculated Air On and
Off
Press and release the button to
switch between outside air and
recirculated air.
The air currently in the passenger
compartment recirculates. This may
reduce the time needed to cool the interior
(when used with A/C) and reduce
unwanted odors from entering your vehicle.
Note: Recirculated air may turn off (or
prevent you from switching on) in all air flow
modes except
MAX A/C to reduce the risk
of fogging. Recirculation may also turn on
and off in various air distribution control
combinations during hot weather to improve
cooling efficiency.
Switching the Ventilated Seats On
and Off Press and release the button to
cycle through the various
ventilated seat settings and off.
See
Climate Controlled Seats (page 167).
HINTS ON CONTROLLING THE
INTERIOR CLIMATE
General Hints
Note: Prolonged use of recirculated air may
cause the windows to fog up.
Note: You may feel a small amount of air
from the footwell air vents regardless of the
air distribution setting.
Note: To reduce humidity build-up inside
your vehicle, do not drive with the system
switched off or with recirculated air always
switched on. Note:
Do not place objects under the front
seats as this may interfere with the airflow
to the rear seats.
Note: Remove any snow, ice or leaves from
the air intake area at the base of the
windshield.
Note: To improve the time to reach a
comfortable temperature in hot weather,
drive with the windows open until you feel
cold air through the air vents.
Manual Climate Control
Note: To reduce fogging of the windshield
during humid weather, adjust the air
distribution control to the windshield air
vents position.
Automatic Climate Control
Note: Adjusting the settings when your
vehicle interior is extremely hot or cold is
not necessary. The system automatically
adjusts to heat or cool the interior to your
selected temperature as quickly as possible.
For the system to function efficiently, the
instrument panel and side air vents should
be fully open.
Note: If you select
AUTO during cold
temperatures, the system directs airflow to
the windshield and side window vents. In
addition, the fan may run at a slower speed
until the engine warms up.
Note: If you select
AUTO during hot
temperatures and the inside of the vehicle
is hot, the system automatically uses
recirculated air to maximize interior cooling.
Fan speed may also reduce until the air
cools.
146
Expedition (TB8) Canada/United States of America, enUSA, Edition date: 201808, Second-Printing Climate Control E268558
Page 151 of 583
Recommended Settings for Cooling
Automatic climate control
Manual climate control
Press AUTO.
Adjust the fan speed to the center
setting.
1
Adjust the temperature control to the
desired setting. Use
72°F (22°C) as a
starting point, then adjust the setting as
necessary.
Adjust the temperature control to the
midway point of the cold settings.
2
Direct air to the instrument panel using
the air distribution buttons.
3
Defogging the Side Windows in Cold Weather Automatic climate control
Manual climate control
Press the defrost button.
Direct air to the windshield using the air
distribution buttons.
1
Adjust the temperature control to the
desired setting. Use
72°F (22°C) as a
starting point, then adjust the setting as
necessary.
Press A/C.
2
Adjust the temperature control to the
desired setting.
3
Adjust the fan speed to the highest
setting.
4
REAR PASSENGER CLIMATE
CONTROLS - VEHICLES WITH:
AUTOMATIC TEMPERATURE
CONTROL
Directing Air to the Overhead Air
Vents Press and release the button to
direct airflow to the overhead air
vents. Directing Air to the Rear Footwell
Air Vents Press and release the button to
direct airflow to rear footwell air
vents.
Rear Climate Control Lock
Indicator When illuminated, you can only
operate the rear passenger
settings through the front
controls.
148
Expedition (TB8) Canada/United States of America, enUSA, Edition date: 201808, Second-Printing Climate Control
Page 159 of 583
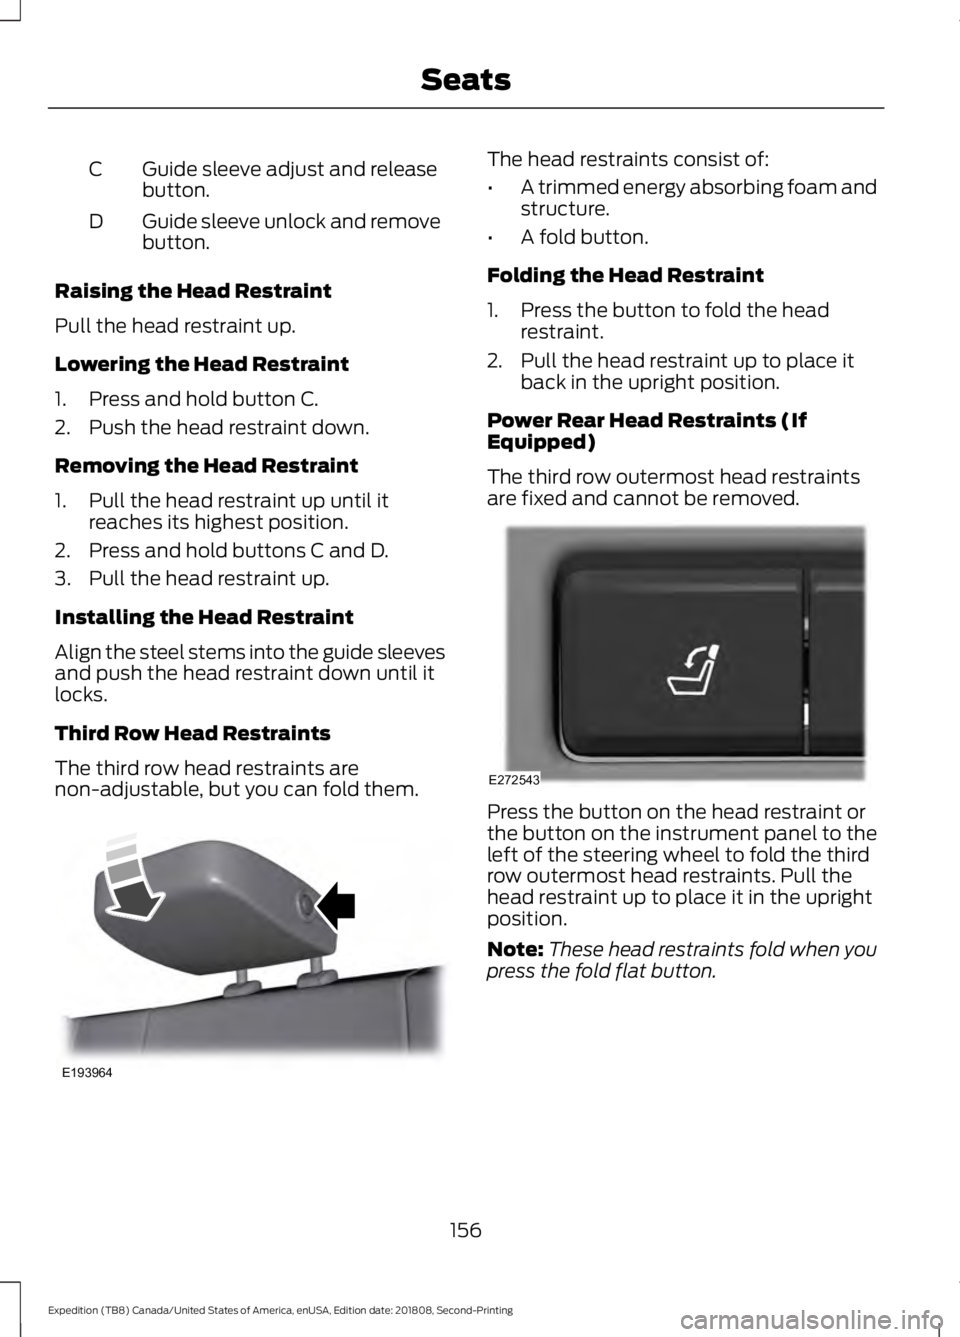
Guide sleeve adjust and release
button.
C
Guide sleeve unlock and remove
button.
D
Raising the Head Restraint
Pull the head restraint up.
Lowering the Head Restraint
1. Press and hold button C.
2. Push the head restraint down.
Removing the Head Restraint
1. Pull the head restraint up until it reaches its highest position.
2. Press and hold buttons C and D.
3. Pull the head restraint up.
Installing the Head Restraint
Align the steel stems into the guide sleeves
and push the head restraint down until it
locks.
Third Row Head Restraints
The third row head restraints are
non-adjustable, but you can fold them. The head restraints consist of:
•
A trimmed energy absorbing foam and
structure.
• A fold button.
Folding the Head Restraint
1. Press the button to fold the head restraint.
2. Pull the head restraint up to place it back in the upright position.
Power Rear Head Restraints (If
Equipped)
The third row outermost head restraints
are fixed and cannot be removed. Press the button on the head restraint or
the button on the instrument panel to the
left of the steering wheel to fold the third
row outermost head restraints. Pull the
head restraint up to place it in the upright
position.
Note:
These head restraints fold when you
press the fold flat button.
156
Expedition (TB8) Canada/United States of America, enUSA, Edition date: 201808, Second-Printing SeatsE193964 E272543
Page 177 of 583

12 Volt DC Power Point
WARNING: Do not plug optional
electrical accessories into the cigar
lighter socket. Incorrect use of the cigar
lighter can cause damage not covered
by the vehicle warranty, and can result
in fire or serious injury.
Note: When you switch the ignition on, you
can use the socket to power 12 volt
appliances with a maximum current rating
of 15 amps.
If the power supply does not work after you
switch the ignition off, switch the ignition
on.
Note: Do not hang any accessory from the
accessory plug.
Note: Do not use the power point over the
vehicle capacity of 12 volt DC 180 watts or
a fuse may blow.
Note: Always keep the power point caps
closed when not in use.
Do not insert objects other than an
accessory plug into the power point. This
damages the power point and may blow
the fuse.
Run the vehicle for full capacity use of the
power point.
To prevent the battery from running out of
charge:
• Do not use the power point longer than
necessary when the engine is not
running.
• Do not leave devices plugged in
overnight or when you park your vehicle
for extended periods. USB Port and Power Point
Locations
USB Ports and Power Points may be in the
following locations:
•
On the lower instrument panel.
• Inside the center console.
• On the front of the center console.
• On the rear of the center console.
• In the cargo area.
• On the passenger side floor panel.
• 3rd row on the quarter trim panels.
Note: Some of the USB ports may not have
data transfer capabilities.
110 Volt AC Power Point
(If Equipped) WARNING: Do not keep electrical
devices plugged in the power point
whenever the device is not in use. Do not
use any extension cord with the 110 volt
AC power point, since it will defeat the
safety protection design. Doing so may
cause the power point to overload due
to powering multiple devices that can
reach beyond the 150 watt load limit and
could result in fire or serious injury.
Note: The power point turns off when you
switch off the ignition, when the vehicle is
not in accessory mode or when the battery
voltage drops below 11 volts.
You can use the power point for electric
devices that require up to 150 watts. It is
on the rear of the center console.
174
Expedition (TB8) Canada/United States of America, enUSA, Edition date: 201808, Second-Printing Auxiliary Power Points