2019 FORD E-450 Capacities
[x] Cancel search: CapacitiesPage 6 of 329

Driving Through Water
................................117
Floor Mats ........................................................
117
Roadside Emergencies
Roadside Assistance ...................................
119
Hazard Flashers ...........................................
120
Fuel Shutoff ...................................................
120
Jump Starting the Vehicle .........................
121
Transporting the Vehicle ...........................
123
Customer Assistance
Getting the Services You Need ...............
124
In California (U.S. Only) .............................
125
The Better Business Bureau (BBB) Auto Line Program (U.S. Only) .....................
126
Utilizing the Mediation/Arbitration Program (Canada Only) ........................
127
Getting Assistance Outside the U.S. and Canada .........................................................
127
Ordering Additional Owner's Literature ........................................................................\
.
129
Reporting Safety Defects (U.S. Only) ........................................................................\
.
129
Reporting Safety Defects (Canada Only) ........................................................................\
.
129
Fuses
Fuse Specification Chart ............................
131
Changing a Fuse ..........................................
139
Maintenance
General Information ....................................
141
Opening and Closing the Hood ...............
141
Under Hood Overview ...............................
142
Engine Oil Dipstick ......................................
143
Engine Oil Check ..........................................
143
Oil Change Indicator Reset ......................
144
Engine Coolant Check ...............................
144
Automatic Transmission Fluid Check ........................................................................\
.
149
Brake Fluid Check ........................................
152Power Steering Fluid Check
.....................
152
Washer Fluid Check ....................................
153
Changing the 12V Battery .........................
153
Checking the Wiper Blades ......................
155
Changing the Wiper Blades .....................
155
Adjusting the Headlamps ........................
156
Removing a Headlamp ..............................
157
Changing a Bulb ...........................................
157
Changing the Engine Air Filter ................
159
Vehicle Care
General Information ...................................
160
Cleaning Products ......................................
160
Cleaning the Exterior .................................
160
Waxing .............................................................
162
Cleaning the Engine ....................................
162
Cleaning the Windows and Wiper Blades ........................................................................\
.
162
Cleaning the Interior ...................................
163
Cleaning the Instrument Panel and Instrument Cluster Lens .......................
163
Cleaning Leather Seats .............................
164
Repairing Minor Paint Damage ..............
165
Cleaning the Wheels ..................................
165
Vehicle Storage ............................................
165
Wheels and Tires
General Information ...................................
168
Tire Care ..........................................................
169
Using Snow Chains .....................................
187
Tire Pressure Monitoring System ..........
188
Changing a Road Wheel ...........................
192
Technical Specifications ..........................
196
Capacities and Specifications
Engine Specifications - 6.2L ...................
198
Engine Specifications - 6.8L ...................
198
Motorcraft Parts - 6.2L ..............................
199
Motorcraft Parts - 6.8L ............................
200
3
E-Series (TE4) Canada/United States of America, enUSA, Edition date: 201804, Second-Printing Table of Contents
Page 7 of 329

Vehicle Identification Number
................201
Vehicle Certification Label ......................
202
Transmission Code Designation ...........
202
Capacities and Specifications - 6.2L ........................................................................\
203
Capacities and Specifications - 6.8L ........................................................................\
207
Bulb Specification Chart ...........................
212
Audio System
General Information ...................................
214
Audio Unit - Vehicles With: AM/FM ......
215
Audio Unit - Vehicles With: AM/FM/CD/ SYNC ............................................................
216
Digital Radio ..................................................
219
Satellite Radio ...............................................
221
USB Port .........................................................
224
Media Hub .....................................................
224
SYNC™
General Information ..................................
225
Using Voice Recognition ...........................
227
Using SYNC™ With Your Phone ...........
230
SYNC™ Applications and Services ......
243
SYNC™ AppLink ™....................................
250
Using SYNC™ With Your Media Player ........................................................................\
252
SYNC™ Troubleshooting ........................
262
Accessories
Accessories .....................................................
271
Auxiliary Switches .......................................
272
Ford Protect
Ford Protect ..................................................
274
Scheduled Maintenance
General Maintenance Information .......
276
Normal Scheduled Maintenance ..........
279Special Operating Conditions Scheduled
Maintenance .............................................
281
Scheduled Maintenance Record ..........
283
Appendices
Electromagnetic Compatibility .............
294
End User License Agreement ................
296
4
E-Series (TE4) Canada/United States of America, enUSA, Edition date: 201804, Second-Printing Table of Contents
Page 104 of 329

WARNING: Exceeding the
Safety Compliance Certification
label vehicle weight limits can
adversely affect the
performance and handling of
your vehicle, cause vehicle
damage and can result in the
loss of control of your vehicle,
serious personal injury or death.
Maximum Loaded Trailer
Weight
Maximum loaded trailer weight is
the highest possible weight of a
fully loaded trailer the vehicle can
tow. Consult an authorized dealer
(or the RV and Trailer Towing
Guide available at an authorized
dealer) for more detailed
information.
GCWR (Gross Combined
Weight Rating)
GCWR is the maximum allowable
weight of the vehicle and the
loaded trailer, including all cargo
and passengers, that the vehicle
can handle without risking
damage. (Important: The towing
vehicle ’s braking system is rated
for operation at Gross Vehicle
Weight Rating, not at Gross
Combined Weight Rating.)
Separate functional brakes should
be used for safe control of towed
vehicles and for trailers where the
Gross Combined Weight of the
towing vehicle plus the trailer
exceed the Gross Vehicle Weight
Rating of the towing vehicle. The gross combined weight must
never exceed the Gross Combined
Weight Rating.
Note:
For trailer towing
information refer to the RV and
Trailer Towing Guide available at
an authorized dealer. WARNING:
Do not exceed
the GVWR or the GAWR
specified on the certification
label. WARNING:
Do not use
replacement tires with lower
load carrying capacities than the
original tires because they may
lower your vehicle's GVWR and
GAWR limitations. Replacement
tires with a higher limit than the
original tires do not increase the
GVWR and GAWR limitations. WARNING:
Exceeding any
vehicle weight rating can
adversely affect the
performance and handling of
your vehicle, cause vehicle
damage and can result in the
loss of control of your vehicle,
serious personal injury or death.
Steps for determining the
correct load limit:
1. Locate the statement "The combined weight of occupants
and cargo should never exceed
XXX kg or XXX lb." on your
vehicle ’s placard.
101
E-Series (TE4) Canada/United States of America, enUSA, Edition date: 201804, Second-Printing Load Carrying
Page 117 of 329

•
When stopped in congested or heavy
traffic during hot weather, place the
gearshift in position P to aid engine and
transmission cooling and to help A/C
performance.
• Switch off the speed control with
heavy loads or in hilly terrain. The
speed control may turn off
automatically when you are towing on
long, steep grades.
• Shift to a lower gear when driving down
a long or steep hill. Do not apply the
brakes continuously, as they may
overheat and become less effective.
• If your transmission is equipped with a
Grade Assist or Tow/Haul feature, use
this feature when towing. This provides
engine braking and helps eliminate
excessive transmission shifting for
optimum fuel economy and
transmission cooling.
• If your vehicle is equipped with
AdvanceTrac with RSC, this system
may turn on during typical cornering
maneuvers with a heavily loaded trailer.
This is normal. Turning the corner at a
slower speed while towing may reduce
this tendency.
• If you are towing a trailer frequently in
hot weather, hilly conditions, at the
gross combined weight rating (or any
combination of these factors), consider
refilling your rear axle with synthetic
gear lubricant. See Capacities and
Specifications (page 198).
• Allow more distance for stopping with
a trailer attached. Anticipate stops and
brake gradually.
• Avoid parking on a grade. However, if
you must park on a grade:
1. Turn the steering wheel to point your vehicle tires away from traffic flow.
2. Set your vehicle parking brake.
3. Place the automatic transmission in position
P. 4. Place wheel chocks in front and back
of the trailer wheels. (Chocks not
included with vehicle.)
Your vehicle may be equipped with a
temporary or conventional spare tire. A
"temporary" spare tire is different in size
(diameter or width), tread-type
(All-Season or All Terrain) or is from a
different manufacturer than the road tires
on your vehicle. Consult information on the
tire label or Safety Compliance label for
limitations when using.
Launching or Retrieving a Boat or
Personal Watercraft (PWC)
Note: Disconnect the wiring to the trailer
before
backing the trailer into the water.
Note: Reconnect the wiring to the trailer
after
removing the trailer from the water.
When backing down a ramp during boat
launching or retrieval:
• Do not allow the static water level to
rise above the bottom edge of the rear
bumper.
• Do not allow waves to break higher
than
6 in (15 cm) above the bottom
edge of the rear bumper.
Exceeding these limits may allow water to
enter vehicle components:
• Causing internal damage to the
components.
• Affecting driveability, emissions and
reliability.
Replace the rear axle lubricant anytime
the rear axle has been submerged in water.
Water may have contaminated the rear
axle lubricant, which is not normally
checked or changed unless a leak is
suspected or other axle repair is required.
114
E-Series (TE4) Canada/United States of America, enUSA, Edition date: 201804, Second-Printing Towing
Page 146 of 329

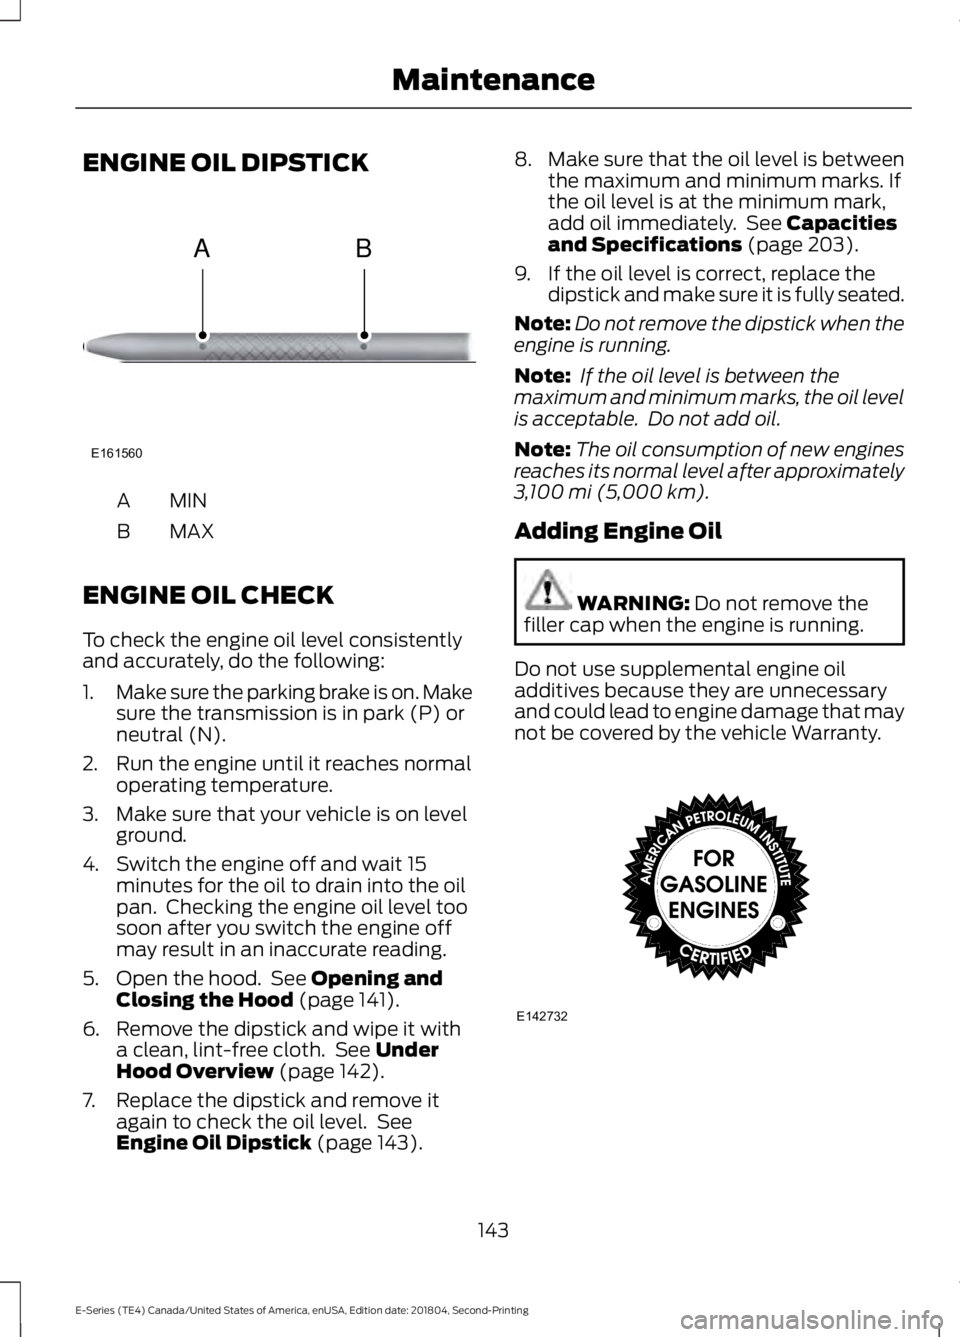
ENGINE OIL DIPSTICK
MINA
MAX
B
ENGINE OIL CHECK
To check the engine oil level consistently
and accurately, do the following:
1. Make sure the parking brake is on. Make
sure the transmission is in park (P) or
neutral (N).
2. Run the engine until it reaches normal operating temperature.
3. Make sure that your vehicle is on level ground.
4. Switch the engine off and wait 15 minutes for the oil to drain into the oil
pan. Checking the engine oil level too
soon after you switch the engine off
may result in an inaccurate reading.
5. Open the hood. See Opening and
Closing the Hood (page 141).
6. Remove the dipstick and wipe it with a clean, lint-free cloth. See
Under
Hood Overview (page 142).
7. Replace the dipstick and remove it again to check the oil level. See
Engine Oil Dipstick
(page 143). 8.
Make sure that the oil level is between
the maximum and minimum marks. If
the oil level is at the minimum mark,
add oil immediately. See
Capacities
and Specifications (page 203).
9. If the oil level is correct, replace the dipstick and make sure it is fully seated.
Note: Do not remove the dipstick when the
engine is running.
Note: If the oil level is between the
maximum and minimum marks, the oil level
is acceptable. Do not add oil.
Note: The oil consumption of new engines
reaches its normal level after approximately
3,100 mi (5,000 km)
.
Adding Engine Oil WARNING:
Do not remove the
filler cap when the engine is running.
Do not use supplemental engine oil
additives because they are unnecessary
and could lead to engine damage that may
not be covered by the vehicle Warranty. 143
E-Series (TE4) Canada/United States of America, enUSA, Edition date: 201804, Second-Printing MaintenanceE161560
AB E142732
Page 147 of 329

Only use oils certified for gasoline engines
by the American Petroleum Institute (API).
An oil with this trademark symbol
conforms to the current engine and
emission system protection standards and
fuel economy requirements of the
International Lubricants Specification
Advisory Committee (ILSAC).
To top up the engine oil level do the
following:
1. Clean the area surrounding the engine
oil filler cap before you remove it.
2. Remove the engine oil filler cap. See Under Hood Overview (page 142).
Turn it counterclockwise and remove
it.
3. Add engine oil that meets Ford specifications. See
Capacities and
Specifications (page 203). You may
have to use a funnel to pour the engine
oil into the opening.
4. Recheck the oil level.
5. If the oil level is correct, replace the dipstick and make sure it is fully seated.
6. Replace the engine oil filler cap. Turn it clockwise until you feel a strong
resistance.
Note: Do not add oil further than the
maximum mark. Oil levels above the
maximum mark may cause engine damage.
Note: Make sure you install the oil filler cap
correctly.
Note: Soak up any spillage with an
absorbent cloth immediately.
OIL CHANGE INDICATOR
RESET
Resetting the Oil Life Monitoring
System
Only reset the oil life monitoring system
after changing the engine oil and oil filter. To reset the oil life monitoring system do
the following:
1.
Switch the ignition on. Do not start the
engine.
2. Fully press the accelerator and brake pedals at the same time.
3. Keep the accelerator and brake pedals
fully pressed.
4. After three seconds, a message displays confirming the reset procedure
is in progress.
5. After 25 seconds, a message displays confirming the reset procedure is
complete.
6. Release the accelerator and brake pedals.
7. Switch the ignition off.
ENGINE COOLANT CHECK WARNING:
Do not remove the
coolant reservoir cap when the engine is
on or the cooling system is hot. Wait 10
minutes for the cooling system to cool
down. Cover the coolant reservoir cap
with a thick cloth to prevent the
possibility of scalding and slowly remove
the cap. Failure to follow this instruction
could result in personal injury. WARNING:
Do not put coolant in
the windshield washer reservoir. If
sprayed on the windshield, coolant could
make it difficult to see through the
windshield.
144
E-Series (TE4) Canada/United States of America, enUSA, Edition date: 201804, Second-Printing Maintenance
Page 148 of 329

WARNING: To reduce the risk of
personal injury, make sure the engine is
cool before unscrewing the coolant
pressure relief cap. The cooling system
is under pressure. Steam and hot liquid
can come out forcefully when you loosen
the cap slightly. WARNING:
Do not add coolant
further than the MAX mark.
When the engine is cold, check the
concentration and level of the coolant at
the intervals listed in the scheduled
maintenance information. See Scheduled
Maintenance
(page 276).
Note: Make sure that the coolant level is
between the
MIN and MAX marks on the
coolant reservoir.
Note: Coolant expands when it is hot. The
level may extend beyond the
MAX mark.
Maintain coolant concentration within
48% to 50%, which equates to a freeze
point between
-29°F (-34°C) and -35°F
(-37°C). Coolant concentration should be
checked using a refractometer. We do not
recommend the use of hydrometers or
coolant test strips for measuring coolant
concentration.
Adding Coolant WARNING:
Do not add engine
coolant when the engine is hot. Failure
to follow this instruction could result in
personal injury. WARNING:
Do not remove the
coolant reservoir cap when the engine is
on or the cooling system is hot. Wait 10
minutes for the cooling system to cool
down. Cover the coolant reservoir cap
with a thick cloth to prevent the
possibility of scalding and slowly remove
the cap. Failure to follow this instruction
could result in personal injury.
Note: Automotive fluids are not
interchangeable. Do not use coolant or
windshield washer fluid outside of its
specified function and vehicle location.
Note: Do not use stop leak pellets, cooling
system sealants, or non-specified additives
as they can cause damage to the engine
cooling or heating systems. Resulting
component damage may not be covered by
the vehicle Warranty.
It is very important to use prediluted
coolant approved to the correct
specification in order to avoid plugging the
small passageways in the engine cooling
system. See
Capacities and
Specifications (page 198). Do not mix
different colors or types of coolant in your
vehicle. Mixing of engine coolants or using
an incorrect coolant may harm the engine
or cooling system components and may
not be covered by the vehicle Warranty.
Note: If prediluted coolant is not available,
use the approved concentrated coolant
diluting it to 50/50 with distilled water. See
Capacities and Specifications (page 198).
Using water that has not been deionized
may contribute to deposit formation,
corrosion and plugging of the small cooling
system passageways.
145
E-Series (TE4) Canada/United States of America, enUSA, Edition date: 201804, Second-Printing Maintenance
Page 149 of 329

Note:
Coolants marketed for all makes and
models may not be approved to Ford
specifications and may cause damage to
the cooling system. Resulting component
damage may not be covered by the vehicle
Warranty.
If the coolant level is at or below the
minimum mark, add prediluted coolant
immediately.
To top up the coolant level do the
following:
1. Unscrew the cap slowly. Any pressure escapes as you unscrew the cap.
2. Add prediluted coolant approved to the correct specification. See
Capacities and Specifications (page
198).
3. Add enough prediluted coolant to reach the correct level.
4. Replace the coolant reservoir cap, turn
it clockwise until you feel a strong
resistance.
5. Check the coolant level in the coolant reservoir the next few times you drive
your vehicle. If necessary, add enough
prediluted engine coolant to bring the
coolant level to the correct level.
If you have to add more than
1.1 qt (1 L) of
engine coolant per month, have your
vehicle checked as soon as possible.
Operating an engine with a low level of
coolant can result in engine overheating
and possible engine damage.
Note: During normal vehicle operation, the
coolant may change color, and slightly
darken. As long as the coolant is clear and
uncontaminated, this color change does not
indicate the coolant has degraded nor does
it require the coolant to be drained, the
system to be flushed, or the coolant to be
replaced. In case of emergency, you can add a large
amount of water without coolant in order
to reach a vehicle service location. In this
instance, qualified personnel:
1. Must drain the cooling system.
2. Chemically clean the coolant system.
3. Refill with coolant that meets the
correct specification. See
Capacities
and Specifications (page 198).
Water alone, without coolant, can cause
engine damage from corrosion,
overheating or freezing.
Do not use the following as a coolant
substitute:
• Alcohol.
• Methanol.
• Brine.
• Any coolant mixed with alcohol or
methanol antifreeze.
Alcohol and other liquids can cause engine
damage from overheating or freezing.
Do not add extra inhibitors or additives to
the coolant. These can be harmful and
compromise the corrosion protection of
the coolant.
Recycled Coolant
We do not recommend the use of recycled
coolant as an approved recycling process
is not yet available.
Dispose of used engine coolant in an
appropriate manner. Follow your
community ’s regulations and standards
for recycling and disposing of automotive
fluids.
146
E-Series (TE4) Canada/United States of America, enUSA, Edition date: 201804, Second-Printing Maintenance