2019 FIAT TIPO 4DOORS high
[x] Cancel search: highPage 4 of 252
READ THIS CAREFULLY
REFUELLINGPetrol engines: only refuel with unleaded petrol with octane rating (RON) not less than 95 in compliance with the European specification
EN228.
Diesel engines: refuel only with Diesel fuel motor vehicles conforming to the European specification EN590. The use of other products or
mixtures may damage the engine beyond repair and consequently invalidate the warranty, due to the damage caused.
LPG engines: refuel only with LPG for motor vehicles conforming to the European specification EN589. The use of other products or mixtures
may damage the engine beyond repair and consequently invalidate the warranty, due to the damage caused.
For further details on the use of the correct fuel see the "Refuelling the vehicle" paragraph in the "Starting and driving" chapter.
STARTING THE ENGINE
Versions with manual gearbox (petrol engines):make sure that the handbrake is engaged; set the gear lever to neutral, fully depress the
clutch pedal without pressing the accelerator, then turn the ignition key to AVV and release the key as soon as the engine has started.
Versions with manual gearbox (Diesel engines): make sure that the handbrake is engaged; set the gear lever to neutral, fully depress the
clutch pedal without pressing the accelerator, then turn the ignition key to MAR and wait for the
warning light to switch off. Turn the
ignition key to AVV and release it as soon as the engine starts.
Versions with automatic transmission(where present): make sure that the handbrake is engaged and that the gear lever is in P (Parking) or
N (Neutral), depress the brake pedal, without pressing the accelerator pedal, then turn the ignition key to AVV or press the ignition device
button; release the key or the button as soon as the engine has started.
PARKING ON FLAMMABLE MATERIAL
The catalytic converter develops high temperatures during operation. Do not park the car on grass, dry leaves, pine needles or other flammable
material: fire hazard.
RESPECTING THE ENVIRONMENT
The vehicle is fitted with a system that carries out a continuous diagnosis of the emission-related components in order to help protect the
environment.
ELECTRICAL ACCESSORIES
If, after buying the vehicle, you decide to add electrical accessories (with the risk of gradually draining the battery), contact a Fiat Dealership.
They can calculate the overall electrical requirement and check that the vehicle's electric system can support the required load.
SCHEDULED SERVICING
Correct maintenance of the car is essential for ensuring that it maintains its performance and its safety features, its environmental friendliness
and low running costs for a long time to come.
Page 18 of 252

operate release device 1 (right or left)
fig. 12 to fold the required backrest
section.
Total luggage compartment
extension
Tilting the rear seat completely forwards
allows maximum loading volume.
Proceed as follows:
completely lower the rear seat head
restraints;
operate release devices 1 to fold
both the right and the left backrest
section, following as previously
described.
Repositioning the backrests
13)
Raise the backrests and push them
back until the locking click of both
retainers is heard. Visually check that
the red marks have disappeared from
the release devices 1 fig. 12.The presence of the red notches
indicates that the backrest is not
secured. In the left buckle (without the
red unlock button on the slot) insert the
first tongue which is located at the end
of the diagonal section of the seat belt
of the central seat.
IMPORTANT When returning the rear
seat from the tilted position to the
normal operating position, take care to
refit the seat belt correctly, in order to
guarantee prompt availability every
time.
WARNING
11)All adjustments must be made with the
car stationary.
12)Once you have released the
adjustment lever, always check that the
seat is locked on the guides by trying to
move it back and forth. If the seat is not
locked into place, it may unexpectedly slide
and cause the driver to lose control of the
car.
13)Make sure the backrests are properly
secured at both sides (not visible "red
notches) to prevent them from moving
forward, in the event of sharp braking, with
possible impact with of the passengers.14)People who can't feel skin pain due to
advanced age, chronic diseases, diabetes,
spine damage, medication, alcohol,
exhaustion, or other physical conditions,
must be careful when using the seat
heater. It could cause burns even at a low
temperature, especially when used for long
periods of time.
15)Do not place objects on the seat or on
the backrest that may isolate the heat,
such as a cover or a pillow. It may cause
the seat heating device to overheat. Sitting
on an overheated seat may cause severe
burns due to the increase in temperature of
the seat surface.
IMPORTANT
4)The fabric upholstery of the seats has
been designed to withstand long-term wear
deriving from normal use of the car. Some
precautions are however required. Avoid
prolonged and/or excessive rubbing
against clothing accessories such as metal
buckles and Velcro strips which, by
applying a high pressure on the fabric in a
small area, could cause it to break, thereby
damaging the upholstery.
1204066J0007EM
16
KNOWING YOUR CAR
Page 22 of 252
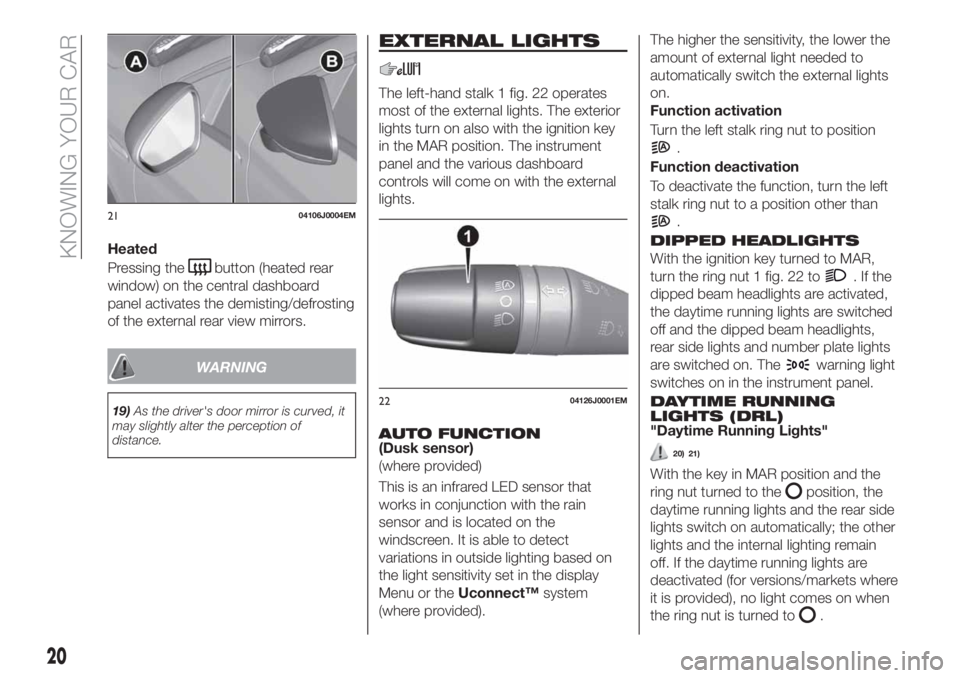
Heated
Pressing the
button (heated rear
window) on the central dashboard
panel activates the demisting/defrosting
of the external rear view mirrors.
WARNING
19)As the driver's door mirror is curved, it
may slightly alter the perception of
distance.
EXTERNAL LIGHTS
The left-hand stalk 1 fig. 22 operates
most of the external lights. The exterior
lights turn on also with the ignition key
in the MAR position. The instrument
panel and the various dashboard
controls will come on with the external
lights.
AUTO FUNCTION(Dusk sensor)
(where provided)
This is an infrared LED sensor that
works in conjunction with the rain
sensor and is located on the
windscreen. It is able to detect
variations in outside lighting based on
the light sensitivity set in the display
Menu or theUconnect™system
(where provided).The higher the sensitivity, the lower the
amount of external light needed to
automatically switch the external lights
on.
Function activation
Turn the left stalk ring nut to position
.
Function deactivation
To deactivate the function, turn the left
stalk ring nut to a position other than
.
DIPPED HEADLIGHTS
With the ignition key turned to MAR,
turn the ring nut 1 fig. 22 to
.Ifthe
dipped beam headlights are activated,
the daytime running lights are switched
off and the dipped beam headlights,
rear side lights and number plate lights
are switched on. The
warning light
switches on in the instrument panel.
DAYTIME RUNNING
LIGHTS (DRL)
"Daytime Running Lights"
20) 21)
With the key in MAR position and the
ring nut turned to the
position, the
daytime running lights and the rear side
lights switch on automatically; the other
lights and the internal lighting remain
off. If the daytime running lights are
deactivated (for versions/markets where
it is provided), no light comes on when
the ring nut is turned to
.
2104106J0004EM
2204126J0001EM
20
KNOWING YOUR CAR
Page 25 of 252

INSTRUMENT PANEL AND
CONTROL BUTTON
GRAPHIC BRIGHTNESS
ADJUSTMENT
The brightness for the instrument panel
and the control buttons can be
adjusted using the main menu on the
instrument panel (refer to the
“Reconfigurable Multifunction Display”
paragraph).
WARNING
20)The daytime running lights are an
alternative to the dipped headlights for
driving during the daytime in countries
where it is compulsory to have lights on
during the day; where it is not compulsory,
the use of daytime running lights is
permitted.
21)Daytime running lights cannot replace
dipped beam headlights when driving at
night or through tunnels. The use of
daytime running lights is governed by the
highway code of the country in which you
are driving. Comply with legal
requirements.
INTERIOR LIGHTS
FRONT CEILING LIGHT
Singe-bulb ceiling light
To switch on/off the ceiling light press
the fig. 27 button:
pressed to 1: interior ceiling light
always off;
pressed to 2: interior ceiling light
always on;
position 0: the interior ceiling light
switches on when a door is opened.
Multi-bulb ceiling light
Switch 1 fig. 28 is used to switch on/off
the ceiling light bulbs.
Switch 1 positions:
central position: lights 2 and 5 switch
on/off when the doors are
opened/closed;
pressed to the left (OFF): lights 2 and
5 are always switched off;
pressed to the right (): lights
2 and 5 are always switched on.
The lights switch on/off gradually.
Switch 3 switches on/off light 2.
Switch 4 switches on/off light 5.
When the lights are turned on manually,
they will switch off automatically after
15 minutes to preserve the battery
charge only with the ignition device in
the STOP position.
Ceiling light timing
On certain versions, to facilitate getting
in/out of the vehicle at night or in
poorly-lit areas, two timed modes have
been provided:
Timing while getting into the vehicle;
Timing while getting out of the car.
27F1B0043C
2804136J0001EM
23
Page 41 of 252

12)When painting in an oven, the LPG tank
must be removed from the car and later
refitted by a Fiat Dealership. Although the
LPG system has numerous safety features,
it is advisable to proceed as follows every
time the vehicle is not in use for a long
period or moved in an emergency as a
result of a breakdown or accident: unscrew
the devices fastening the cover of the LPG
tank, then remove it. Close the LPG cock
rotating the ring nut clockwise (see
"Passive safety / active safety"). Refit the
cover and retighten the fastening devices.
13)When switching is requested, metallic
noise from the valves which pressurise the
circuit can be heard. For the switching logic
described above, a delay between the
valve ticking and the switching off of the
instrument panel indication is completely
normal.
14)Do not switch between the two
operating modes whilst starting the engine.15)In particular usage conditions, such as
starting and operation at low ambient
temperature or LPG supply with low
propane content, the system may switch
temporarily to petrol operation, without a
visual indication of switching on the
instrument panel. In the event of low LPG
levels in the tank or request for high
performance (e.g. overtaking, car fully
laden, steep hills) the system may
automatically switch to petrol operation to
guarantee the engine power requested; the
green warning light
on the instrument
panel switches on to indicate this. When
the above conditions are no longer present,
the system automatically restores LPG
operation; the green warning light
switches off. To achieve the automatic
switching described above, make sure that
there is always enough fuel in the petrol
tank.
16)It is strictly forbidden to use any
additive in the LPG. Periodically (at least
once every six months) it is advisable to let
the LPG in the tank run out and, at the first
refuelling, to check that it does not exceed
the maximum capacity of 42 litres (reserve
included) (with a tolerance of 1 litres
excess). If the level is above 42 litres
(reserve included) contact a Fiat Dealership
immediately.
17)Only use LPG for motor vehicles.
39
Page 48 of 252

DISPLAY
DESCRIPTION
The vehicle is equipped with a display
that can show useful information to the
driver while driving.
GEAR SHIFT INDICATOR
The Gear Shift Indicator (GSI) system
advises the driver to change gear
through a special indication on the
display.
Through the GSI, the driver is informed
that the gear change will allow a
reduction in fuel consumption.
When the
icon appears on the
display, the GSI suggests switching to a
higher gear, while when the
icon is
displayed, the GSI suggests changing
to a lower gear.
The indication in the display remains
until a gear is shifted or the driving
conditions go back to a situation where
gearshifting is not required to improve
consumption.
MULTIFUNCTION
DISPLAY
The display fig. 58 will show the
following information:
1: Headlight alignment position (only
with dipped beam headlights on)
2: Gear Shift Indicator (GSI)
3: Engaged gear indication
4: Time
5: Outside temperature (for
versions/markets, where provided)
6: Odometer (display of distance
travelled in kilometres/miles)
7: Display of "Cruise Control" or
instantaneous speed (for
versions/markets, where provided)
CONTROL BUTTONS
These are located on the left side of the
steering wheel fig. 59.
They allow the driver to select and
interact with the items in the Main menu
of the display (see paragraph "Main
menu").
/: press and release the
buttons to access the Main menu and
to scroll the menu and the submenus
upwards or downwards.
: press briefly to access the
menu and/or go to next screen or to
confirm the required menu option.
: press and release the button to
return to the previous menu item.
5805036J0001EM
5905036J0002EM
46
KNOWING THE INSTRUMENT PANEL
Page 54 of 252

Warning light What it means
redLOW ENGINE OIL PRESSURE
The warning light or symbol switches on in the case of insufficient engine oil pressure.
19)
IMPORTANT Do not use the car until the failure has been solved. The switching on of the symbol does not
show the quantity of oil in the engine: the oil level must be checked manually.
red
amberEBD FAILURE
The simultaneous switching on of the
(red) and(amber) warning lights with the engine on indicates
either a failure of the EBD system or that the system is not available. In this case, the rear wheels may
suddenly lock and the vehicle may swerve when braking sharply.
Drive very carefully to the nearest Fiat Dealership to have the system inspected immediately.
IMPORTANT
18)Driving the vehicle with this symbol on may severely damage the gearbox, with resulting breakage. The oil may also overheat: contact with
hot engine or with exhaust components at high temperature could cause fires.
19)If the symbol switches on when driving, stop the engine immediately and contact a Fiat Dealership.
52
KNOWING THE INSTRUMENT PANEL
Page 55 of 252

Warning light What it means
redSEAT BELTS REMINDER
The warning light switches on constantly if the vehicle is stationary and the driver side or passenger side
seat belt (for versions/markets, where provided), with the passenger seated, is not fastened. The warning
light flashes and a buzzer will sound if the vehicle is in motion and the driver side or passenger side seat
belt (for versions/markets, where provided), with the passenger seated, is not correctly fastened. In this
case, fasten the seat belt.
redENGINE COOLANT TEMPERATURE TOO HIGH
The warning light (or the icon on the display on some versions) switches on when the engine is overheated.
In normal driving conditions: stop the car, switch off the engine and check that the coolant level in the
reservoir is not below the MIN mark. In this case, wait for the engine to cool down, then slowly and
carefully open the cap, top up with coolant and check that the level is between the MIN and MAX marks on
the reservoir itself. Also check visually for any fluid leaks. If, when restarting, the warning light switches on
(or the icon is displayed) again, contact a Fiat Dealership.
If the vehicle is used under demanding conditions(e.g. in high-performance driving): slow down and,
if the warning light stays on, stop the vehicle. Stop for two or three minutes with the engine running and
slightly accelerated to facilitate better coolant circulation, then turn the engine off. Check that the coolant
level is correct as described above.
IMPORTANT Over demanding routes, it is advisable to keep the engine running and slightly accelerated for
a few minutes before turning it off.
redALTERNATOR FAILURE
If this warning light or symbol switches on when the engine is running, this indicates a vehicle recharging
system failure. Contact a Fiat Dealership as soon as possible.
redDOOR OPEN
The warning light or the symbol turns on when one or more doors (or, for some versions also the bonnet
and the engine bonnet) are not perfectly closed (for versions/markets, where provided). An acoustic signal
is activated with the doors open and the car moving. Close the doors properly.
53