2019 FIAT 500L LIVING wheel
[x] Cancel search: wheelPage 112 of 248
If needed (e.g. when overtaking), you
can increase speed simply by pressing
the accelerator; when you release the
pedal, the car goes back to the speed
stored previously.
When travelling downhill with the device
active, the car speed may slightly
exceed the set one.
IMPORTANT Before pressing the SET +
(or SET –) buttons, the car must be
travelling at a constant speed on a flat
surface.
INCREASING /
DECREASING SPEED
Increasing the speed: once the
electronic Cruise Control has been
activated, the speed can be increased
by pressing button SET +.
Decreasing the speed: with the
device activated, the speed can be
decreased by pressing button SET –.
DEVICE DEACTIVATION
Lightly pressing the brake pedal,
depressing the clutch to shift gear or
pressing the CANC button deactivates
the Cruise Control without deleting
the stored speed.The device can also be deactivated if
the handbrake is engaged, if the
braking system is activated (e.g.
triggering of the ESC system) or in the
event of automatic braking activated by
the City Brake Control - “Collision
Mitigation” system.
If the device is deactivated, the
instrument panel display shows the
symbol (coloured white) with CANC
next to it.
DISENGAGEMENT OF
THE DEVICE
To disengage the device, press button
A fig. 93 or turn the ignition key to
STOP.
WARNING
104)When travelling with the device active,
never move the gear lever to neutral.
105)In case of a malfunction or failure of
the device, contact a Fiat Dealership.
106)The Cruise Control can be dangerous
if the system cannot keep a constant
speed. In specific conditions speed may be
excessive, resulting in the risk of losing
control of the vehicle and causing
accidents. Do not use the device in heavy
traffic or on winding, icy, snowy or slippery
roads.
SPEED LIMITER
(for versions/markets, where provided)
This a driving assistance device that
limits the speed of the car as set by the
driver. The maximum speed can be
set both with vehicle stationary and in
motion. The speed is programmable
between 30 and 130 km/h.
When the device is active, the car
speed depends on the pressure at the
accelerator pedal, until the
programmed speed limit is reached
(see "Speed limit programming"
paragraph).
DEVICE ACTIVATION
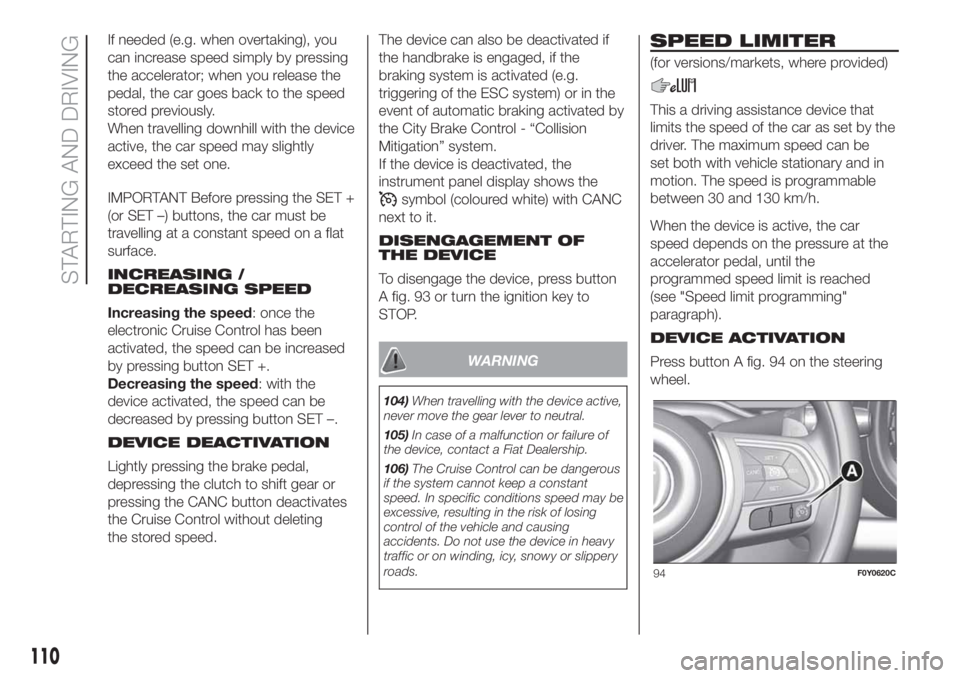
Press button A fig. 94 on the steering
wheel.
94F0Y0620C
110
STARTING AND DRIVING
Page 114 of 248
“NORMAL” MODE
It is a driving mode aimed at comfort
and safety in normal grip and driving
conditions.
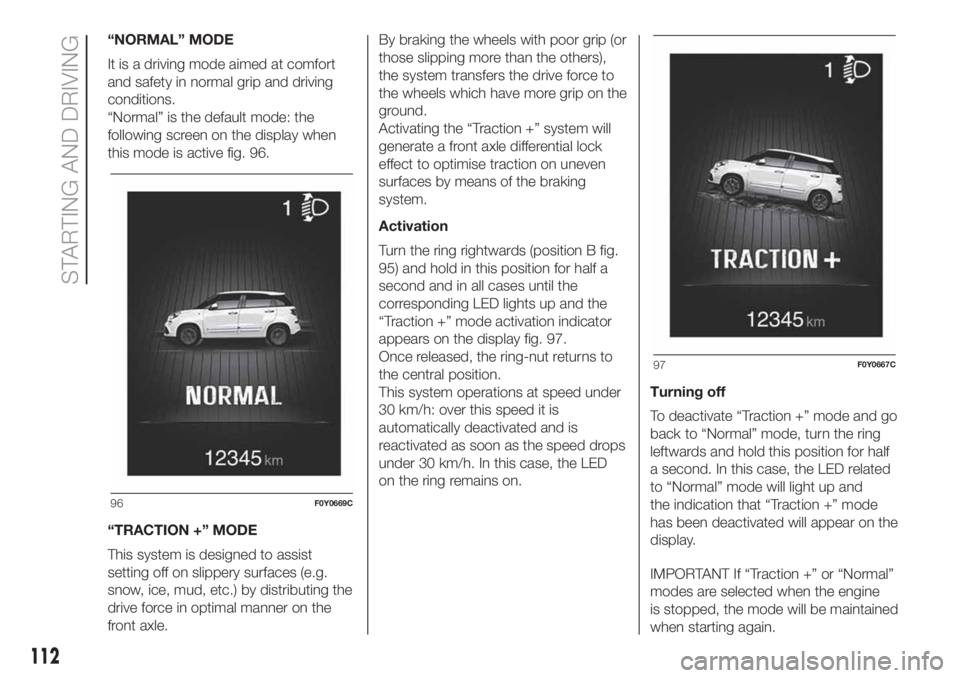
“Normal” is the default mode: the
following screen on the display when
this mode is active fig. 96.
“TRACTION +” MODE
This system is designed to assist
setting off on slippery surfaces (e.g.
snow, ice, mud, etc.) by distributing the
drive force in optimal manner on the
front axle.By braking the wheels with poor grip (or
those slipping more than the others),
the system transfers the drive force to
the wheels which have more grip on the
ground.
Activating the “Traction +” system will
generate a front axle differential lock
effect to optimise traction on uneven
surfaces by means of the braking
system.
Activation
Turn the ring rightwards (position B fig.
95) and hold in this position for half a
second and in all cases until the
corresponding LED lights up and the
“Traction +” mode activation indicator
appears on the display fig. 97.
Once released, the ring-nut returns to
the central position.
This system operations at speed under
30 km/h: over this speed it is
automatically deactivated and is
reactivated as soon as the speed drops
under 30 km/h. In this case, the LED
on the ring remains on.Turning off
To deactivate “Traction +” mode and go
back to “Normal” mode, turn the ring
leftwards and hold this position for half
a second. In this case, the LED related
to “Normal” mode will light up and
the indication that “Traction +” mode
has been deactivated will appear on the
display.
IMPORTANT If “Traction +” or “Normal”
modes are selected when the engine
is stopped, the mode will be maintained
when starting again.
96F0Y0669C
97F0Y0667C
112
STARTING AND DRIVING
Page 115 of 248
IMPORTANT In “Traction +” mode, the
Start&Stop system is temporarily
deactivated (LED on the Start&Stop
system button on). To reactivate the
Start&Stop system with “Traction +”
mode on, press the Start&Stop button
located on the dashboard. The
Start&Stop system will be activated
again when “Traction +” mode is
deactivated.
IMPORTANT The City Brake Control -
“Collision Mitigation” system is
temporarily deactivated when “Traction
+” mode is deactivated. Temporary
deactivation of the system is indicated
by the warning light
on the
instrument panel (together with a
message on the display). The City
Brake Control - “Collision Mitigation”
system will be activated again when
“Traction +” mode is deactivated.
“GRAVITY CONTROL” FUNCTION
This driving function aims at maintaining
a constant speed when driving
downhill on a steel gradient. Noise and
vibrations from the wheel sides (brakes)
are normal when the function is active.IMPORTANT The function can only be
selected with “Traction +” mode active,
engine running, handbrake released
and driver side door correctly closed.
Activation
To activate the function, go to a speed
slower than 25 km/h.
After reaching the desired speed,
release the accelerator and brake
pedals completely. If you want to
increase/decrease the speed, press the
accelerator and brake pedals again.
Activation
Turn the ring rightwards (position C fig.
95) and hold in this position for half a
second and in all cases until the
corresponding LED lights up and the
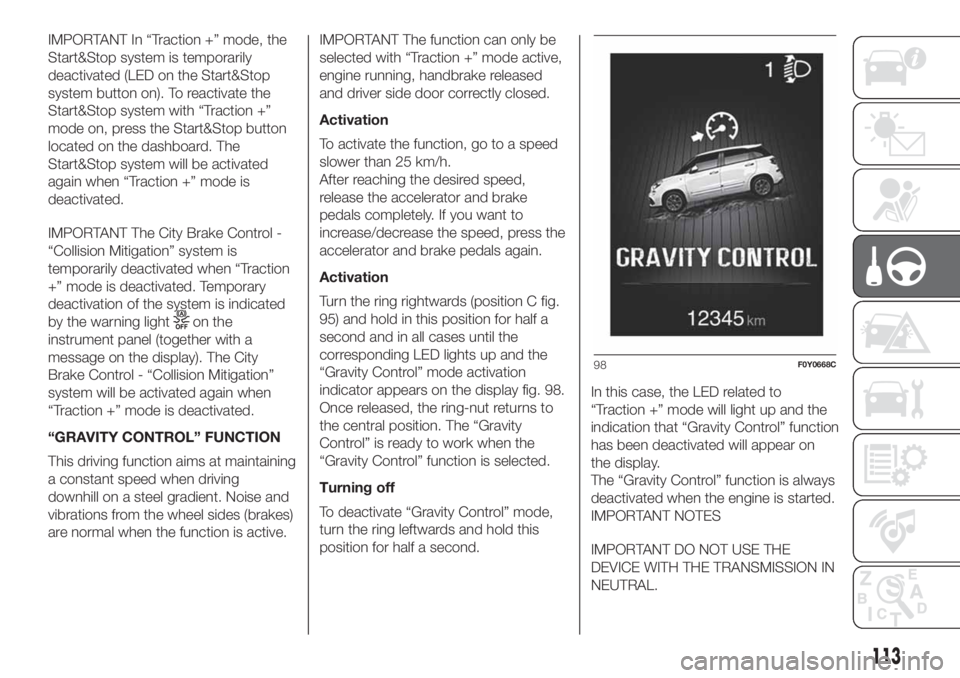
“Gravity Control” mode activation
indicator appears on the display fig. 98.
Once released, the ring-nut returns to
the central position. The “Gravity
Control” is ready to work when the
“Gravity Control” function is selected.
Turning off
To deactivate “Gravity Control” mode,
turn the ring leftwards and hold this
position for half a second.In this case, the LED related to
“Traction +” mode will light up and the
indication that “Gravity Control” function
has been deactivated will appear on
the display.
The “Gravity Control” function is always
deactivated when the engine is started.
IMPORTANT NOTES
IMPORTANT DO NOT USE THE
DEVICE WITH THE TRANSMISSION IN
NEUTRAL.
98F0Y0668C
113
Page 124 of 248
IN AN EMERGENCY
A punctured tyre or a burnt-out bulb?
At times, a problem may interfere
with our journey.
The pages on emergencies can help
you to deal with critical situations
independently and with calm.
In an emergency we recommend that
you call the freephone number found in
the Warranty Booklet.
It is also possible to call the national or
international universal freephone
number to search for the nearest
Dealership.HAZARD WARNING LIGHTS...........123
REPLACING A WHEEL ...................123
“FIX&GO AUTOMATIC” KIT .............128
CHANGING A BULB .......................130
REPLACING FUSES........................138
JUMP STARTING ............................144
FUEL CUT-OFF SYSTEM ................146
TOWING THE VEHICLE ..................146
122
IN AN EMERGENCY
Page 125 of 248
HAZARD WARNING
LIGHTS
CONTROL
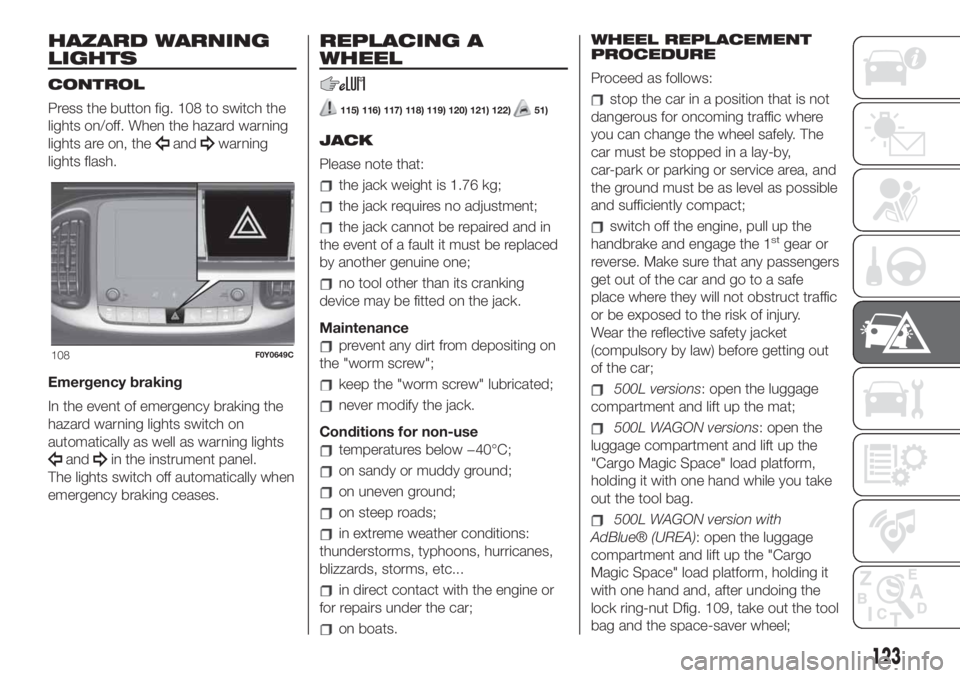
Press the button fig. 108 to switch the
lights on/off. When the hazard warning
lights are on, the
andwarning
lights flash.
Emergency braking
In the event of emergency braking the
hazard warning lights switch on
automatically as well as warning lights
andin the instrument panel.
The lights switch off automatically when
emergency braking ceases.
REPLACING A
WHEEL
115) 116) 117) 118) 119) 120) 121) 122)51)
JACK
Please note that:
the jack weight is 1.76 kg;
the jack requires no adjustment;
the jack cannot be repaired and in
the event of a fault it must be replaced
by another genuine one;
no tool other than its cranking
device may be fitted on the jack.
Maintenance
prevent any dirt from depositing on
the "worm screw";
keep the "worm screw" lubricated;
never modify the jack.
Conditions for non-use
temperatures below −40°C;
on sandy or muddy ground;
on uneven ground;
on steep roads;
in extreme weather conditions:
thunderstorms, typhoons, hurricanes,
blizzards, storms, etc...
in direct contact with the engine or
for repairs under the car;
on boats.WHEEL REPLACEMENT
PROCEDURE
Proceed as follows:
stop the car in a position that is not
dangerous for oncoming traffic where
you can change the wheel safely. The
car must be stopped in a lay-by,
car-park or parking or service area, and
the ground must be as level as possible
and sufficiently compact;
switch off the engine, pull up the
handbrake and engage the 1stgear or
reverse. Make sure that any passengers
get out of the car and go to a safe
place where they will not obstruct traffic
or be exposed to the risk of injury.
Wear the reflective safety jacket
(compulsory by law) before getting out
of the car;
500L versions: open the luggage
compartment and lift up the mat;
500L WAGON versions: open the
luggage compartment and lift up the
"Cargo Magic Space" load platform,
holding it with one hand while you take
out the tool bag.
500L WAGON version with
AdBlue® (UREA): open the luggage
compartment and lift up the "Cargo
Magic Space" load platform, holding it
with one hand and, after undoing the
lock ring-nut Dfig. 109, take out the tool
bag and the space-saver wheel;
108F0Y0649C
123
Page 126 of 248
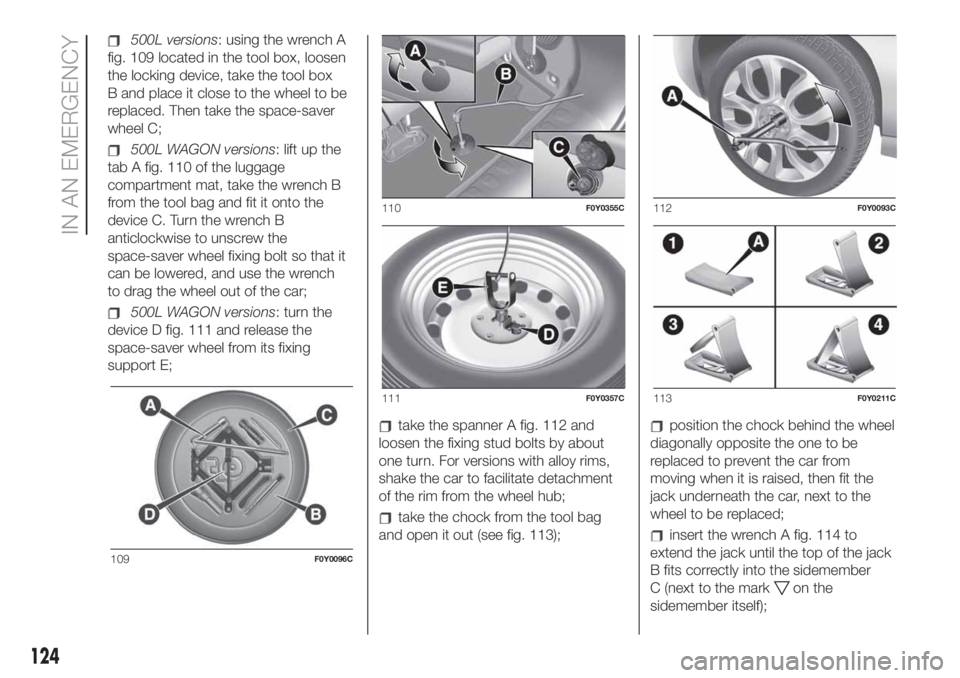
500L versions: using the wrench A
fig. 109 located in the tool box, loosen
the locking device, take the tool box
B and place it close to the wheel to be
replaced. Then take the space-saver
wheel C;
500L WAGON versions: lift up the
tab A fig. 110 of the luggage
compartment mat, take the wrench B
from the tool bag and fit it onto the
device C. Turn the wrench B
anticlockwise to unscrew the
space-saver wheel fixing bolt so that it
can be lowered, and use the wrench
to drag the wheel out of the car;
500L WAGON versions: turn the
device D fig. 111 and release the
space-saver wheel from its fixing
support E;
take the spanner A fig. 112 and
loosen the fixing stud bolts by about
one turn. For versions with alloy rims,
shake the car to facilitate detachment
of the rim from the wheel hub;
take the chock from the tool bag
and open it out (see fig. 113);
position the chock behind the wheel
diagonally opposite the one to be
replaced to prevent the car from
moving when it is raised, then fit the
jack underneath the car, next to the
wheel to be replaced;
insert the wrench A fig. 114 to
extend the jack until the top of the jack
B fits correctly into the sidemember
C (next to the mark
on the
sidemember itself);
109F0Y0096C
110F0Y0355C
111F0Y0357C
112F0Y0093C
113F0Y0211C
124
IN AN EMERGENCY
Page 127 of 248
alert any bystander that the car is
about to be raised; all persons should
be kept away from the car and nobody
must touch it until it has been lowered;
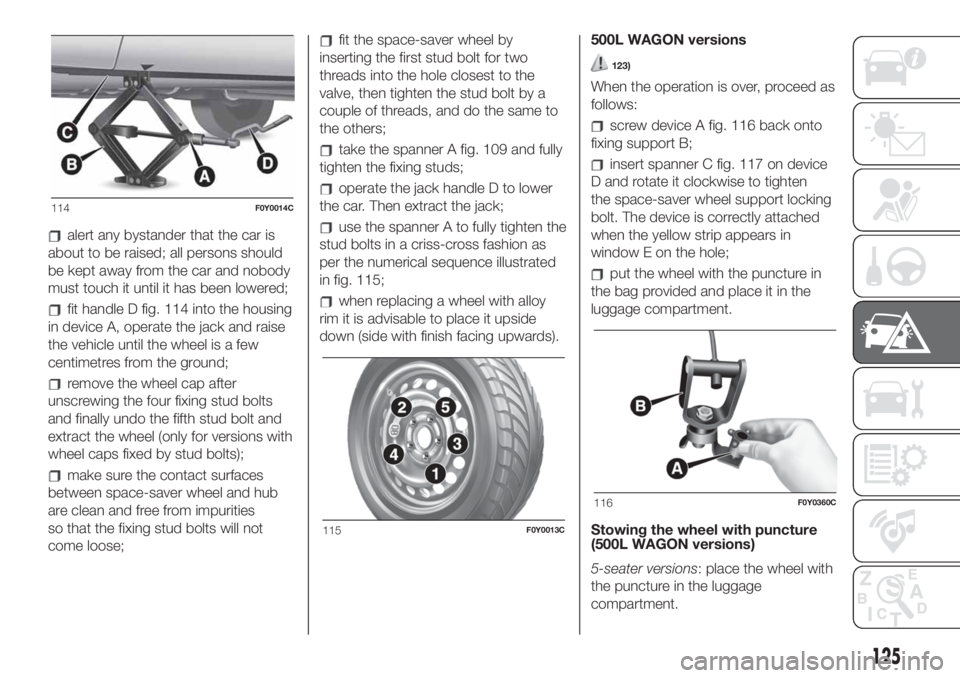
fit handle D fig. 114 into the housing
in device A, operate the jack and raise
the vehicle until the wheel is a few
centimetres from the ground;
remove the wheel cap after
unscrewing the four fixing stud bolts
and finally undo the fifth stud bolt and
extract the wheel (only for versions with
wheel caps fixed by stud bolts);
make sure the contact surfaces
between space-saver wheel and hub
are clean and free from impurities
so that the fixing stud bolts will not
come loose;
fit the space-saver wheel by
inserting the first stud bolt for two
threads into the hole closest to the
valve, then tighten the stud bolt by a
couple of threads, and do the same to
the others;
take the spanner A fig. 109 and fully
tighten the fixing studs;
operate the jack handle D to lower
the car. Then extract the jack;
use the spanner A to fully tighten the
stud bolts in a criss-cross fashion as
per the numerical sequence illustrated
in fig. 115;
when replacing a wheel with alloy
rim it is advisable to place it upside
down (side with finish facing upwards).500L WAGON versions
123)
When the operation is over, proceed as
follows:
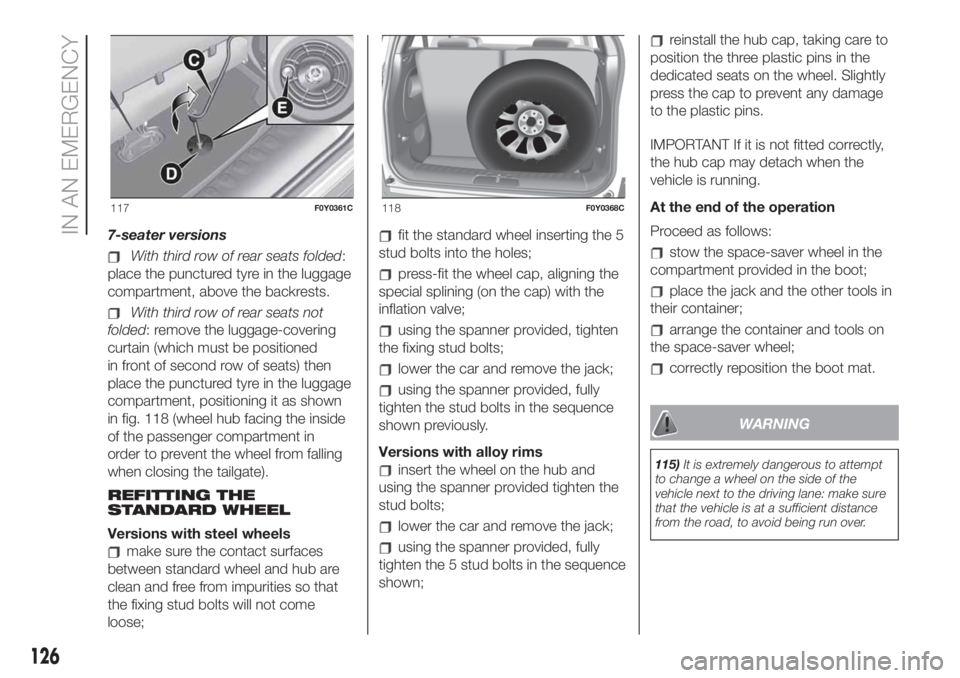
screw device A fig. 116 back onto
fixing support B;
insert spanner C fig. 117 on device
D and rotate it clockwise to tighten
the space-saver wheel support locking
bolt. The device is correctly attached
when the yellow strip appears in
window E on the hole;
put the wheel with the puncture in
the bag provided and place it in the
luggage compartment.
Stowing the wheel with puncture
(500L WAGON versions)
5-seater versions: place the wheel with
the puncture in the luggage
compartment.
114F0Y0014C
115F0Y0013C
116F0Y0360C
125
Page 128 of 248
7-seater versions
With third row of rear seats folded:
place the punctured tyre in the luggage
compartment, above the backrests.
With third row of rear seats not
folded: remove the luggage-covering
curtain (which must be positioned
in front of second row of seats) then
place the punctured tyre in the luggage
compartment, positioning it as shown
in fig. 118 (wheel hub facing the inside
of the passenger compartment in
order to prevent the wheel from falling
when closing the tailgate).
REFITTING THE
STANDARD WHEEL
Versions with steel wheels
make sure the contact surfaces
between standard wheel and hub are
clean and free from impurities so that
the fixing stud bolts will not come
loose;
fit the standard wheel inserting the 5
stud bolts into the holes;
press-fit the wheel cap, aligning the
special splining (on the cap) with the
inflation valve;
using the spanner provided, tighten
the fixing stud bolts;
lower the car and remove the jack;
using the spanner provided, fully
tighten the stud bolts in the sequence
shown previously.
Versions with alloy rims
insert the wheel on the hub and
using the spanner provided tighten the
stud bolts;
lower the car and remove the jack;
using the spanner provided, fully
tighten the 5 stud bolts in the sequence
shown;
reinstall the hub cap, taking care to
position the three plastic pins in the
dedicated seats on the wheel. Slightly
press the cap to prevent any damage
to the plastic pins.
IMPORTANT If it is not fitted correctly,
the hub cap may detach when the
vehicle is running.
At the end of the operation
Proceed as follows:
stow the space-saver wheel in the
compartment provided in the boot;
place the jack and the other tools in
their container;
arrange the container and tools on
the space-saver wheel;
correctly reposition the boot mat.
WARNING
115)It is extremely dangerous to attempt
to change a wheel on the side of the
vehicle next to the driving lane: make sure
that the vehicle is at a sufficient distance
from the road, to avoid being run over.
117F0Y0361C118F0Y0368C
126
IN AN EMERGENCY