Page 525 of 572

9. Four Colored Buttons — Push to access Blu-ray Discfeatures.
10. POPUP/MENU — Push to bring up repeat and shuffle options, the Blu-ray Disc popup menu, the DVD title
menu, or to access disc menus.
11. Keypad — Push to navigate chapters or titles.
12.
(Stop) — Stops disc play.
13. ��� — Push and hold to fast rewind through the
current audio track or video chapter.
14.
— Mutes headphone audio.
15. BACK — Push to exit out of menus or return to source selection screen.
16. �— Push to navigate menus.
17. �— Push to navigate menus.
18. OK— Push to select the highlighted option in a menu.
19. �— Push to navigate menus.
Headphones Operation
The headphones receive two separate channels of audio
using an infrared transmitter from the video screen.
If no audio is heard after increasing the volume control,
verify that the screen is turned on, the channel is not muted
and the headphone channel selector switch is on the
desired channel. If audio is still not heard, check that fully
charged batteries are installed in the headphones.
Rear Seat Entertainment Headphones1 — Power Button
2 — Volume Control
3 — Channel Selection Switch
10
MULTIMEDIA 523
Page 526 of 572

Controls
The headphone power indicator and controls are located
on the right ear cup.
NOTE:The rear video system must be turned on before
sound can be heard from the headphones. To conserve
battery life, the headphones will automatically turn off
approximately three minutes after the rear video system is
turned off.
Changing the Audio Mode for Headphones
1. Ensure the Remote Control channel/screen selector switch is in the same position as the headphone selector
switch.
NOTE: •When both the headphone and the remote control
channel selector switches are on Channel 1, the Re-
mote is controlling Channel 1 and the headphones are
tuned to the audio on Channel 1.
• When both the headphone and the remote control
channel selector switches are on Channel 2, the Re-
mote is controlling Channel 2 and the headphones are
tuned to the audio on Channel 2. 2. Push the SOURCE button on the remote control.
3. Pushing the SOURCE button will advance to the next
mode.
4. When the Mode Selection menu appears on screen, use the cursor buttons on the remote control to navigate to
the available modes and push the OK button to select
the new mode.
5. To cancel out of the Mode Selection menu, push the BACK button on the remote control.
Replacing The Headphone Batteries
Each set of headphones requires two AAA batteries for
operation. To replace the batteries:
1. Locate the battery compartment on the left ear cup ofthe headphones, and then slide the battery cover down-
ward.
2. Replace the batteries, making sure to orient them ac- cording to the polarity diagram shown.
3. Replace the battery compartment cover.
524 MULTIMEDIA
Page 528 of 572

System Information
Disc Menu
When listening to a CD Audio or CD Data disc, pushing
the remote control’s POP UP/MENU button displays a list
of all commands which control playback of the disc.
Display Settings
When watching a video source (Blu-ray Disc or DVD Video
with the disc in Play mode, Aux Video, etc.), pushing the
remote control’s SETUP button activates the Display Set-
tings menu. These settings control the appearance of thevideo on the screen. The factory default settings are already
set for optimum viewing, so there is no need to change
these settings under normal circumstances.
To change the settings, push the remote control’s naviga-
tion buttons (�,
�) to select an item, then push the remote
control’s navigation buttons (�, �) to change the value for
the currently selected item. To reset all values back to the
original settings, select the Default Settings menu option
and push the remote control’s ENTER/OK button.
Disc Features control the remote Blu-ray Disc player’s
settings of DVD being watched in the remote player.
Listening To Audio With The Screen Closed
To listen to only audio portion of the channel with the
screen closed:
• Set the audio to the desired source and channel.
• Close the video screen.
• To change the current audio mode, push the remote
control’s SOURCE button. This will automatically select
the next available audio mode without using the Mode/
Source Select menu.
Video Screen Display Settings
526 MULTIMEDIA
Page 534 of 572

NOTE:If you see the NAV icon on the bottom bar, or in the
Apps menus, of your touchscreen, you have the Uconnect
4C NAV system. If not, you have a Uconnect 4C system.
Get Started
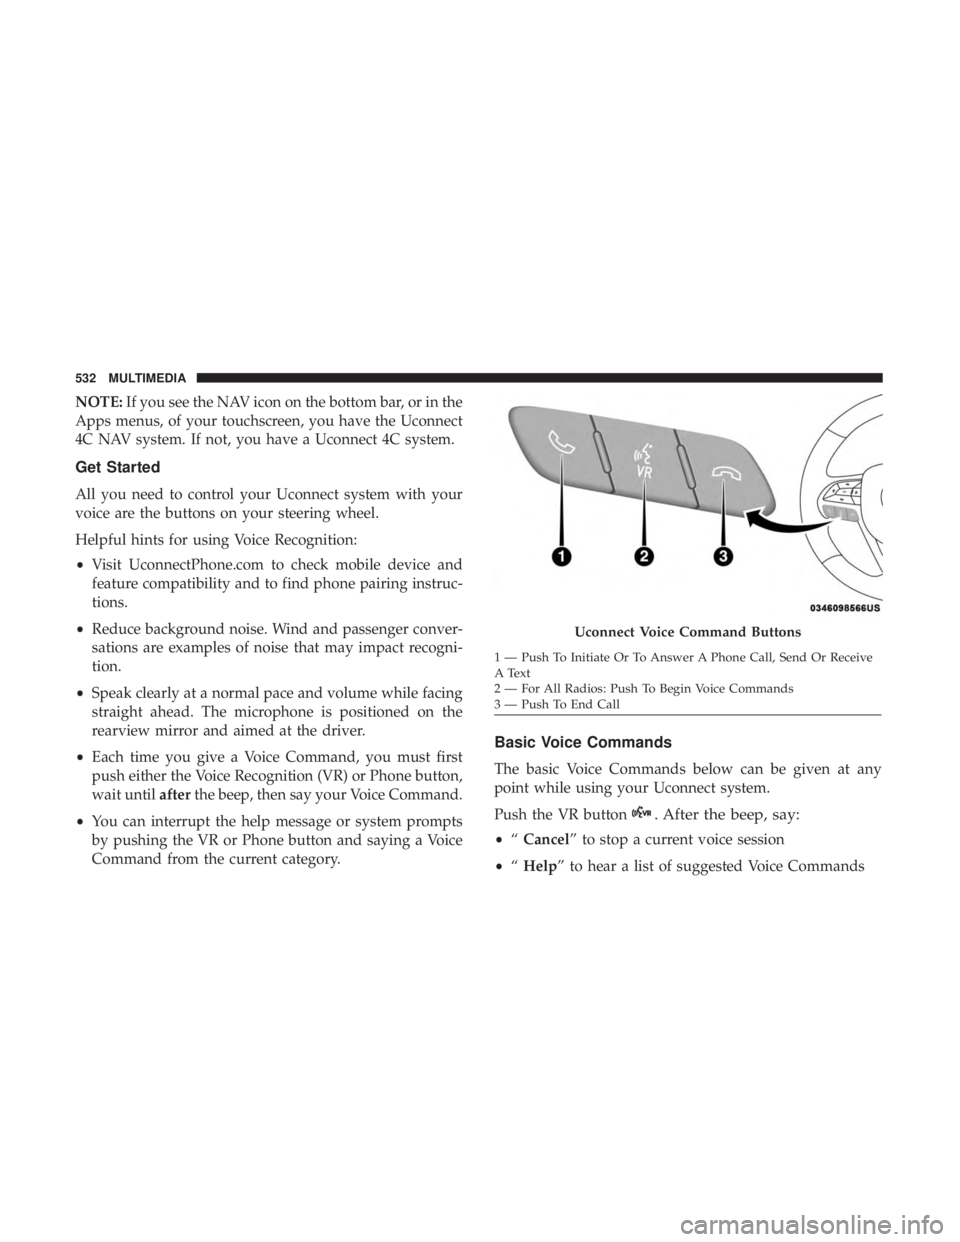
All you need to control your Uconnect system with your
voice are the buttons on your steering wheel.
Helpful hints for using Voice Recognition:
• Visit UconnectPhone.com to check mobile device and
feature compatibility and to find phone pairing instruc-
tions.
• Reduce background noise. Wind and passenger conver-
sations are examples of noise that may impact recogni-
tion.
• Speak clearly at a normal pace and volume while facing
straight ahead. The microphone is positioned on the
rearview mirror and aimed at the driver.
• Each time you give a Voice Command, you must first
push either the Voice Recognition (VR) or Phone button,
wait until afterthe beep, then say your Voice Command.
• You can interrupt the help message or system prompts
by pushing the VR or Phone button and saying a Voice
Command from the current category.
Basic Voice Commands
The basic Voice Commands below can be given at any
point while using your Uconnect system.
Push the VR button
. After the beep, say:
• “Cancel” to stop a current voice session
• “Help” to hear a list of suggested Voice Commands
Uconnect Voice Command Buttons
1 — Push To Initiate Or To Answer A Phone Call, Send Or Receive
A Text
2 — For All Radios: Push To Begin Voice Commands
3 — Push To End Call
532 MULTIMEDIA