2019 DODGE CHALLENGER SRT buttons
[x] Cancel search: buttonsPage 41 of 500
The doors can also be locked and unlocked with the
Keyless Enter-N-Go — Passive Entry system. Refer to
“Keyless Enter-N-Go — Passive Entry” located in “Doors”
in “Getting To Know Your Vehicle” for further information.
If you push the power door lock switch while the ignition
is on, and either door is open, the power locks will not
operate. This prevents you from accidentally locking the
key fob in the vehicle. Turning off the ignition or closing
the door will allow the locks to operate. If a door is open
with the ignition either cycled to ACC or ON/RUN (engine
not running), a chime will sound as a reminder.
Keyless Enter-N-Go — Passive Entry
The Passive Entry system is an enhancement to the vehi-
cle’s Remote Keyless Entry system and a feature of Keyless
Enter-N-Go. This feature allows you to lock and unlock the
vehicle’s door(s) without having to push the key fob lock
or unlock buttons.
NOTE:
•Passive Entry may be programmed on or off; refer to
“Uconnect Settings” in “Multimedia” in the Owner ’s
Manual for further information. •
If wearing gloves on your hands, or if it has been
raining/snowing on the Passive Entry door handle, the
unlock sensitivity can be affected, resulting in a slower
response time.
• If the vehicle is unlocked by Passive Entry and no door
is opened within 60 seconds, the vehicle will re-lock and
if equipped will arm the security alarm.
• The key fob may not be able to be detected by the vehicle
Passive Entry system if it is located next to a mobile
phone, laptop or other electronic device; these devices
may block the key fob’s wireless signal and prevent the
Passive Entry handle from locking/unlocking the ve-
hicle.
To Unlock From The Driver’s Side:
With a Passive Entry key fob within 5 ft (1.5 m) of the
driver door handle, grab the front driver door handle to
unlock the driver’s door automatically. The interior door
panel lock knob will raise when the door is unlocked.
3
GETTING TO KNOW YOUR VEHICLE 39
Page 50 of 500
Power Lumbar — If Equipped
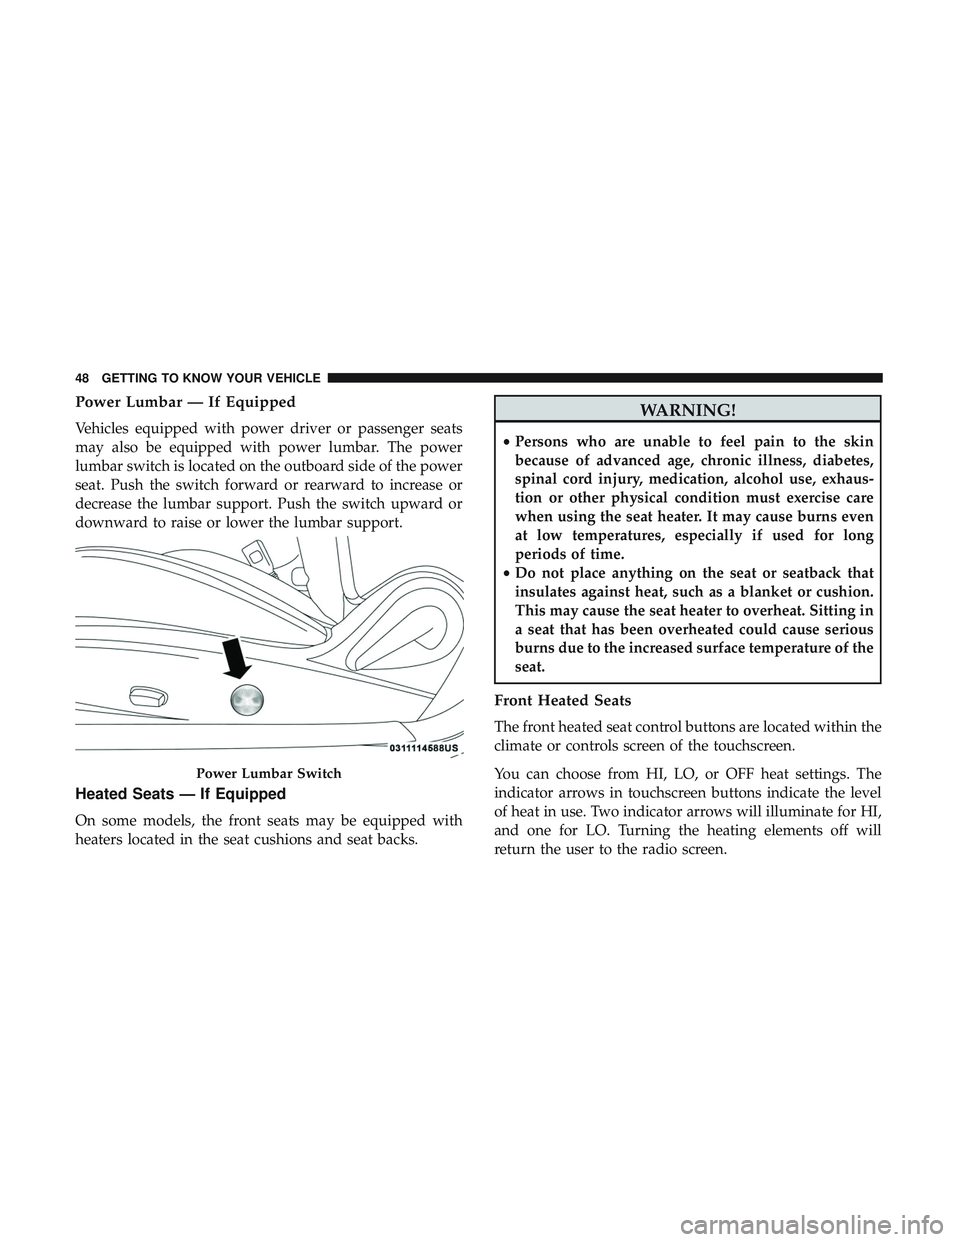
Vehicles equipped with power driver or passenger seats
may also be equipped with power lumbar. The power
lumbar switch is located on the outboard side of the power
seat. Push the switch forward or rearward to increase or
decrease the lumbar support. Push the switch upward or
downward to raise or lower the lumbar support.
Heated Seats — If Equipped
On some models, the front seats may be equipped with
heaters located in the seat cushions and seat backs.
WARNING!
•Persons who are unable to feel pain to the skin
because of advanced age, chronic illness, diabetes,
spinal cord injury, medication, alcohol use, exhaus-
tion or other physical condition must exercise care
when using the seat heater. It may cause burns even
at low temperatures, especially if used for long
periods of time.
• Do not place anything on the seat or seatback that
insulates against heat, such as a blanket or cushion.
This may cause the seat heater to overheat. Sitting in
a seat that has been overheated could cause serious
burns due to the increased surface temperature of the
seat.
Front Heated Seats
The front heated seat control buttons are located within the
climate or controls screen of the touchscreen.
You can choose from HI, LO, or OFF heat settings. The
indicator arrows in touchscreen buttons indicate the level
of heat in use. Two indicator arrows will illuminate for HI,
and one for LO. Turning the heating elements off will
return the user to the radio screen.
Power Lumbar Switch
48 GETTING TO KNOW YOUR VEHICLE
Page 52 of 500
Front Ventilated Seats — If Equipped
Located in the seat cushion and seat back are fans that
draw the air from the passenger compartment and move
air through fine perforations in the seat cover to help keep
the driver and front passenger cooler in higher ambient
temperatures. The fans operate at two speeds, HI and LO.
The front ventilated seats control buttons are located
within the Uconnect system. You can gain access to the
control buttons through the climate screen or the controls
screen.
•Press the ventilated seat button
once to choose HI.
•Press the ventilated seat buttona second time to
choose LO.
• Press the ventilated seat buttona third time to turn
the ventilated seat off.
NOTE: The engine must be running for the ventilated seats
to operate.
Vehicles Equipped With Remote Start
On models that are equipped with remote start, the venti-
lated seats can be programmed to come on during a remote
start. This feature can be programmed through the Uconnect
system. Refer to “Uconnect Settings” in “Multimedia” for
further information.
Vehicles Without Rear Seating Installed
All passenger occupants within the vehicle must be in a
seat equipped with a Seat Belt System and Head Restraint
for the safety of the passenger. If the rear seat has been
removed, do not ride in that area.
This vehicle has been designed to maximize total perfor-
mance. In doing so, the deletion of the rear seat may affect
the NVH (Noise, Vibration, and Harshness) characteristics.
As a result, the interior (driver cockpit) Noise, Vibration,
and Harshness (NVH) will be louder overall.
WARNING!
•
If the rear seat has been removed, do not ride in that
area. In a collision, people riding in this area are
more likely to be seriously injured or killed.
• It is dangerous to ride in a cargo area, inside or
outside of a vehicle. In a collision, people riding in
this area are more likely to be seriously injured or
killed.
(Continued)
50 GETTING TO KNOW YOUR VEHICLE
Page 61 of 500
Power Mirrors
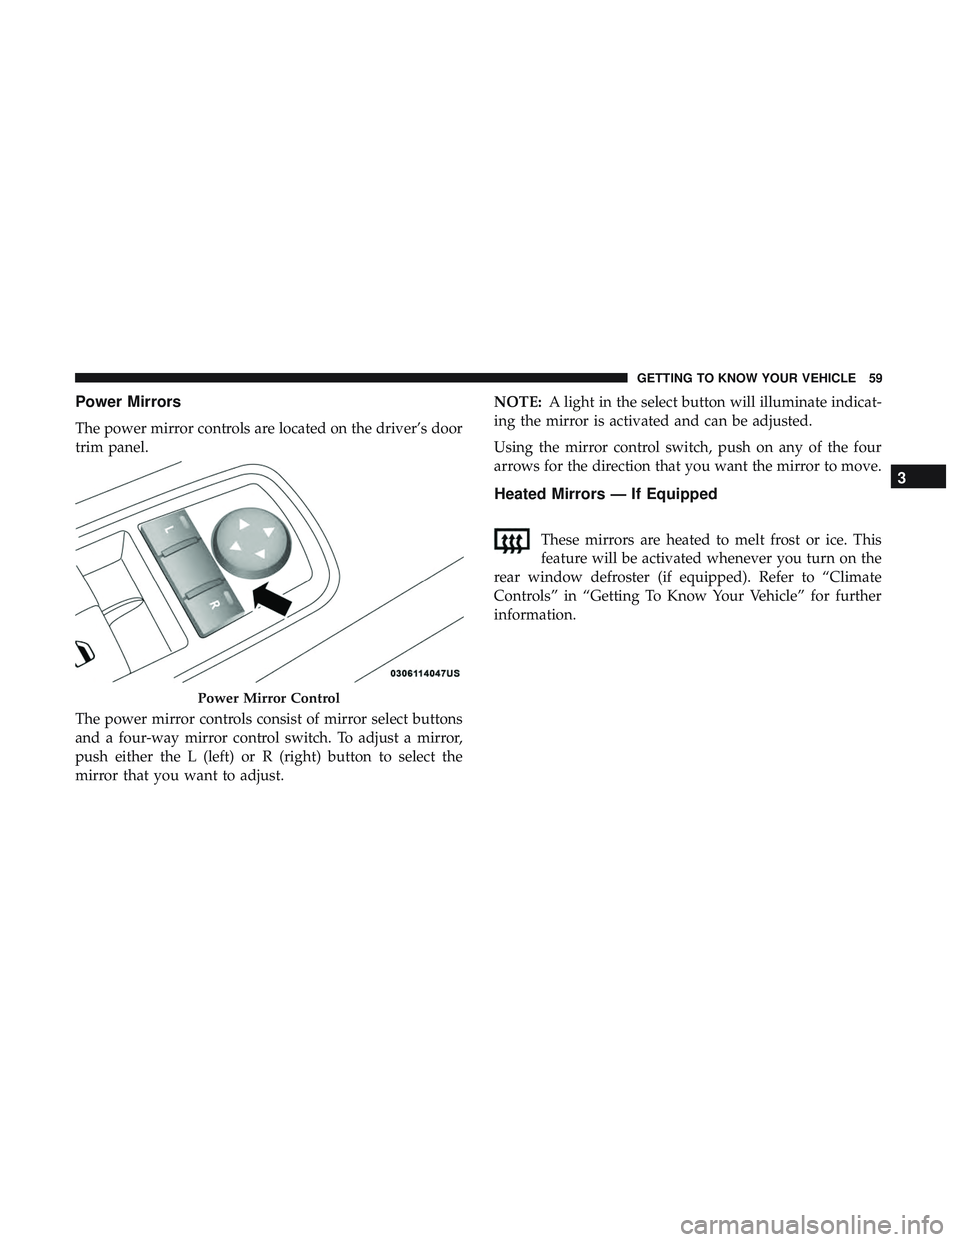
The power mirror controls are located on the driver’s door
trim panel.
The power mirror controls consist of mirror select buttons
and a four-way mirror control switch. To adjust a mirror,
push either the L (left) or R (right) button to select the
mirror that you want to adjust.NOTE:
A light in the select button will illuminate indicat-
ing the mirror is activated and can be adjusted.
Using the mirror control switch, push on any of the four
arrows for the direction that you want the mirror to move.
Heated Mirrors — If Equipped
These mirrors are heated to melt frost or ice. This
feature will be activated whenever you turn on the
rear window defroster (if equipped). Refer to “Climate
Controls” in “Getting To Know Your Vehicle” for further
information.
Power Mirror Control
3
GETTING TO KNOW YOUR VEHICLE 59
Page 74 of 500

IconDescription
AUTO Button
Automatically controls the interior cabin temperature by adjusting airflow distribution and
amount. Toggling this function will cause the system to switch between manual mode and auto-
matic modes.
Refer to “Automatic Operation” within this section for more information.
Front Defrost Button
Press and release to change the current airflow setting to Defrost mode. The indicator illumi-
nates when this feature is on. Air comes from the windshield and side window demist outlets.
When the defrost button is selected, the blower level may increase. Use Defrost mode with
maximum temperature settings for best windshield and side window defrosting and defogging.
When toggling the Front Mode Defrost button, the climate system will return to the previous
setting.
Rear Defrost Button
Push and release the Rear Defrost Control button to turn on the rear window defroster and the
heated outside mirrors (if equipped). An indicator will illuminate when the rear window de-
froster is on. The rear window defroster automatically turns off after ten minutes.
Driver And Passenger Temperature Up And Down Buttons
Provides the driver and passenger with independent temperature control. Push the red button
on the faceplate or touchscreen or press and slide the temperature bar towards the red arrow
button on the touchscreen for warmer temperature settings. Push the blue button on the face-
plate or touchscreen or press and slide the temperature bar towards the blue arrow on the
touchscreen for cooler temperature settings.
72 GETTING TO KNOW YOUR VEHICLE
Page 75 of 500
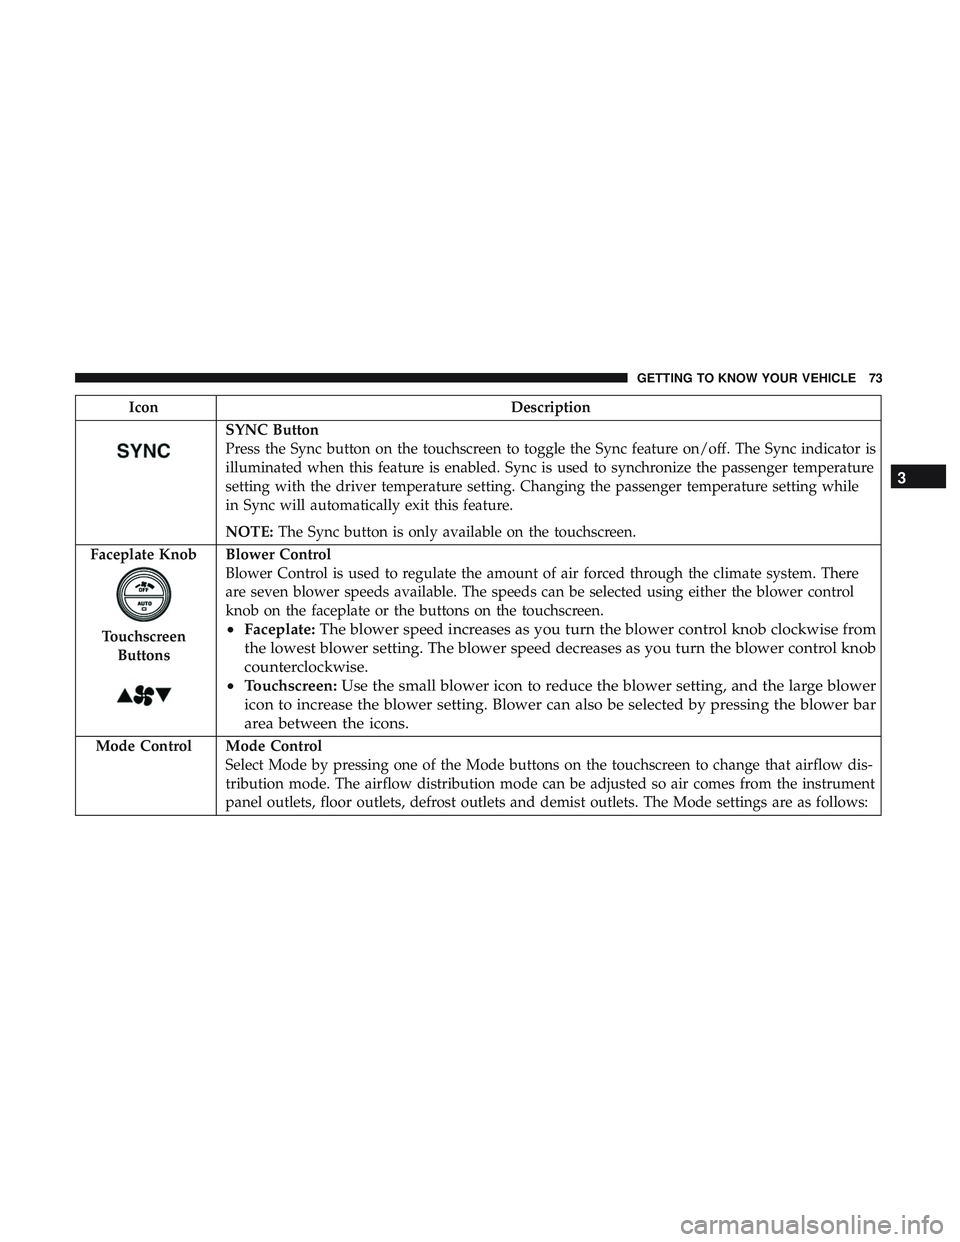
IconDescription
SYNC Button
Press the Sync button on the touchscreen to toggle the Sync feature on/off. The Sync indicator is
illuminated when this feature is enabled. Sync is used to synchronize the passenger temperature
setting with the driver temperature setting. Changing the passenger temperature setting while
in Sync will automatically exit this feature.
NOTE:The Sync button is only available on the touchscreen.
Faceplate Knob
Touchscreen Buttons
Blower Control
Blower Control is used to regulate the amount of air forced through the climate system. There
are seven blower speeds available. The speeds can be selected using either the blower control
knob on the faceplate or the buttons on the touchscreen.
• Faceplate: The blower speed increases as you turn the blower control knob clockwise from
the lowest blower setting. The blower speed decreases as you turn the blower control knob
counterclockwise.
• Touchscreen: Use the small blower icon to reduce the blower setting, and the large blower
icon to increase the blower setting. Blower can also be selected by pressing the blower bar
area between the icons.
Mode Control Mode Control Select Mode by pressing one of the Mode buttons on the touchscreen to change that airflow dis-
tribution mode. The airflow distribution mode can be adjusted so air comes from the instrument
panel outlets, floor outlets, defrost outlets and demist outlets. The Mode settings are as follows:
3
GETTING TO KNOW YOUR VEHICLE 73
Page 78 of 500
2. Next, adjust the temperature that you would like thesystem to maintain by adjusting the driver and passen-
ger temperature control buttons. Once the desired tem-
perature is displayed, the system will achieve and
automatically maintain that comfort level.
3. When the system is set up for your comfort level, it is not necessary to change the settings. You will experience
the greatest efficiency by simply allowing the system to
function automatically.
NOTE:
• It is not necessary to move the temperature settings for
cold or hot vehicles. The system automatically adjusts
the temperature, mode, and blower speed to provide
comfort as quickly as possible.
• The temperature can be displayed in U.S. or Metric units
by selecting the US/Metric customer-programmable fea-
ture. Refer to the “Uconnect Settings” in “Multimedia”
for further information.
To provide you with maximum comfort in the Automatic
mode during cold start-ups, the blower fan will remain on
low until the engine warms up. The blower will increase in
speed and transition into Auto mode.Manual Operation Override
This system offers a full complement of manual override
features. The AUTO symbol in the front ATC display will
be turned off when the system is being used in the manual
mode.
Operating Tips
NOTE: Refer to the chart at the end of this section for
suggested control settings for various weather conditions.
Summer Operation
The engine cooling system must be protected with a
high-quality antifreeze coolant to provide proper corrosion
protection and to protect against engine overheating. OAT
coolant (conforming to MS.90032) is recommended.
Winter Operation
To ensure the best possible heater and defroster perfor-
mance, make sure the engine cooling system is functioning
properly and the proper amount, type, and concentration
of coolant is used. Use of the Air Recirculation mode
during Winter months is not recommended, because it may
cause window fogging.
76 GETTING TO KNOW YOUR VEHICLE
Page 88 of 500
Trunk Safety
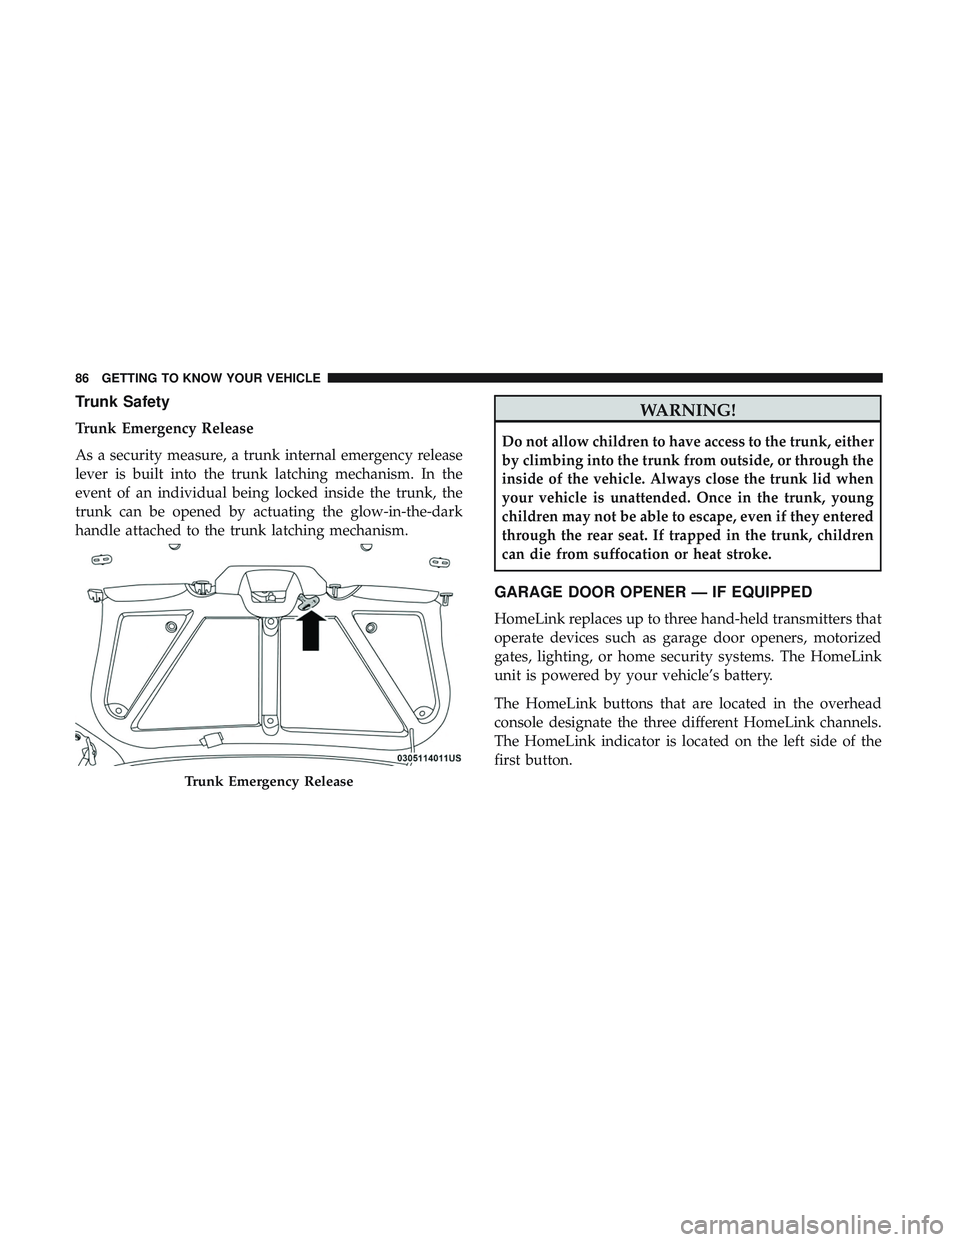
Trunk Emergency Release
As a security measure, a trunk internal emergency release
lever is built into the trunk latching mechanism. In the
event of an individual being locked inside the trunk, the
trunk can be opened by actuating the glow-in-the-dark
handle attached to the trunk latching mechanism.
WARNING!
Do not allow children to have access to the trunk, either
by climbing into the trunk from outside, or through the
inside of the vehicle. Always close the trunk lid when
your vehicle is unattended. Once in the trunk, young
children may not be able to escape, even if they entered
through the rear seat. If trapped in the trunk, children
can die from suffocation or heat stroke.
GARAGE DOOR OPENER — IF EQUIPPED
HomeLink replaces up to three hand-held transmitters that
operate devices such as garage door openers, motorized
gates, lighting, or home security systems. The HomeLink
unit is powered by your vehicle’s battery.
The HomeLink buttons that are located in the overhead
console designate the three different HomeLink channels.
The HomeLink indicator is located on the left side of the
first button.
Trunk Emergency Release
86 GETTING TO KNOW YOUR VEHICLE