2019 DODGE CHALLENGER SRT ignition
[x] Cancel search: ignitionPage 40 of 500
WARNING!
•For personal security and safety in the event of a
collision, lock the vehicle doors before you drive as
well as when you park and leave the vehicle.
• Before exiting a vehicle, always shift the automatic
transmission into PARK or the manual transmission
into FIRST gear or REVERSE, apply the parking
brake, turn the vehicle OFF, remove the key fobs
from the vehicle and lock all doors, and lock your
vehicle.
• When leaving the vehicle, always remove the key
from the ignition and lock your vehicle. Unsuper-
vised use of vehicle equipment may cause severe
personal injuries and death.
• Never leave children alone in a vehicle, or with
access to an unlocked vehicle. Allowing children to
be in a vehicle unattended is dangerous for a number
of reasons. A child or others could be seriously or
fatally injured. Children should be warned not to
touch the parking brake, brake pedal or gear selector.
• Do not leave the key fob in or near the vehicle, or in
a location accessible to children, and do not leave the
(Continued)
WARNING! (Continued)
ignition of a vehicle equipped with Keyless Enter-
N-Go in the ACC or ON/RUN mode. A child could
operate power windows, other controls, or move the
vehicle.
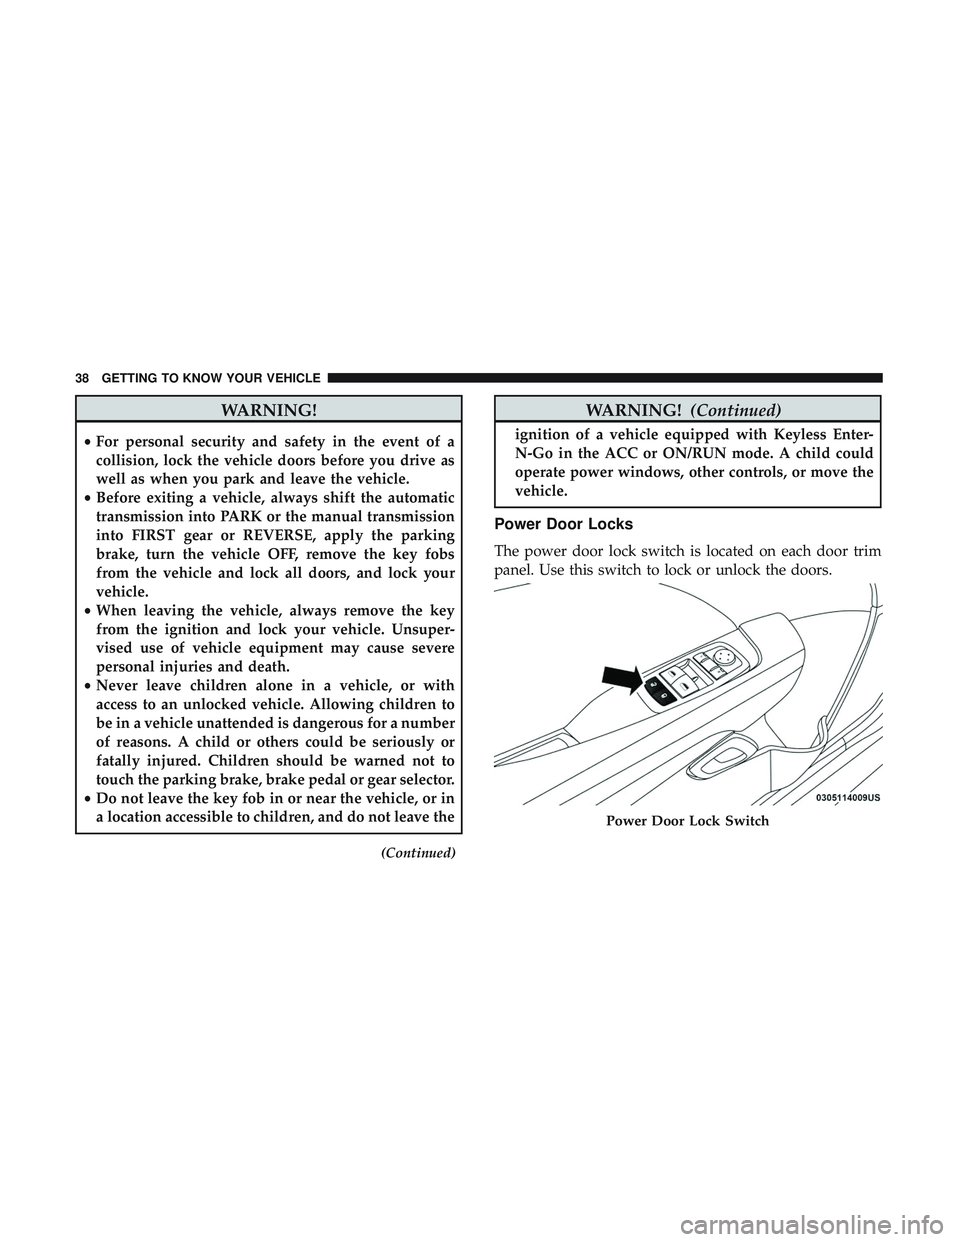
Power Door Locks
The power door lock switch is located on each door trim
panel. Use this switch to lock or unlock the doors.
Power Door Lock Switch
38 GETTING TO KNOW YOUR VEHICLE
Page 41 of 500
The doors can also be locked and unlocked with the
Keyless Enter-N-Go — Passive Entry system. Refer to
“Keyless Enter-N-Go — Passive Entry” located in “Doors”
in “Getting To Know Your Vehicle” for further information.
If you push the power door lock switch while the ignition
is on, and either door is open, the power locks will not
operate. This prevents you from accidentally locking the
key fob in the vehicle. Turning off the ignition or closing
the door will allow the locks to operate. If a door is open
with the ignition either cycled to ACC or ON/RUN (engine
not running), a chime will sound as a reminder.
Keyless Enter-N-Go — Passive Entry
The Passive Entry system is an enhancement to the vehi-
cle’s Remote Keyless Entry system and a feature of Keyless
Enter-N-Go. This feature allows you to lock and unlock the
vehicle’s door(s) without having to push the key fob lock
or unlock buttons.
NOTE:
•Passive Entry may be programmed on or off; refer to
“Uconnect Settings” in “Multimedia” in the Owner ’s
Manual for further information. •
If wearing gloves on your hands, or if it has been
raining/snowing on the Passive Entry door handle, the
unlock sensitivity can be affected, resulting in a slower
response time.
• If the vehicle is unlocked by Passive Entry and no door
is opened within 60 seconds, the vehicle will re-lock and
if equipped will arm the security alarm.
• The key fob may not be able to be detected by the vehicle
Passive Entry system if it is located next to a mobile
phone, laptop or other electronic device; these devices
may block the key fob’s wireless signal and prevent the
Passive Entry handle from locking/unlocking the ve-
hicle.
To Unlock From The Driver’s Side:
With a Passive Entry key fob within 5 ft (1.5 m) of the
driver door handle, grab the front driver door handle to
unlock the driver’s door automatically. The interior door
panel lock knob will raise when the door is unlocked.
3
GETTING TO KNOW YOUR VEHICLE 39
Page 42 of 500
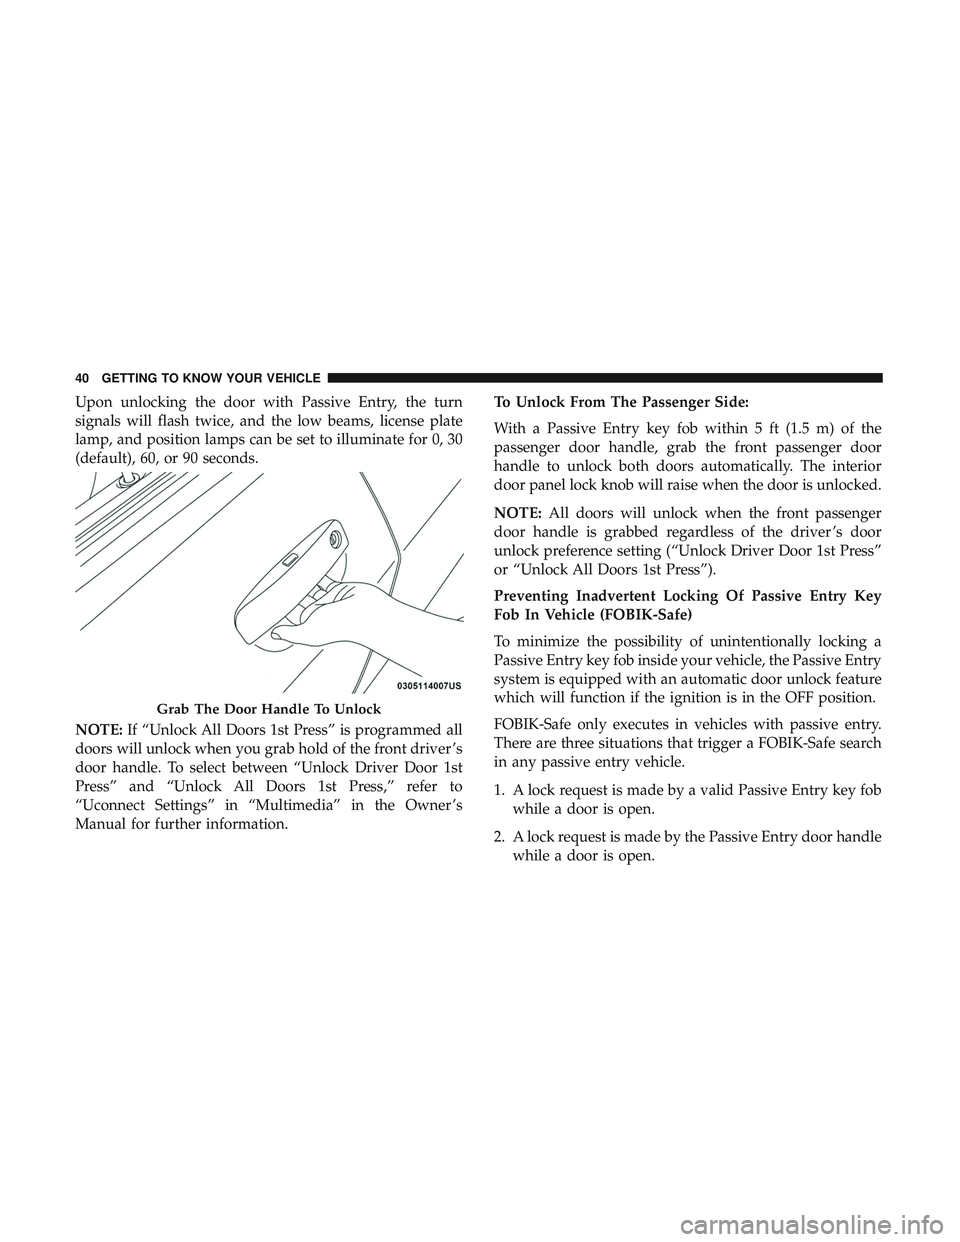
Upon unlocking the door with Passive Entry, the turn
signals will flash twice, and the low beams, license plate
lamp, and position lamps can be set to illuminate for 0, 30
(default), 60, or 90 seconds.
NOTE:If “Unlock All Doors 1st Press” is programmed all
doors will unlock when you grab hold of the front driver ’s
door handle. To select between “Unlock Driver Door 1st
Press” and “Unlock All Doors 1st Press,” refer to
“Uconnect Settings” in “Multimedia” in the Owner ’s
Manual for further information. To Unlock From The Passenger Side:
With a Passive Entry key fob within 5 ft (1.5 m) of the
passenger door handle, grab the front passenger door
handle to unlock both doors automatically. The interior
door panel lock knob will raise when the door is unlocked.
NOTE:
All doors will unlock when the front passenger
door handle is grabbed regardless of the driver ’s door
unlock preference setting (“Unlock Driver Door 1st Press”
or “Unlock All Doors 1st Press”).
Preventing Inadvertent Locking Of Passive Entry Key
Fob In Vehicle (FOBIK-Safe)
To minimize the possibility of unintentionally locking a
Passive Entry key fob inside your vehicle, the Passive Entry
system is equipped with an automatic door unlock feature
which will function if the ignition is in the OFF position.
FOBIK-Safe only executes in vehicles with passive entry.
There are three situations that trigger a FOBIK-Safe search
in any passive entry vehicle.
1. A lock request is made by a valid Passive Entry key fob while a door is open.
2. A lock request is made by the Passive Entry door handle while a door is open.
Grab The Door Handle To Unlock
40 GETTING TO KNOW YOUR VEHICLE
Page 65 of 500
Automatic Headlights
This system automatically turns the headlights on or off
according to ambient light levels. To turn the system on,
rotate the headlight switch counterclockwise to the AUTO
position. When the system is on, the headlight time delay
feature is also on. This means the headlights will stay on
for up to 90 seconds after you place the ignition into the
OFF position. The headlight time delay can be pro-
grammed 0/30/60/90 seconds.
Refer to “Uconnect Settings” in “Multimedia” for further
information.
To turn the automatic system off, move the headlight
switch out of the AUTO position.
NOTE:The engine must be running before the headlights
will come on in the automatic mode.
Parking Lights
Turn the headlight switch knob to the first detent to turn
the parking lights on. This also turns on all instrument
panel lighting.
Headlights On With Wipers
When this feature is active, the headlights will turn on after
the wipers are turned on if the headlight switch is placed in the AUTO position and programmable feature is set to on.
In addition, the headlights will turn off when the wipers
are turned off if they were turned on by this feature.
NOTE:
The “Headlights On With Wipers” feature can be
turned on or off using the Uconnect System. Refer to
“Uconnect Settings” in “Multimedia” for further informa-
tion.
Headlight Time Delay
This feature provides the safety of headlight illumination
for up to 90 seconds when leaving your vehicle in an unlit
area with the headlight switch in the O (off) position.
To activate the delay feature, turn OFF the ignition switch
while the headlights are still on. Then, turn off the head-
lights within 45 seconds. The delay interval begins when
the headlight switch is turned off.
NOTE: The lights must be turned off within 45 seconds of
turning the ignition OFF to activate this feature.
If you turn the headlights, park lights or ignition switch
ON again, the system will cancel the delay.
If you turn the headlights off before the ignition, they will
turn off in the normal manner.
3
GETTING TO KNOW YOUR VEHICLE 63
Page 66 of 500

NOTE:The Headlight Time Delay is programmable using
the Uconnect System, refer to “Uconnect Settings” in
“Multimedia” for further information.
Lights-On Reminder
If the headlights or parking lights are on after the ignition
is placed in the OFF position, a chime will sound to alert
the driver when the driver’s door is opened.
Fog Lights — If Equipped
The front fog light switch is built into the headlight switch. To activate the front fog lights, turn on the parking lights or
the low beam headlights and push the headlight switch. To
turn off the front fog lights, either push the headlight
switch a second time or turn off the headlight switch.
An indicator light in the instrument cluster display illumi-
nates when the fog lights are turned on.
NOTE:
The fog lights will operate with the low beam
headlights or parking lights on. However, selecting the
high beam headlights will turn off the fog lights.Turn Signals
Move the multifunction lever up or down and the arrows
on each side of the instrument cluster display flash to show
proper operation of the front and rear turn signal lights.
NOTE:
• If either light remains on and does not flash, or there is
a very fast flash rate, check for a defective outside light
bulb. If an indicator fails to light when the lever is
moved, it would suggest that the indicator bulb is
defective.
• A “Turn Signal On” message will appear in the instru-
ment cluster display and a continuous chime will sound
if the vehicle is driven more than 1 mile (1.6 km) with
either turn signal on.
Fog Light Switch
64 GETTING TO KNOW YOUR VEHICLE
Page 67 of 500

Lane Change Assist — If Equipped
Tap the multifunction lever up or down once, without
moving beyond the detent, and the turn signal (right or
left) will flash three times then automatically turn off.
INTERIOR LIGHTS
The interior lights come on when a door is opened.
To protect the battery, the interior lights will turn off
automatically ten minutes after the ignition is moved to the
OFF position. This will occur if the interior lights were
switched on manually or are on because a door is open.
The Battery Protection also includes the glove compart-
ment light and the trunk light. To restore interior light
operation after automatic battery protection is enabled
(lights off), either place the ignition in the ON/RUN
position or cycle the light switch.
Map/Reading Lights
These lights are mounted between the sun visors on the
overhead console. Each light is turned on by pushing the
lens. Push the lens a second time to turn off the light. These
lights also turn on when a door is opened, when the unlock
button on the remote keyless entry key fob is pushed, or
when the dimmer control is turned fully upward, past the
second detent.
Overhead Console
3
GETTING TO KNOW YOUR VEHICLE 65
Page 69 of 500
Parade Mode (Daytime Brightness Feature)
Rotate the instrument panel dimmer control upward to the
first detent. This feature brightens all text displays such as
the odometer, instrument cluster display, and radio when
the position lights or headlights are on.
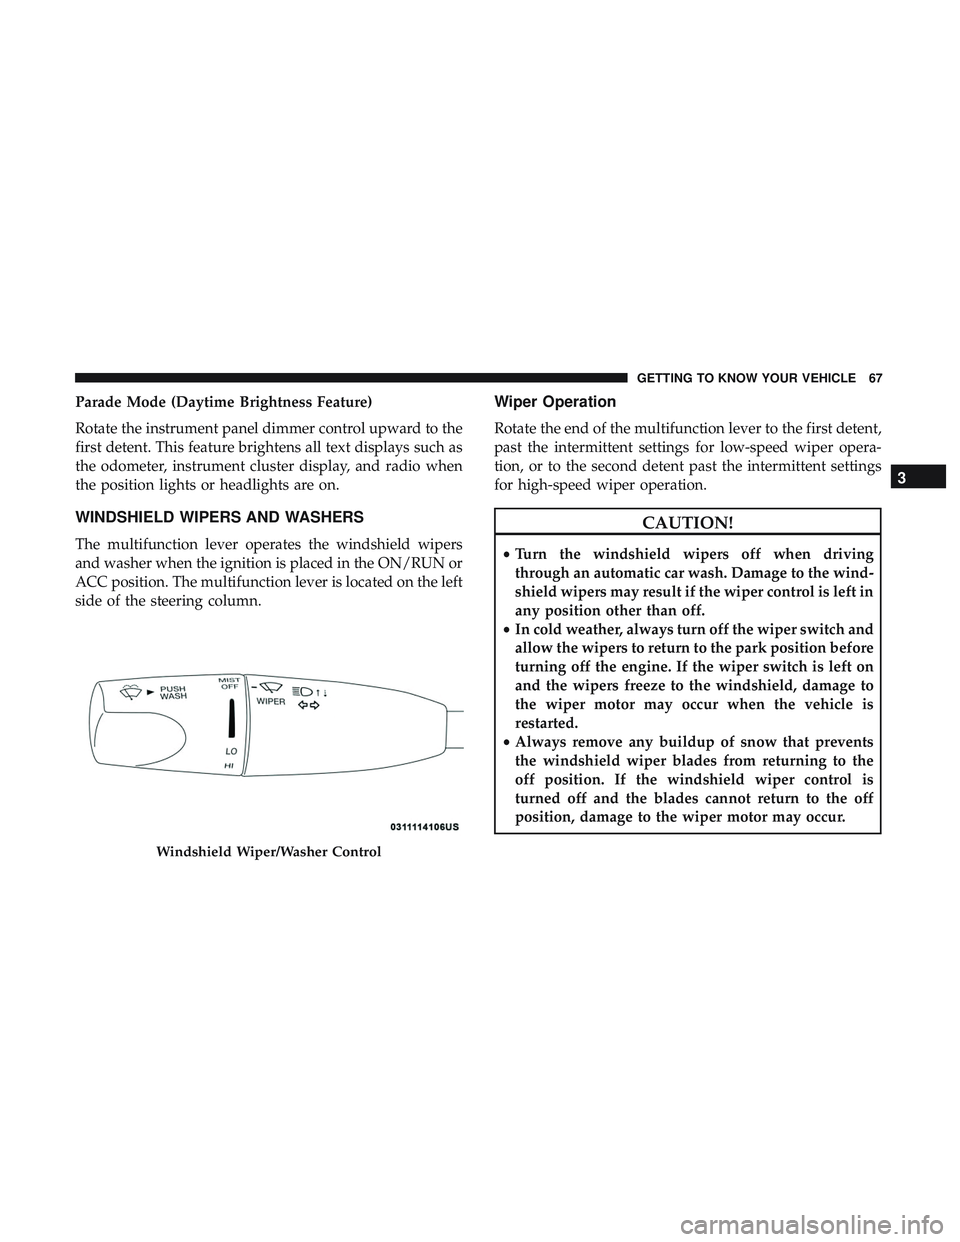
WINDSHIELD WIPERS AND WASHERS
The multifunction lever operates the windshield wipers
and washer when the ignition is placed in the ON/RUN or
ACC position. The multifunction lever is located on the left
side of the steering column.
Wiper Operation
Rotate the end of the multifunction lever to the first detent,
past the intermittent settings for low-speed wiper opera-
tion, or to the second detent past the intermittent settings
for high-speed wiper operation.
CAUTION!
•Turn the windshield wipers off when driving
through an automatic car wash. Damage to the wind-
shield wipers may result if the wiper control is left in
any position other than off.
• In cold weather, always turn off the wiper switch and
allow the wipers to return to the park position before
turning off the engine. If the wiper switch is left on
and the wipers freeze to the windshield, damage to
the wiper motor may occur when the vehicle is
restarted.
• Always remove any buildup of snow that prevents
the windshield wiper blades from returning to the
off position. If the windshield wiper control is
turned off and the blades cannot return to the off
position, damage to the wiper motor may occur.
Windshield Wiper/Washer Control
3
GETTING TO KNOW YOUR VEHICLE 67
Page 71 of 500
from the windshield washers of the vehicle ahead. Rotate
the end of the multifunction lever to one of four settings to
activate this feature.
The sensitivity of the system can be adjusted with the
multifunction lever. Wiper delay position 1 is the least
sensitive, and wiper delay position 4 is the most sensitive.
Setting 3 should be used for normal rain conditions.
Settings 1 and 2 can be used if the driver desires less wiper
sensitivity. Setting 4 can be used if the driver desires more
sensitivity. Place the wiper switch in the off position when
not using the system.
NOTE:
•The Rain Sensing feature will not operate when the
wiper switch is in the low or high-speed position.
• The Rain Sensing feature may not function properly
when ice, or dried salt water is present on the wind-
shield.
• Use of Rain-X or products containing wax or silicone
may reduce Rain Sensing performance.
The Rain Sensing system has protection features for the
wiper blades and arms, and will not operate under the
following conditions: •
Low Ambient Temperature — When the ignition is first
turned ON, the Rain Sensing system will not operate
until the wiper switch is moved, vehicle speed is greater
than 0 mph (0 km/h), or the outside temperature is
greater than 32°F (0°C).
• Transmission In NEUTRAL Position — When the igni-
tion is ON, and the transmission is in the NEUTRAL
position, the Rain Sensing system will not operate until
the wiper switch is moved, vehicle speed is greater than
3 mph (5 km/h), or the gear selector is moved out of the
NEUTRAL position.
NOTE: Rain Sensing can be turned on and off using the
Uconnect System, refer to “Uconnect Settings” in “Multi-
media” for further information.
CLIMATE CONTROLS
The Climate Control System allows you to regulate the
temperature, air flow, and direction of air circulating
throughout the vehicle. The controls are located on the
touchscreen (if equipped) and on the instrument panel
below the radio.
3
GETTING TO KNOW YOUR VEHICLE 69