2019 DODGE CHALLENGER belt
[x] Cancel search: beltPage 44 of 532
SEATS
Seats are a part of the Occupant Restraint System of the
vehicle.
WARNING!
•It is dangerous to ride in a cargo area, inside or
outside of a vehicle. In a collision, people riding in
these areas are more likely to be seriously injured or
killed.
• Do not allow people to ride in any area of your
vehicle that is not equipped with seats and seat belts.
In a collision, people riding in these areas are more
likely to be seriously injured or killed.
• Be sure everyone in your vehicle is in a seat and
using a seat belt properly.
Manual Adjustment (Front Seats) — If Equipped
WARNING!
• Adjusting a seat while the vehicle is moving is
dangerous. The sudden movement of the seat could
cause you to lose control. The seat belt might not be
adjusted properly and you could be injured. Adjust
the seat only while the vehicle is parked.
• Do not ride with the seatback reclined so that the
shoulder belt is no longer resting against your chest.
In a collision you could slide under the seat belt and
be seriously or even fatally injured. Use the recliner
only when the vehicle is parked.
Manual Front Seats Forward/Rearward Adjustment
The adjusting bar is located at the front of the seat, near the
floor. Pull the bar upward to move the seat forward or
rearward. Release the bar once the seat is in the desired
position. Using body pressure, move forward and rear-
ward on the seat to be sure that the seat adjusters have
latched.
42 GETTING TO KNOW YOUR VEHICLE
Page 45 of 532
WARNING!
•Adjusting a seat while driving may be dangerous.
Moving a seat while driving could result in loss of
control which could cause a collision and serious
injury or death.
• Seats should be adjusted before fastening the seat
belts and while the vehicle is parked. Serious injury
or death could result from a poorly adjusted seat belt.
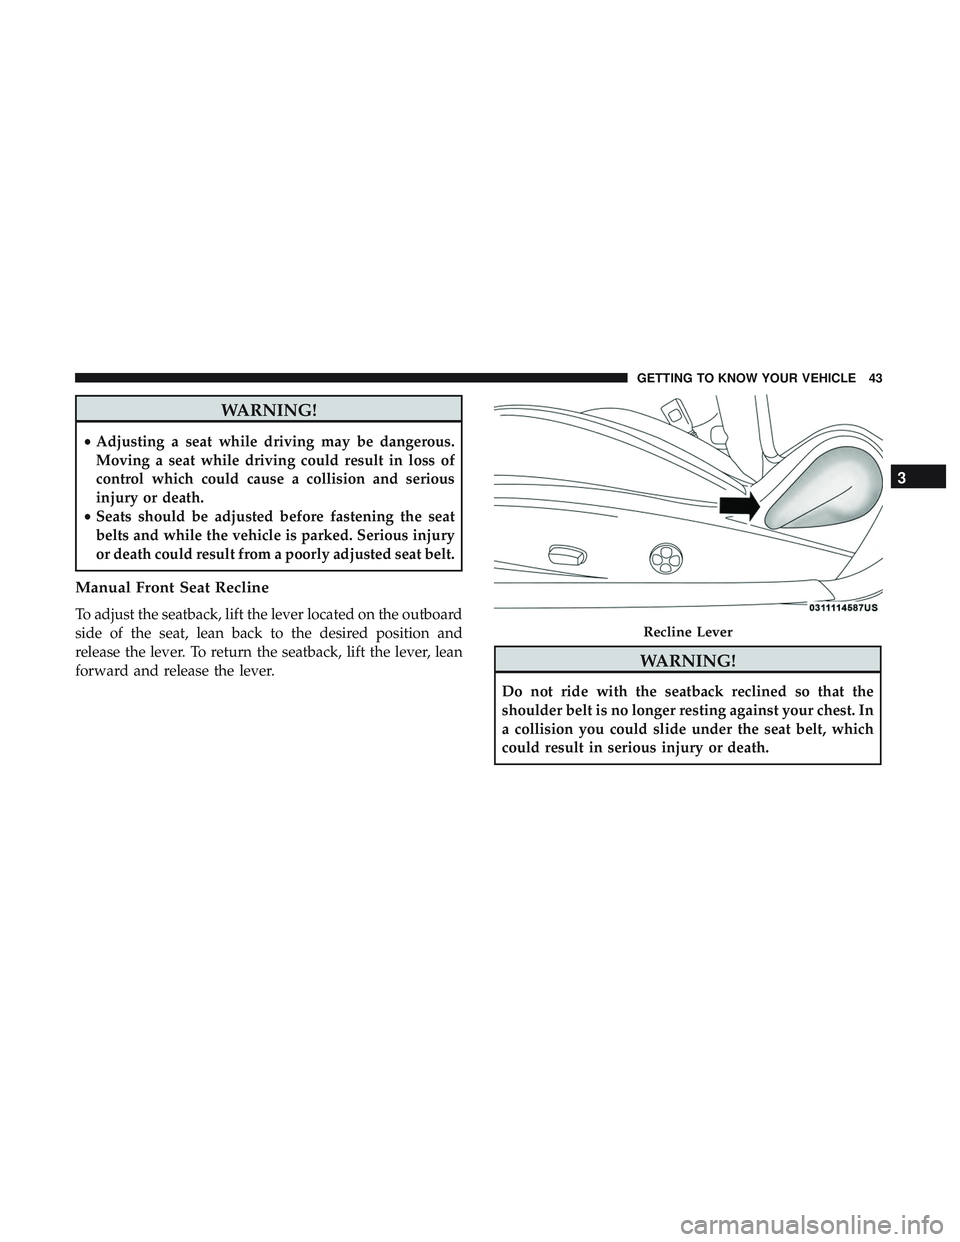
Manual Front Seat Recline
To adjust the seatback, lift the lever located on the outboard
side of the seat, lean back to the desired position and
release the lever. To return the seatback, lift the lever, lean
forward and release the lever.
WARNING!
Do not ride with the seatback reclined so that the
shoulder belt is no longer resting against your chest. In
a collision you could slide under the seat belt, which
could result in serious injury or death.
Recline Lever
3
GETTING TO KNOW YOUR VEHICLE 43
Page 46 of 532
Manual Adjustment (Rear Seats)
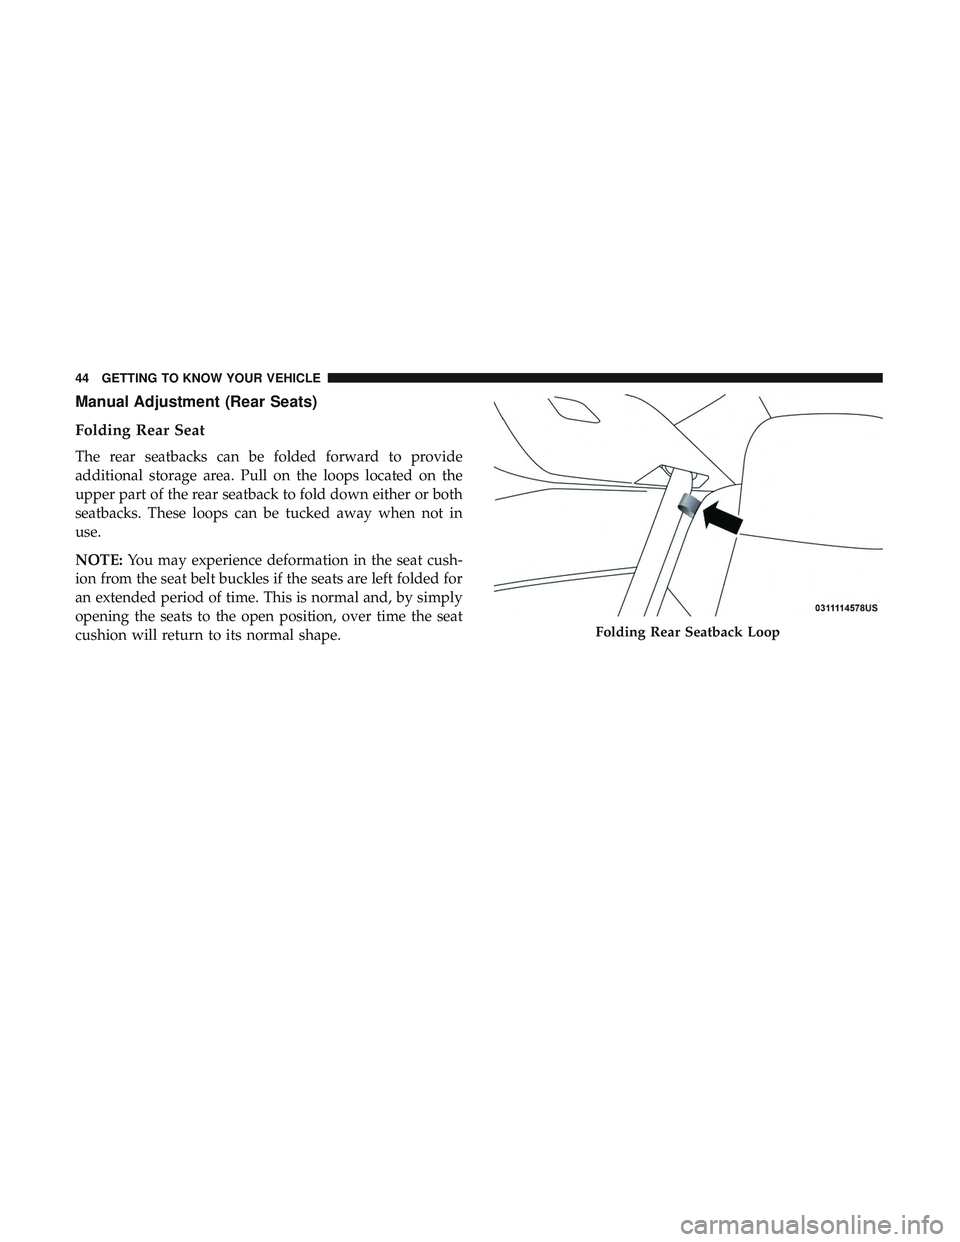
Folding Rear Seat
The rear seatbacks can be folded forward to provide
additional storage area. Pull on the loops located on the
upper part of the rear seatback to fold down either or both
seatbacks. These loops can be tucked away when not in
use.
NOTE:You may experience deformation in the seat cush-
ion from the seat belt buckles if the seats are left folded for
an extended period of time. This is normal and, by simply
opening the seats to the open position, over time the seat
cushion will return to its normal shape.
Folding Rear Seatback Loop
44 GETTING TO KNOW YOUR VEHICLE
Page 51 of 532
Vehicles Without Passenger Seating Installed
All passenger occupants within the vehicle must be in a
seat equipped with a Seat Belt System and Head Restraint
for the safety of the passenger. If the passenger and/or rear
seats have been removed, do not ride in those areas.
This vehicle has been designed to maximize total perfor-
mance. In doing so, the deletion of passenger seats and/or
rear seat may affect the NVH (Noise, Vibration, and
Harshness) characteristics. As a result, the interior (driver
cockpit) Noise, Vibration, and Harshness (NVH) will be
louder overall.
WARNING!
•If the passenger and/or rear seats have been re-
moved, do not ride in those areas. In a collision,
people riding in these areas are more likely to be
seriously injured or killed.
• If this vehicle was not factory equipped with a
passenger seat, NEVER attempt to install a passenger
seat because the safety systems, including the air
bags and seatbelt, may not properly protect you.
(Continued)
WARNING! (Continued)
•It is dangerous to ride in a cargo area, inside or
outside of a vehicle. In a collision, people riding in
this area are more likely to be seriously injured or
killed.
• Only ride in available seating positions equipped
with seat belt systems. Always properly wear your
seat belt. Failure to do so could result in an increased
risk of serious injury or death in the event of an
accident.
• Be sure everyone in your vehicle is in a seat and
using a seat belt properly. Occupants, including the
driver, should always wear their seat belts whether
or not an air bag is also provided at their seating
positions to minimize the risk of severe injury or
death in the event of a crash.
• All occupants, including the driver, should not oper-
ate a vehicle or sit in a vehicle’s seat if the head
restraints are not in place of their proper positions in
order to minimize the risk of neck injury in the event
of a crash.
(Continued)
3
GETTING TO KNOW YOUR VEHICLE 49
Page 52 of 532
WARNING!(Continued)
•Head restraints should never be adjusted while the
vehicle is in motion. Driving a vehicle with the head
restraints improperly adjusted or removed could
cause serious injury or death in the event of a
collision.
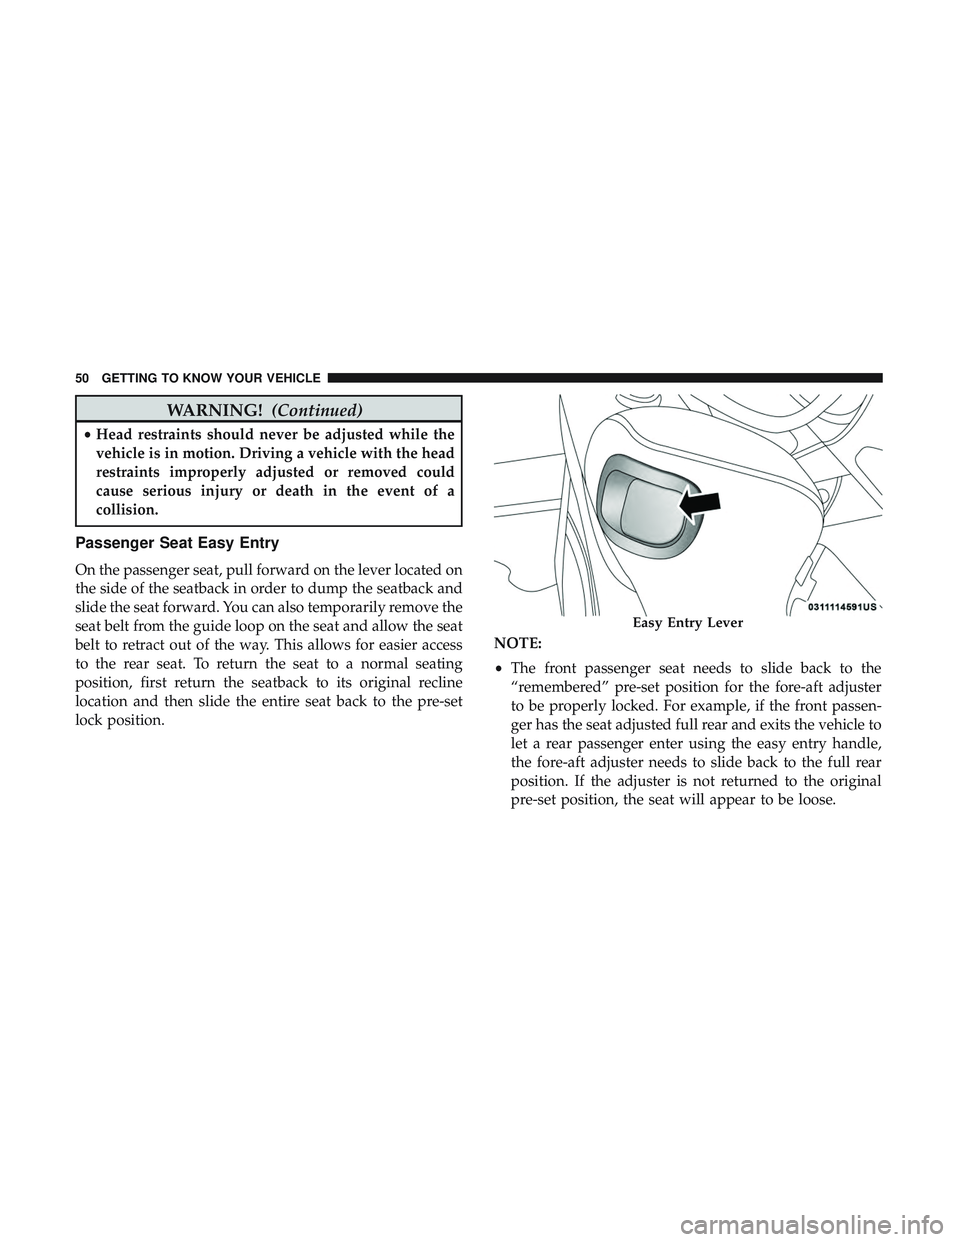
Passenger Seat Easy Entry
On the passenger seat, pull forward on the lever located on
the side of the seatback in order to dump the seatback and
slide the seat forward. You can also temporarily remove the
seat belt from the guide loop on the seat and allow the seat
belt to retract out of the way. This allows for easier access
to the rear seat. To return the seat to a normal seating
position, first return the seatback to its original recline
location and then slide the entire seat back to the pre-set
lock position. NOTE:
•
The front passenger seat needs to slide back to the
“remembered” pre-set position for the fore-aft adjuster
to be properly locked. For example, if the front passen-
ger has the seat adjusted full rear and exits the vehicle to
let a rear passenger enter using the easy entry handle,
the fore-aft adjuster needs to slide back to the full rear
position. If the adjuster is not returned to the original
pre-set position, the seat will appear to be loose.
Easy Entry Lever
50 GETTING TO KNOW YOUR VEHICLE
Page 54 of 532
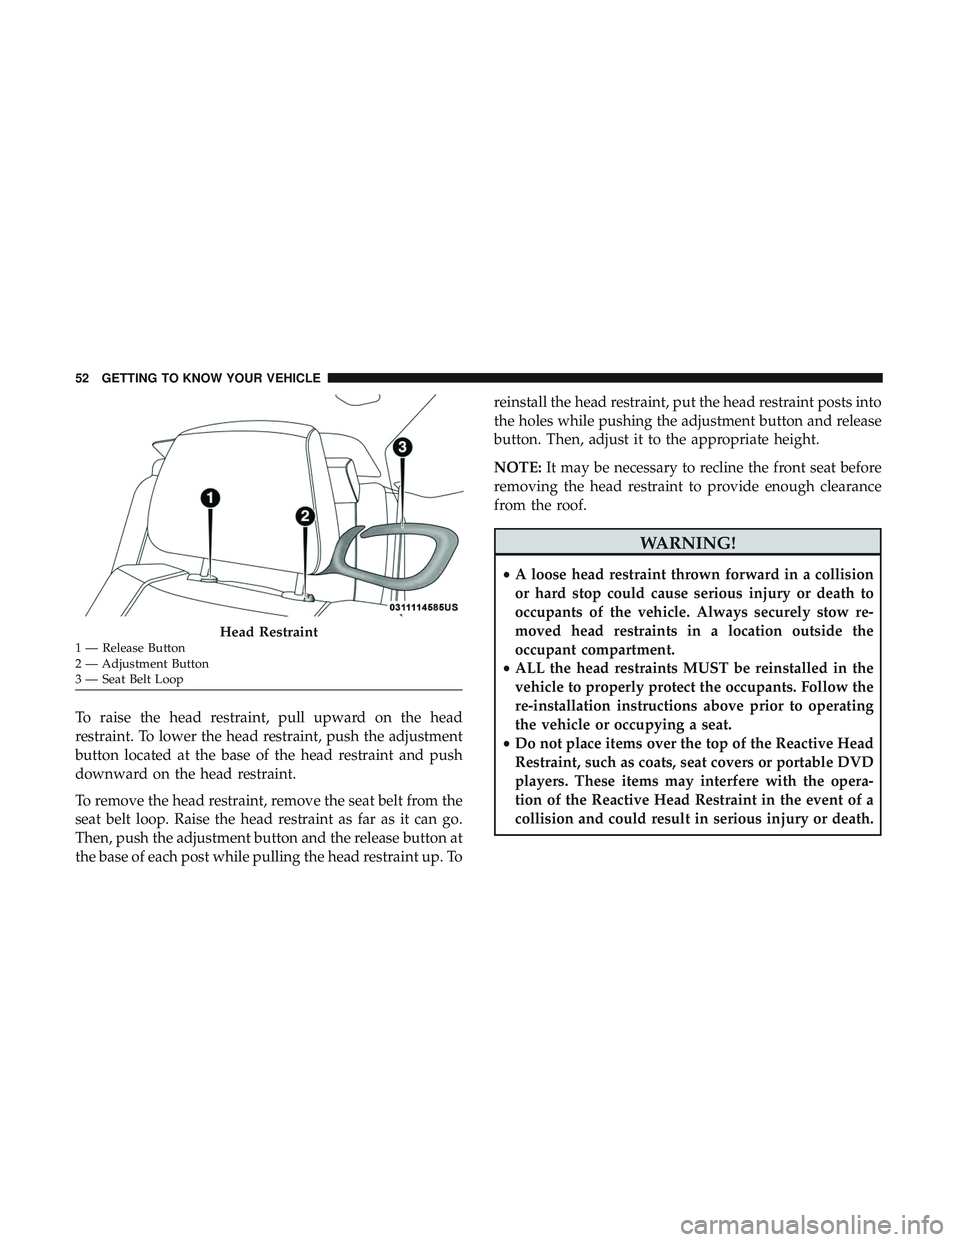
To raise the head restraint, pull upward on the head
restraint. To lower the head restraint, push the adjustment
button located at the base of the head restraint and push
downward on the head restraint.
To remove the head restraint, remove the seat belt from the
seat belt loop. Raise the head restraint as far as it can go.
Then, push the adjustment button and the release button at
the base of each post while pulling the head restraint up. Toreinstall the head restraint, put the head restraint posts into
the holes while pushing the adjustment button and release
button. Then, adjust it to the appropriate height.
NOTE:
It may be necessary to recline the front seat before
removing the head restraint to provide enough clearance
from the roof.
WARNING!
• A loose head restraint thrown forward in a collision
or hard stop could cause serious injury or death to
occupants of the vehicle. Always securely stow re-
moved head restraints in a location outside the
occupant compartment.
• ALL the head restraints MUST be reinstalled in the
vehicle to properly protect the occupants. Follow the
re-installation instructions above prior to operating
the vehicle or occupying a seat.
• Do not place items over the top of the Reactive Head
Restraint, such as coats, seat covers or portable DVD
players. These items may interfere with the opera-
tion of the Reactive Head Restraint in the event of a
collision and could result in serious injury or death.
Head Restraint1 — Release Button
2 — Adjustment Button
3 — Seat Belt Loop 52 GETTING TO KNOW YOUR VEHICLE
Page 55 of 532
Rear Head Restraints
The rear outboard head restraints are non-adjustable and
are designed to reduce the risk of injury by restricting head
movement in the event of a rear impact.
Vehicles Without Passenger Seating Installed
All passenger occupants within the vehicle must be in a
seat equipped with a Seat Belt System and Head Restraint
for the safety of the passenger. If the passenger and/or rear
seats have been removed, do not ride in those areas.
This vehicle has been designed to maximize total perfor-
mance. In doing so, the deletion of passenger seats and/or
rear seat may affect the NVH (Noise, Vibration, and
Harshness) characteristics. As a result, the interior (driver
cockpit) Noise, Vibration, and Harshness (NVH) will be
louder overall.
WARNING!
•If the passenger and/or rear seats have been re-
moved, do not ride in those areas. In a collision,
people riding in these areas are more likely to be
seriously injured or killed.
(Continued)
WARNING! (Continued)
•If this vehicle was not factory equipped with a
passenger seat, NEVER attempt to install a passenger
seat because the safety systems, including the air
bags and seatbelt, may not properly protect you.
• It is dangerous to ride in a cargo area, inside or
outside of a vehicle. In a collision, people riding in
this area are more likely to be seriously injured or
killed.
• Only ride in available seating positions equipped
with seat belt systems. Always properly wear your
seat belt. Failure to do so could result in an increased
risk of serious injury or death in the event of an
accident.
• Be sure everyone in your vehicle is in a seat and
using a seat belt properly. Occupants, including the
driver, should always wear their seat belts whether
or not an air bag is also provided at their seating
positions to minimize the risk of severe injury or
death in the event of a crash.
(Continued)
3
GETTING TO KNOW YOUR VEHICLE 53
Page 83 of 532
WARNING!(Continued)
equipped with Keyless Enter-N-Go in the ACC or
ON/RUN mode. Occupants, particularly unattended
children, can become entrapped by the power sun-
roof while operating the power sunroof switch. Such
entrapment may result in serious injury or death.
• In a collision, there is a greater risk of being thrown
from a vehicle with an open sunroof. You could also
be seriously injured or killed. Always fasten your
seat belt properly and make sure all passengers are
also properly secured.
• Do not allow small children to operate the sunroof.
Never allow your fingers, other body parts, or any
object, to project through the sunroof opening. In-
jury may result.
Opening Sunroof
Express
Push the switch rearward and release it within one-half
second, the sunroof and sunshade will open automatically
and stop at full open position. During Express Open
operation any other actuation of the sunroof switches will
stop the sunroof in a partially open position. Manual Mode
Push and hold the switch rearward, the sunroof and
sunshade will open and automatically stop at full open
position. Releasing the switch while the sunroof is in
motion will stop the sunroof in a partially open position.
Vent Open
Push and release the Vent switch within one half second
and the sunroof will open to the vent position. During
Express Vent operation any other actuation of the sunroof
switches will stop the sunroof operation.
Closing Sunroof
Express
Push the switch forward and release it within one-half
second and the sunroof will close automatically from any
position. During Express Close operation any other actua-
tion of the sunroof switches will stop the sunroof in a
partially open position.
Manual Mode
Push and hold the switch forward and the sunroof will
close from any position and stop at a full closed position.
Releasing the switch while the sunroof is in motion will
stop the sunroof in a partially open position.
3
GETTING TO KNOW YOUR VEHICLE 81