2019 CHRYSLER PACIFICA ECU
[x] Cancel search: ECUPage 261 of 718

Seat Belt Pretensioner
The front outboard seat belt system is equipped with
pretensioning devices that are designed to remove slack
from the seat belt in the event of a collision. These devices
may improve the performance of the seat belt by removing
slack from the seat belt early in a collision. Pretensioners
work for all size occupants, including those in child
restraints.
NOTE:These devices are not a substitute for proper seat
belt placement by the occupant. The seat belt still must be
worn snugly and positioned properly.
The pretensioners are triggered by the Occupant Restraint
Controller (ORC). Like the air bags, the pretensioners are
single use items. A deployed pretensioner or a deployed air
bag must be replaced immediately.
Energy Management Feature
The front outboard seat belt system is equipped with an
Energy Management feature that may help further reduce
the risk of injury in the event of a collision. The seat belt
system has a retractor assembly that is designed to release
webbing in a controlled manner.
Switchable Automatic Locking Retractors (ALR)
The seat belts in the passenger seating positions are
equipped with a Switchable Automatic Locking Retractor
(ALR) which is used to secure a child restraint system. For
additional information, refer to “Installing Child Restraints
Using The Vehicle Seat Belt” under the “Child Restraints”
section of this manual. The figure below illustrates the
locking feature for each seating position.
7 Passenger Bench Seat Automatic Locking Retractor
(ALR) Locations
ALR — Switchable Automatic Locking Retractor
5
SAFETY 259
Page 264 of 718

Seat Belt Park Stitch — If Equipped
The rear outboard seat belts may be equipped with a park
stitch to raise the latch plate for easier access to occupants.
If the park stitch interferes with the tight installation of a
child restraint, slide the latch plate over the stitching to
shorten the lap portion of the belt and install the car seat
normally. When the car seat is removed from the vehicle,
slide the latch plate above the park stitch to enable occu-
pants to latch the seatbelt securely.
Third Row Stow Clip - If Equipped
Your vehicle may be equipped with a stow clip on the
lower trim behind the third row. This clip is used to hold
the seat belt out of the path of the power folding third row
seat. Only place the seat belt webbing in this clip while
folding and opening the seat. Do not leave the webbing
behind the clip when using the belt to restrain an occupant.
Seat Belt Park Stitch Location
Third Row Stow Clip
262 SAFETY
Page 285 of 718

These data can help provide a better understanding of the
circumstances in which crashes and injuries occur.
NOTE:EDR data are recorded by your vehicle only if a
non-trivial crash situation occurs; no data are recorded by
the EDR under normal driving conditions and no personal
data (e.g., name, gender, age, and crash location) are
recorded. However, other parties, such as law enforcement,
could combine the EDR data with the type of personally
identifying data routinely acquired during a crash investi-
gation.
To read data recorded by an EDR, special equipment is
required, and access to the vehicle or the EDR is needed. In
addition to the vehicle manufacturer, other parties, such as
law enforcement, that have the special equipment, can read
the information if they have access to the vehicle or the
EDR.
Child Restraints
Everyone in your vehicle needs to be buckled up at all
times, including babies and children. Every state in the
United States, and every Canadian province, requires that
small children ride in proper restraint systems. This is the
law, and you can be prosecuted for ignoring it. Children 12 years or younger should ride properly buckled
up in a rear seat, if available. According to crash statistics,
children are safer when properly restrained in the rear
seats rather than in the front.
WARNING!
In a collision, an unrestrained child can become a
projectile inside the vehicle. The force required to hold
even an infant on your lap could become so great that
you could not hold the child, no matter how strong you
are. The child and others could be badly injured or
killed. Any child riding in your vehicle should be in a
proper restraint for the child’s size.
There are different sizes and types of restraints for children
from newborn size to the child almost large enough for an
adult safety belt. Always check the child seat Owner ’s
Manual to make sure you have the correct seat for your
child. Carefully read and follow all the instructions and
warnings in the child restraint Owner ’s Manual and on all
the labels attached to the child restraint.
Before buying any restraint system, make sure that it has a
label certifying that it meets all applicable Safety Stan-
dards. You should also make sure that you can install it in
the vehicle where you will use it.5
SAFETY 283
Page 289 of 718

WARNING!(Continued)
Remove the child restraint before adjusting the ve-
hicle seat position. When the vehicle seat has been
adjusted, reinstall the child restraint.
• When your child restraint is not in use, secure it in
the vehicle with the seat belt or LATCH anchorages,
or remove it from the vehicle. Do not leave it loose in
the vehicle. In a sudden stop or accident, it could
strike the occupants or seatbacks and cause serious
personal injury.
Children Too Large For Booster Seats
Children who are large enough to wear the shoulder belt
comfortably, and whose legs are long enough to bend over
the front of the seat when their back is against the seatback,
should use the seat belt in a rear seat. Use this simple 5-step
test to decide whether the child can use the vehicle’s seat
belt alone:
1. Can the child sit all the way back against the back of the vehicle seat?
2. Do the child’s knees bend comfortably over the front of the vehicle seat – while the child is still sitting all the
way back? 3. Does the shoulder belt cross the child’s shoulder be-
tween the neck and arm?
4. Is the lap part of the belt as low as possible, touching the child’s thighs and not the stomach?
5. Can the child stay seated like this for the whole trip?
If the answer to any of these questions was “no,” then the
child still needs to use a booster seat in this vehicle. If the
child is using the lap/shoulder belt, check seat belt fit
periodically and make sure the seat belt buckle is latched.
A child’s squirming or slouching can move the belt out of
position. If the shoulder belt contacts the face or neck,
move the child closer to the center of the vehicle, or use a
booster seat to position the seat belt on the child correctly.
WARNING!
Never allow a child to put the shoulder belt under an
arm or behind their back. In a crash, the shoulder belt
will not protect a child properly, which may result in
serious injury or death. A child must always wear both
the lap and shoulder portions of the seat belt correctly.
5
SAFETY 287
Page 302 of 718

6. Test that the child restraint is installed tightly by pullingback and forth on the child seat at the belt path. It
should not move more than 1 inch (25.4 mm) in any
direction.
How To Stow An Unused Switchable-ALR (ALR)
Seat Belt:
When using the LATCH attaching system to install a child
restraint, stow all ALR seat belts that are not being used by
other occupants or being used to secure child restraints. An
unused belt could injure a child if they play with it and
accidentally lock the seat belt retractor. Before installing a
child restraint using the LATCH system, buckle the seat
belt behind the child restraint and out of the child’s reach.
If the buckled seat belt interferes with the child restraint
installation, instead of buckling it behind the child re-
straint, route the seat belt through the child restraint belt
path and then buckle it. Do not lock the seat belt. Remind
all children in the vehicle that the seat belts are not toys and
that they should not play with them.
WARNING!
•Improper installation of a child restraint to the
LATCH anchorages can lead to failure of the re-
straint. The child could be badly injured or killed.
Follow the child restraint manufacturer ’s directions
exactly when installing an infant or child restraint.
• Child restraint anchorages are designed to withstand
only those loads imposed by correctly-fitted child
restraints. Under no circumstances are they to be
used for adult seat belts, harnesses, or for attaching
other items or equipment to the vehicle.
Installing Child Restraints Using The Vehicle Seat
Belt
Child restraint systems are designed to be secured in
vehicle seats by lap belts or the lap belt portion of a
lap/shoulder belt.
WARNING!
• Improper installation or failure to properly secure a
child restraint can lead to failure of the restraint. The
child could be badly injured or killed.
(Continued)
300 SAFETY
Page 307 of 718

Installing A Child Restraint With A Switchable
Automatic Locking Retractor (ALR):
Child restraint systems are designed to be secured in
vehicle seats by lap belts or the lap belt portion of a
lap/shoulder belt.
WARNING!
•Improper installation or failure to properly secure a
child restraint can lead to failure of the restraint. The
child could be badly injured or killed.
• Follow the child restraint manufacturer ’s directions
exactly when installing an infant or child restraint.
1. Place the child seat in the center of the seating position. For some second row seats, you may need to recline the
seat and/or raise the head restraint (if adjustable) to get
a better fit. If the rear seat can be moved forward and
rearward in the vehicle, you may wish to move it to its
rear-most position to make room for the child seat. You
may also move the front seat forward to allow more
room for the child seat.
2. Pull enough of the seat belt webbing from the retractor to pass it through the belt path of the child restraint. Do
not twist the belt webbing in the belt path. 3. Slide the latch plate into the buckle until you hear a
“click.”
4. Pull on the webbing to make the lap portion tight against the child seat.
5. To lock the seat belt, pull down on the shoulder part of the belt until you have pulled all the seat belt webbing
out of the retractor. Then, allow the webbing to retract
back into the retractor. As the webbing retracts, you will
hear a clicking sound. This means the seat belt is now in
the Automatic Locking mode.
6. Try to pull the webbing out of the retractor. If it is locked, you should not be able to pull out any webbing.
If the retractor is not locked, repeat step 5.
7. Finally, pull up on any excess webbing to tighten the lap portion around the child restraint while you push the
child restraint rearward and downward into the vehicle
seat.
8. If the child restraint has a top tether strap and the seating position has a top tether anchorage, connect the
tether strap to the anchorage and tighten the tether
strap. See the section “Installing Child Restraints Using
the Top Tether Anchorage” for directions to attach a
tether anchor.5
SAFETY 305
Page 308 of 718

9. Test that the child restraint is installed tightly by pullingback and forth on the child seat at the belt path. It
should not move more than 1 inch (25.4 mm) in any
direction.
Any seat belt system will loosen with time, so check the
belt occasionally, and pull it tight if necessary.
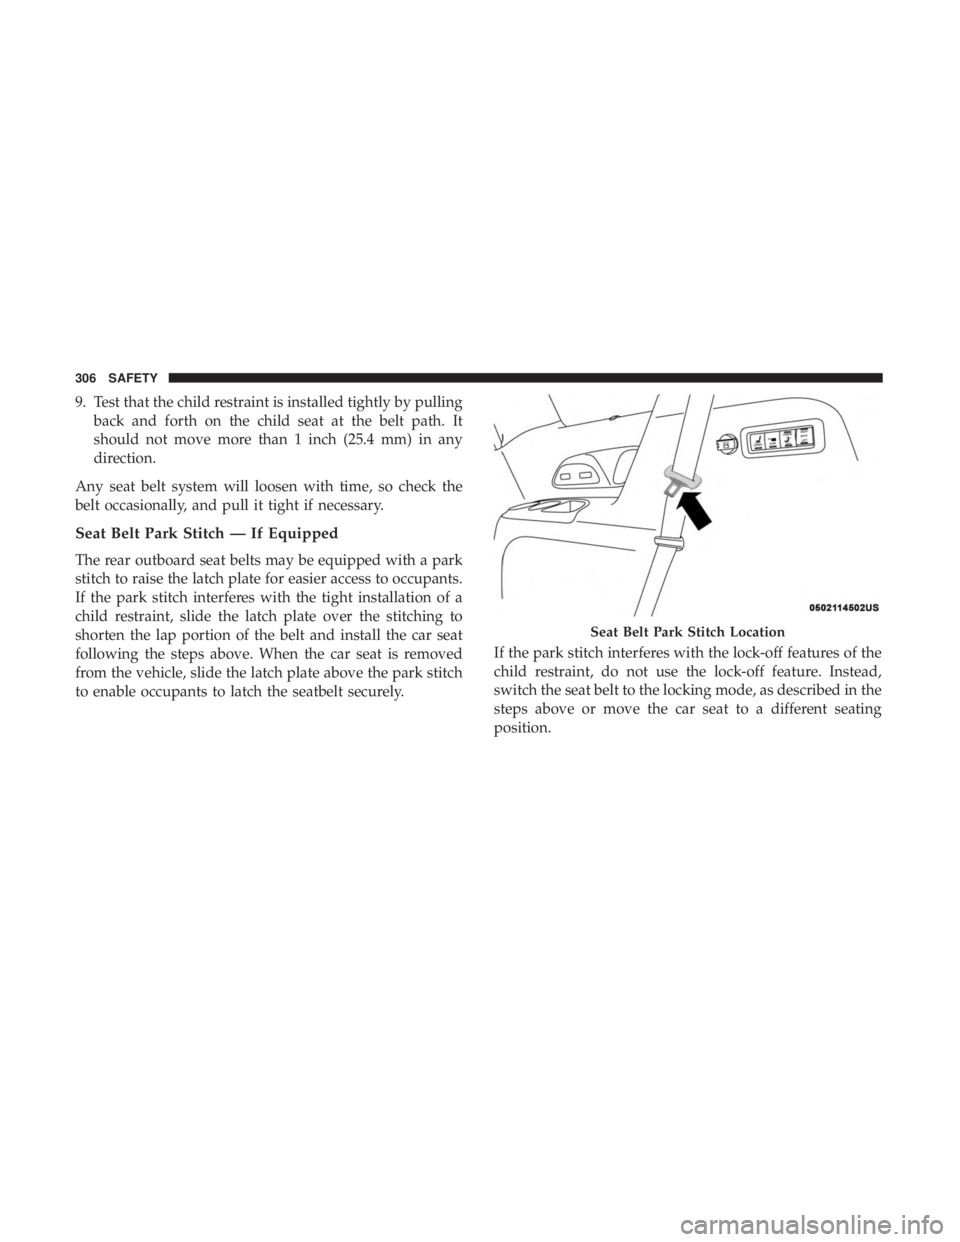
Seat Belt Park Stitch — If Equipped
The rear outboard seat belts may be equipped with a park
stitch to raise the latch plate for easier access to occupants.
If the park stitch interferes with the tight installation of a
child restraint, slide the latch plate over the stitching to
shorten the lap portion of the belt and install the car seat
following the steps above. When the car seat is removed
from the vehicle, slide the latch plate above the park stitch
to enable occupants to latch the seatbelt securely. If the park stitch interferes with the lock-off features of the
child restraint, do not use the lock-off feature. Instead,
switch the seat belt to the locking mode, as described in the
steps above or move the car seat to a different seating
position.
Seat Belt Park Stitch Location
306 SAFETY
Page 311 of 718

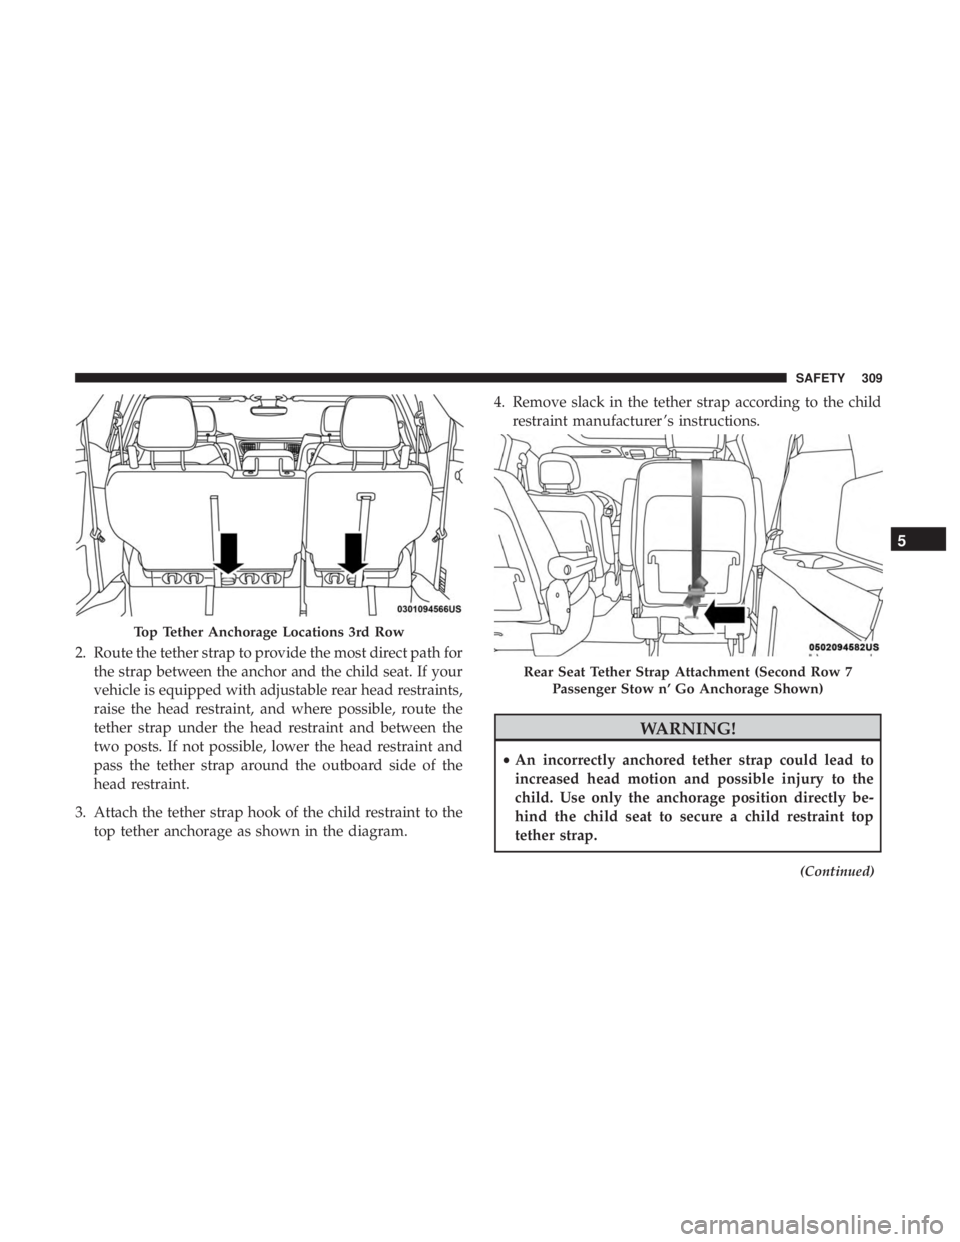
2. Route the tether strap to provide the most direct path forthe strap between the anchor and the child seat. If your
vehicle is equipped with adjustable rear head restraints,
raise the head restraint, and where possible, route the
tether strap under the head restraint and between the
two posts. If not possible, lower the head restraint and
pass the tether strap around the outboard side of the
head restraint.
3. Attach the tether strap hook of the child restraint to the top tether anchorage as shown in the diagram. 4. Remove slack in the tether strap according to the child
restraint manufacturer ’s instructions.
WARNING!
•An incorrectly anchored tether strap could lead to
increased head motion and possible injury to the
child. Use only the anchorage position directly be-
hind the child seat to secure a child restraint top
tether strap.
(Continued)
Top Tether Anchorage Locations 3rd Row
Rear Seat Tether Strap Attachment (Second Row 7
Passenger Stow n’ Go Anchorage Shown)
5
SAFETY 309