2019 CHRYSLER PACIFICA change wheel
[x] Cancel search: change wheelPage 405 of 718

Perpendicular Parking Space Assistance
Operation/Display
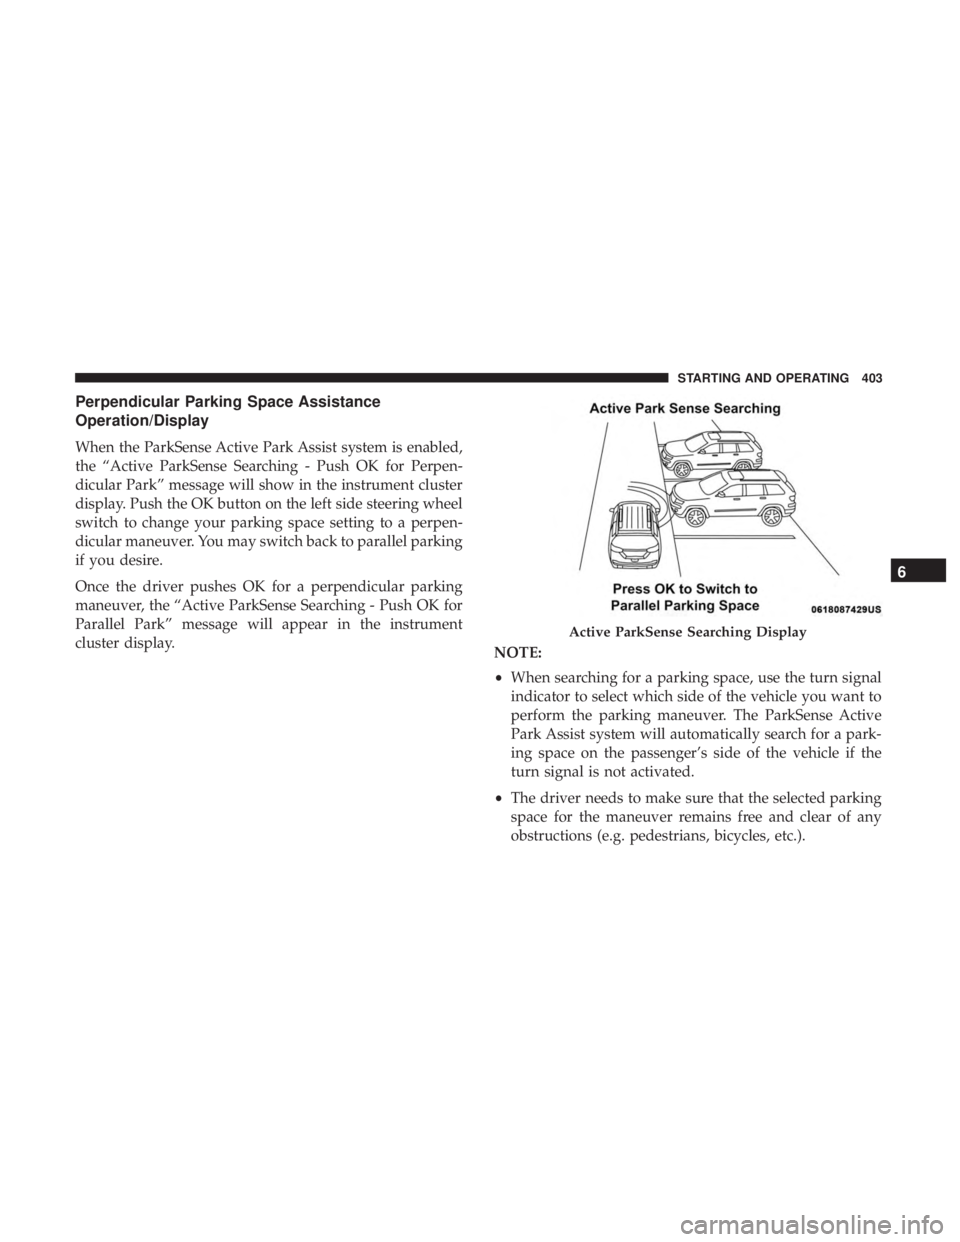
When the ParkSense Active Park Assist system is enabled,
the “Active ParkSense Searching - Push OK for Perpen-
dicular Park” message will show in the instrument cluster
display. Push the OK button on the left side steering wheel
switch to change your parking space setting to a perpen-
dicular maneuver. You may switch back to parallel parking
if you desire.
Once the driver pushes OK for a perpendicular parking
maneuver, the “Active ParkSense Searching - Push OK for
Parallel Park” message will appear in the instrument
cluster display.NOTE:
•When searching for a parking space, use the turn signal
indicator to select which side of the vehicle you want to
perform the parking maneuver. The ParkSense Active
Park Assist system will automatically search for a park-
ing space on the passenger’s side of the vehicle if the
turn signal is not activated.
• The driver needs to make sure that the selected parking
space for the maneuver remains free and clear of any
obstructions (e.g. pedestrians, bicycles, etc.).
Active ParkSense Searching Display
6
STARTING AND OPERATING 403
Page 415 of 718

NOTE:When operating conditions have been met, the
LaneSense system will monitor if the driver ’s hands are on
the steering wheel and provides an audible and visual
warning to the driver when the driver ’s hands are not
detected on the steering wheel. The system will cancel if
the driver does not return their hands to the wheel.
Turning LaneSense On Or Off
The LaneSense button is located on the switch
panel below the Uconnect display.
To turn the LaneSense system on, push the LaneSense
button (LED turns off). A “LaneSense On” message is
shown in the instrument cluster display. To turn the LaneSense system off, push the LaneSense
button again (LED turns on).
NOTE:
The LaneSense system will retain the last system
state on or off from the last ignition cycle when the ignition
is changed to the ON/RUN position.
Lane Sense On Message
6
STARTING AND OPERATING 413
Page 417 of 718

NOTE:The LaneSense system operates with the similar
behavior for a right lane departure when only the right
lane marking has been detected.
Left Lane Departure — Both Lane Lines Detected
• When the LaneSense system is ON, the lane lines turn
from gray to white. The LaneSense telltale
is solid
green when both lane markings have been detected
and the system is “armed” to provide visual warn-
ings in the instrument cluster display and a torque
warning in the steering wheel if an unintentional lane
departure occurs.
• When the LaneSense system senses a lane drift situation,
the left inside and outside lane lines turn solid yellow.
The LaneSense telltale
changes from solid green to
solid yellow. At this time torque is applied to the
steering wheel in the opposite direction of the lane
boundary.
• For example: If approaching the left side of the lane the
steering wheel will turn to the right.
• When the LaneSense system senses the lane has been
approached and is in a lane departure situation, the left
inside lane line flashes yellow (on/off) while the left
Lanes Sensed (White Lines) With Green Telltale
Lane Sensed (Solid Yellow Inside Line, Solid Yellow
Outside Line) With Solid Yellow Telltale
6
STARTING AND OPERATING 415
Page 418 of 718

outside line remains solid yellow. The LaneSense telltale
changes from solid yellow to flashing yellow. At
this time torque is applied to the steering wheel in the
opposite direction of the lane boundary.
• For example: If approaching the left side of the lane the
steering wheel will turn to the right.
NOTE: The LaneSense system operates with the similar
behavior for a right lane departure.
Changing LaneSense Status
The LaneSense system has settings to adjust the intensity of
the torque warning and the warning zone sensitivity
(Early/Medium/Late) that you can configure through the
Uconnect system screen. Refer to “Uconnect Settings” in
“Multimedia” for further information.
NOTE:
• When enabled the system operates above 37 mph
(60 km/h) and below 112 mph (180 km/h).
• Use of the turn signal suppresses the warnings.
• The system will not apply torque to the steering wheel
whenever a safety system engages (anti-lock brakes,
traction control system, electronic stability control, for-
ward collision warning, etc.).
PARKVIEW REAR BACK UP CAMERA
The ParkView Rear Back Up Camera allows you to see an
on-screen image of the rear surroundings of your vehicle
whenever the gear selector is put into REVERSE. The
image will be displayed on the touchscreen display along
with a caution note “Check Entire Surroundings” across
the top of the screen. After five seconds, this note willLane Approached (Flashing Yellow Inside Line, Solid
Yellow Outside Line) With Flashing Yellow Telltale
416 STARTING AND OPERATING
Page 468 of 718

JACKING AND TIRE CHANGING — IF EQUIPPED
WARNING!
•Do not attempt to change a tire on the side of the
vehicle close to moving traffic. Pull far enough off
the road to avoid the danger of being hit when
operating the jack or changing the wheel.
• Being under a jacked-up vehicle is dangerous. The
vehicle could slip off the jack and fall on you. You
could be crushed. Never put any part of your body
under a vehicle that is on a jack. If you need to get
under a raised vehicle, take it to a service center
where it can be raised on a lift.
• The jack is designed to be used as a tool for changing
tires only. The jack should not be used to lift the
vehicle for service purposes. The vehicle should be
jacked on a firm level surface only. Avoid ice or
slippery areas.
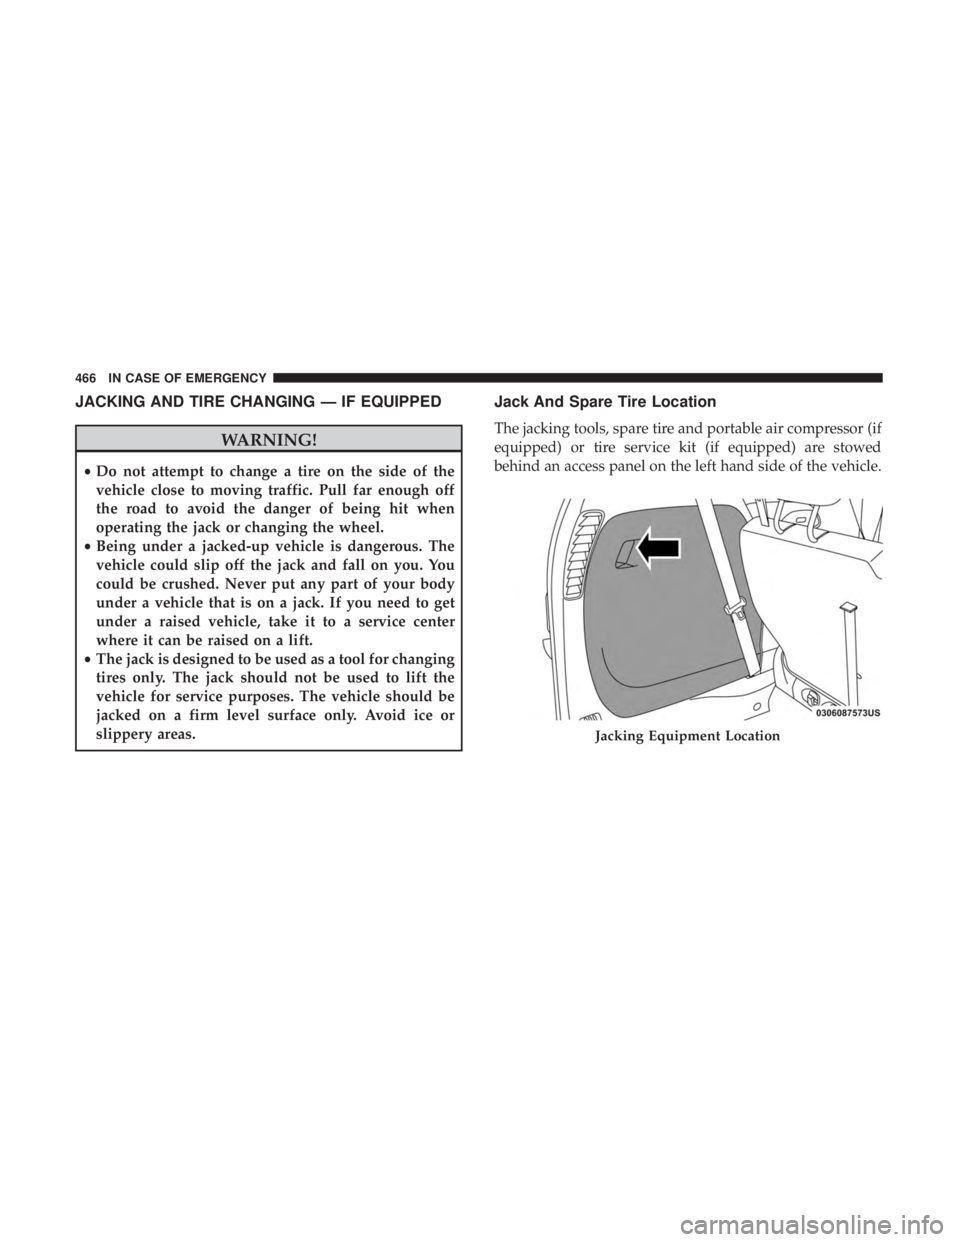
Jack And Spare Tire Location
The jacking tools, spare tire and portable air compressor (if
equipped) or tire service kit (if equipped) are stowed
behind an access panel on the left hand side of the vehicle.
Jacking Equipment Location
466 IN CASE OF EMERGENCY
Page 470 of 718

WARNING!
Do not attempt to change a tire on the side of the
vehicle close to moving traffic. Pull far enough off the
road to avoid being hit when operating the jack or
changing the wheel.
2. Turn on the Hazard Warning flasher.
3. Apply the parking brake.
4. Place the gear selector into PARK.
5. Place the ignition in OFF mode.
6. Block both the front and rear of the wheel diagonally opposite the jacking position. For example, if the right
front wheel is being changed, block the left rear wheel.
NOTE:Passengers should not remain in the
vehicle when the vehicle is being jacked.
Jacking Instructions
WARNING!
Carefully follow these tire changing warnings to help
prevent personal injury or damage to your vehicle:
• Always park on a firm, level surface as far from the
edge of the roadway as possible before raising the
vehicle.
• Turn on the Hazard Warning flasher.
• Block the wheel diagonally opposite the wheel to be
raised.
• Apply the parking brake firmly and set the transmis-
sion in PARK.
• Do not let any passenger sit in the vehicle when it is
on a jack.
• Do not get under the vehicle when it is on a jack. If
you need to get under a raised vehicle, take it to a
service center where it can be raised on a lift.
• Only use the jack in the positions indicated and for
lifting this vehicle during a tire change.
• If working on or near a roadway, be extremely
careful of motor traffic.
468 IN CASE OF EMERGENCY
Page 490 of 718

WARNING!(Continued)
•Keep Tire Service Kit away from open flames or heat
source.
• A loose Tire Service Kit thrown forward in a collision
or hard stop could endanger the occupants of the
vehicle. Always stow the Tire Service Kit in the place
provided. Failure to follow these warnings can result
in injuries that are serious or fatal to you, your
passengers, and others around you.
• Take care not to allow the contents of Tire Service Kit
to come in contact with hair, eyes, or clothing. Tire
Service Kit sealant is harmful if inhaled, swallowed,
or absorbed through the skin. It causes skin, eye, and
respiratory irritation. Flush immediately with plenty
of water if there is any contact with eyes or skin.
Change clothing as soon as possible, if there is any
contact with clothing.
• Tire Service Kit Sealant solution contains latex. In
case of an allergic reaction or rash, consult a physi-
cian immediately. Keep Tire Service Kit out of reach
of children. If swallowed, rinse mouth immediately
with plenty of water and drink plenty of water. Do
not induce vomiting! Consult a physician immedi-
ately. Sealing A Tire With Tire Service Kit
Whenever You Stop To Use Tire Service Kit:
1. Pull over to a safe location and turn on the vehicle’s
Hazard Warning flashers.
2. Verify that the valve stem (on the wheel with the deflated tire) is in a position that is near to the ground.
This will allow the Tire Service Kit Hose to reach the
valve stem and keep the Tire Service Kit flat on the
ground. This will provide the best positioning of the kit
when injecting the sealant into the deflated tire and
running the air pump. Move the vehicle as necessary to
place the valve stem in this position before proceeding.
3. Place the transmission in PARK and cycle the ignition in the OFF position.
4. Apply the parking brake.
Setting Up To Use Tire Service Kit:
1. Uncoil the Sealant Hose and then remove the cap from the fitting at the end of the hose.
2. Place the Tire Service Kit flat on the ground next to the deflated tire.
488 IN CASE OF EMERGENCY
Page 553 of 718

description (Load Index and Speed Symbol). Replace the
tire pressure sensor as well as it is not designed to be
reused.
Run Flat Tires — If Equipped
Run Flat tires allow you the capability to drive 50 miles
(80 km) at 50 mph (80 km/h) after a rapid loss of inflation
pressure. This rapid loss of inflation is referred to as the
Run Flat mode. A Run Flat mode occurs when the tire
inflation pressure is of/or below 14 psi (96 kPa). Once a
Run Flat tire reaches the run flat mode it has limited
driving capabilities and needs to be replaced immediately.
A Run Flat tire is not repairable. When a run flat tire is
changed after driving with underinflated tire condition,
please replace the TPM sensor as it is not designed to be
reused when driven under run flat mode (14 psi (96 kPa))
condition.
NOTE:TPM Sensor must be replaced after driving the
vehicle on a flat tire condition.
It is not recommended driving a vehicle loaded at full
capacity or to tow a trailer while a tire is in the run flat
mode.
See the tire pressure monitoring section for more informa-
tion.
Tire Spinning
When stuck in mud, sand, snow, or ice conditions, do not
spin your vehicle’s wheels above 30 mph (48 km/h) or for
longer than 30 seconds continuously without stopping.
Refer to “Freeing A Stuck Vehicle” in “In Case Of Emer-
gency” for further information.
WARNING!
Fast spinning tires can be dangerous. Forces generated
by excessive wheel speeds may cause tire damage or
failure. A tire could explode and injure someone. Do
not spin your vehicle’s wheels faster than 30 mph
(48 km/h) for more than 30 seconds continuously when
you are stuck, and do not let anyone near a spinning
wheel, no matter what the speed.
8
SERVICING AND MAINTENANCE 551