2019 CHEVROLET SONIC warning light
[x] Cancel search: warning lightPage 220 of 351

Chevrolet Sonic Owner Manual (GMNA-Localizing-U.S./Canada-12461769) -
2019 - crc - 5/21/18
Driving and Operating 219
Warning (Continued)
Contact should be
maintained until the filling is
complete.
. Do not smoke while
pumping fuel.
. Avoid using electronic
devices.
Trailer Towing
General Towing
Information
{Warning
Never tow a trailer with your
vehicle. It was not designed or
intended to tow a trailer.
Conversions and
Add-Ons
Add-On Electrical
Equipment
{Warning
The Data Link Connector (DLC) is
used for vehicle service and
Emission Inspection/Maintenance
testing. See Malfunction Indicator
Lamp (Check Engine Light) 0116.
A device connected to the DLC —
such as an aftermarket fleet or
driver-behavior tracking device —
may interfere with vehicle
systems. This could affect vehicle
operation and cause a crash.
Such devices may also access
information stored in the vehicle’s
systems.
Page 228 of 351

Chevrolet Sonic Owner Manual (GMNA-Localizing-U.S./Canada-12461769) -
2019 - crc - 5/21/18
Vehicle Care 227
1.Engine Air Cleaner/Filter 0231.
2. Engine Oil Dipstick. See Engine Oil 0227.
3. Engine Cooling Fan (Out of View). See Cooling System
0 232.
4. Engine Oil Fill Cap. See Engine Oil 0227.
5. Engine Coolant Surge Tank and Pressure Cap. See
Cooling System 0232.
6. Brake/Clutch Fluid Reservoir. See Brake Fluid 0238 and
Hydraulic Clutch 0231.
7. Battery - North America 0239.
8. Windshield Washer Fluid Reservoir. See Washer Fluid
0 237.
9. Engine Compartment Fuse
Block 0249.Engine Oil
To ensure proper engine
performance and long life, careful
attention must be paid to engine oil.
Following these simple, but
important steps will help protect
your investment:
.
Use engine oil approved to the
proper specification and of the
proper viscosity grade. See
“Selecting the Right Engine Oil”
in this section.
. Check the engine oil level
regularly and maintain the
proper oil level. See “Checking
Engine Oil” and“When to Add
Engine Oil” in this section.
. Change the engine oil at the
appropriate time. See Engine Oil
Life System 0229.
. Always dispose of engine oil
properly. See “What to Do with
Used Oil” in this section.
If the engine oil pressure light
comes on, check the engine oil level
right away. The oil pressure light is
on the instrument cluster. See
Engine Oil Pressure Light 0123.
Check the engine oil level regularly;
this is an added reminder.
Checking Engine Oil
Check the engine oil level regularly,
every 650 km (400 mi), especially
prior to a long trip. The engine oil
dipstick handle is a loop. See
Engine Compartment Overview
0 226 for the location.
{Warning
The engine oil dipstick handle
may be hot; it could burn you.
Use a towel or glove to touch the
dipstick handle.
Page 233 of 351

Chevrolet Sonic Owner Manual (GMNA-Localizing-U.S./Canada-12461769) -
2019 - crc - 5/21/18
232 Vehicle Care
components are free of dirt and
debris. Remove the engine air
cleaner/filter. Lightly tap and shake
the engine air cleaner/filter (away
from the vehicle), to release loose
dust and dirt. Inspect the engine air
cleaner/filter for damage, and
replace if damaged. Do not clean
the engine air cleaner/filter or
components with water or
compressed air.
To inspect or replace the air cleaner/
filter:
1. Remove the two screws, tilt thecover, and slide it out of the
assembly. 2. Inspect or replace the engine
air cleaner/filter.
3. Lower the cover, slide it into the assembly, then secure with
the two screws.
{Warning
Operating the engine with the air
cleaner/filter off can cause you or
others to be burned. Use caution
when working on the engine. Do
not start the engine or drive the
vehicle with the air cleaner/filter
off, as flames may be present if
the engine backfires.
Caution
If the air cleaner/filter is off, dirt
can easily get into the engine,
which could damage it. Always
have the air cleaner/filter in place
when driving.
Cooling System
The cooling system allows the
engine to maintain the correct
working temperature.
1. Engine Cooling Fan (Out
of View)
2. Engine Coolant Surge Tank and Pressure Cap
{Warning
An underhood electric fan can
start up even when the engine is
not running and can cause injury.
(Continued)
Page 239 of 351

Chevrolet Sonic Owner Manual (GMNA-Localizing-U.S./Canada-12461769) -
2019 - crc - 5/21/18
238 Vehicle Care
be heard all the time when the
vehicle is moving, except when
applying the brake pedal firmly.
{Warning
The brake wear warning sound
means that soon the brakes will
not work well. That could lead to
a crash. When the brake wear
warning sound is heard, have the
vehicle serviced.
Caution
Continuing to drive with worn-out
brake pads could result in costly
brake repair.
Some driving conditions or climates
can cause a brake squeal when the
brakes are first applied or lightly
applied. This does not mean
something is wrong with the brakes.
Properly torqued wheel nuts are
necessary to help prevent brake
pulsation. When tires are rotated, inspect brake pads for wear and
evenly tighten wheel nuts in the
proper sequence to torque
specifications. See
Capacities and
Specifications 0310.
Brake pads should be replaced as
complete sets.
Brake Pedal Travel
See your dealer if the brake pedal
does not return to normal height,
or if there is a rapid increase in
pedal travel. This could be a sign
that brake service may be required.
Replacing Brake System Parts
Always replace brake system parts
with new, approved replacement
parts. If this is not done, the brakes
may not work properly. The braking
performance expected can change
in many other ways if the wrong
replacement brake parts are
installed or if parts are improperly
installed.
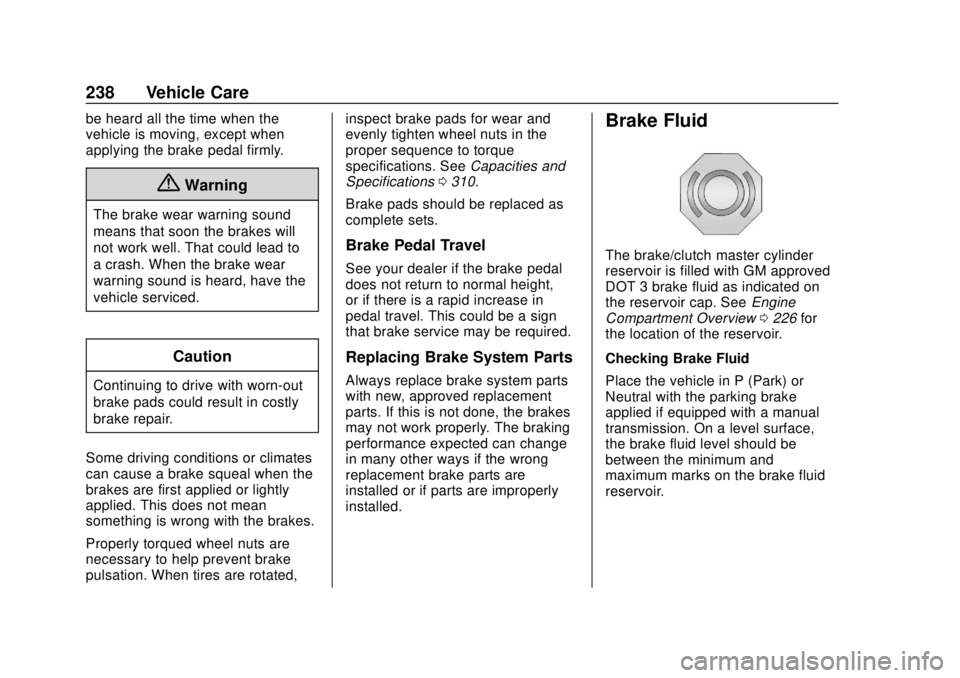
Brake Fluid
The brake/clutch master cylinder
reservoir is filled with GM approved
DOT 3 brake fluid as indicated on
the reservoir cap. See Engine
Compartment Overview 0226 for
the location of the reservoir.
Checking Brake Fluid
Place the vehicle in P (Park) or
Neutral with the parking brake
applied if equipped with a manual
transmission. On a level surface,
the brake fluid level should be
between the minimum and
maximum marks on the brake fluid
reservoir.
Page 240 of 351

Chevrolet Sonic Owner Manual (GMNA-Localizing-U.S./Canada-12461769) -
2019 - crc - 5/21/18
Vehicle Care 239
There are only two reasons why the
brake fluid level in the reservoir may
go down:
.Normal brake lining wear. When
new linings are installed, the
fluid level goes back up.
. A fluid leak in the brake/clutch
hydraulic system. Have the
brake/clutch hydraulic system
fixed. With a leak, the brakes will
not work well.
Always clean the brake fluid
reservoir cap and the area around
the cap before removing it.
Do not top off the brake/clutch fluid.
Adding fluid does not correct a leak.
If fluid is added when the linings are
worn, there will be too much fluid
when new brake linings are
installed. Add or remove fluid, as
necessary, only when work is done
on the brake/clutch hydraulic
system.{Warning
If too much brake fluid is added, it
can spill on the engine and burn,
if the engine is hot enough. You
or others could be burned, and
the vehicle could be damaged.
Add brake fluid only when work is
done on the brake/clutch
hydraulic system.
When the brake/clutch fluid falls to a
low level, the brake warning light
comes on. See Brake System
Warning Light 0118.
Brake fluid absorbs water over time
which degrades the effectiveness of
the brake fluid. Replace brake fluid
at the specified intervals to prevent
increased stopping distance. See
Maintenance Schedule 0297.
What to Add
Use only GM approved DOT 3
brake fluid from a clean, sealed
container. See Recommended
Fluids and Lubricants 0306.
{Warning
The wrong or contaminated brake
fluid could result in damage to the
brake system. This could result in
the loss of braking leading to a
possible injury. Always use the
proper GM approved brake fluid.
Caution
If brake fluid is spilled on the
vehicle's painted surfaces, the
paint finish can be damaged.
Immediately wash off any painted
surface.
Battery - North America
The original equipment battery is
maintenance free. Do not remove
the cap and do not add fluid.
Refer to the replacement number
shown on the original battery label
when a new battery is needed. See
Engine Compartment Overview
0226 for battery location.
Page 263 of 351

Chevrolet Sonic Owner Manual (GMNA-Localizing-U.S./Canada-12461769) -
2019 - crc - 5/21/18
262 Vehicle Care
(TPMS) that illuminates a low tire
pressure telltale when one or more
of your tires is significantly
under-inflated.
Accordingly, when the low tire
pressure telltale illuminates, you
should stop and check your tires as
soon as possible, and inflate them
to the proper pressure. Driving on a
significantly under-inflated tire
causes the tire to overheat and can
lead to tire failure. Under-inflation
also reduces fuel efficiency and tire
tread life, and may affect the
vehicle's handling and stopping
ability.
Please note that the TPMS is not a
substitute for proper tire
maintenance, and it is the driver's
responsibility to maintain correct tire
pressure, even if under-inflation has
not reached the level to trigger
illumination of the TPMS low tire
pressure telltale.
Your vehicle has also been
equipped with a TPMS malfunction
indicator to indicate when the
system is not operating properly.
The TPMS malfunction indicator iscombined with the low tire pressure
telltale. When the system detects a
malfunction, the telltale will flash for
approximately one minute and then
remain continuously illuminated.
This sequence will continue upon
subsequent vehicle start-ups as
long as the malfunction exists.
When the malfunction indicator is
illuminated, the system may not be
able to detect or signal low tire
pressure as intended. TPMS
malfunctions may occur for a variety
of reasons, including the installation
of replacement or alternate tires or
wheels on the vehicle that prevent
the TPMS from functioning properly.
Always check the TPMS malfunction
telltale after replacing one or more
tires or wheels on your vehicle to
ensure that the replacement or
alternate tires and wheels allow the
TPMS to continue to function
properly.
See
Tire Pressure Monitor
Operation 0262.
See Radio Frequency Statement
0 323.Tire Pressure Monitor
Operation
This vehicle may have a Tire
Pressure Monitor System (TPMS).
The TPMS is designed to warn the
driver when a low tire pressure
condition exists. TPMS sensors are
mounted onto each tire and wheel
assembly, excluding the spare tire
and wheel assembly. The TPMS
sensors monitor the air pressure in
the tires and transmit the tire
pressure readings to a receiver
located in the vehicle.
When a low tire pressure condition
is detected, the TPMS illuminates
the low tire pressure warning light
located on the instrument cluster.
If the warning light comes on, stop
as soon as possible and inflate the
tires to the recommended pressure
Page 264 of 351

Chevrolet Sonic Owner Manual (GMNA-Localizing-U.S./Canada-12461769) -
2019 - crc - 5/21/18
Vehicle Care 263
shown on the Tire and Loading
Information label. SeeVehicle Load
Limits 0181.
The low tire pressure warning light
comes on at each ignition cycle until
the tires are inflated to the correct
inflation pressure.
The low tire pressure warning light
may come on in cool weather when
the vehicle is first started, and then
turn off as the vehicle is driven. This
could be an early indicator that the
air pressure is getting low and must
be inflated to the proper pressure.
A Tire and Loading Information label
shows the size of the original
equipment tires and the correct
inflation pressure for the tires when
they are cold. See Vehicle Load
Limits 0181, for an example of the
Tire and Loading Information label
and its location. Also see Tire
Pressure 0260.
The TPMS can warn about a low
tire pressure condition but it does
not replace normal tire maintenance. See
Tire Inspection
0 265, Tire Rotation 0265 andTires
0 253.
Caution
Tire sealant materials are not all
the same. A non-approved tire
sealant could damage the TPMS
sensors. TPMS sensor damage
caused by using an incorrect tire
sealant is not covered by the
vehicle warranty. Always use only
the GM approved tire sealant
available through your dealer or
included in the vehicle.
TPMS Malfunction Light
The TPMS will not function properly
if one or more of the TPMS sensors
are missing or inoperable. When the
system detects a malfunction, the
low tire pressure warning light
flashes for about one minute and
then stays on for the remainder of
the ignition cycle. The malfunction
light comes on at each ignition cycle until the problem is corrected. Some
of the conditions that can cause this
to come on are:
.
One of the road tires has been
replaced with the spare tire. The
spare tire does not have a
TPMS sensor. The malfunction
light should go off after the road
tire is replaced and the sensor
matching process is performed
successfully. See "TPMS Sensor
Matching Process" later in this
section.
. The TPMS sensor matching
process was not done or not
completed successfully after
rotating the tires. The
malfunction light should go off
after successfully completing the
sensor matching process. See
"TPMS Sensor Matching
Process" later in this section.
. One or more TPMS sensors are
missing or damaged. The
malfunction light should go off
when the TPMS sensors are
installed and the sensor
Page 267 of 351

Chevrolet Sonic Owner Manual (GMNA-Localizing-U.S./Canada-12461769) -
2019 - crc - 5/21/18
266 Vehicle Care
unusual wear continues after the
rotation, check the wheel
alignment.
SeeWhen It Is Time for New
Tires 0266 andWheel
Replacement 0271.
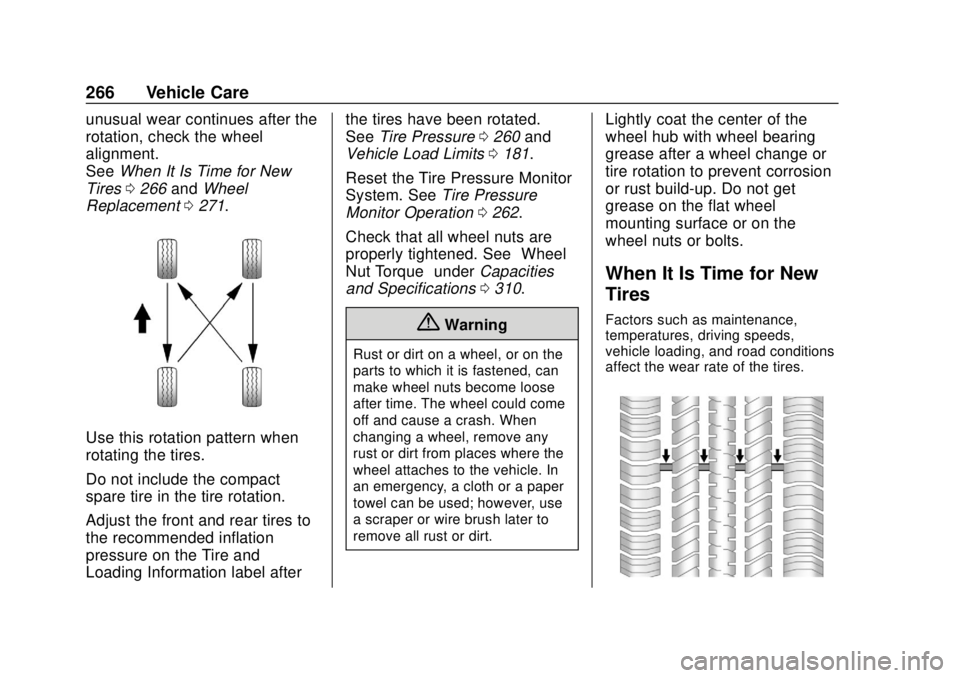
Use this rotation pattern when
rotating the tires.
Do not include the compact
spare tire in the tire rotation.
Adjust the front and rear tires to
the recommended inflation
pressure on the Tire and
Loading Information label after the tires have been rotated.
See
Tire Pressure 0260 and
Vehicle Load Limits 0181.
Reset the Tire Pressure Monitor
System. See Tire Pressure
Monitor Operation 0262.
Check that all wheel nuts are
properly tightened. See “Wheel
Nut Torque” underCapacities
and Specifications 0310.
{Warning
Rust or dirt on a wheel, or on the
parts to which it is fastened, can
make wheel nuts become loose
after time. The wheel could come
off and cause a crash. When
changing a wheel, remove any
rust or dirt from places where the
wheel attaches to the vehicle. In
an emergency, a cloth or a paper
towel can be used; however, use
a scraper or wire brush later to
remove all rust or dirt.
Lightly coat the center of the
wheel hub with wheel bearing
grease after a wheel change or
tire rotation to prevent corrosion
or rust build-up. Do not get
grease on the flat wheel
mounting surface or on the
wheel nuts or bolts.
When It Is Time for New
Tires
Factors such as maintenance,
temperatures, driving speeds,
vehicle loading, and road conditions
affect the wear rate of the tires.